Electronics and Code Setup Page for NerdForge's HexaLeaf Code
Ok so first off, thanks to NerdForge for sharing his code. If you like this please consider signing up for NerdForge's Patreon to support them for their efforts in coding the HexaLeaf. They have a code walkthrough for members which will help greatly in understanding how the code works. I am only adding this part since they did not touch on how to set up the Blynk application on either of the video's which I have seen, and since I figured it out, I thought it may be helpful to others to share this info.
First some background and prerequisites. The Hexaleaf panel is described in the video here, and you can find another code walkthrough video on their Patreon (it is a bit hard to find but if you navigate to their Posts and then search for "walkthrough" it will be the 4th video down on the list - however you must join their patreon for a minimum of $3/month to be able to view the code walkthrough. It was interesting to watch, but the code walkthrough did not really touch on the blynk setup which is what this post is all about.
I am not really familiar with Blynk, except to say that I wish I had heard of it before, it looks awesome. It is an app that you can get from the Play Store and, it will allow you to interface with Arduinos, NodeMCU and a ton of other IOT devices too. It is a very visual app and things seem to be fairly self explanatory once you go through the options, but some knowledge of your microcontroller and the Arduino IDE is helpful. In this case, NerdForge has very helpfully posted his code to github, and it is well documented, please go take a look and just open up the Hexalights.ino in another browser window to follow along.
Before getting started, please note that I did have to guesstimate on some values for the sliders and some values I chose to have round numbers showing (IIRC some like "Hue Randomness" I changed based on the code). If you see something that could be improved with my setup please let me know. If I make changes later which improve things, I will try and update this page also.
First to set up the Blynk App, you need to open it and create an account. The way the developers make some money from the app is by selling "energy" credits, but you will have plenty by default to get the HexaLeaf working for free (they give you 2000 credits to start, but you can purchase more if you need them later). Again the 2000 is plenty for this project. If you think you will really get into making Blynk apps though, you can buy more credits or set up a local Blynk server which can run on a raspberry Pi - if you run a local server you don't need to buy credits (just mentioning that but you can see more about that here). The way the Blynk App works is, you create a new project and it will email you an "auth token" to the email you used to set up the account. This is a key which is required for communication between the app on the phone, the Blynk server and the NodeMCU which will be running the HexaLeaf panels. This key is entered in the Hexalights.ino (in the section at the top where you enter your WiFi info). As an aside, I'd recommend trying to segment your IOT devices on their own vlan or Wifi network if at all possible for security reasons. Once the auth token and wifi info is added to Hexalights.ino, that is all you need to do for that file. The other file is called Nanohex.h and this one only requires some basic info on the number of LEDs in each panel and how many panels are being run, as well as the pin they are connected to (default is 19), this can all be found at the top of the file. Since NerdForge has paywalled their code walkthrough video I am not going to assist with anything more regarding the code specifically (not that I could do much anyway) and will respectfully suggest that you become a patron of theirs to ask them for assistance directly.
I was able to get the basic layout of the blynk app that Nerdforge used from watching the end of the public Youtube project video, where the app was demo'ed. Seeing the app also gave me an idea of which widgets were going to be necessary to configure blynk.
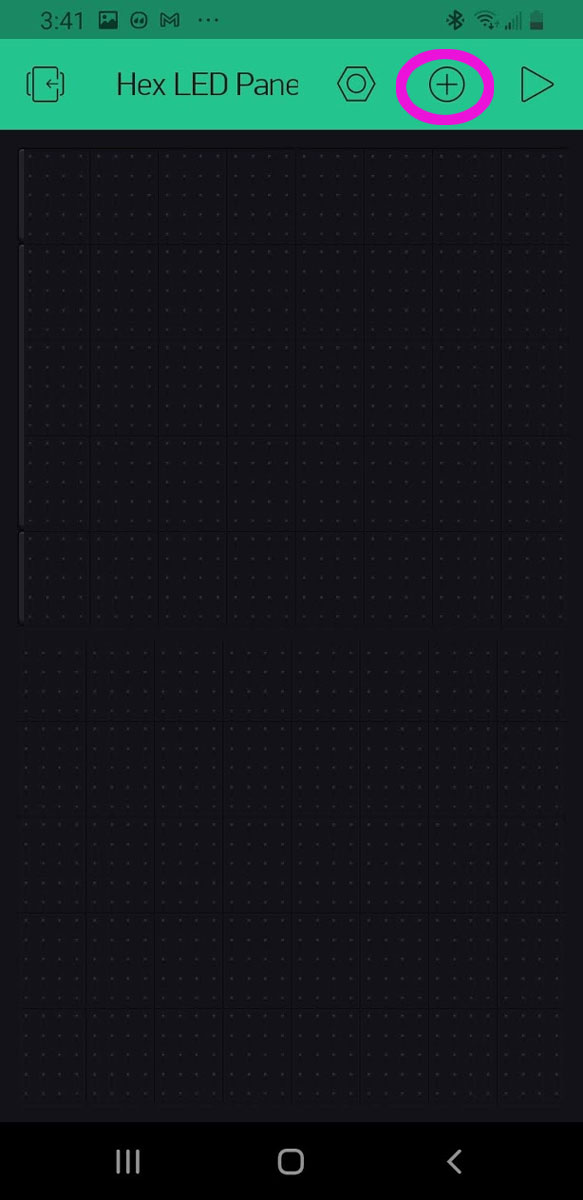
Now, to setup the Blynk "app" to control the HexaLeaf Panels, first a project needs to be created, I called mine "Hex LED Panels". This brings up a blank screen where "widgets" can be added to the project by clicking the "+" sign on the top bar. Something to understand about the Blynk widgets is that they can control a physical or "virtual" pin. For the HexaLeaf, it will always be virtual pins being used. You can easily tell which virtual pin is used for each widget, by looking again at the Hexalights.ino file. Just look for "BLYNK_WRITE" and next to that you will see something like "BLYNK_WRITE(V1)", then look above where it is commented that this term relates to getting the "main mode of operation". So here we know that the "virtual" pin we will use with the Blynk app will be "V1" for the Mode Menu. To actually figure out the modes, it is not as simple, but they are found in the Nanohex.h, where it becomes clear since the modes are found under "void update()", and there are 3 possibilities which are Static (case 1), Binary Twinkle (case 2) and Hue Twinkle (case 3). It is important to know which case and what they do, in order to set up the Menu Widget in the Blynk app, which will allow the mode to be selected.
So to summarize, we first need to set up a menu widget to select one of 3 modes (Static, Binary Twinkle and Hue Twinkle) and these modes are cases 1, 2 and 3 respectively. And in order for the NodeMCU to know what the data from Blynk means with respect to this menu, the NodeMCU will look for it on virtual pin V1. So now we know everything needed to set up the first widget in the Blynk app.
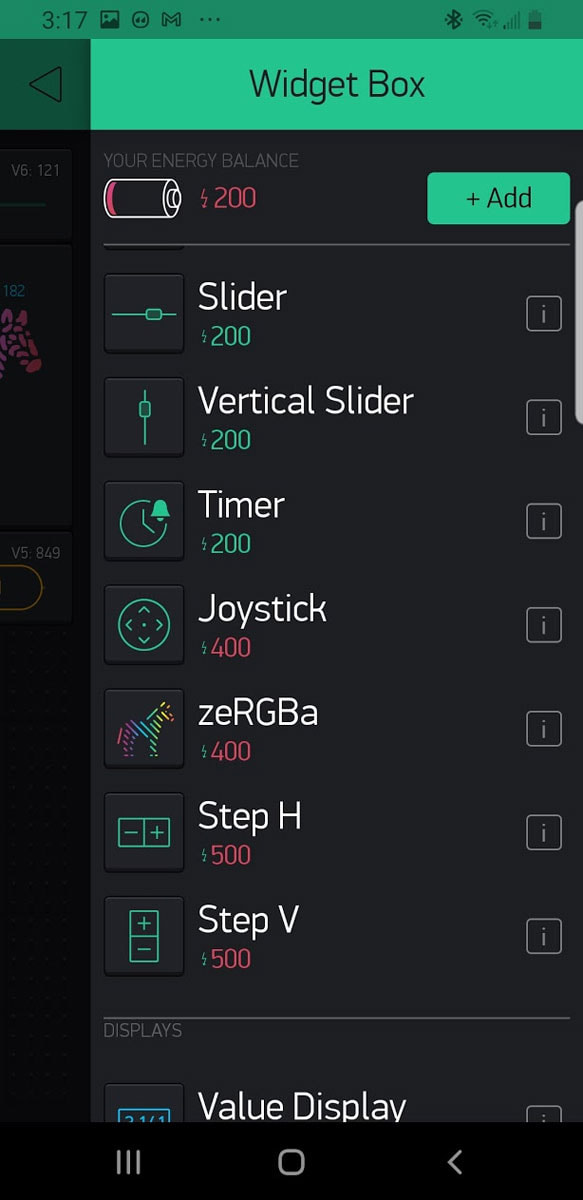
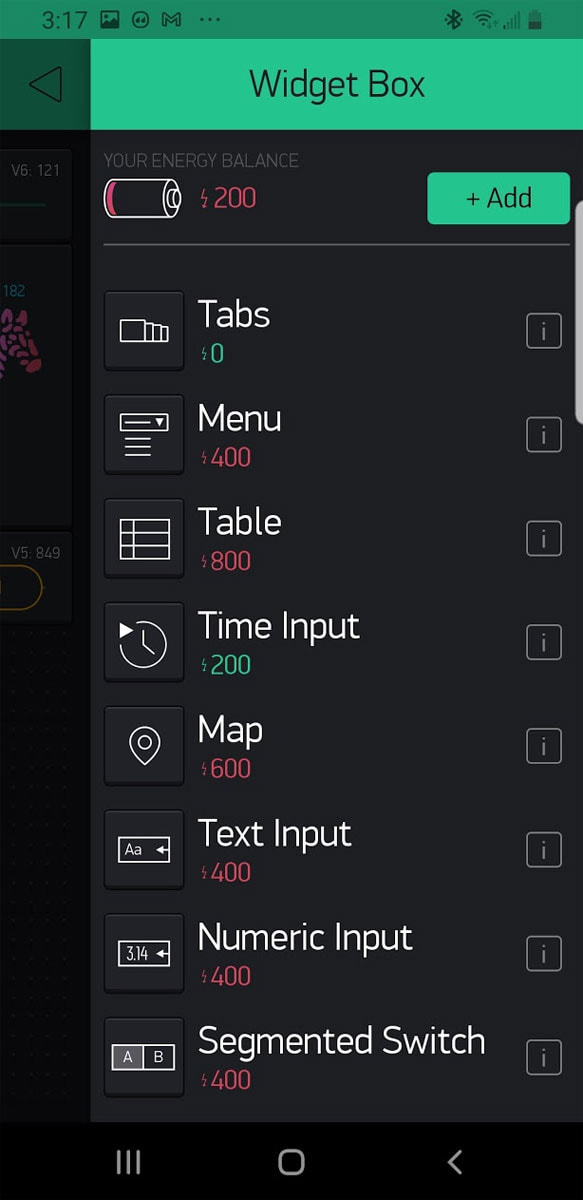
So first click on the "+" symbol in the project, which will open the widgets menu. Note that each widget shows a cost but don't worry, they gave you 2000 energy credits to work with so that will be plenty. Look through the "Widget Box" we will first need a "Menu" so select that one:
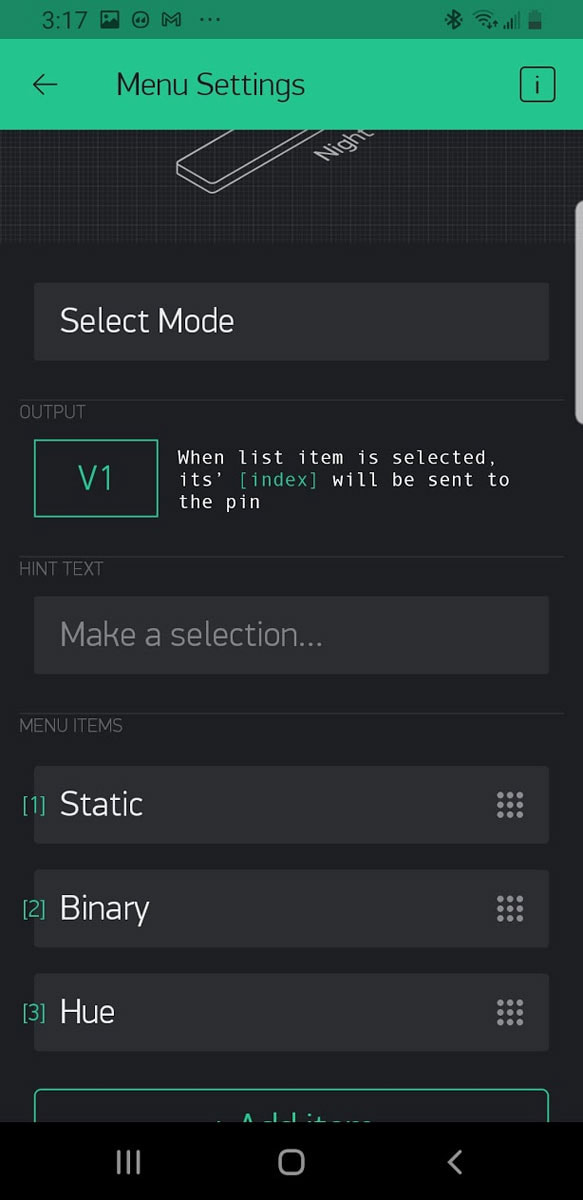
Here we will need to set up a title (which I set as "Select Mode"), the "virtual" pin (V1), the 3 menu items (and note which index they are associated with since it does matter). Note that if you make an extra menu item, I could not figure out how to delete it so I had to delete the widget and start over. Also if you enter the menu items out of order, they can be dragged to the correct order (and again, the order does matter). What I ended up with is shown below. Once done click the left arrow at the top next to "Menu Settings" to return to the main screen.
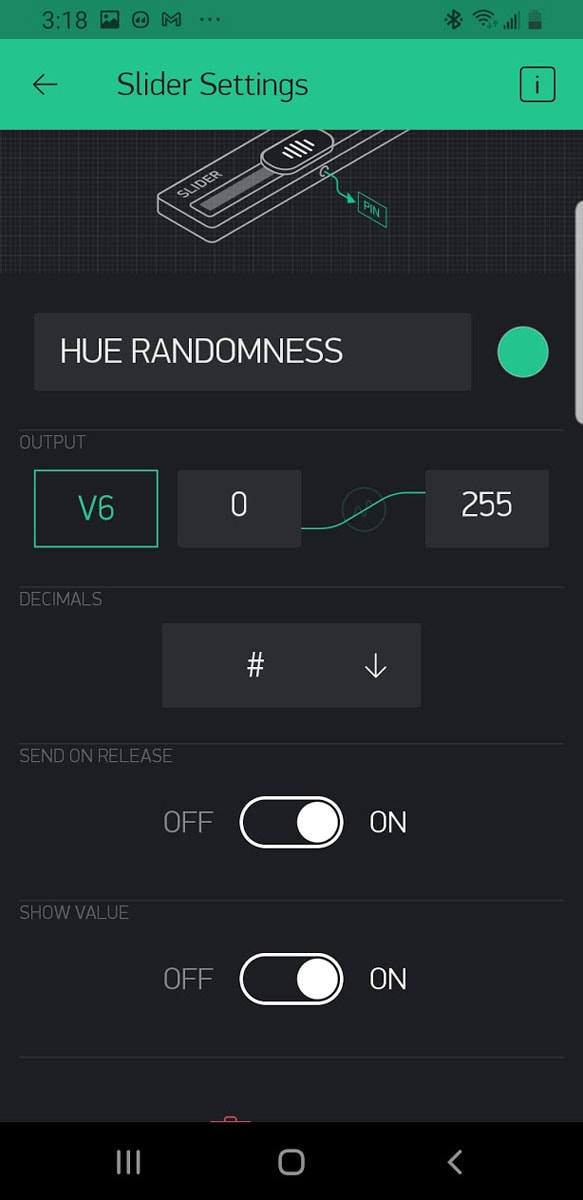
Next up is what is called "Hue Randomness" and it is a slider. To configure this widget, again click the "+" and then find the "Slider". To figure out what "virtual" pin this will use for "output", take a look again at the Hexalights.ino and look for "Hue randomness", then look below that and find "BLYNK_WRITE(V6)". "V6" is the virtual pin that the NodeMCU will look for, from Blynk's server, for the "Hue Randomness" parameter. This is then set as the output pin as below. I also changed the name to "HUE RANDOMNESS" and set the default scale (under "OUTPUT") from 0-1024 to 0-255 as shown below:
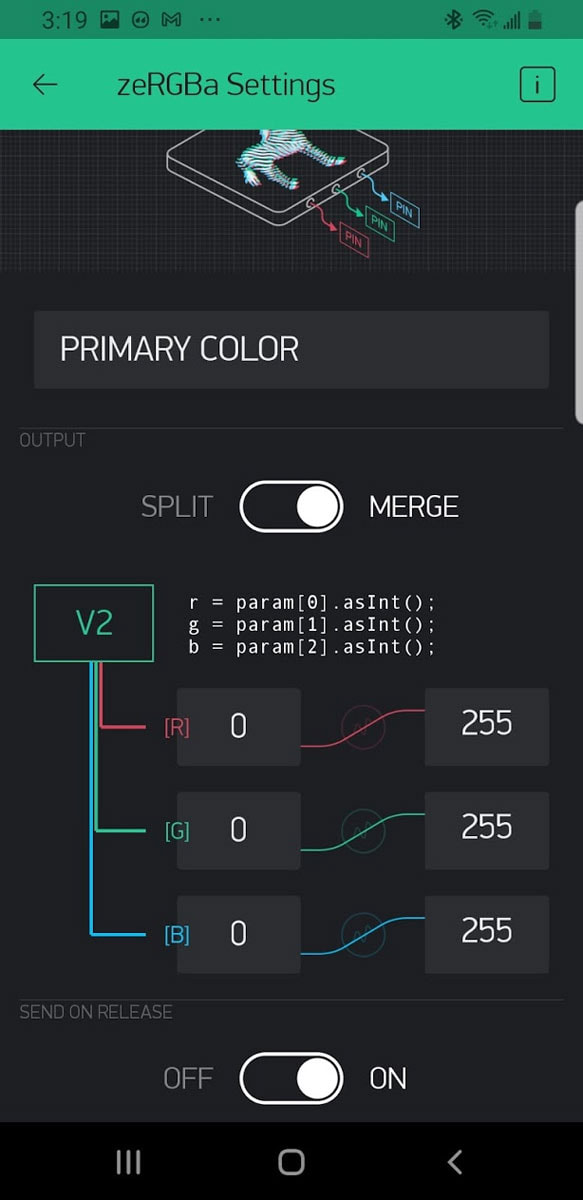
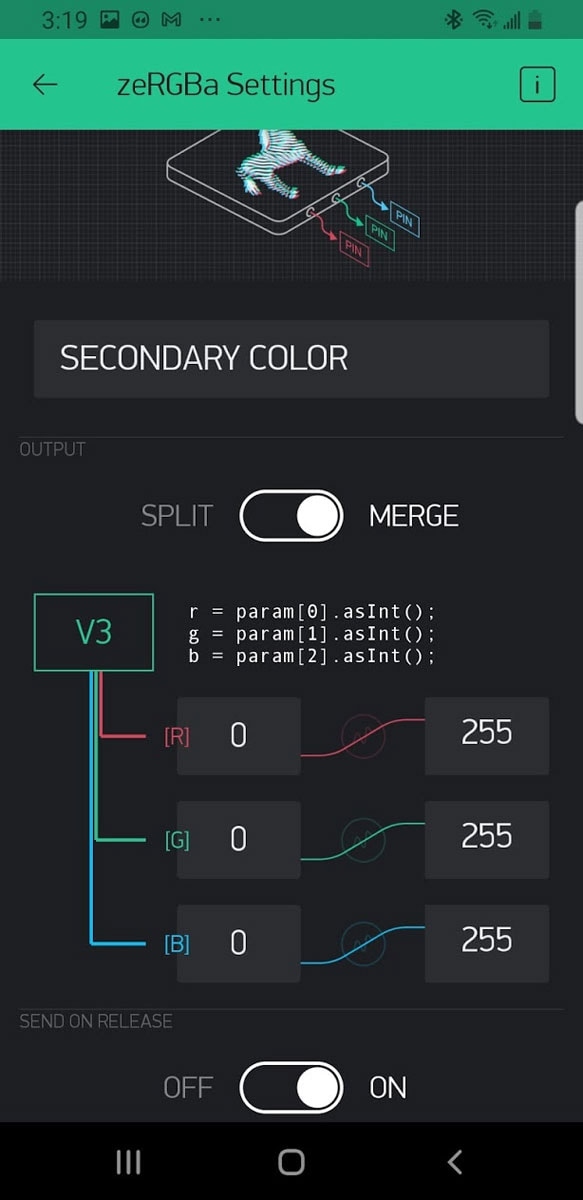
Next up are the primary and secondary color selections. In the video, these are the zebras which let you pick any color. There is a primary and secondary and they are both set up the same way, aside from the output "virtual" pin. Note with these that under "OUTPUT" there is a slider button, which is set to "MERGE" (the default is "SPLIT". We want it to be on "MERGE".
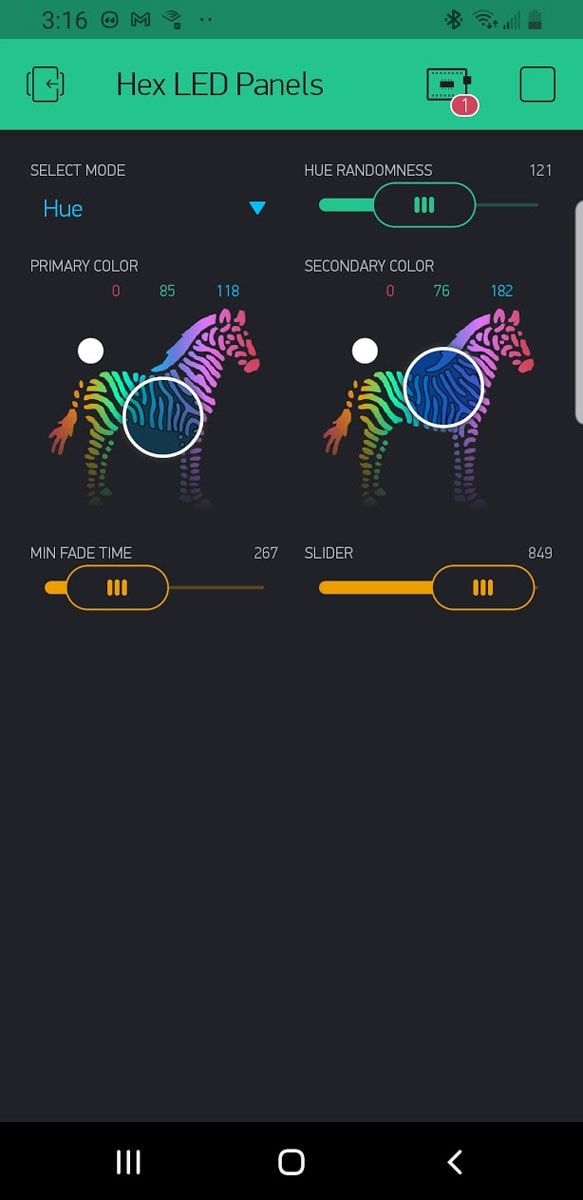
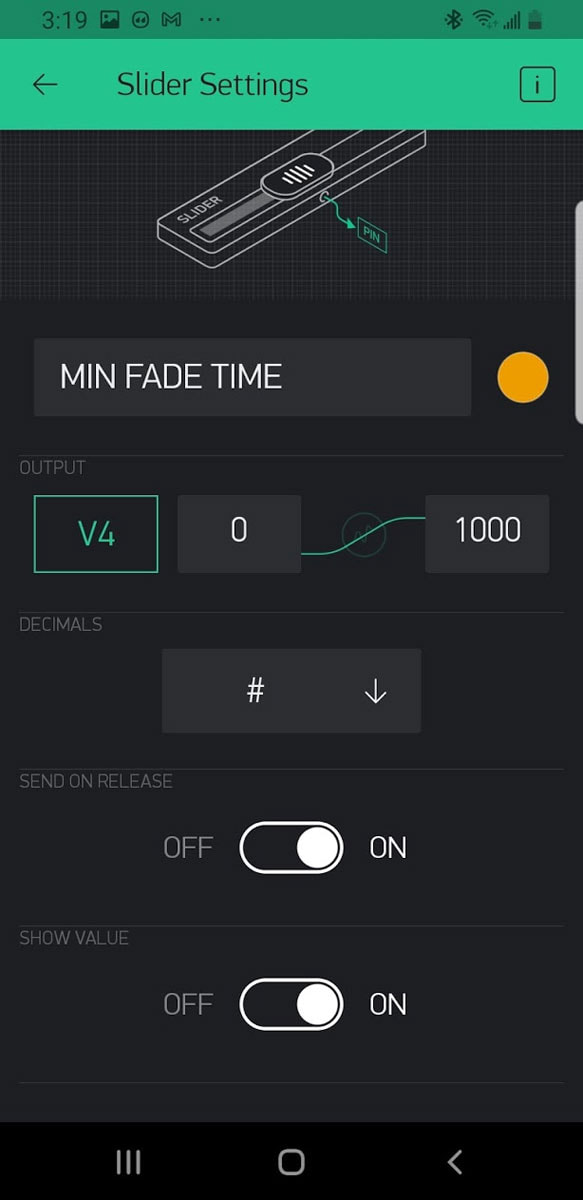
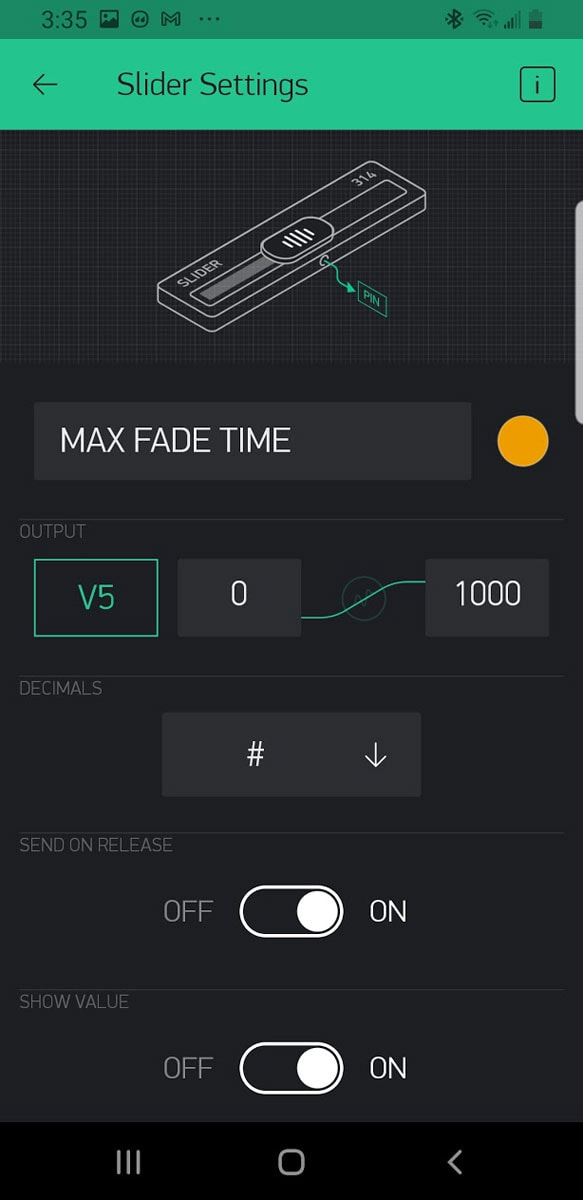
That should be enough to get it working. Below is a pic of how mine looks when it was done. I did add the additional Min and Max Fade Time sliders just to see what they would do, but they are not needed since the program already has some default values already set which will work fine.
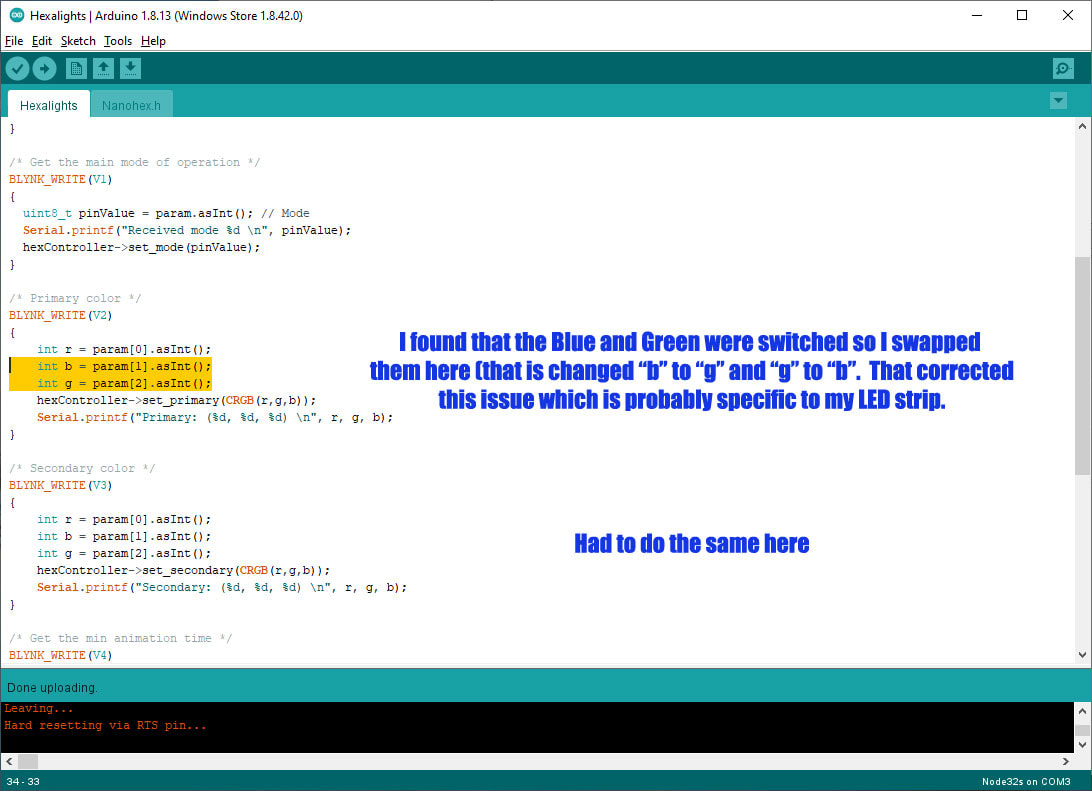
When I tested this, I found that Blue and Green were inverted. To correct that, I swapped "b" and "g" (leaving the parameters and order the same) in Hexalights.ino:
