Creality 3D Printer Tips
From time to time, I find stuff out about 3D printers, which would possibly save people some time since there can be a number of problems which can occur and many are simple fixes, but difficult to figure out unless you have seen them before or have some experience with 3D printers. Some of these tips will come from Thingiverse.com posts and where possible I will credit the user who is responsible for the tip/idea or provide a link to the thread. Some of these tips are just things I have picked up along the way working on 3D printers. In any case, these are just tips, not the end all be all, and so if you have a serious problem with a 3D printer, just try covering the basics and then post over in the appropriate forum at thingiverse.com and I'm sure you will get help, and maybe a quick solution. No need to try and battle through a problem if others have fought it many times before, and have a ready answer. And if there are no ready answers, you will probably find somebody who can point you in the direction to finding a solution. In any case, 3D Printers don't exist to become black holes for our time, they exist to make cool stuff, and hopefully some of these tips can help.
Some thoughts on safety. First, although your printer may have "thermal runaway protection", that "protection" relies on the printer's firmware and the thermistors to be functional. There are still corner cases where things can fail and these protections may not work, especially if you have an AC powered heated bed which use a solid state relay (SSR) and can fail in a state where they will remain on no matter what the printer commands. It is always good to monitor a printer, but realistically when they can run for 10's of hours that is not always possible. Therefore there are some minimum precautions that should be taken, like having smoke detectors around the printer and if possible, some form of fire suppression nearby, either active or just an extinguisher. I keep a 5LB ABC extinguisher near my printer and each of them has a Stovetop Firestop mounted above them for an added bit of protection. Smoke detectors should be mounted on the ceiling near the printers, and if they can be connected to each other or integrated with a smart home system, that is even better. It is also possible to set up a power cut-off using a smoke detector (something I still need to do). There are many ways to do this and this but the method here seems to be one of the simpler ones (but I have not tried it).
Something else to consider is where the printer will go and what materials will be printed with it. There is a good article which compares the types of particles and VOC's emitted by various filament materials.
https://3dprinterchat.com/ultrafine-particles-from-3d-printers/
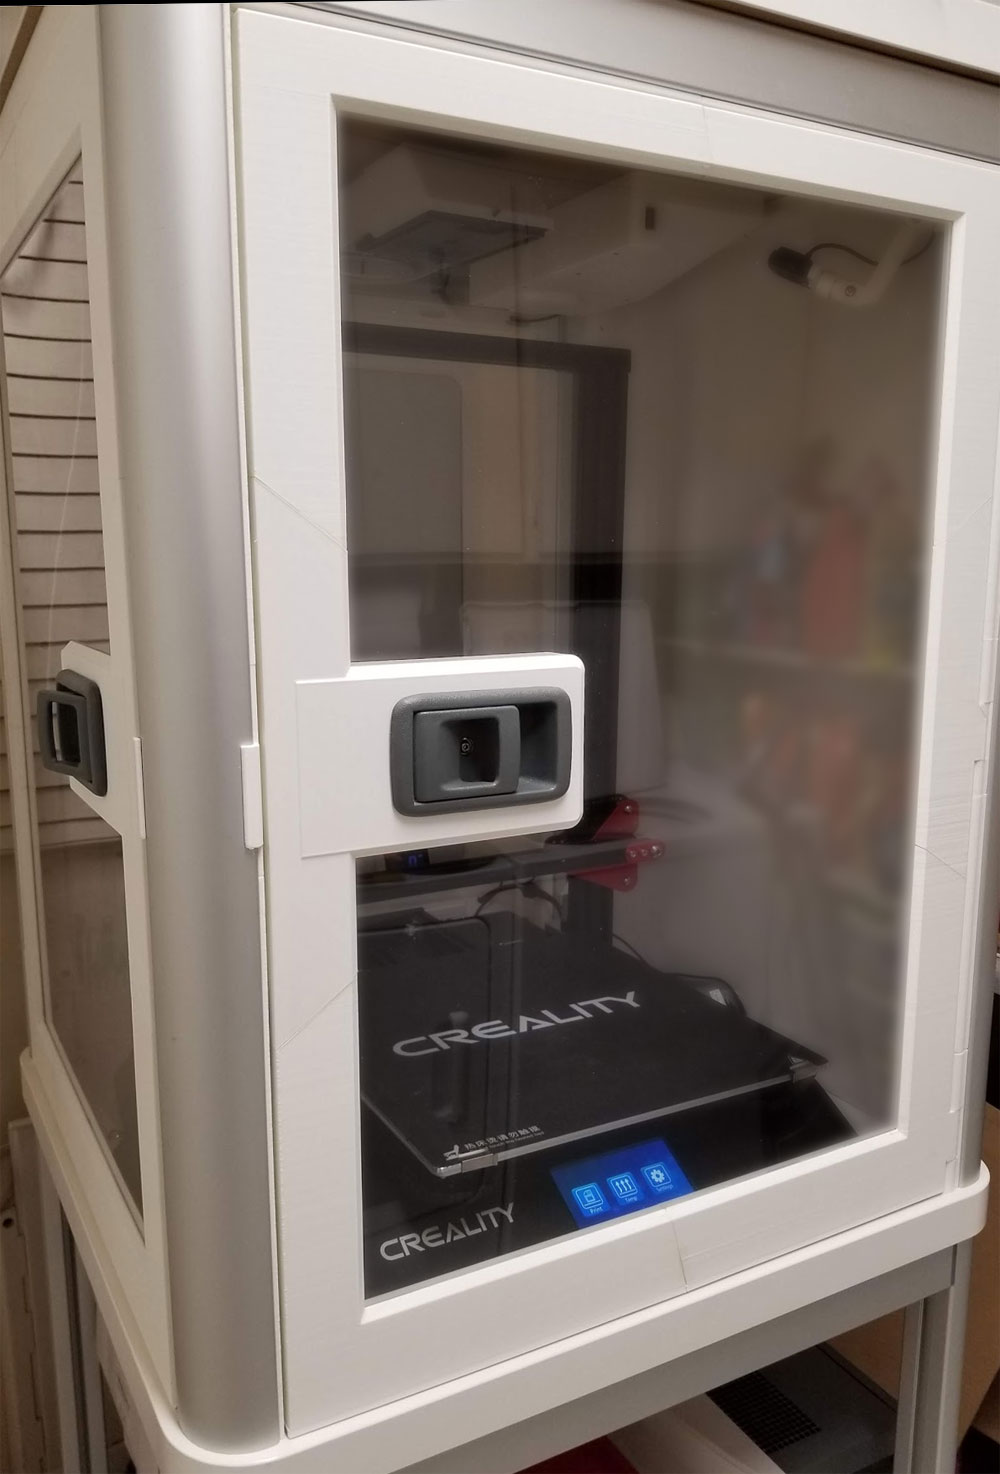
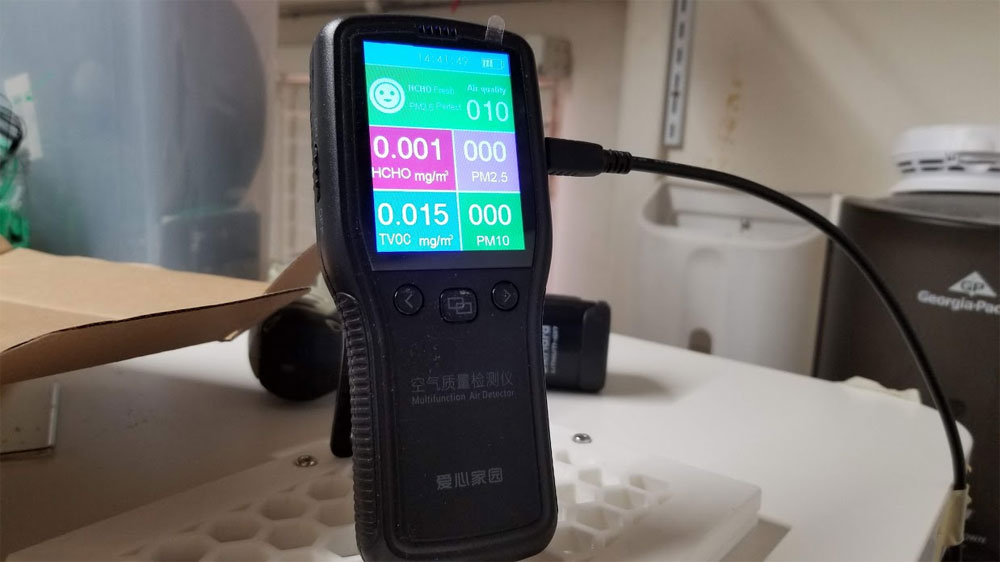
In my opinion, that article shows the need for some sort of enclosure when printing indoors, as well as some sort of active air filtration for the printer. Adding a 3D printer to a home is something that needs to be weighed carefully since there are possible risks which I feel are probably not well understood yet. At a minimum I'd keep it in a room where nobody sleeps and if possible a HEPA filter should be nearby (running at least when the printer is on and then for an hour or so afterwards). There are also simple portable printer enclosures which appear to have been developed based on indoor plant growing enclosures, and they could be fitted with HEPA filters as well. Enclosures have the extra benefit of stopping drafts and maintaining a more even temperature around the printer which can help with quality - though in the case of PLA too warm temps around the printer can have a negative effect as well. In my indoor printer enclosure, I keep a PM2.5 monitor to let me know if I should wait for the filter to clear the air inside before opening it. Normally with PETG and PLA the exhaust fan will keep it at zero but it still nice to know for sure that the air quality inside the enclosure is good before opening it up. Something else to be aware of is that some materials may seem cool and cutting edge like Carbon filled filaments, but the dangers of these materials is just beginning to be understood and studied (that link relates to carbon nanotube filled filaments). The benefits of printing something in carbon filled filaments may be less than you think, and it may be better to work with more difficult but stronger materials like Polycarbonate (also in an enclosure).
Some thoughts on safety. First, although your printer may have "thermal runaway protection", that "protection" relies on the printer's firmware and the thermistors to be functional. There are still corner cases where things can fail and these protections may not work, especially if you have an AC powered heated bed which use a solid state relay (SSR) and can fail in a state where they will remain on no matter what the printer commands. It is always good to monitor a printer, but realistically when they can run for 10's of hours that is not always possible. Therefore there are some minimum precautions that should be taken, like having smoke detectors around the printer and if possible, some form of fire suppression nearby, either active or just an extinguisher. I keep a 5LB ABC extinguisher near my printer and each of them has a Stovetop Firestop mounted above them for an added bit of protection. Smoke detectors should be mounted on the ceiling near the printers, and if they can be connected to each other or integrated with a smart home system, that is even better. It is also possible to set up a power cut-off using a smoke detector (something I still need to do). There are many ways to do this and this but the method here seems to be one of the simpler ones (but I have not tried it).
Something else to consider is where the printer will go and what materials will be printed with it. There is a good article which compares the types of particles and VOC's emitted by various filament materials.
https://3dprinterchat.com/ultrafine-particles-from-3d-printers/
In my opinion, that article shows the need for some sort of enclosure when printing indoors, as well as some sort of active air filtration for the printer. Adding a 3D printer to a home is something that needs to be weighed carefully since there are possible risks which I feel are probably not well understood yet. At a minimum I'd keep it in a room where nobody sleeps and if possible a HEPA filter should be nearby (running at least when the printer is on and then for an hour or so afterwards). There are also simple portable printer enclosures which appear to have been developed based on indoor plant growing enclosures, and they could be fitted with HEPA filters as well. Enclosures have the extra benefit of stopping drafts and maintaining a more even temperature around the printer which can help with quality - though in the case of PLA too warm temps around the printer can have a negative effect as well. In my indoor printer enclosure, I keep a PM2.5 monitor to let me know if I should wait for the filter to clear the air inside before opening it. Normally with PETG and PLA the exhaust fan will keep it at zero but it still nice to know for sure that the air quality inside the enclosure is good before opening it up. Something else to be aware of is that some materials may seem cool and cutting edge like Carbon filled filaments, but the dangers of these materials is just beginning to be understood and studied (that link relates to carbon nanotube filled filaments). The benefits of printing something in carbon filled filaments may be less than you think, and it may be better to work with more difficult but stronger materials like Polycarbonate (also in an enclosure).
|
|
Finally, be aware that many printers have a hot end design which incorporates a PTFE (Teflon) tube that buts right up against the brass nozzle and is therefore exposed to high temperatures inside the hot end. This design is meant for printing with PLA, however many people do print with other materials, but there is a risk due to the outgassing from the PTFE tube (which is especially dangerous to pet birds). There is info here (which pertains to Caprcorn branded PTFE tube), but you can probably extrapolate it to generic PTFE. In any case, if printing > 200°C with a standard (not all-metal) hot end, I would exercise caution, and not put the printer indoors, or use a filtered or ducted enclosure if you have to keep it inside. If you keep birds, also know that PTFE fumes can be deadly to them, so I would suggest switching to an all metal hot end like the MicroSwiss all metal or E3D V6 all metal hot end to avoid issues with PTFE tubes.
The tips in this section below are based on Creality Printers, but may also apply to other brands since most printers are pretty similar in their basic systems. This section is still a work in progress and you will also find some more 3D printer tips and links in the "links" section of this site.
The Basic Tip Checklist to Which May Help With Common Problems:
Below you will find a quick checklist of basic things to check, which can be easily missed during the setup of the printer. Problems with these can cause Inconsistent extrusion, you may see waves on the surface where the walls are thicker and then thinner, or you may have problems with the dimensions on the finished parts. If you have jamming, or clicking, that is probably the hot end clogging (see the Hot End Section below). If you have layers that look massively over extruded, which are sandwiched between perfect layers, that could be the z-coupler, or even dirty wheels see the fix under the X-Y-Z Mechanical section.
Note that I am not an expert, and this information is as-is, like everything on the Internet. Every problem and printer is different so research is going to be required. Good resources to check first are the documentation for the printer, the manufacturer support (varies between manufacturers but give them a try they can be very good sometimes), the printer specific forums at thingiverse.com which are a great resource, and the many youtubers and their videos (which can really be a great way to see how to do things). 3D printers can be a great way to learn new stuff, but they are still somewhat complex systems when taken as a whole, so needing help is almost a certainty with them. In any case don't let anyone convince you, and please do not consider doing, something you do not feel is safe, or that you do not feel confident in your understanding of what needs to be done, or your current ability to do things safely - if in doubt, research it (and again the forums at thingiverse.com are a great place to start). The tips below are compiled from working on printers over the past couple years, but it is by no means a how-to guide or an exhaustive list. It's more the cliff notes version which I can refer back to when I hit these issues to make sure I did not miss something. I hope it is helpful though.
Extruder
Bowden Tube
Hot end
X,Y, Z Axis Mechanical
Note that I am not an expert, and this information is as-is, like everything on the Internet. Every problem and printer is different so research is going to be required. Good resources to check first are the documentation for the printer, the manufacturer support (varies between manufacturers but give them a try they can be very good sometimes), the printer specific forums at thingiverse.com which are a great resource, and the many youtubers and their videos (which can really be a great way to see how to do things). 3D printers can be a great way to learn new stuff, but they are still somewhat complex systems when taken as a whole, so needing help is almost a certainty with them. In any case don't let anyone convince you, and please do not consider doing, something you do not feel is safe, or that you do not feel confident in your understanding of what needs to be done, or your current ability to do things safely - if in doubt, research it (and again the forums at thingiverse.com are a great place to start). The tips below are compiled from working on printers over the past couple years, but it is by no means a how-to guide or an exhaustive list. It's more the cliff notes version which I can refer back to when I hit these issues to make sure I did not miss something. I hope it is helpful though.
Extruder
- Check the bowden coupler is tight and the tube is fully inserted - also make sure the end is cut square and is not rough. Great tool for getting square cuts here.
- Extruder Gear - check that both grub screws are tight and not proud of the surface, also make sure one grub is on the flat of the extruder stepper shaft.
- If it is a plastic extruder, check for cracks
- Make sure the idler bearing turns freely, if it is not, try loosening the screw just a bit till it turns
- Specific to the CR10S PRO or printers that use the metal dual gear Creality Extruder - there can be a wear issue described here.
- If you find that the stock spring tension is not adequate (which it should be, so double check the other stuff first), there are spacers on Thingiverse which may help (search for "extruder spring spacer" to see some of the models). Note however popping/skipping is often due to hot end issues.
- If you have checked everything else and suspect you are losing steps due to low torque in the stepper motor, you can check the Vref of the extruder stepper (scroll down to the section for that below).
- If everything else is working and the problem is not consistent extrusion, but under/over extrusion, you can calibrate steps per mm and flow. This link describes how to do that (note that in Cura, flow = extrusion multiplier which is what they call it in Simplify 3D). Here is a good video on calibration as well. I first check the extruder steps by testing without the hot end involved - that is:
- disconnect the bowden from the extruder
- mark off 100 and 110 mm from where the filament goes into the extruder
- heat the hot end to at least 170C (this is required due to the cold extrusion prevention in the firmware)
- either using the screen or Octopi, request the printer send 100mm through the extruder
- measure and check your settings for extruder steps per the website or video mentioned earlier
- Do that a couple times after it is adjusted to verify it is consistent, then add the bowden back, heat the hot end to temp and do it a couple more times with the hot end and see if there is a change (if it remains consistent or if it changes). If it changes then it is gonna most likely be the hot end.
Bowden Tube
- Ends need to cut clean and square on both ends, but especially the hot end side. Great tool for getting square cuts here.
- Remove any zip ties or tight clips from the tube
- Make sure the bowden tube is not too short with tight bends at the end of the x-axis moves
- Check that the area where the couplers grip the tube is not beaten up, if it is cut a bit to move the area so it has a clean area to bite into.
- If your pneumatic couplers are not holding the bowden, they will need to be replaced. These parts are some of the most failure prone parts on my printers and it's hard to recommend good ones, but I am currently using these, and they work so far.
- The blue Capricorn or similar bowden tubes seem a bit better than most stock PTFE tube, and is probably worth the upgrade if it is not much more, if you need to swap it.
Hot end
- Verify the hot end cooling fan works and is not clogged up with junk, same for the fins on the heat sink. If there is an airflow problem on the hot end, it can cause heat creep which will clog the hot end after some time printing.
- Check that the bowden coupler is tight and the bowden is all the way in and seated against the nozzle.
- Verify that the end of the bowden that seats inside the hot end (against the nozzle) is cut square and is not degraded, burnt or fuzzy. Great tool for getting square cuts here.
- If there is any oozing around the hot end, you will need to take it apart and clean it out since something is not tight. Good video here - However note in the video he used a brass brush to clean up the hot end while the printer was live which is a really bad idea. It is easy to short the heater wires if the brass tines bridge the hot end wires which can be slightly exposed near the cartridge and that will probably blow the board. I'd skip that or do it with the printer off, but still warmed up.
- Watch the temps on the screen to, if you see them fluctuating while it is printing by several degrees, that is a problem. It is normal for it to over/undershoot a bit while heating up, but once printing it should be mostly stable. If that happens, check the following:
- your heater cartridge and thermistor are secured
- Part fan is not blowing on the block
- It would be good to insulate the block if it is not already, a silicone sock is a good way to do that.
- If you think it is clogging, then you can clear it, this is the best video I have seen yet on clearing a clog on an Ender 3 (also would work on other Creality printers).
- If the hot end does not heat at all or a similar problem, the heater cartrige can be checked. The hot end heater can be disconnected from the main board, and then checked with a multimeter to test the resistance. On a typical 40w 12V cartrige they will be around 3.6 Ohms (mine are around 4.0 Ohms), and on a 40w 24v cartridge they will be around 14.4 Ohms (mine are around 13.3-15.1 Ohms). Be careful to get the correct type (12v or 24v) for the printer, and it would be a good idea to measure them before they are installed to make sure the seller did not mix them up. As an example, a 12V heater cartridge in a 24V printer can cause a hazard (it will pull 4 times the current than the correct 24v heater). When reconnecting the heater to the main board, watch for any stray wire strands which can cause a short between the wires or to the board and properly tighten the connections. I put wire ferrules on the ends of the heater and power wires on my Ender3 when I had it apart, to avoid that problem, and I think it makes for a better connection on the screw down terminals.
- Thermistor - if you are not getting any temp reading at all, first check the connection is secure on the mainboard and at the heater block. Also check the wires at the end which connects to the block and verify the insulation is not damaged (which can cause them to short to the block). For the thermistor to work correctly it must be in contact with the block, and most printers I have seen have a hole in the block where the thermistor inserts. There is sometimes a screw used to clamp the wires to the block, or for cartridge types they use a grub screw that tightens against the cartridge - but be careful not to over tighten these since that can damage the sensor. A giggle test is also sometimes helpful if the problem is intermittent, just loosely giggle the wires along the path between the board and hot end to see if the displayed temp changes (which could indicate a problem with the wires to the thermistor and likely replacement required). If checking over the connections does not fix it, the thermistor can be disconnected from the board and tested using a multmeter. On my printers, which use what seems to be a standard NTC 100K termistor, I get around 80KOhms to 90KOhms at room temp, and the resistance goes down as the temp goes up.
- If you are seeing intermittent clogs, it could be that the PTFE tube is slipping on the bowden coupler at the hot end. If that happens there could be a void forming where melted plastic can work up the heatbreak causing problems with extruding. There is something called the "Original Hot End Fix Creality" on thingiverse which can help. Note however that I have read that often the guides are not perfect one size fits all solutions, so you may need to do some trial and error to get the right fit for your printer. See this video for an explanation and permanent fix https://www.youtube.com/watch?v=7tCxO17XZtw. *note that I have not used this fix, since I swapped my hot ends with a Titan Aero, V6 and an MicroSwiss all metal hot end.
X,Y, Z Axis Mechanical
- Belts - These need to be tight, with just a bit of deflection when pressed. You don't want to over tighten them, but they should have resistance when pressed on. The idea is to keep them from slipping, when I find a better link for this I will post it here.
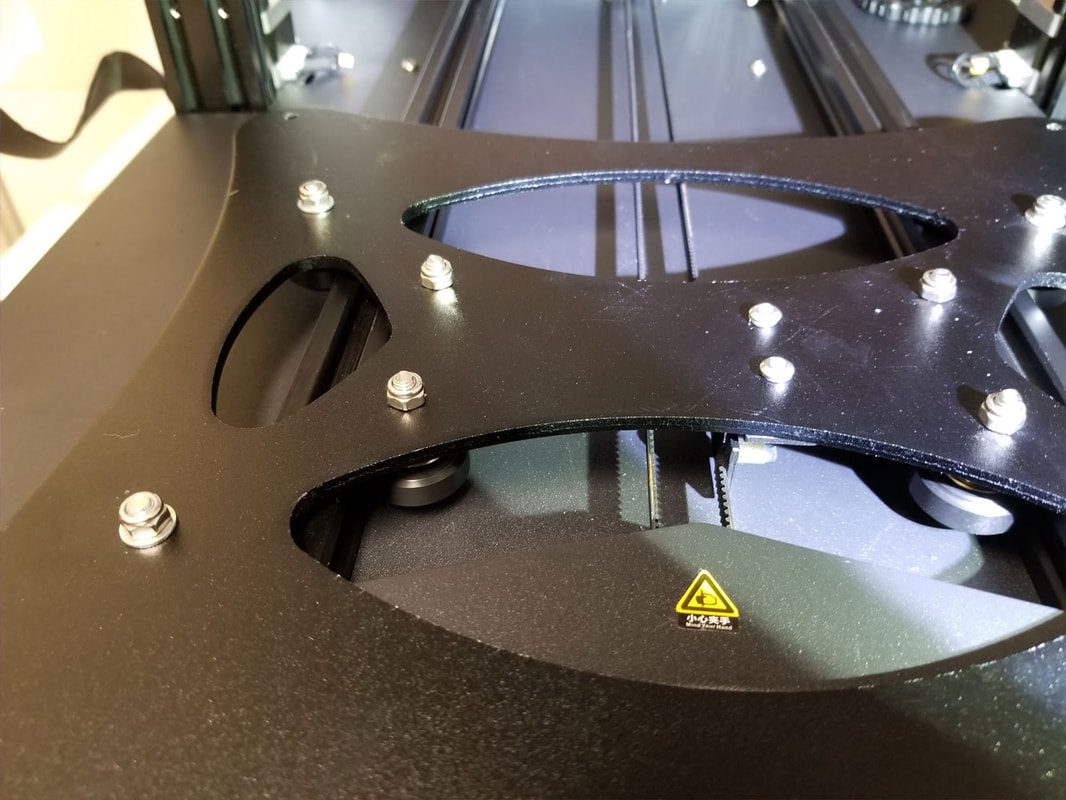
- Stepper gears (see pics - pardon the dust). These have 2 grub screws which are 90 degrees apart. One of these screws needs to sit on the flat of the stepper shaft and both need to be tight and sitting below the surface of the gear.


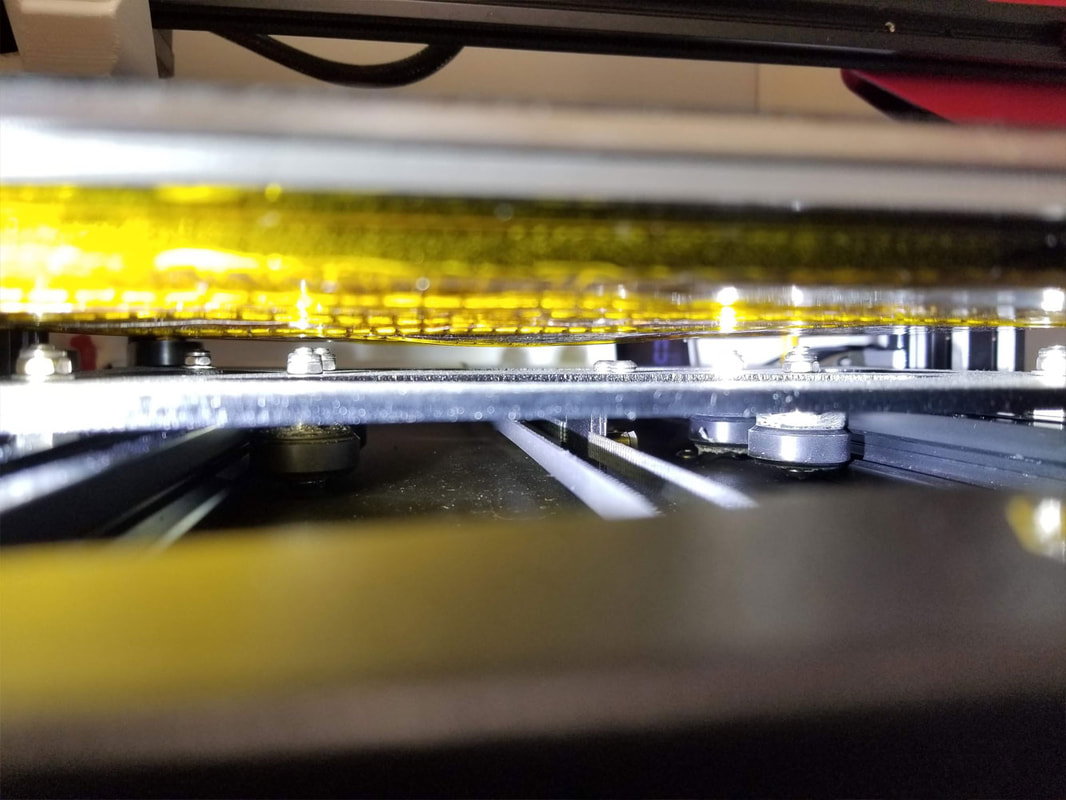
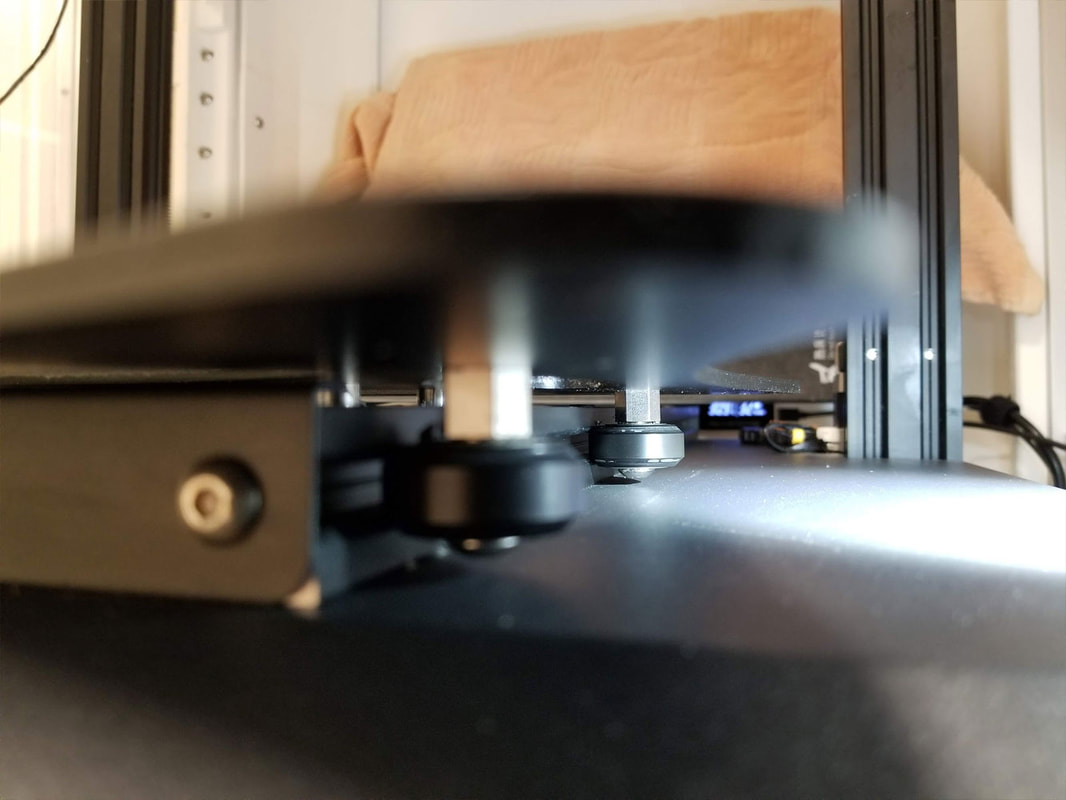
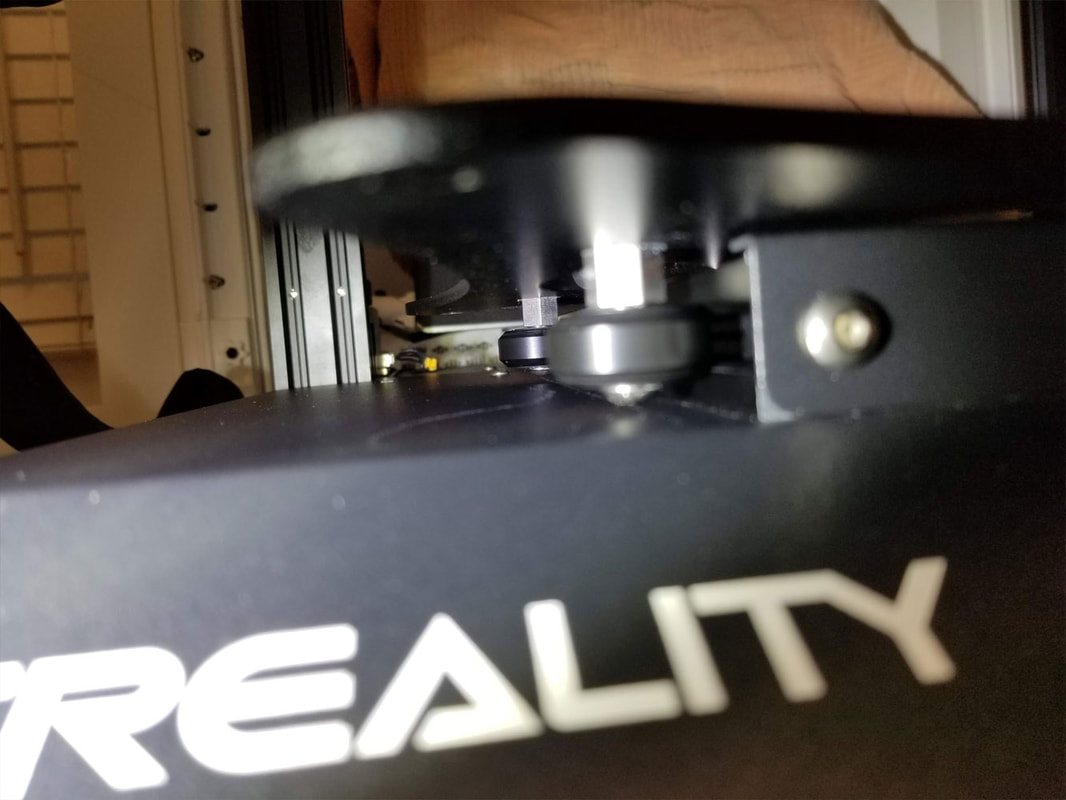
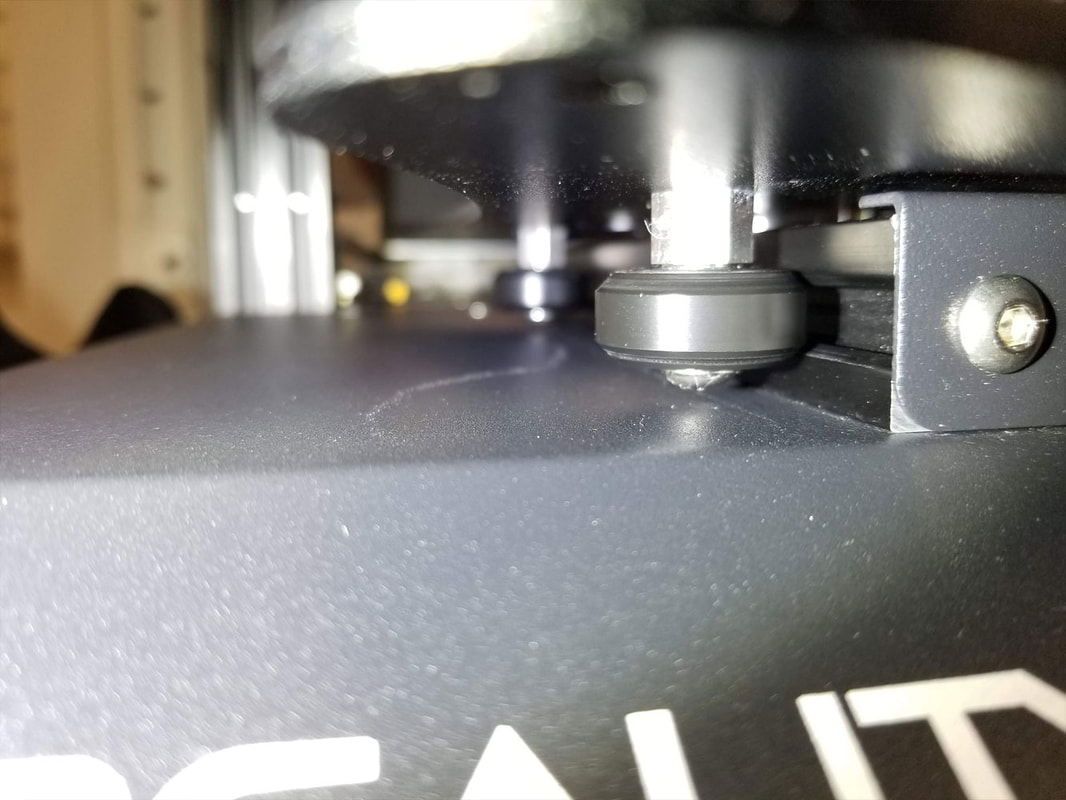
- Wheels - they need to be tight and should not roll freely, or be so hard to move that they are getting deformed. Several of the wheels have eccentric adjustment nuts which allow the wheel to be moved in or out (see the pics below). On the Ender3 and CR10, the inside wheels on the Z Axis can be adjusted, and on the Y carriage (IIRC) the adjustment wheels are on the right side. They will be obvious when you see them - see the pics. Additionally, if you are adjusting the Z-axis wheels, you can also try adjusting the X-gantry so it is parallel to the bed or top bar which will help square it up to the frame. If your bed is not square, wobbles or the wheels are not tight, they can be similarly adjusted (eccentric nuts are on one side only).

- Bed Wheels - I posted a quick tip here on how to fix slight resistance or bumps felt when moving the bed (y-axis) by hand. It was just some dirty wheels, but the bed had to be removed to get at them for cleaning. This is a small fix that can make a big difference in print quality, and a good maintenance item to check (note to self :-).


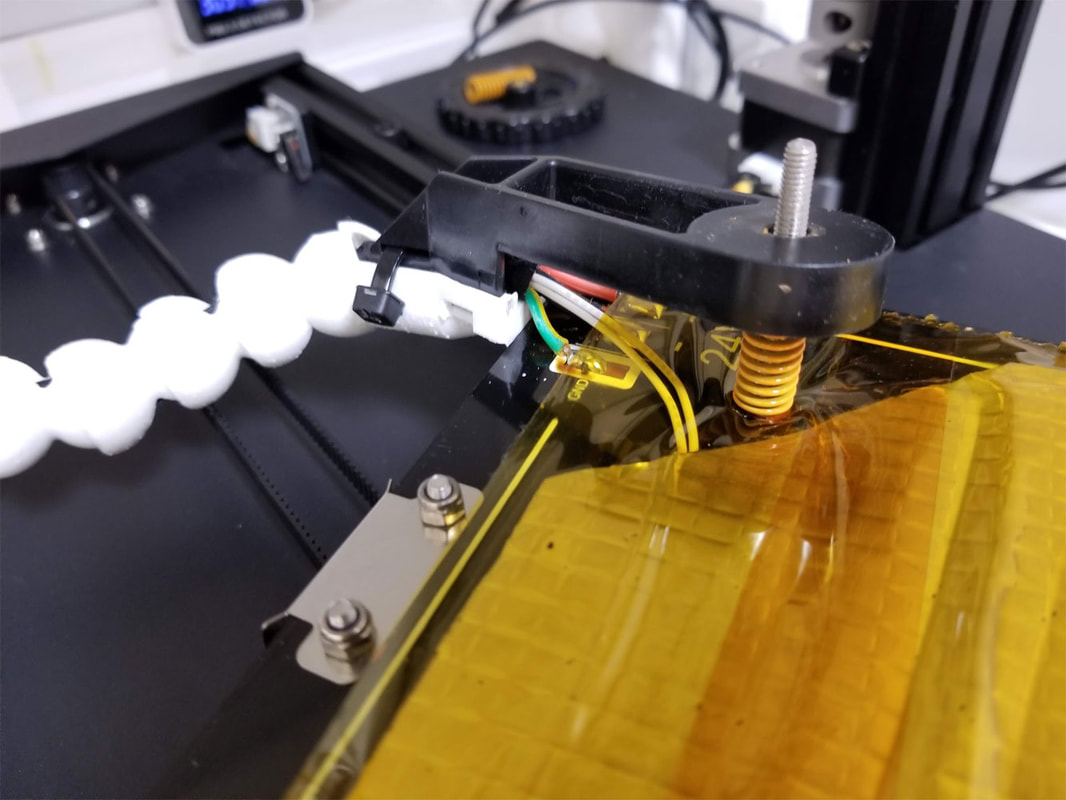
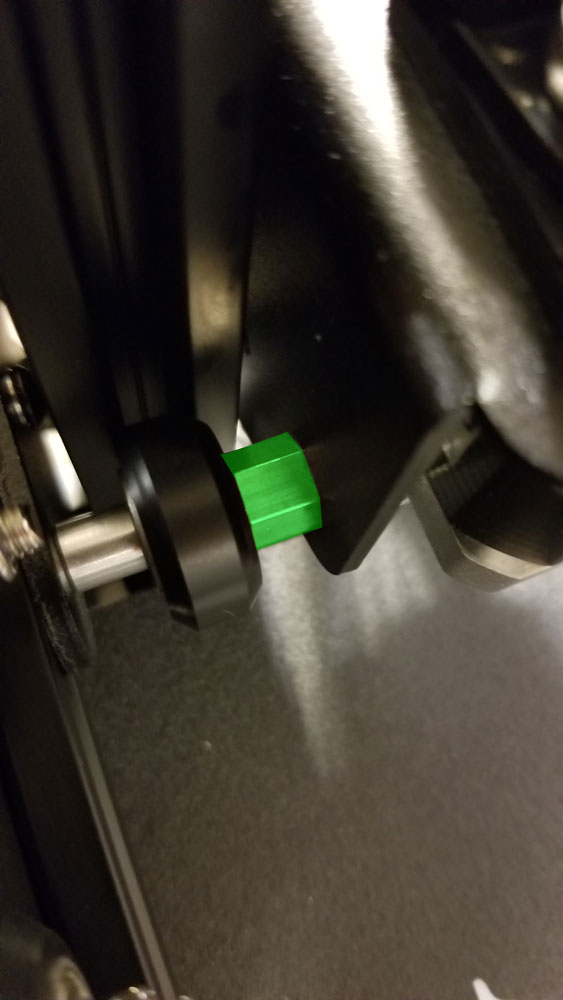
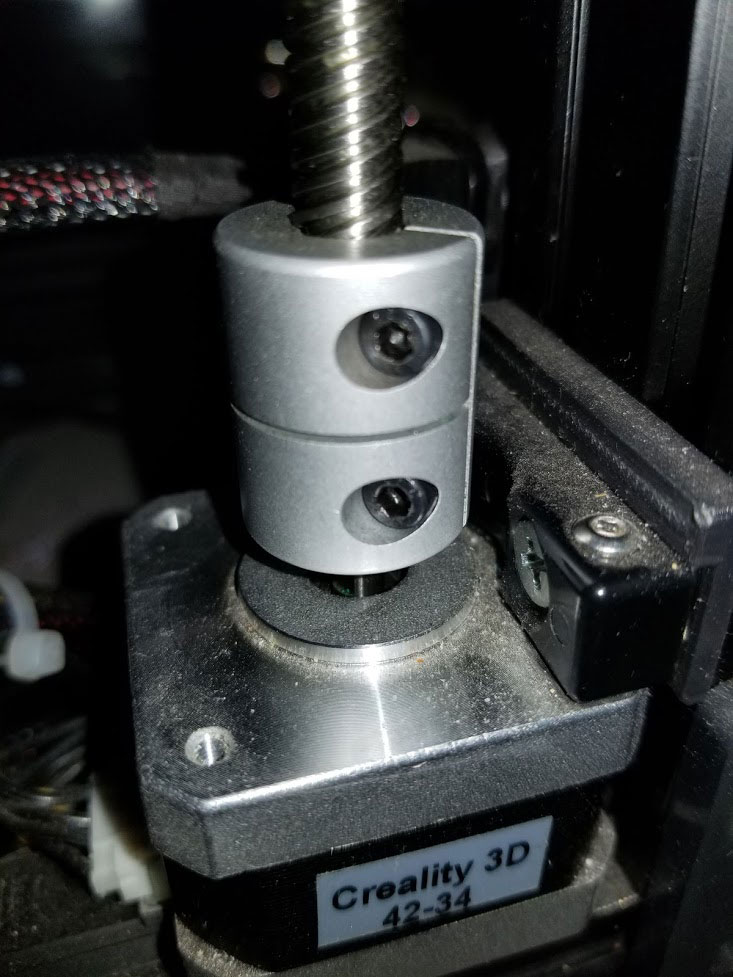
- Z Axis leadscrew and coupler - this is something that is very easy to miss in setup and can cause headaches later with intermittent problems (like having your prints look like they are perfect for several layers and smooshed on others, then back to perfect, or things that look like layer shifting but very smooshed). To check for possible issues, the first thing to look at is the coupler. It should be tight, and the leadscrew should have a mm or two gap between it and the top of the stepper shaft (to limit vibrations and allow the coupler to flex between the stepper and leadscrew). There should also be a small gap between the stepper and coupler - to keep the coupler from touching the body of the stepper motor. See the pic of the coupler below and again, pardon the dust. The Z leadscrew may be misaligned from the factory or even binding, to fix that, see this video - check this out regardless it is a great setup video. If your z-coupler has 4 grub screws, then one of them should be on the flat of the stepper shaft.
Slicers
This section is going to be a work in progress, and I am gonna keep it brief since it is a topic that requires a lot more research than I have time for right now.
The "slicer" is the software that takes a model (.STL usually) and separates it into 2D layers which can be printed one on top of the other, which forms the 3D print. There are a lot of slicers out there and I think some CAD programs wiill even perform that function now, but for the most part people start off with Cura.
I have so far only used Cura, Prusa Slicer and IdeaMaker (which are all free) so those are the ones I can comment on. I have heard very good things about Simplify3D (it's support handing is legendary), however it's a bit out of my budget at $149 US. I primarily use Cura, which is what I would recommend for anyone starting out, since it is what the majority of folks are using (and so it has very good support). Cura does a good job for most things, and if you can slice it using the "tree supports", things will probably work out well. Even with "normal" supports in Cura, it will often be fine with some careful cleanup or tuning beforehand, but it takes more work to keep supports from becoming one with the rest of the model. Cura however does have excellent integration with OctoPrint, which is how I control my printers (no more SD cards needed).
If I have a model with particularly difficult supports however, I will use IdeaMaker since it handles supports much better. Supports in IdeaMaker tend to be more broken up and there seems to be minimal support material that goes with the grain of the rest of the print. They also seem to be more intelligently placed than Cura's normal supports tend to be. The drawback of IdeaMaker is that the UI is fragmented and has confusing options, so the learning curve is going to be steeper. I very rarely use PrusaSlicer., but the supports in PrusaSlicer were better than Cura, and it does have some neat tools for cutting models which may be too large to fit a printer.
Filament issues - keep it dry
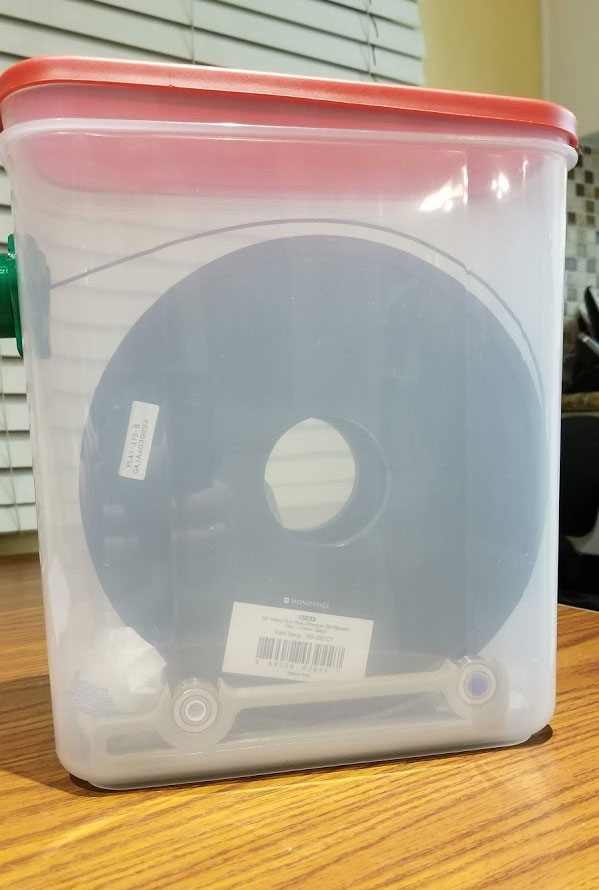
"Trust in God and keep your filament dry" would be good advice for anyone dealing with print issues. It is probably the most often overlooked problem, since it is not obvious that filament would pick up moisture from the air and possibly spoil an otherwise perfect print. The usual indications of a problem is a "rice krispies" sound from the extruder, which is water boiling out, and zits or roughness in the prints, from the bubbles bursting on the surface. Most often it will be obvious something is wrong though, since I have found that wet filament is usually brittle and will snap before it can be loaded. It is easy to prevent wet filament however, and you can do it on the cheap or use a more permanent dry box setup.
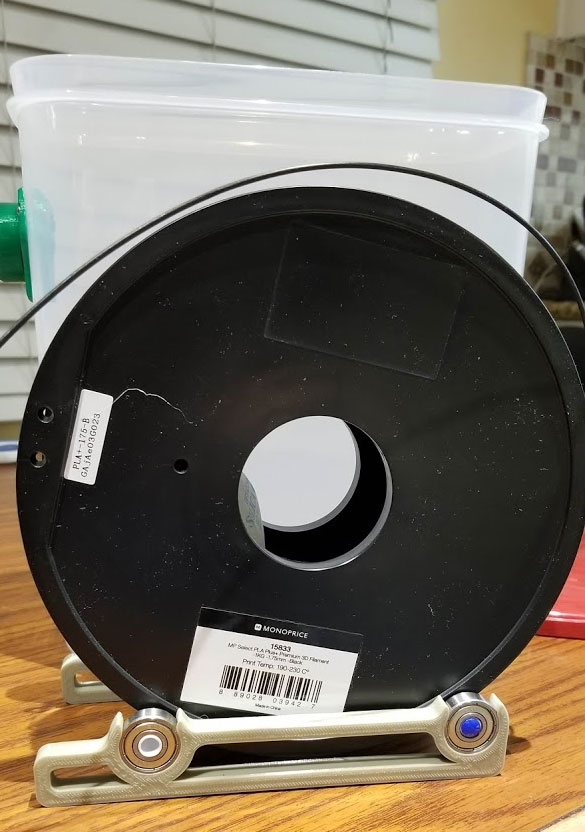
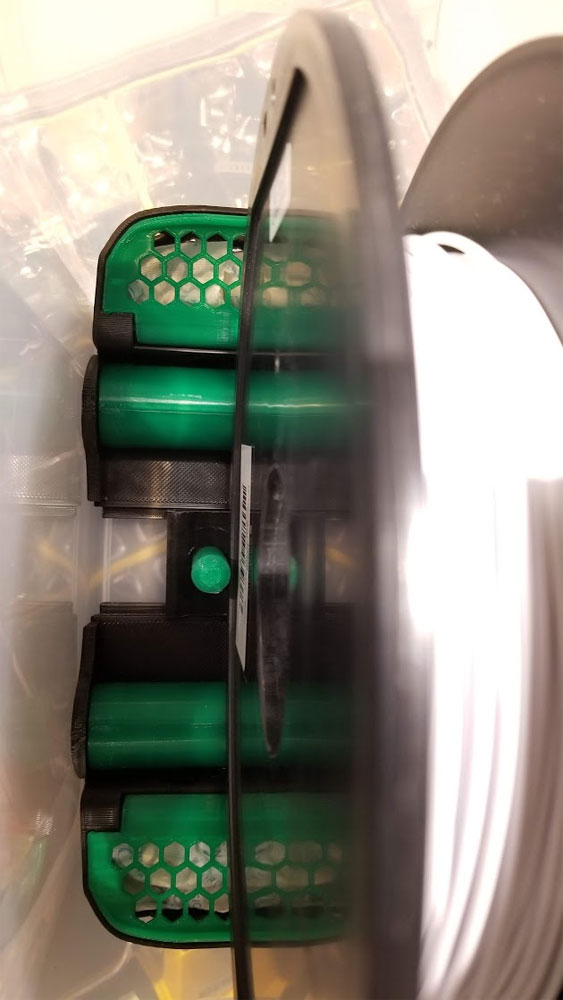
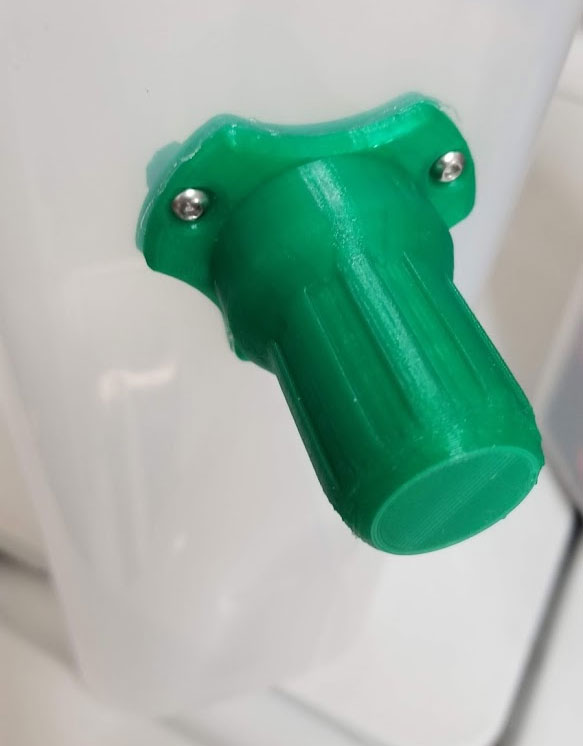
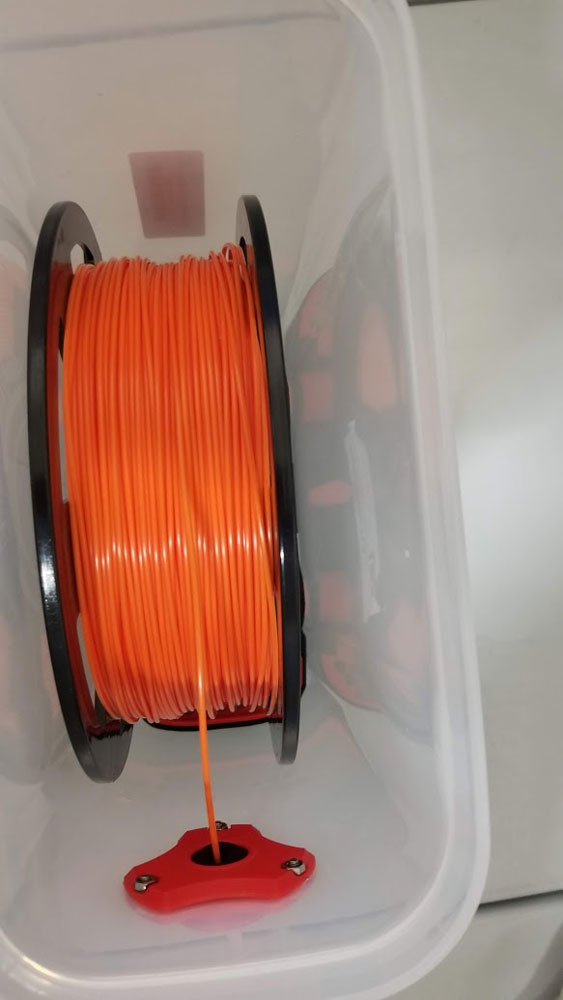
Filaments like PLA, ABS, TPU and PETG all should be stored in a bag or sealed container with a large packet of silica gel. Take note however, some of the indicating versions of silica gel may not be super healthy, it's very minor but if you have kids this stuff can look like candy. I get the packets with a few indicators mixed in with the plain which seems like a good balance. I recently started using these vacuum bags, and don't plan to go back. They come with a hand pump and actually seem to hold the vacuum for as long as I have been using them (months now). The screw on valve caps give a bit more security they will maintain the seal as well. As a less expensive option, I have found these Hefty 2.5 Gallon bags are perfect for holding spools, but I'm moving away from using them unless I run out of vacuum bags. For spools I am actively using on the printer, I designed and use a dry box setup using some "Rubbermaid 711717429496 21-Cup Dry Food Containers", which were cheaper when I got them, about 8 bucks each in a 4 pack, but other storage boxes will certainly work too:
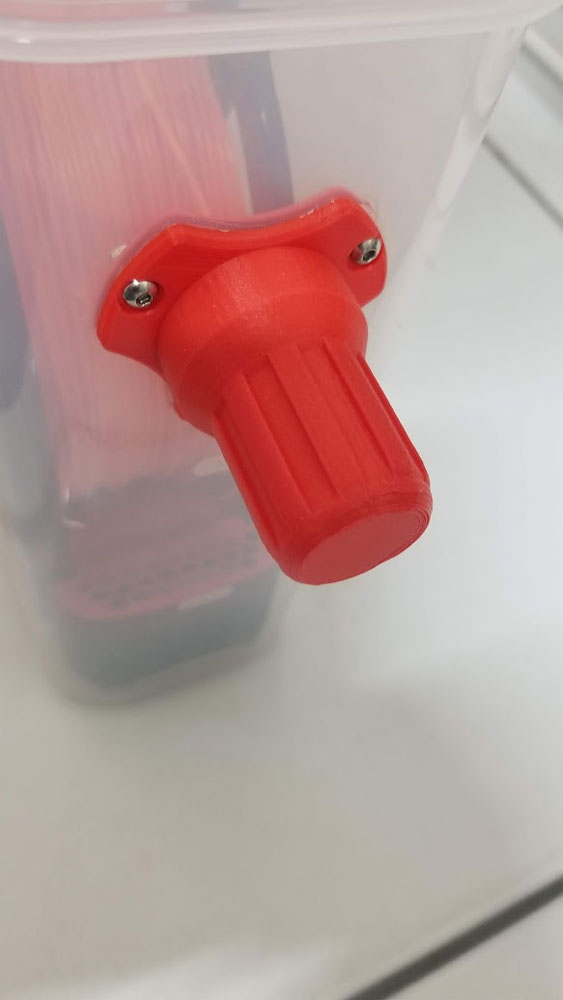
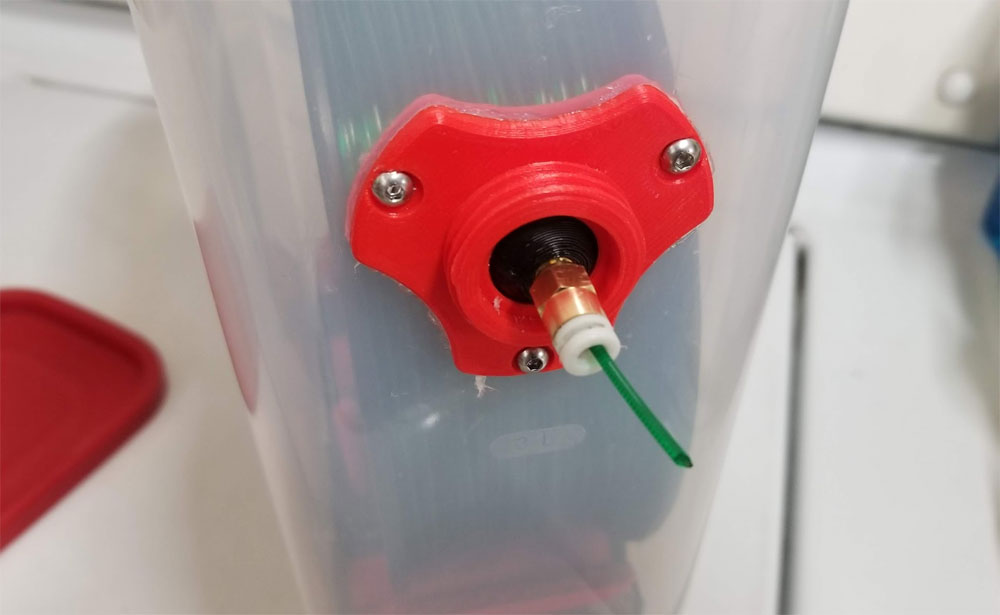
Drybox filament pass through with O-ring seals:
https://www.thingiverse.com/thing:3951296
I designed an spool roller insert for the Rubbermaid container, which looks all nice and fancy, but I prefer to throw a packet of silica gel in the bottom of the box and use the much simpler "Wally Jr" spool roller here:
https://www.thingiverse.com/thing:2651592
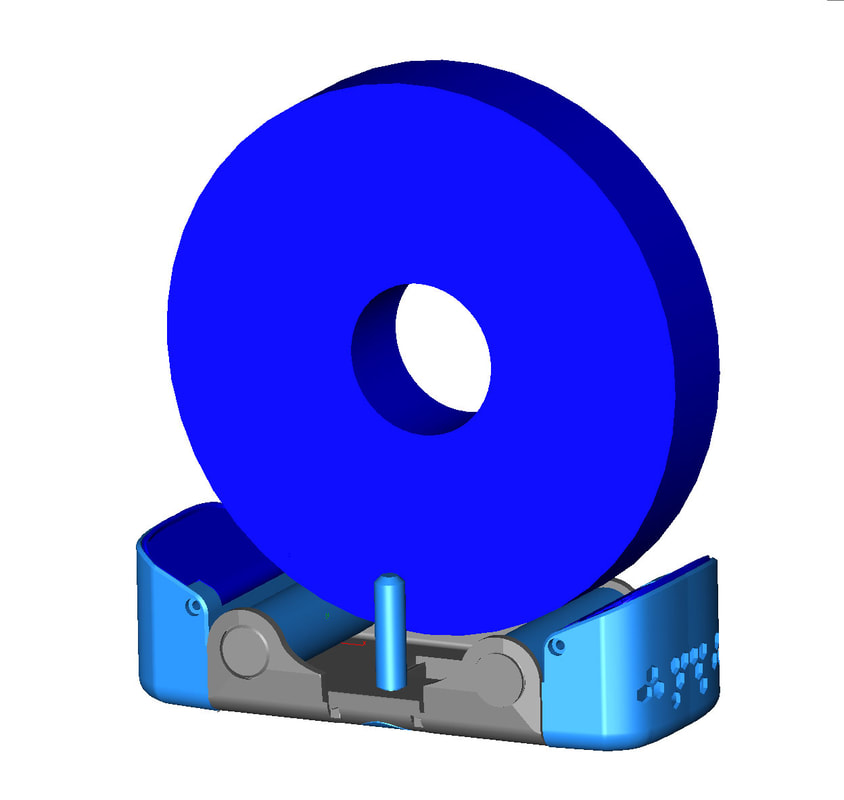
And a newer version here with a latching base (feeds downward for my specific application):
www.thingiverse.com/thing:4967884
No matter how you do it though, keeping PLA and PETG, Nylon or other exotic filaments dry is a good idea to protect the value of the material. They should also be kept in a manner that does not expose them to UV light, which also degrades them. If the worst happens, it may be possible to save a spool though. I have used a regular food dehydrator several times to save spools, and it has worked out, but it is not a guarantee, and the spool may never print as well as it did when new. Here is a link with some suggested drying temps and times to dry out and possibly recover wet filaments:
https://forum.prusaprinters.org/forum/original-prusa-i3-mk3s-mk3-general-discussion-announcements-and-releases/drying-times-and-temps-in-dehydrator/
By keeping filaments in bags or dry boxes with a sachet of silica gel I can avoid problems most of the time, and when I notice an unusual degrading of print quality from a spool, that signals when I should put it in the dehydrator for a few hours. So far I have used ABS, PLA, PETG and TPU, and of those, I would say that TPU is requires the most attention to storage, and even so, it will probably require some drying unless you can use up the roll quickly. It is pretty cool though to see TPU go from printing like garbage to perfectly almost like new after a run through the dehydrator. PETG also seems to require a run in the dehydrator if I can't use up the whole spool, usually when it begins to be much more stringy than normal. PLA is the easiest and is normally OK with careful storage, but signals that it is wet when it becomes brittle.
There are two other problems common to filaments and those are inconsistent diameter (which can cause layers to be thicker or thinner causing tell tale horizontal lines on the print, and tangled spools. To see if the diameter is not correct, you would need a caliper, I use these and they work well enough for the stuff I do. If you do much printing, you will find that a digital caliper will be a necessary item in your toolkit after a while. Unfortunately there is not much you can do about inconsistent diameter filament, except try and get your money back. There will always be some variation and if the problem is simply under or oversized filament, but it is consistent, then doing a flow calibration with the roll will probably negate any problem. Poorly wound spools are less of a problem from my experience, seems companies are getting better at that. However it is still possible to get a tangle by improperly storing a roll of filament. To avoid tangles, the end should never be left unsecured. Spools have at least 2 holes along the edge that are used to secure the filament, and there are a ton of clips on Thingiverse to do the same - or even tape will work. If you find that a spool does have a tangle or is prone to them, the only way I have found to overcome that is to unspool the amount of material that Cura estimates the print will take, and then re-coil that on the spool. It's a pain and eventually the spool or what remains of it will get re-rolled but that's the way it goes sometimes.
Somewhat related to filament is general print quality, so the following links, which are a couple great and simple guides, may help you find some direction on printing problems:
https://www.simplify3d.com/support/print-quality-troubleshooting/
https://rigid.ink/pages/ultimate-troubleshooting-guide
Filaments like PLA, ABS, TPU and PETG all should be stored in a bag or sealed container with a large packet of silica gel. Take note however, some of the indicating versions of silica gel may not be super healthy, it's very minor but if you have kids this stuff can look like candy. I get the packets with a few indicators mixed in with the plain which seems like a good balance. I recently started using these vacuum bags, and don't plan to go back. They come with a hand pump and actually seem to hold the vacuum for as long as I have been using them (months now). The screw on valve caps give a bit more security they will maintain the seal as well. As a less expensive option, I have found these Hefty 2.5 Gallon bags are perfect for holding spools, but I'm moving away from using them unless I run out of vacuum bags. For spools I am actively using on the printer, I designed and use a dry box setup using some "Rubbermaid 711717429496 21-Cup Dry Food Containers", which were cheaper when I got them, about 8 bucks each in a 4 pack, but other storage boxes will certainly work too:
Drybox filament pass through with O-ring seals:
https://www.thingiverse.com/thing:3951296
I designed an spool roller insert for the Rubbermaid container, which looks all nice and fancy, but I prefer to throw a packet of silica gel in the bottom of the box and use the much simpler "Wally Jr" spool roller here:
https://www.thingiverse.com/thing:2651592
And a newer version here with a latching base (feeds downward for my specific application):
www.thingiverse.com/thing:4967884
No matter how you do it though, keeping PLA and PETG, Nylon or other exotic filaments dry is a good idea to protect the value of the material. They should also be kept in a manner that does not expose them to UV light, which also degrades them. If the worst happens, it may be possible to save a spool though. I have used a regular food dehydrator several times to save spools, and it has worked out, but it is not a guarantee, and the spool may never print as well as it did when new. Here is a link with some suggested drying temps and times to dry out and possibly recover wet filaments:
https://forum.prusaprinters.org/forum/original-prusa-i3-mk3s-mk3-general-discussion-announcements-and-releases/drying-times-and-temps-in-dehydrator/
By keeping filaments in bags or dry boxes with a sachet of silica gel I can avoid problems most of the time, and when I notice an unusual degrading of print quality from a spool, that signals when I should put it in the dehydrator for a few hours. So far I have used ABS, PLA, PETG and TPU, and of those, I would say that TPU is requires the most attention to storage, and even so, it will probably require some drying unless you can use up the roll quickly. It is pretty cool though to see TPU go from printing like garbage to perfectly almost like new after a run through the dehydrator. PETG also seems to require a run in the dehydrator if I can't use up the whole spool, usually when it begins to be much more stringy than normal. PLA is the easiest and is normally OK with careful storage, but signals that it is wet when it becomes brittle.
There are two other problems common to filaments and those are inconsistent diameter (which can cause layers to be thicker or thinner causing tell tale horizontal lines on the print, and tangled spools. To see if the diameter is not correct, you would need a caliper, I use these and they work well enough for the stuff I do. If you do much printing, you will find that a digital caliper will be a necessary item in your toolkit after a while. Unfortunately there is not much you can do about inconsistent diameter filament, except try and get your money back. There will always be some variation and if the problem is simply under or oversized filament, but it is consistent, then doing a flow calibration with the roll will probably negate any problem. Poorly wound spools are less of a problem from my experience, seems companies are getting better at that. However it is still possible to get a tangle by improperly storing a roll of filament. To avoid tangles, the end should never be left unsecured. Spools have at least 2 holes along the edge that are used to secure the filament, and there are a ton of clips on Thingiverse to do the same - or even tape will work. If you find that a spool does have a tangle or is prone to them, the only way I have found to overcome that is to unspool the amount of material that Cura estimates the print will take, and then re-coil that on the spool. It's a pain and eventually the spool or what remains of it will get re-rolled but that's the way it goes sometimes.
Somewhat related to filament is general print quality, so the following links, which are a couple great and simple guides, may help you find some direction on printing problems:
https://www.simplify3d.com/support/print-quality-troubleshooting/
https://rigid.ink/pages/ultimate-troubleshooting-guide

Checking Vref on the stepper drivers
If you think you may be losing steps or can feel the steppers are running really hot, you can check the reference voltage on the stepper drivers (Vref). On Creality printers these stepper drivers are built into the board, but still have small adjustment potentiometers used to set the Vref. Other printers use modules called step stick drivers which can be replaced, but also have the adjustment potentiometers. Some TMC drivers (running in certain modes) allow the stepper current to be set using software, but should also have a potentiometer. The reference voltage required will depend on the type of driver IC used by the printer, but for the most part, a good rule of thumb I use when making manual adjustments to the Vref using the potientiometers, is to make small adjustments (0.1v or so) and then re-test to see if the problem has resolved. Different printers using the same drivers may also have different stock or suggested Vref values based on the load a stepper may need, so it is best to search online to see what other users have tried (if you have no basis of a baseline to try if swapping a board out or something like that).
This requires a multimeter and a steady hand since it is done live with the printer on. Good video on that here:
https://www.youtube.com/watch?v=pJRYXKRAUN4
If you check Verf by following the video, note that you do not need to take the power supply cover apart, you can access everything you need from the board. Just use any good ground reference point (I use the screw terminal for the negative power supply lead). It's even better if you can clip the negative test point since that is one less thing to manage when doing this. A ceramic screwdriver is also handy and the recommended way to adjust trimpots. However I don't have one anymore, and I find it simpler to just clip a wire from the meter's probe to a small metal screwdriver, which lets me monitor the changes while I adjust them. That method is a bit risky though, due to using a metal screwdriver to adjust the trim pot, and possibly shorting of other components if touched by accident. But I have not had problems yet, doing it that way
Bed Issues and Adhesion
Bed problems can be the 2nd most frustrating problem with 3D Printers. I will probably add more to this section, and am not going to make a guide for basic leveling since that is covered in many places. This is just a basic guide to problems which can happen when you have done the leveling and it still does not work. Right now, I would suggest the following:
Leveling Problems
Adhesion
Leveling Problems
- If normal leveling fails, check for other mechanical issues - and look at the "wheels" section above for adjusting the x-gantry. Also check that there is no wobble in the bed, and adjust the Y Axis eccentric nuts if needed. I have heard of one case where one of the mounting holes in the bed carriage had broken out causing a problem with inconsistent leveling (this was one case, but worth looking over the underside of the bed for problems due to defects or loose mechanical connections).
- If your bed is truly warped, then you have few options and all will cost money to fix. Some people have had success using strategically placed strips of painters tape below the build surface or glass plate to level a bed. Sometimes just swapping with an ultrabase or borosilicate glass plate can fix it. Adding an auto-leveling probe is probably the best fix but also the most technical. I'd recommend starting with the Ultrabase or glass plate (or glass + PEI) first and going from there.
Adhesion
- Clean the bed
- Make sure the part cooling fan is off for the first layer in Cura (Cooling > Initial Fan Speed)
- Increase the initial layer temp and flow as well (Material > Printing Temperature Initial Layer and Initial Layer Flow)
- Tweak the z-offset. First take note of the current Z-offset, either using M503 and noting what it shows for M851, that way you can always go back. I will usually start by raising or lowering it 0.04 to 0.08mm and checking the result. Another way to test a Z-offset tweak on a per-print basis is by using the "Z-offset Setting" plugin for Cura which you can find in Cura's Marketplace (Build Plate Adhesion > Z Offset). Keep in mind though that the ideal Z-offset can change depending on the material being printed. PETG likes to be printed a bit higher than PLA for example (so I use the Cura plugin to raise it by 0.04mm or so).
- If you have a BL Touch, and have an Octopi, you can install the bed visualizer plugin, and it will show you if you may need to do a manual level as well. Manually leveling should be done whenerver the bed is worked on and then an auto bed level (ABL) should be run and the mesh saved using the menus to save settings or using M500 on the terminal. A couple things to note about auto-leveling though:
- if you put G29 in the start Gcode (to run an auto bed level), place the G28 (home) command before that and do not add another home command after the G29.
- If you don't want to waste time running an ABL every print, you can instead use the stoners favorite command "M420 S1 Z2" in the start Gcode (instead of G29). M420 also needs to have a G28 (home) run prior, but not after it. Note that the "Z2" part of the command specifies the "fade height" in mm, which is the height above zero where the compensation for the difference in bed height will take place in the printed model. Some people use Z10, so the software will compensate for bed differences over the first 10mm of the model, I like to use 2mm though. M420 command is documented here. In order for M420 to work, there must be a valid saved mesh in the eeprom, so it requires running an ABL (G29) and saving the mesh prior to using M420.
- Adhesion is a big problem with some of the stock build surfaces, especially the flexible magnetic stock build surface on some Ender3's from what I have heard. If you have one of these, it may be better to stick an Ultrabase, wham bam (or similar flexible surface), or glass + PEI sheet on the printer. My experience is that a textured PEI spring steel plate is best for PLA. The textured PEI plates also work well with PETG, but a plain PEI sheet can actually stick too well with PETG (so I sometimes will just hit it with hairspray as a release agent when running PETG). Hairspray works either way though (as a release agent or to help with adhesion), and is handy to have around. I prefer it over glue stick since it goes on much more evenly. Tt's a good idea though to remove the surface to spray it so the overspray does not get all over the printer. I've used PEI for years now, running PLA, PETG and little ABS, and it has been the best surface overall (but sometimes it needs some help from the hairspray). When I used Glass alone, it was great when it worked, but inconsistent with some parts just lifting or separating and causing failed prints, unless gluestick or hairspray was used. Plain PEI sheet is also sandable, so it can be refreshed if needed. The downside for PEI is that it can stick too well with PETG and TPU (for TPU, if you gotta use PEI, then use something as a release agent or there will be a problem). I don't print much ABS but I don't recall problems running it with PEI, but it will still curl if ABS is not printed in some type of enclosure. I'm currently using a textured PEI sprint steel sheet on my Ender3 and I also run one on my CR10S pro (the sheets from TH3D are pretty good, but I have also had luck with others). The spring steel magnetic build plates are so far the best I have used for PLA and PETG (again though with PETG, care needs to be taken or it may stick too well).
Adjusting the X-Axis Gantry on an Ender3/CR10 style printer
I did a short write up on how I leveled my X-gantry on the Ender3 a while back, thought I would post it here since it is hard to search this site.
http://www.mystoopidstuff.com/blog/adjusting-the-x-axis-on-the-ender-3
Dimensional Issues with Prints
If you have a well tuned printer but are having issues with prints that seem off dimensionally, then there are several possibilities for what may be wrong. The most unlikely would be that your steps per mm are off from what they should be, and in that case you would need to calibrate the e-steps (see above). I only mention that since e-steps is more of an initial printer setup thing, and not something that will change unless you make a intentional change to the printer (like swap a pulley with a different type or change a stepper for a different type), I'm not going into that here (but it is explained above). The most common problems I have with dimensional accuracy of printed parts can usually be resolved by first calibrating the flow (info here and here) and then once that is good, the horizontal expansion. I try to do this when I get a new filament and need to print something accurately, and it mostly works. I have to say that unlike in the video for horizontal expansion I rarely get it perfect, but within 0.1mm is usually fine since the surface roughness of printed parts usually seems to be that or worse.
I use this simple and quick test "cube" to calibrate the flow, and sometimes I just use it to check my first layer. There is a more detailed description in the link:
My Stoopid Test Cube
I use this simple and quick test "cube" to calibrate the flow, and sometimes I just use it to check my first layer. There is a more detailed description in the link:
My Stoopid Test Cube
Power Supply and Grounding Problems
Despite the fact that you may have paid upwards of $300 for your printer, they are usually comprised of cheap components. After the main board, the most expensive component is probably going to be the power supply (unless your printer is huge and then maybe the bed will be the most expensive component). Many/most manufacturers seem to be quite happy to cut costs on power supplies, probably due to them being sort'a invisible to most consumers of their products. But fortunately, consumers of 3D printers are becoming aware of this component, either due to problems they have had firsthand or though forums and youtube. Some companies are highlighting that they use quality (Meanwell) power supplies as a feature (Ender 3 pro for example), so things may be changing.
I wouldn't recommend poking around in your power supply - those big capacitors can still pack a charge after they are unplugged, but it is interesting to see how poorly they are sometimes assembled (see video below).
I wouldn't recommend poking around in your power supply - those big capacitors can still pack a charge after they are unplugged, but it is interesting to see how poorly they are sometimes assembled (see video below).
TH3D's channel on YouTube is a great resource for anything printer related and he also has a video showing some cheap mains power cables which had faulty ground connections, as well as showing how to check the grounding on the power supplies (I couldn't find a better video, but in this review he demonstrates how to check and fix a poor ground connection between the chassis and supply).
Running the PID Calibration for the Hot End and Bed
PID tuning is done to optimize the stability of the bed and nozzle temperature. These can either be configured in the configuration.h in Marlin before compiling, or set in the EEPROM after the firmware is loaded using gcodes. Since adding them to the conifguration.h is not possible until the printer is running the firmware, I think it is simpler to just do it afterwards using gcodes. If I were to upgrade Marlin later, I would just add these to the configuration.h since I have the values now. To run PID autotune and set the values, a terminal to the printer is needed. Octoprint (using a Raspberry Pi) and Pronterface (for the PC) are the two that seem simplest.
First please take note of the following:
- PID values are specific to each printer, so even though a printer may be the same model with all the same components, the PID values will be different.
- Take some precautions, especially when running PID for the first time. I monitored the temps when running PID tuning to make sure the correct temp probe was reporting the temps expected (so if tuning the bed, I made sure the bed temp probe was reporting the higher temp), and then the same for the hot end. I also allowed things to cool down between running the bed and nozzle calibrations. This confirmed that the temp probes were correctly set up and not connected to the wrong places on the board.
- I don't know if it matters much, but I run the PID for the nozzle with the hot end lowered near but not touching the bed. This is because the airflow from the fan will be much different when it is close to a part or the bed, than if it were lifted in the air.
This is how I ran the PID AutoTune, so use this info at your own risk. If you have issues with your printer maintaining temps, I suggest checking that the thermistor is not loose/damaged/broken, and is making good contact with the block before changing PID vales. Also check that your parts fan is not blowing on the block, and try insulating the block with a silicone sock or insulation wrap.
There is a great video here which covers the whole process, worth a watch if you have never done this before.
https://www.youtube.com/watch?v=jVcIt7nFaks
It is a good idea to take note of your current PID values using M503 to get the current parameters. That information can be copied to a notepad for reference later if things need to be reverted back.
Bed PID AutoTune:
M303 E-1 C8 S60
Explanation:
E-1 = Bed
C8 = run the test for 8 iterations
S60 = run the test at 60 degrees C (or whatever temp you want to calibrate for)
Recv: bias: 129 d: 125 min: 89.74 max: 90.25 Ku: 632.41 Tu: 22.26
Recv: Classic PIDR
ecv: Kp: 379.45 Ki: 34.09 Kd: 1055.81
Recv: PID Autotune finished! Put the last Kp, Ki and Kd constants from below into Configuration.h
Recv: #define DEFAULT_bedKp 379.45
Recv: #define DEFAULT_bedKi 34.09
Recv: #define DEFAULT_bedKd 1055.81
Recv: ok
to set the above values (this is an example based on the above output, DON'T USE THESE VALUES - they are specific to my printer only):
M304 P379.45 I34.09 D1055.81
M500
http://marlinfw.org/docs/gcode/M303.html
http://marlinfw.org/docs/gcode/M304.html
(M500 is to save the settings)
Nozzle PID AutoTune:
M106 S255
M303 E0 C8 S200
Explanation:
M106 S255 = sets fan to 100% (visually check to be sure the hot end fan is turned on)
M303 (PID AutoTune):
E0 = nozzle
C8 = run the test for 8 iterations
S200 = run the test at 200 degrees C (or whatever temp you want to calibrate for)
Recv: bias: 125 d: 125 min: 194.41 max: 207.14 Ku: 24.99 Tu: 29.95
Recv: Classic PIDRecv: Kp: 15.00 Ki: 1.00 Kd: 56.14
Recv: PID Autotune finished! Put the last Kp, Ki and Kd constants from below into Configuration.h
Recv: #define DEFAULT_Kp 15.00
Recv: #define DEFAULT_Ki 1.00
Recv: #define DEFAULT_Kd 56.14
to set the above values (this is an example based on the above output, DON'T USE THESE VALUES - they are specific to my printer only):
M301 P15.00 I1.00 D56.14
M500
http://marlinfw.org/docs/gcode/M106.html
http://marlinfw.org/docs/gcode/M303.html
http://marlinfw.org/docs/gcode/M301.html
(M500 is to save the settings)
For each of these calibrations, and at each step where they were set, I used M500 to save the config to EEPROM and M501 and M503 to confirm the values are in EEPROM.
The output above also gives the configs that would be used in configuration.h (in bold) which could be set when Marlin is re-compiled. I am fine with keeping them in EEPROM however so won't re-compile just for this.
Not directly related to PID, but please be aware that some older Versions of Marlin firmware DO NOT have Marlin's Thermal Runaway Protection enabled. Some factory installed firmwares are also using older verisons of Marlin which are missing Thermal Runaway Protection. It would be a good idea to update to newer firmware which has Thermal Runaway Protection, on a printer that does not have it.
3D Printing Tools
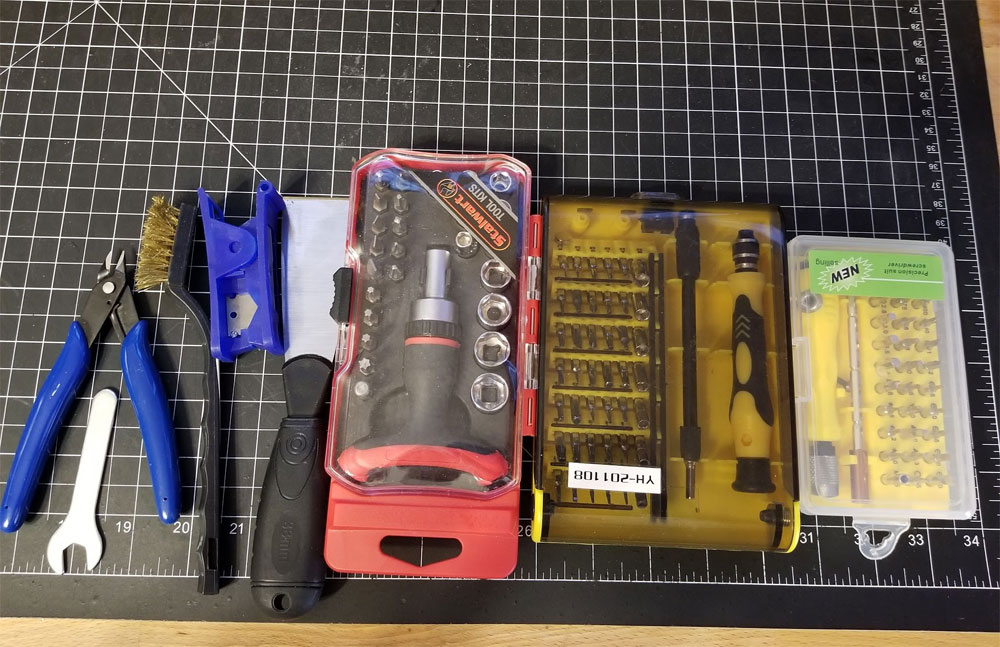
Below are some pics of the tools I use most often with my 3D printer. Note that some of the links are Amazon affiliate links. This means that, at zero cost to you, I will earn an affiliate commission if you click through the link and finalize a purchase. This will help to support this site and pay for more Stoopid Stuff.
Left Pic (General maintenance and basic tools):
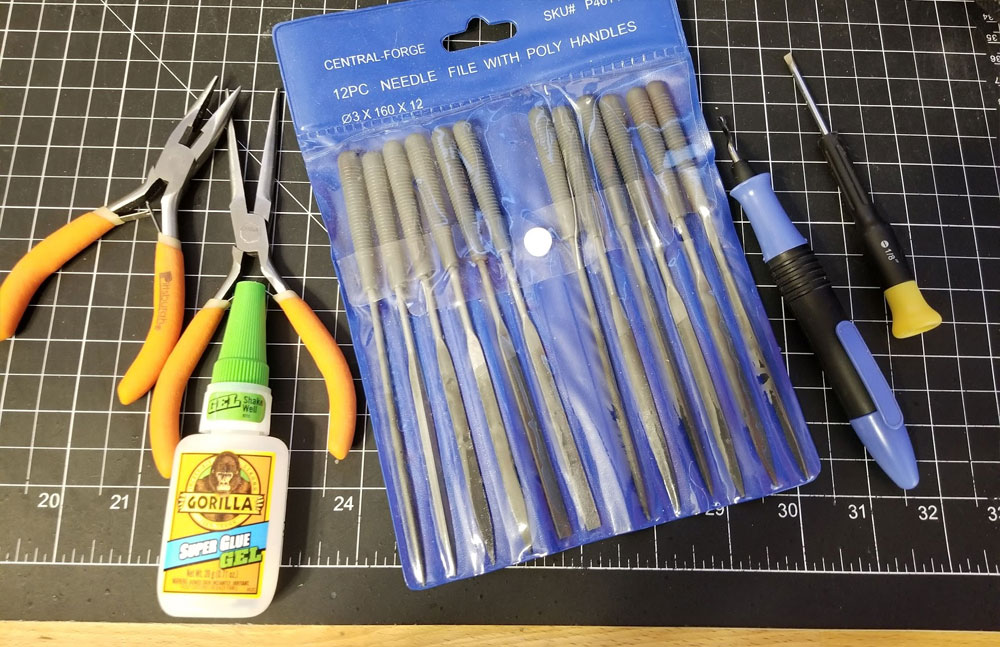
Center Pic (Cleanup and Basic Post Processing tools):
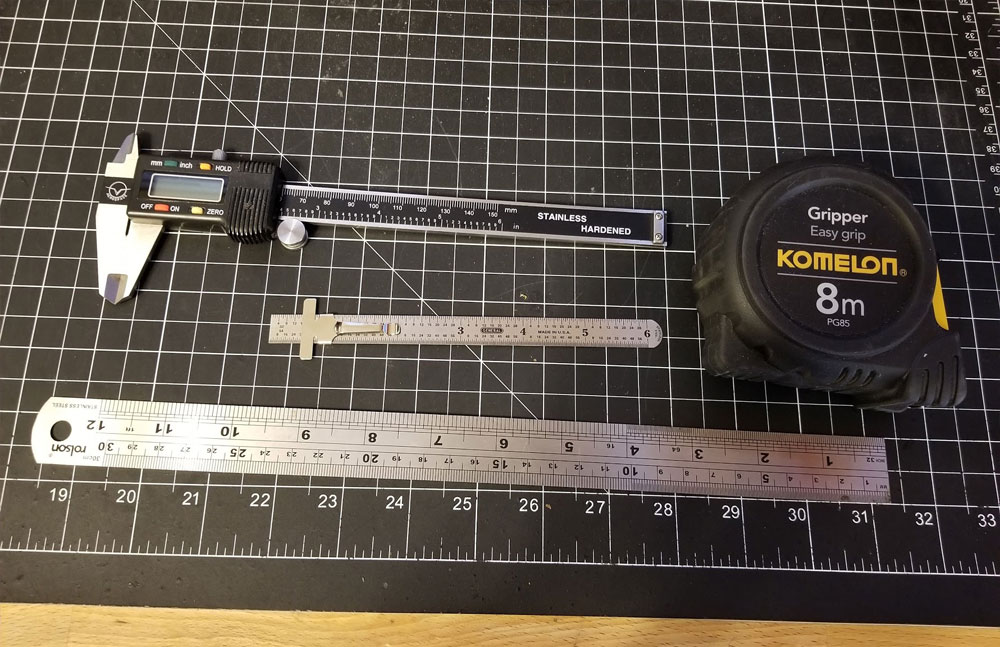
Right Pic (Measuring Tools):
Bottom Pic (Electronic Tools):
Left Pic (General maintenance and basic tools):
- Edge cutter - these are usually included with the printers
- 10mm wrench for adjusting the eccentric nuts - it has to be a thin wrench to get in the tight spots. Easy to loose tool and looks like a throwaway but hang on to it! These are usually included with the printers
- Brass wire brush, for cleaning the nozzle. Gotta be careful with this since the tines can short the hot end heater if care is not taken.
- Bowden cutter (in blue). I also use one I printed (here) which works better. These are necessary to get a square cut on the bowden where it seats against the nozzle
- Putty knife or spatula for removing prints - these are usually included with the printers
- Ratcheting Screwdriver with 27 Piece Bit and Socket Set – T-Shaped Handle Multitool (it looks like that wrench is discontinued but this one looks similar and would be my 2nd choice). I use this to remove nozzles, but any nozzle wrench will work.
- and 8. A screwdriver set with a number of small size 2mm to 4mm hex bits. One of these sets has a flexible shaft adapter which is very handy when working in tight spots. Tons of these on Amazon and I no longer have the links, but would not necessarily recommend either of the sets shown.
Center Pic (Cleanup and Basic Post Processing tools):
- Long nose pliers, which are great for grabbing and twisting out stubborn supports.
- Gorilla Glue Clear Super Glue Gel. I use this to glue PLA parts, seems to work well.
- Needle File set
- Deburring Tool, this is a great tool for cleaning up the flash from a brim. It has a blade that swivels and takes some getting used to but it's a lot like a vegetable peeler. Had this for years so I lost the link.
- Mini Standard Screwdriver. I use this for separating supports from prints. It's simple but does the job better than other tools since it can get in between the support interface and the printed part and pop them apart.
Right Pic (Measuring Tools):
- A metric and standard ruler, which is great for marking filament for extruder calibration. I put a piece of tape at 60mm or 100mm and then use the ruler to stick it on the filament which marks it for the calibration.
- Digital Caliper (6") - this is really a must have tool for printing. If you need to see how accurate your prints are, you can use these to take dimensions off the part and compare to the model. They also help for measuring filament diameter, and general setup of the printer.
- Small ruler (this is standard but I prefer to use my metric ruler for most things printer related). Having a smaller ruler helps since it can get into hard to reach places to take measurements.
- 8m metric tape measure. Not really needed for 3D printing but I have used it in setting up a printer and it is also handy for other projects.
Bottom Pic (Electronic Tools):
- A multimeter is a good thing to have on hand for 3D printing. If you are not familiar with them, I'd suggest getting an auto-ranging one, so you only need to choose what you are measuring. Always familiarize yourself with how the meter works though and if you aren't sure how to use it, check for videos and online guides - it only takes a second to fry a board or worse, yourself. This is a basic one and this one is auto-ranging, they have both been decent meters but certainly do your research since I don't know if these are the best for the money, just the ones I use. My preference is for the auto-ranging meter though.
- A selection of Dupont Jumpers in various types (male/male, male/female. etc)
- Some alligator clip leads, which are handy when you can clip in on what you are measuring so you don't need to hold the leads all the time.
- Lever Nut Wire Connectors, which are handy for connecting wires either temporarily or for testing (note that the ones pictured are not the same ones linked, I would get the WAGO's which are linked, since they should be more trustworthy). They could probably be permanent but I'd rather solder in most cases.
- TS-80P soldering iron. I have the older model which works only on QC3.0 but the new one (linked) works with both PD and QC3.0 USB battery banks. This is not necessary but there will be times when soldering may be the best solution to fix a problem on a printer. This USB-C soldering iron works great and I power it off a USB battery. A cheaper option if you can find it in stock, is the Pinecil which is also available at Amazon.

Electronic Tools
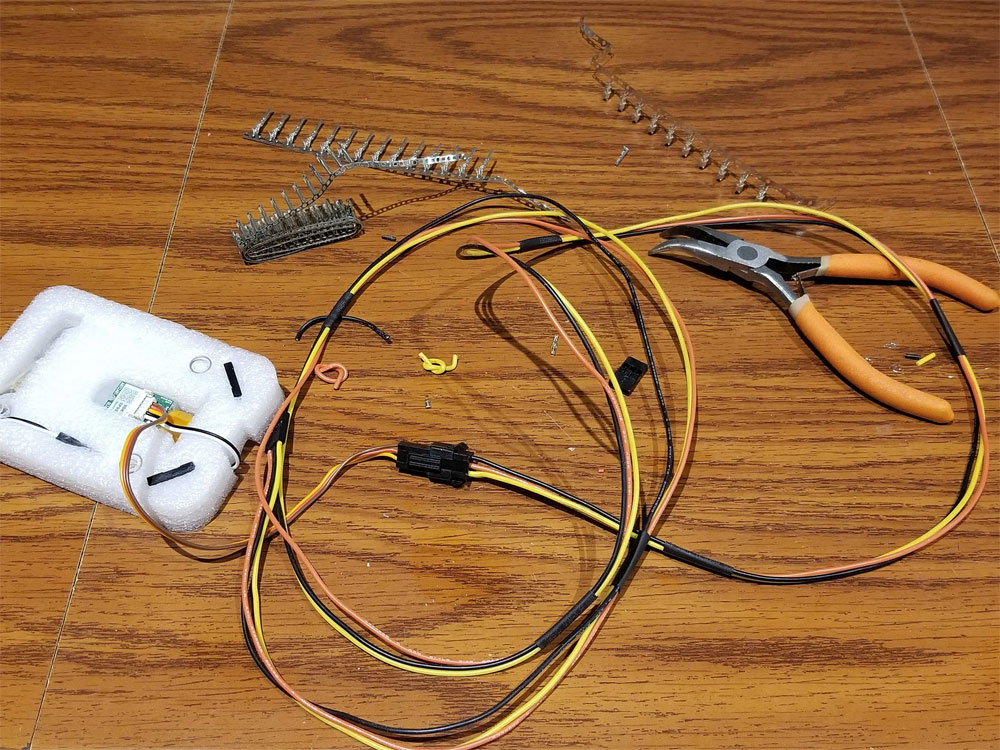
Notes on Updating an Anycubic I3 Mega with TMC2208 drivers and a BLTouch (replaces the Z-min endstop)
|
|
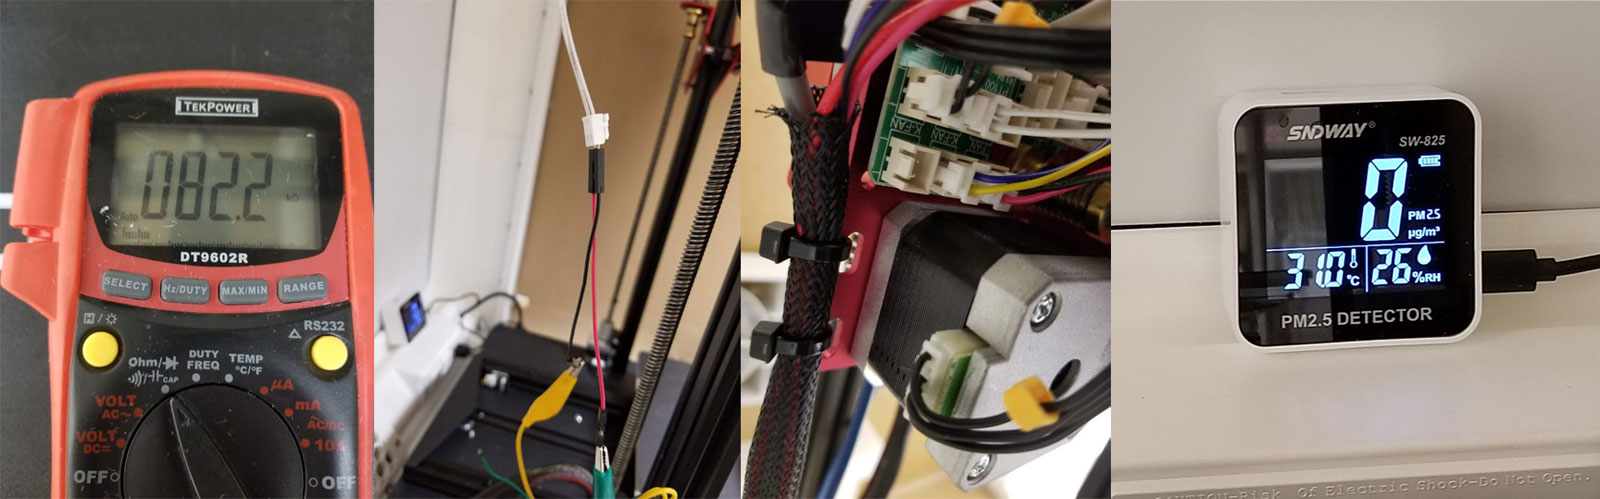
Testing the hot end and Thermistor on a CR10S Pro
I was not having problems with mine, but since I did check them, thought I'd post the pics. I tested with a meter and got the following results:
Thermistor @ 31C is 82.2KOhm
Hot end Heater was 16.4Ohm (this is a 24v printer and the heater is a 40w model)
Thermistor @ 31C is 82.2KOhm
Hot end Heater was 16.4Ohm (this is a 24v printer and the heater is a 40w model)
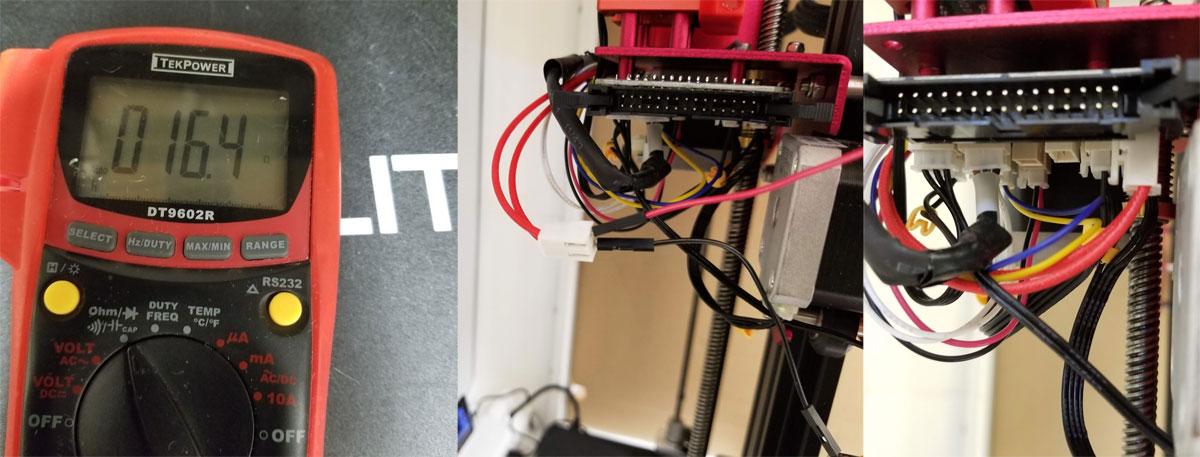
Pinout for the CR10S Pro Ribbon Cable (handy if swapping boards or testing stuff)
I found this and wanted to save since it is a good bit of work involved to put the pinout together. Thanks to BustedChain @ Thingivese for posting it.
https://imgur.com/gallery/YRRrEmX
https://imgur.com/gallery/YRRrEmX
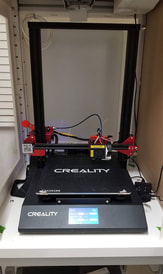
CR10S Pro (V1) Upgrades
The CR10S Pro is a great printer out of the box, but I have made some minor upgrades, most of these things were done when parts wore out or failed: The one linked is the v2 which has an upgraded BLTouch probe vs the capacitive probe which is stock on the V1 which I own.
Since the stock extruder has recently failed (idler gear burrowed into the arm), I'm going to try (finally) testing my remix of the Hyrda Fan Duct System by BoothyBoothy at Thingiverse. I am waiting on a cable to extend the extruder to allow me to use a BondTech clone as a direct drive extruder, but I have dry fit the parts and they seem to work.
- Added a Flexible Steel PEI sheet and magnetic "sticker" to the bed - described here.
- Replaced the stock Capacitive sensor with an Inductive Sensor (LJ18A3-8-Z/BX), more info is here.
- Replaced the brass z-axis nuts with POM anti-backlash nuts, more info is here.
- Swapped the wheels on the Y-axis with polycarbonate wheels. I'm still testing these and have seen some white dust from them but they did solve a problem due to a faulty bearing on one of the old wheels.
- I'm using a textured flex steel PEI sheet which is the best build surface I have found yet. The TH3D version is nice, but it may be worth buying a cheap one on Amazon with the magnet, and then of the TH3D plates as well, since TH3D sells the plates and magnets separately.
- Added the extruder arm fix from Tinymachines.
- Added a printed cable chain for the ribbon cable (V2 version here).
- Added a strain relief cable chain on the bed cable
- Added a filament guide
- Extended the micro-sd card from the display to make it easier to upgrade.
- Updated the firmware to Tinymachines.
- Micro-Swiss All Metal Hotend for the CR10S Pro (note that the CR10S Pro has a specific hot end, and the normal CR10 hot end will not work). This was probably the best upgrade on my printer so far, however the stock hot end is no slouch either. Some folks have different opinions of this hot end though, it has been very solid for my printer.
- It's not specific to this printer, but I also use an OctoPi with it, which runs on a Pi 4B (4G), though I have another running on a 3B+ without issues. Now the best option is probably the Pi Zero 2 W for only $15, though there are some compromises with that vs the full size Pi3B and Pi4's.
- I also use these leveling blocks to keep the x-axis gantry in proper trim (which I rarely need to mess with thanks to the anti-backlast nuts).
Since the stock extruder has recently failed (idler gear burrowed into the arm), I'm going to try (finally) testing my remix of the Hyrda Fan Duct System by BoothyBoothy at Thingiverse. I am waiting on a cable to extend the extruder to allow me to use a BondTech clone as a direct drive extruder, but I have dry fit the parts and they seem to work.
3D Printing Deals
Here are some sites where deals on 3D printers, filament and accessories can be found:
https://3dprintingdeals.com/
www.reddit.com/r/3dprintingdeals/
https://plasticfantasticdeals.com/
https://3dprintingdeals.com/
www.reddit.com/r/3dprintingdeals/
https://plasticfantasticdeals.com/
CR10 Enclosure Information
|
|
|
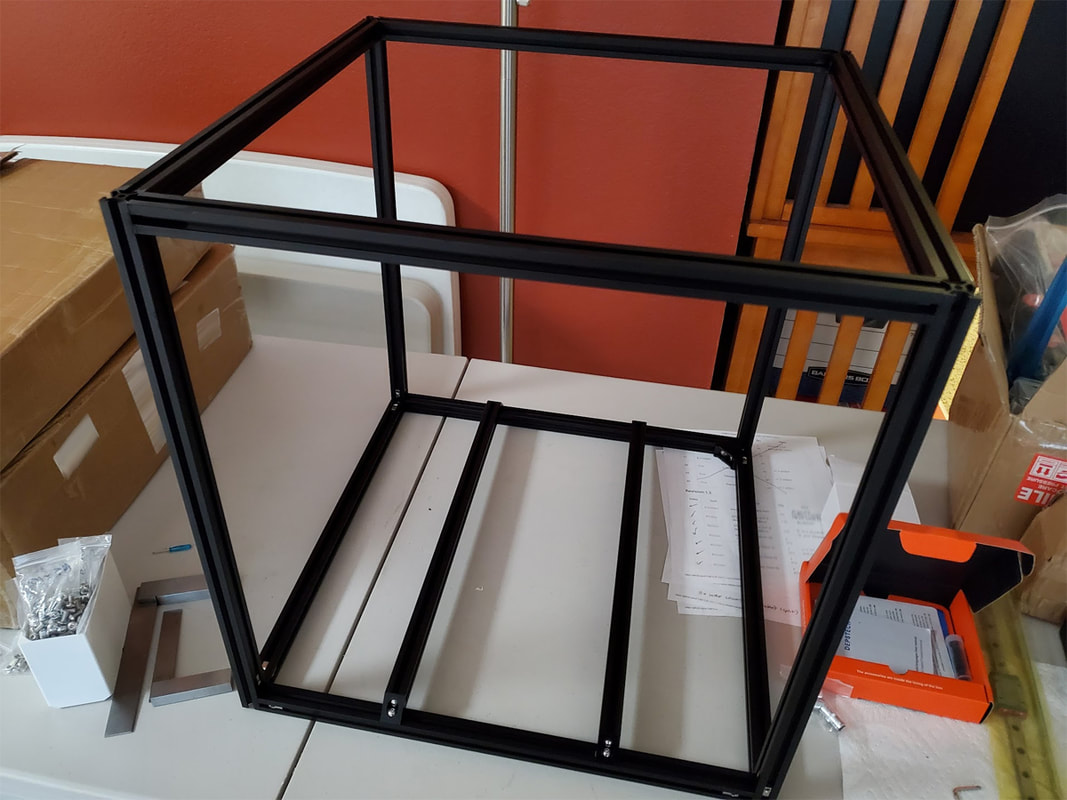
Voron 2.4 Build Log
|
I'm finally gonna build a Voron, you can find the build log here.
|
