Making a TSA safe Pink Leatherman Style PS (using a Style CS)
You can't buy a TSA safe Leatherman Style "PS" in pink, but making one is not too hard (though you need a Syle PS and Style CS). This would of course be simple if I could just buy a Style PS in pink, but the only pink Leatherman Style I could find was the CS which has a scissors and knife (made for the pink ribbon campaign against breast cancer). In my case, the Letherman is a gift, but for somebody who knows me well enough not to expect the warranty to be valid. If I had lost a screw though I would have been well, screwed, since I have no idea where to get a replacement.
I first had to get the following:
A Pink Leatherman CS and a TSA safe Letherman PS.
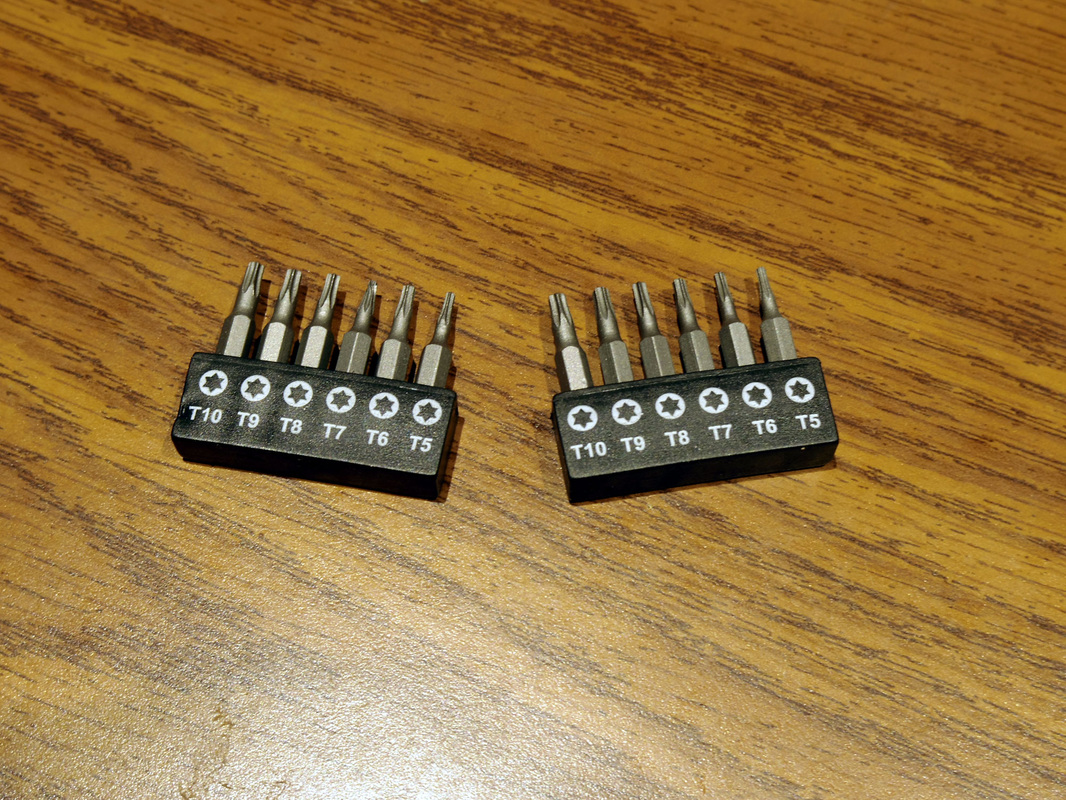
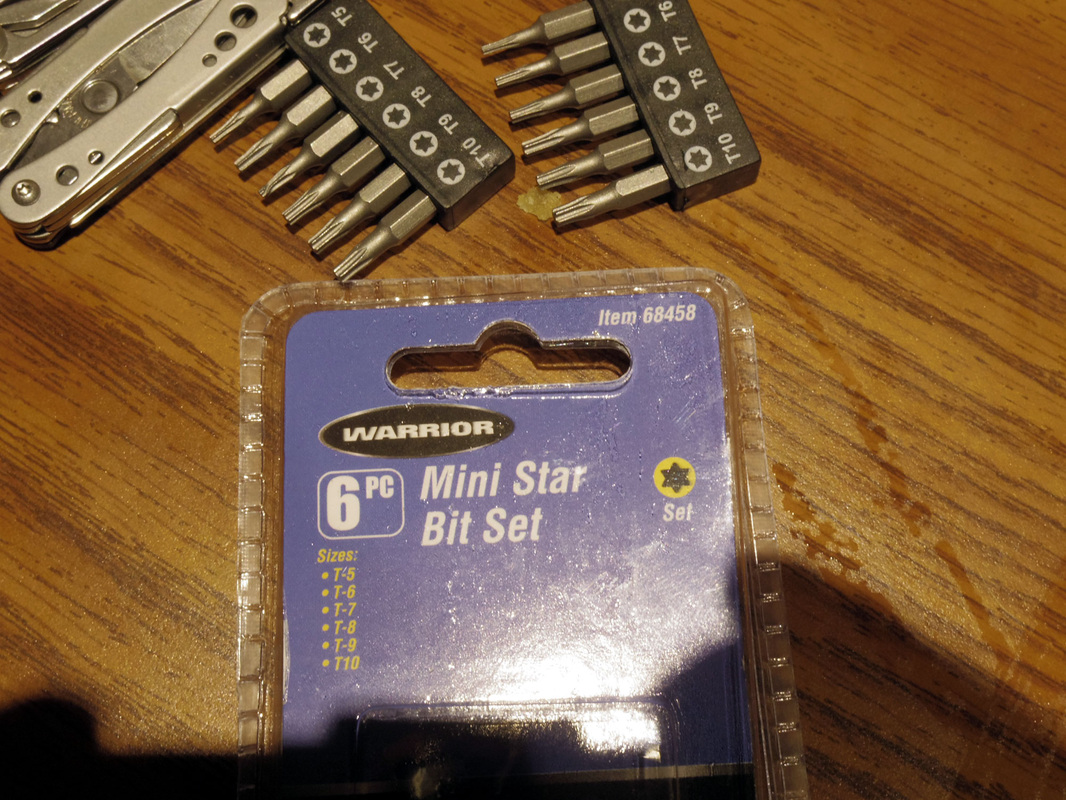
A couple T6 star bits (Harbor Freight Item 68458 included one) - I bought 3 of these since one of the T6 bits stripped out.
A vice, I used a flat vice from a drill press.
Some RED threadlocker.
2 pair of vice grips.
The pics below are missing some steps showing the disassembly, but that is pretty self explanatory.
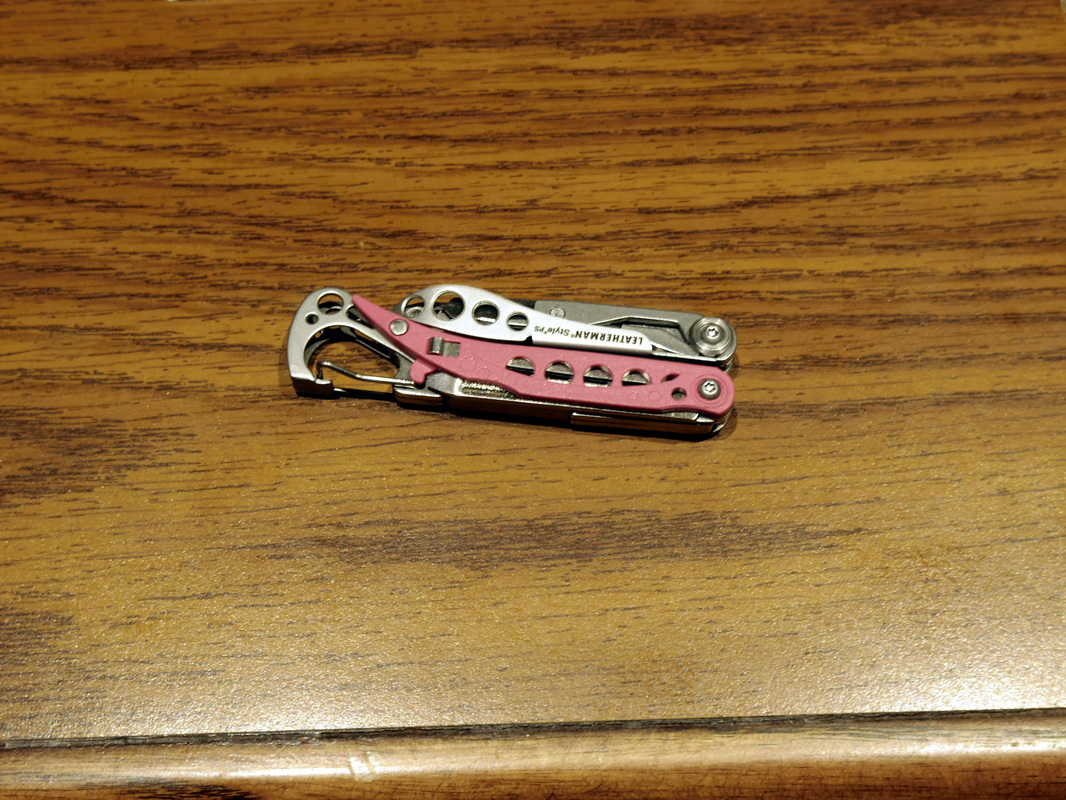
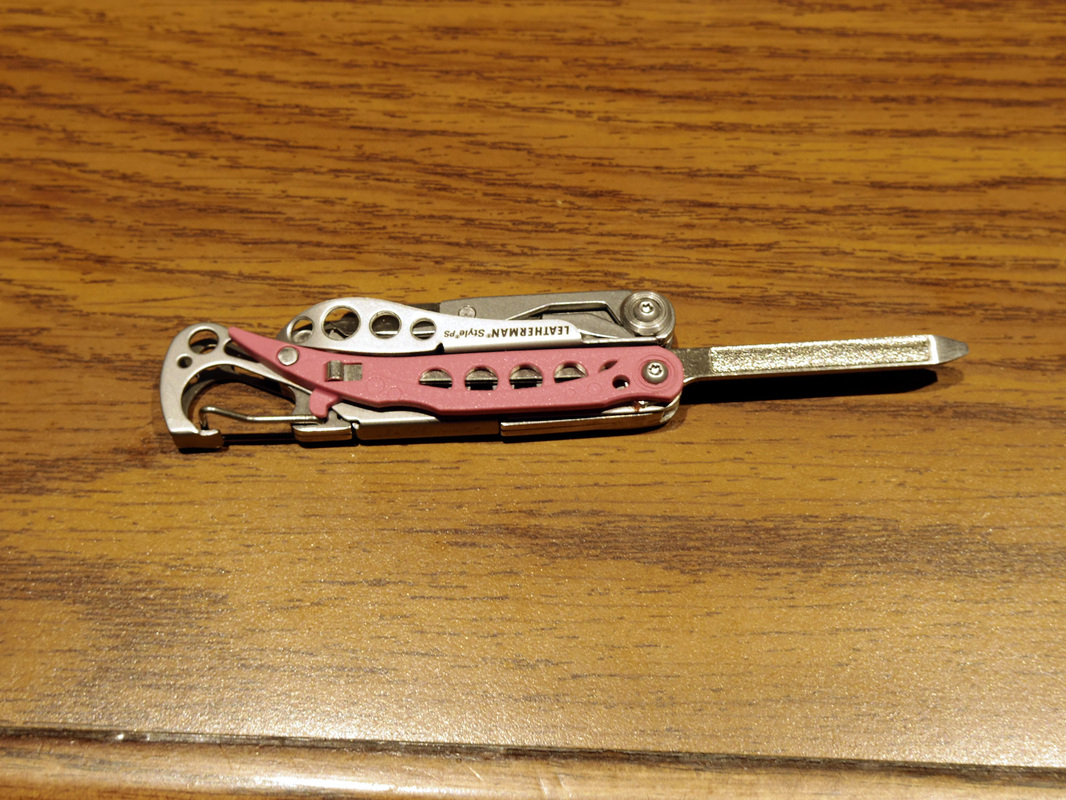
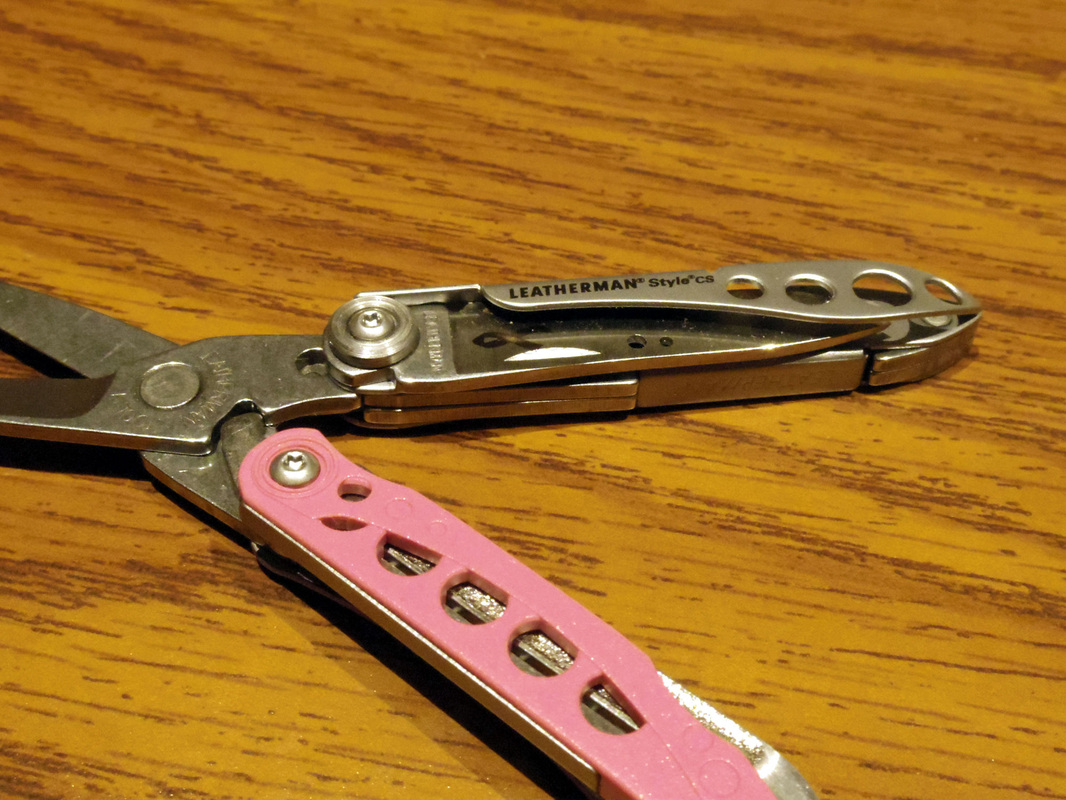
First, here are some reference pics of the pink CS:
I first had to get the following:
A Pink Leatherman CS and a TSA safe Letherman PS.
A couple T6 star bits (Harbor Freight Item 68458 included one) - I bought 3 of these since one of the T6 bits stripped out.
A vice, I used a flat vice from a drill press.
Some RED threadlocker.
2 pair of vice grips.
The pics below are missing some steps showing the disassembly, but that is pretty self explanatory.
First, here are some reference pics of the pink CS:
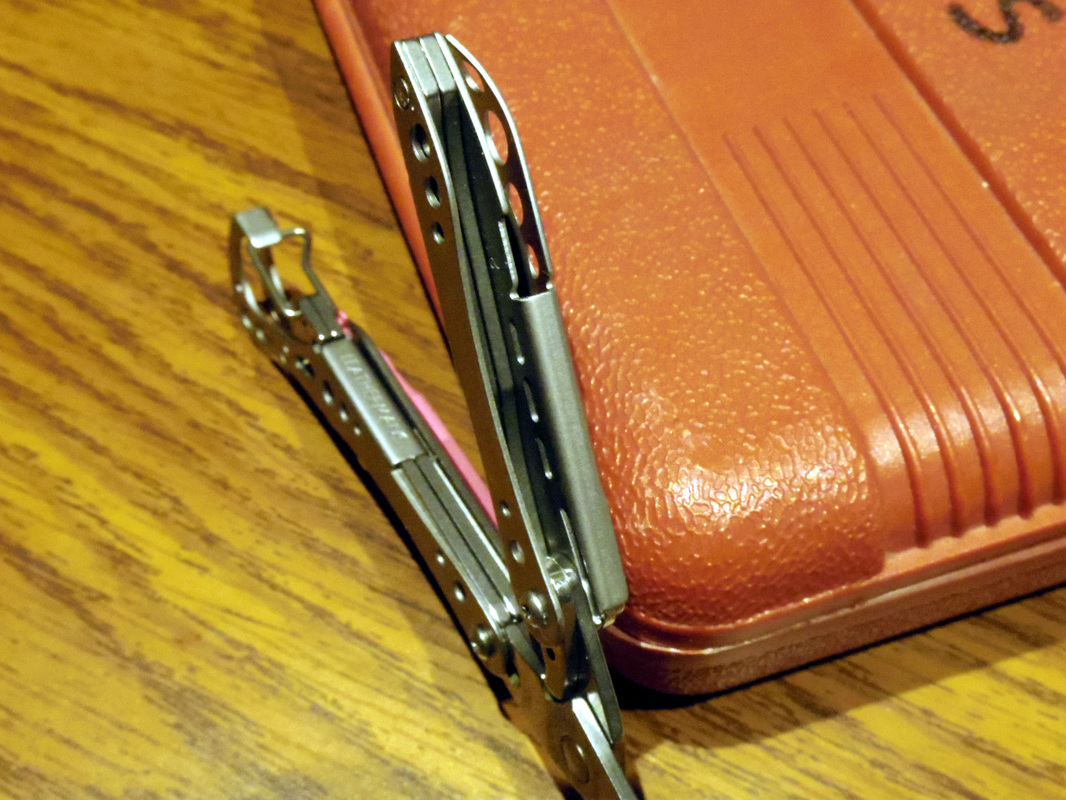
Moving on from there, we I can start. Note that since I did not take many pics you may see a black or pink one, but as long as you understand that just the side that has the plastic on it needs to be swapped, it should be clear what I had to do. I also did not get pics of disassembly of the pink CS, but if you can imagine unscrewing screw post and having several small parts fall out, that is what it looked like. Since I did not get pics of the Pink Style re-assembly, these are pics of the black cased former "PS", but it is basically the same.
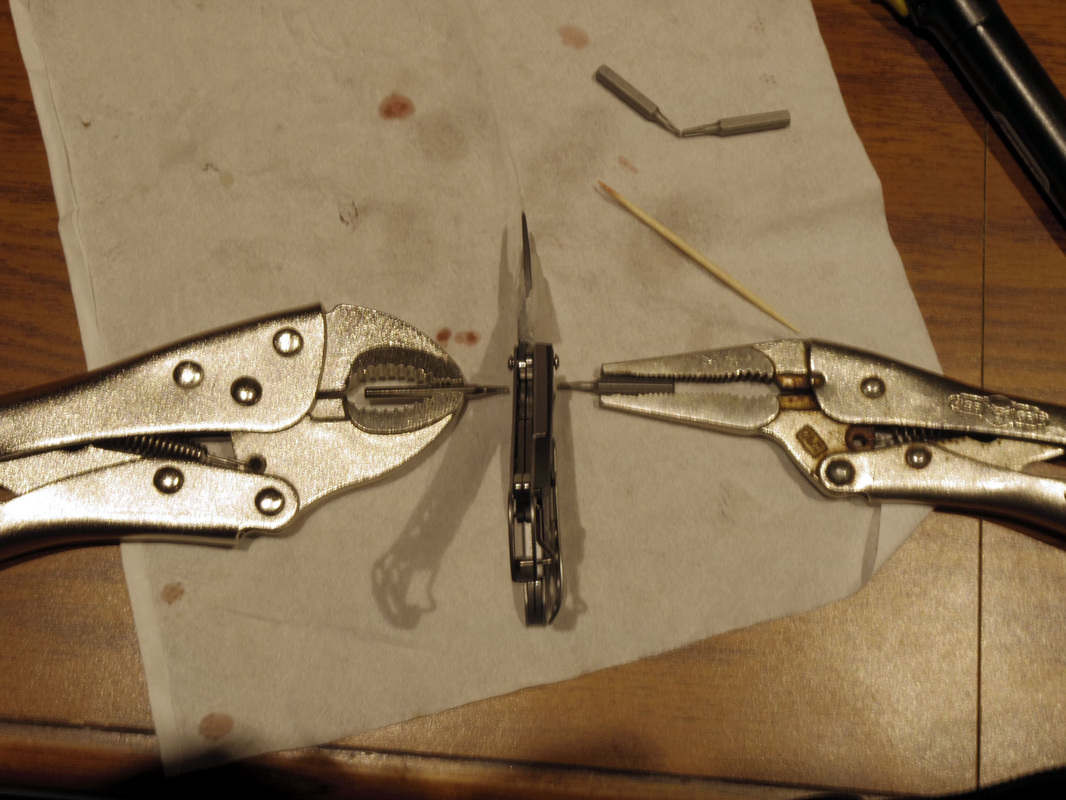
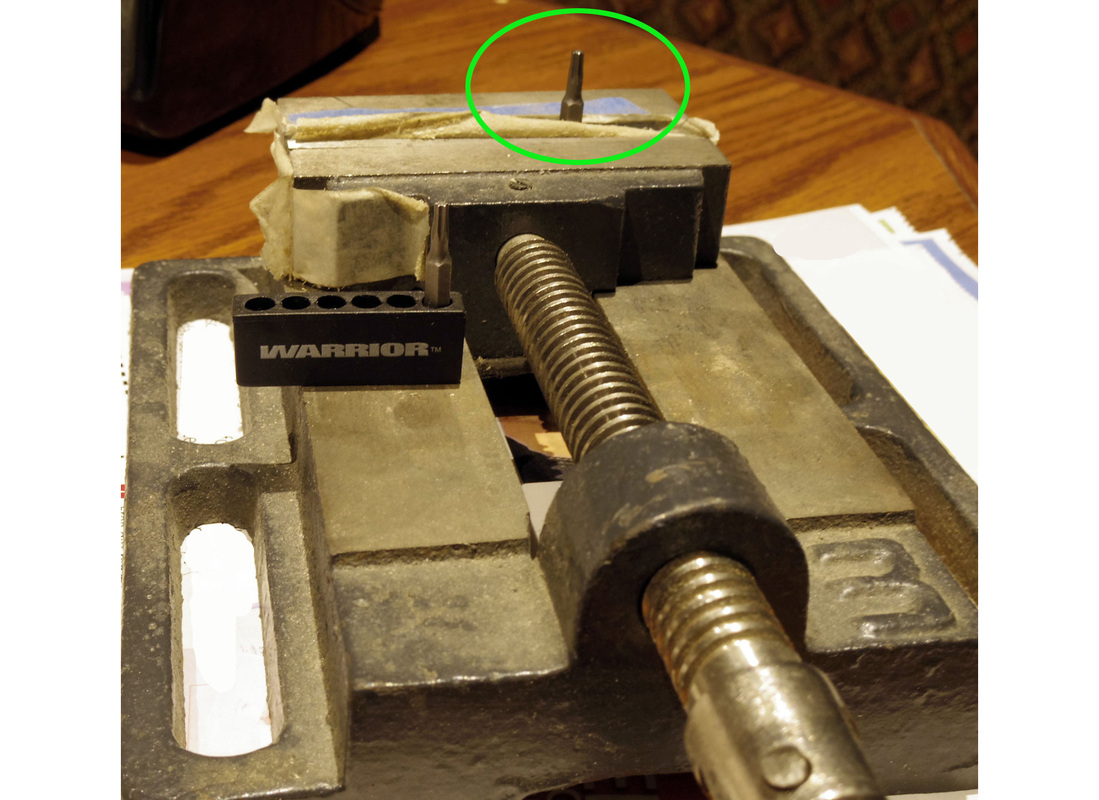
The first pic below shows how I set up the T6 star bits so I could unscrew/screw in the screw and screw posts. They use some red threadlocker so it was a bit tight, and the bits can strip (I had this happen). The next two pics show the bit set I bought at Harbor Freight. Note that the black holder is used in the following pics to hold a bit (T8 or T9 I think) in the vice to use as an alignment jig to help re-assemble the handle.
I could have re-assembled the plastic sides by hand, but I found it a bit easier to clamp a T8 to T9 star bit in the vice (while placed in it's black holder). See the 4th pic below.
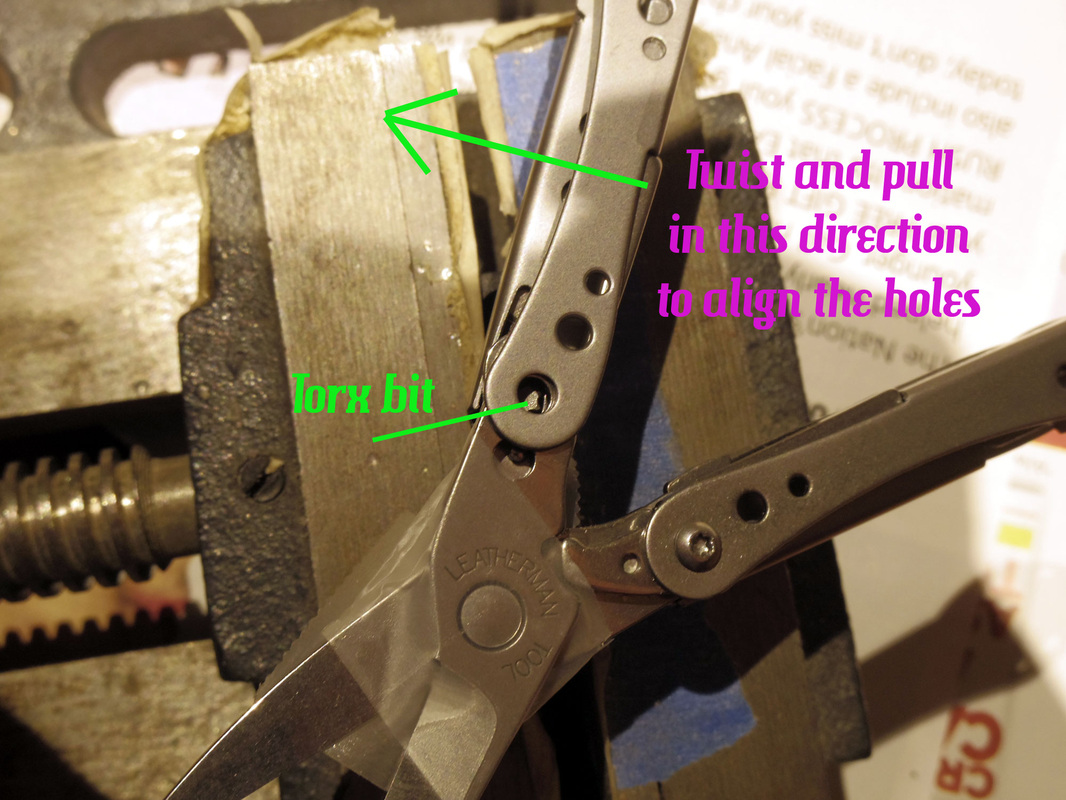
I then placed the knife to be re-assembled in the 5th pic (I outlined where the star bit is located to align the parts).
Then I twisted the handle a bit to help line up the parts in the handle (there is a torsion spring which requires some force to get the parts to align) - 6th pic below.
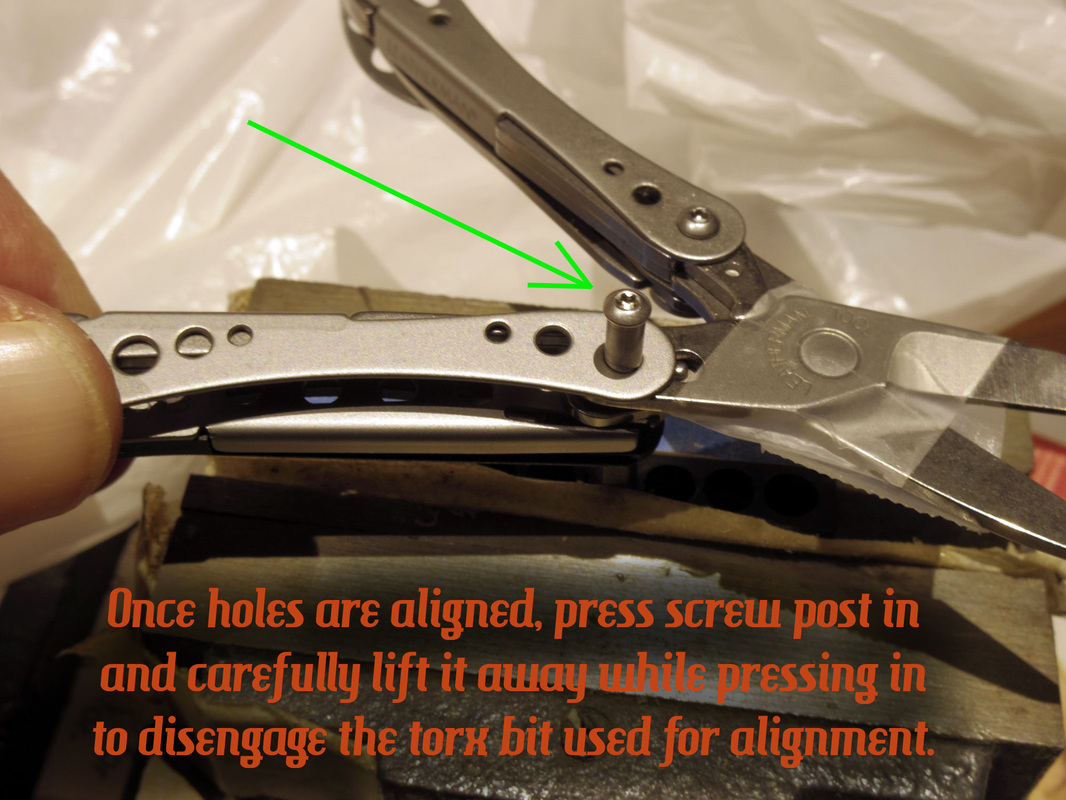
Finally I placed the screw post in the hole and while twisting the handle to align the parts, I pushed in on the screw while slightly lifting to allow the screw to displace the star bit which is just keeping things in alignment. (7th pic)
Once the screwpost was through, I just put the nail file back on, and then put the regular screw through that side and tightened (with some red threadlocker applied to the inside threads using at toothpick). (this step is not shown)
The first pic below shows how I set up the T6 star bits so I could unscrew/screw in the screw and screw posts. They use some red threadlocker so it was a bit tight, and the bits can strip (I had this happen). The next two pics show the bit set I bought at Harbor Freight. Note that the black holder is used in the following pics to hold a bit (T8 or T9 I think) in the vice to use as an alignment jig to help re-assemble the handle.
I could have re-assembled the plastic sides by hand, but I found it a bit easier to clamp a T8 to T9 star bit in the vice (while placed in it's black holder). See the 4th pic below.
I then placed the knife to be re-assembled in the 5th pic (I outlined where the star bit is located to align the parts).
Then I twisted the handle a bit to help line up the parts in the handle (there is a torsion spring which requires some force to get the parts to align) - 6th pic below.
Finally I placed the screw post in the hole and while twisting the handle to align the parts, I pushed in on the screw while slightly lifting to allow the screw to displace the star bit which is just keeping things in alignment. (7th pic)
Once the screwpost was through, I just put the nail file back on, and then put the regular screw through that side and tightened (with some red threadlocker applied to the inside threads using at toothpick). (this step is not shown)

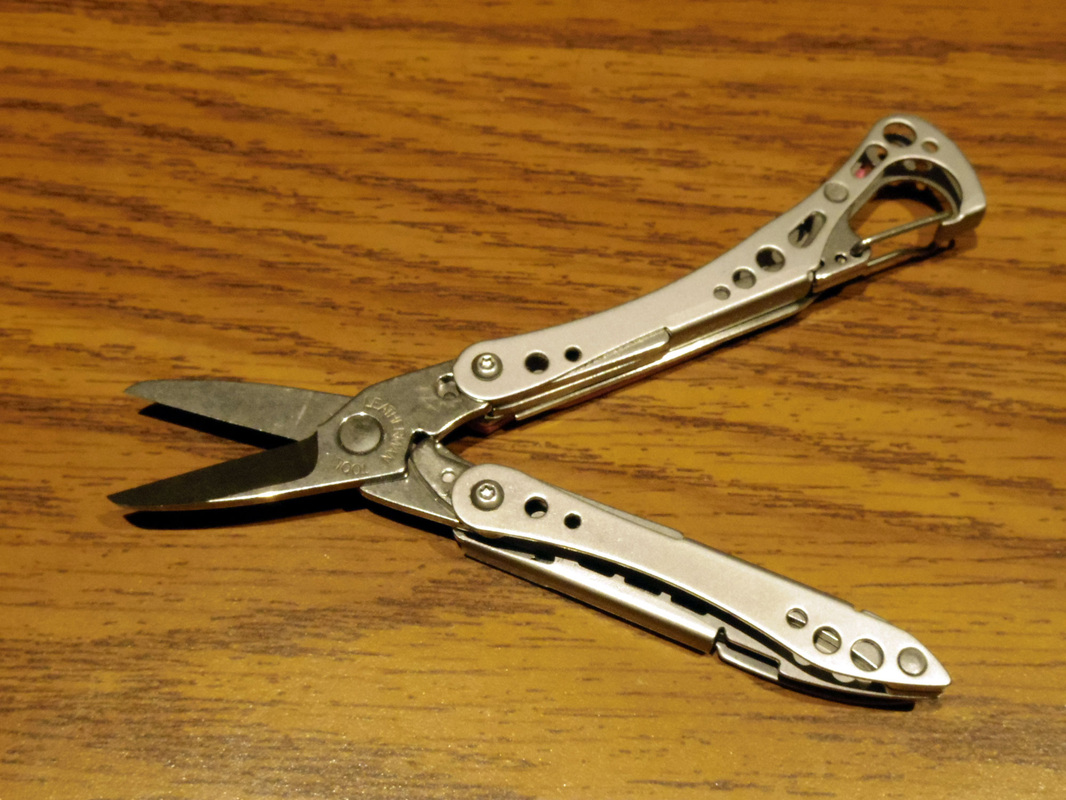
So that's pretty much it, and the pics below show what all this hassle is for. A TSA safe PINK Leatherman. Beautiful ain't it? Well I hope my niece thinks so.