I posted a remix of Hartk1213's Voron2.4 GE5C Z Joint to Printables and TeamFDM.
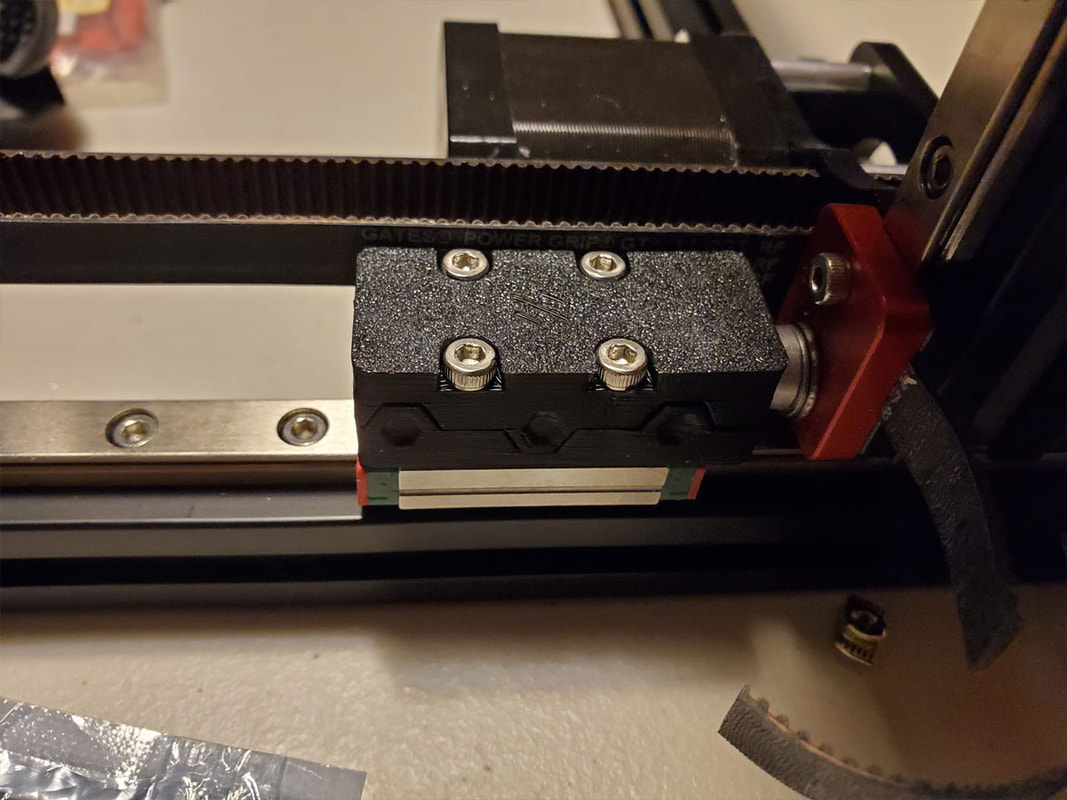
The original design from Hartk1213 is great, and I do not feel this is an improvement, just different. The primary difference is that the bearing is moved up (higher than the MGN9 carriage) and back just a fraction of a mm which would otherwise interfere with the carriage). Hartk1213's design has the bearing sitting tight against the carriage which helps to retain it fully but limits moving the bearing back towards the carriage (since it sits tight to the carriage). I could have used the original design and just re-adjusted my AB joints a touch (like a fraction of a mm) and it would be fine as well.
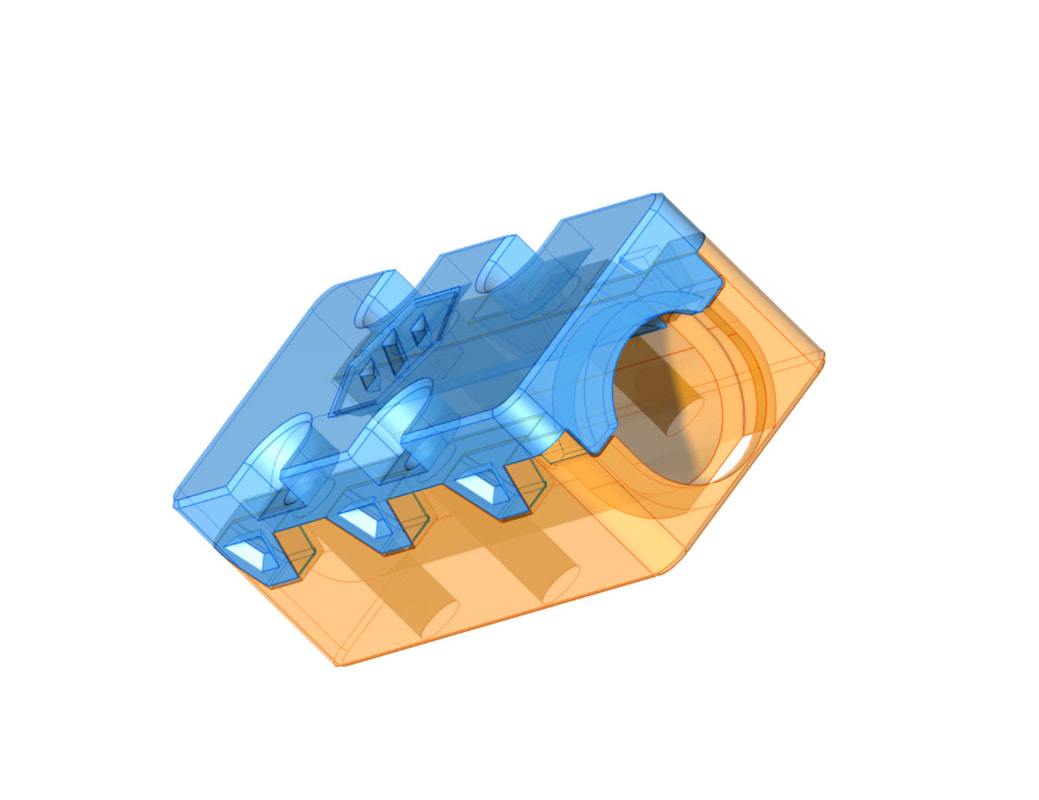
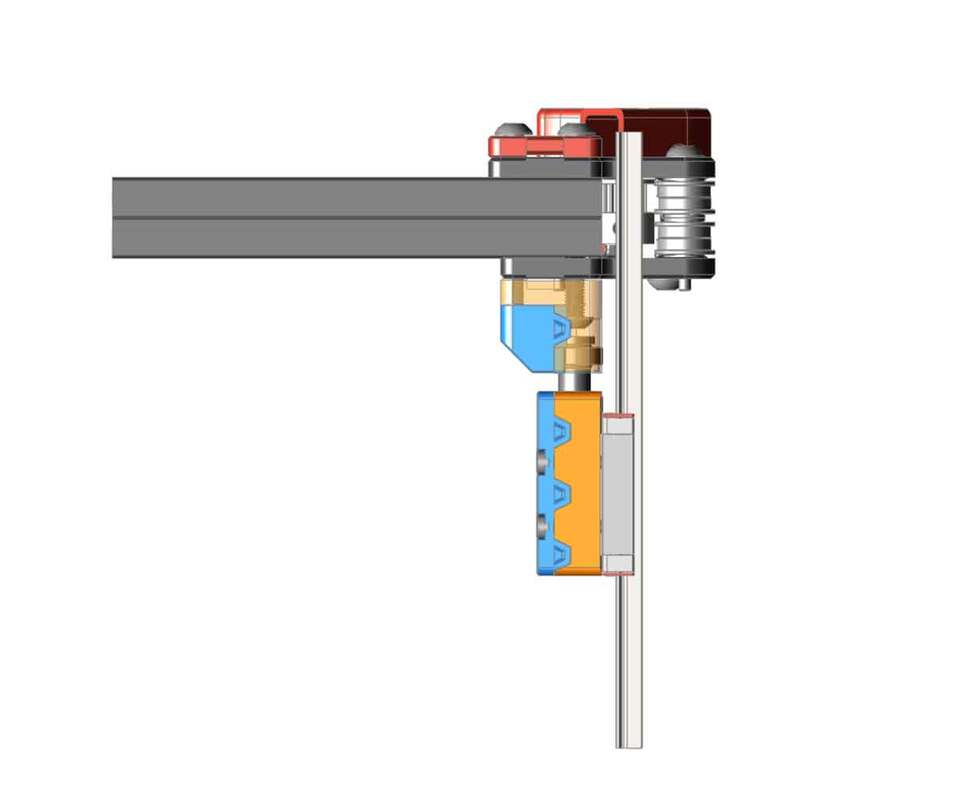
To make the remix, I used the models from the Voron Github, so I set the center of the GE5C bearing using the CAD model's center of the M5 bolt which attaches the lower belt clip. Using that position meant the bearing would interfere with the MGN9 carriage, so I raised the bearing just enough to clear the MGN9 carriage. To both raise the bearing above the carriage and hold it in all directions, I had to split the joint. The split is designed with a lot of surface area, so it would be possible to use some glue, to better hold it together. So far I have not glued mine.
This design is an almost ground up remix, so some dimensions are changed from the original model. I used the STEP file from the Voron Github to assist with setting up the alignment of the parts. If interested, please check it out on Printables, and if you like it, please post a make for it there (which helps get me to a first roll of Prusament).
I could not find a decent deal on Amazon for the bearings, but they are less expensive in quantity on AliExpress (and maybe Ebay as well) - UPDATE these are garbage, they have too much play. If you want to try the IGUS bearings they have them on KB-3D.com (though I have not tried these - but probably will).
The original design from Hartk1213 is great, and I do not feel this is an improvement, just different. The primary difference is that the bearing is moved up (higher than the MGN9 carriage) and back just a fraction of a mm which would otherwise interfere with the carriage). Hartk1213's design has the bearing sitting tight against the carriage which helps to retain it fully but limits moving the bearing back towards the carriage (since it sits tight to the carriage). I could have used the original design and just re-adjusted my AB joints a touch (like a fraction of a mm) and it would be fine as well.
To make the remix, I used the models from the Voron Github, so I set the center of the GE5C bearing using the CAD model's center of the M5 bolt which attaches the lower belt clip. Using that position meant the bearing would interfere with the MGN9 carriage, so I raised the bearing just enough to clear the MGN9 carriage. To both raise the bearing above the carriage and hold it in all directions, I had to split the joint. The split is designed with a lot of surface area, so it would be possible to use some glue, to better hold it together. So far I have not glued mine.
This design is an almost ground up remix, so some dimensions are changed from the original model. I used the STEP file from the Voron Github to assist with setting up the alignment of the parts. If interested, please check it out on Printables, and if you like it, please post a make for it there (which helps get me to a first roll of Prusament).
I could not find a decent deal on Amazon for the bearings, but they are less expensive in quantity on AliExpress (and maybe Ebay as well) - UPDATE these are garbage, they have too much play. If you want to try the IGUS bearings they have them on KB-3D.com (though I have not tried these - but probably will).
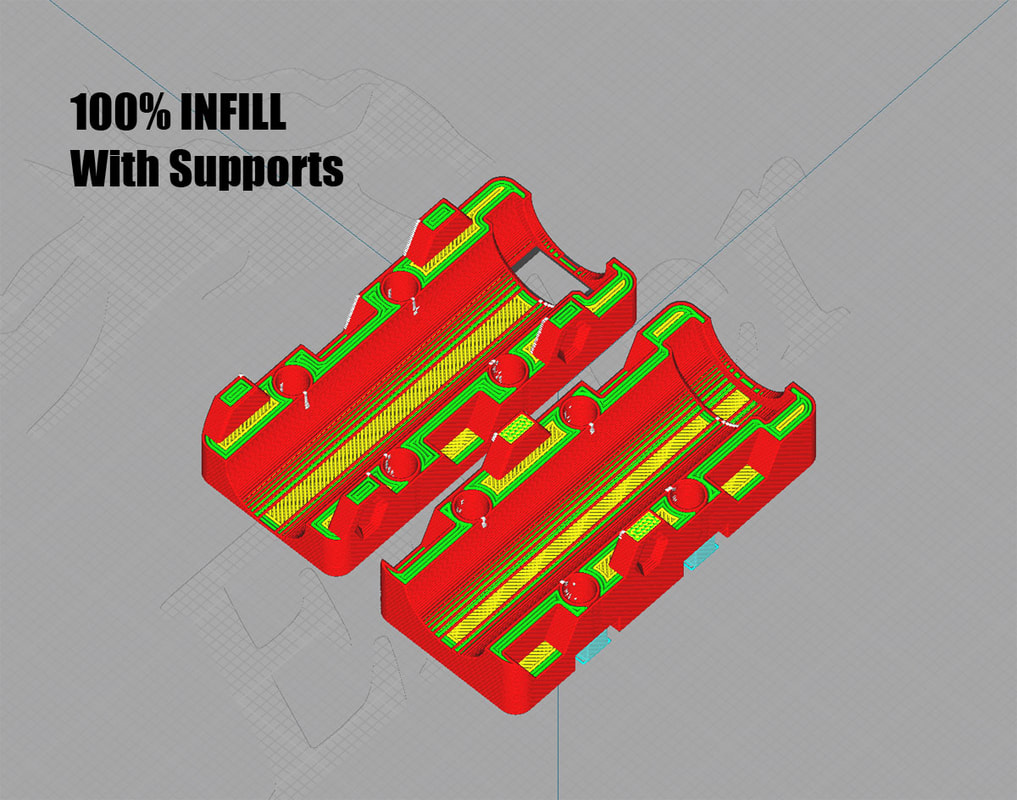
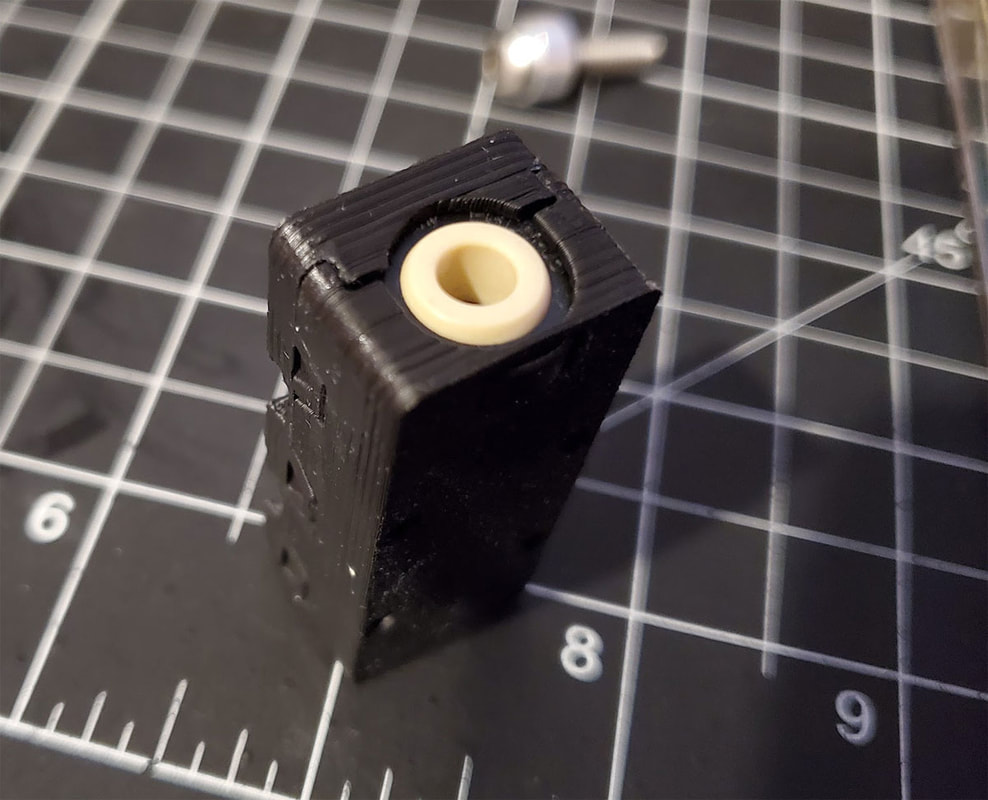
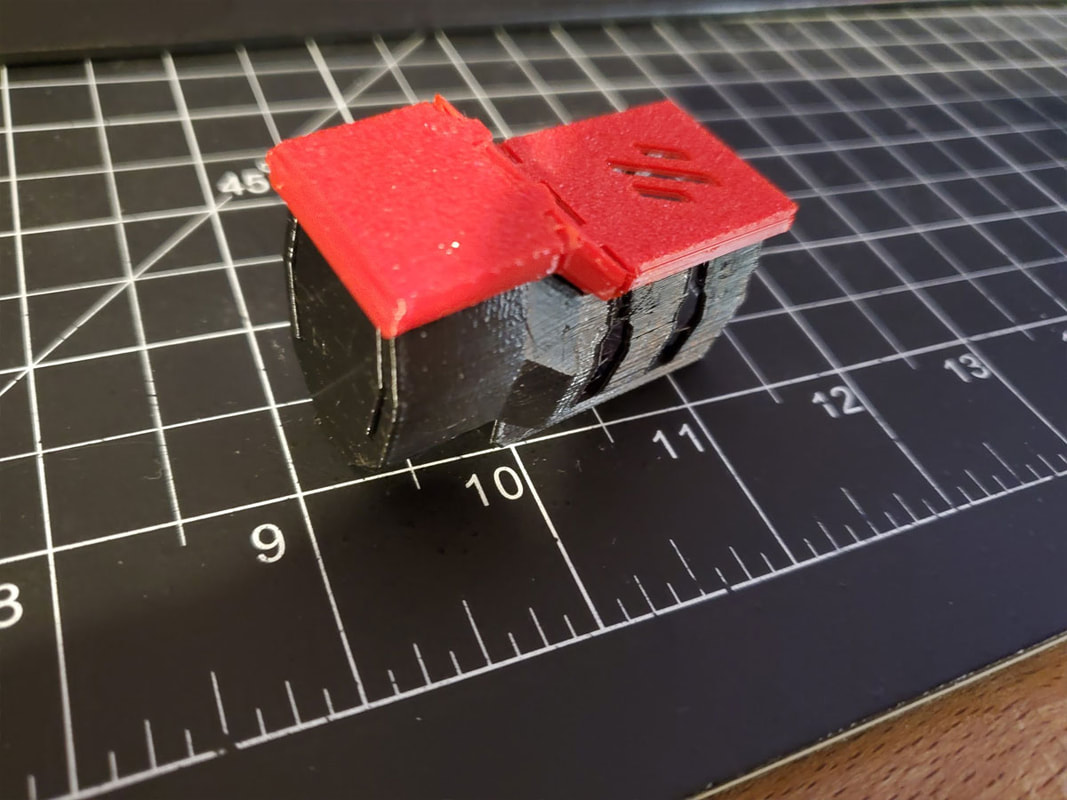
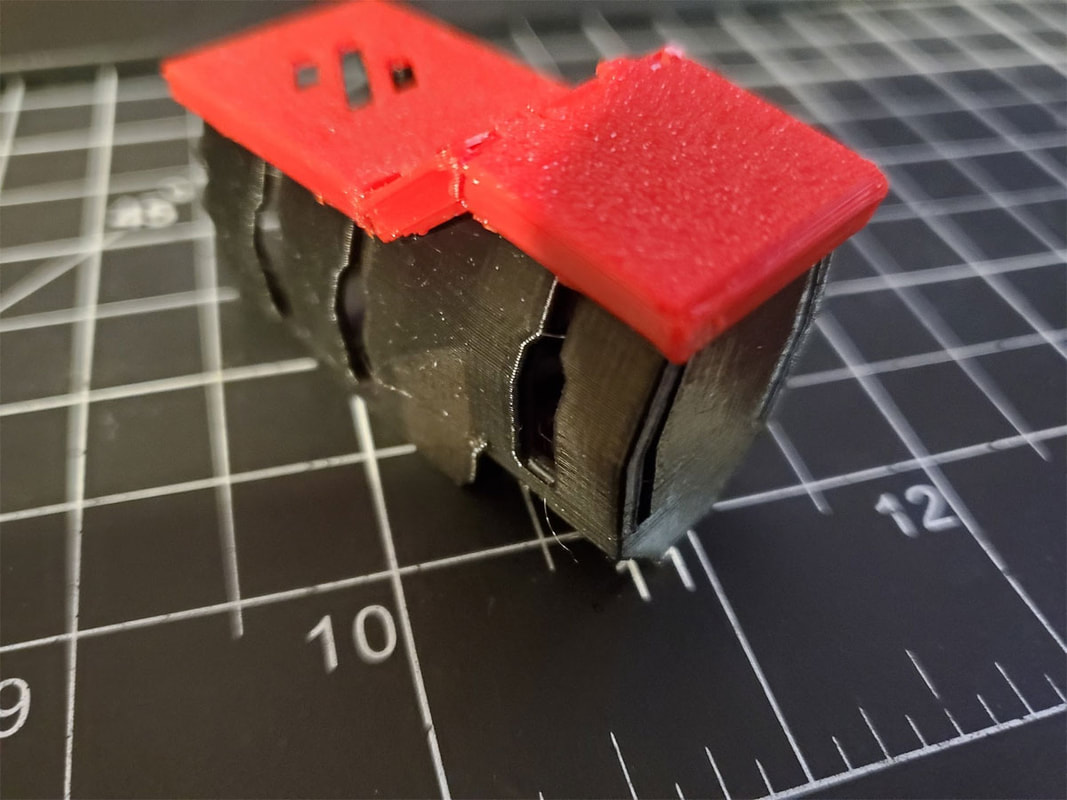
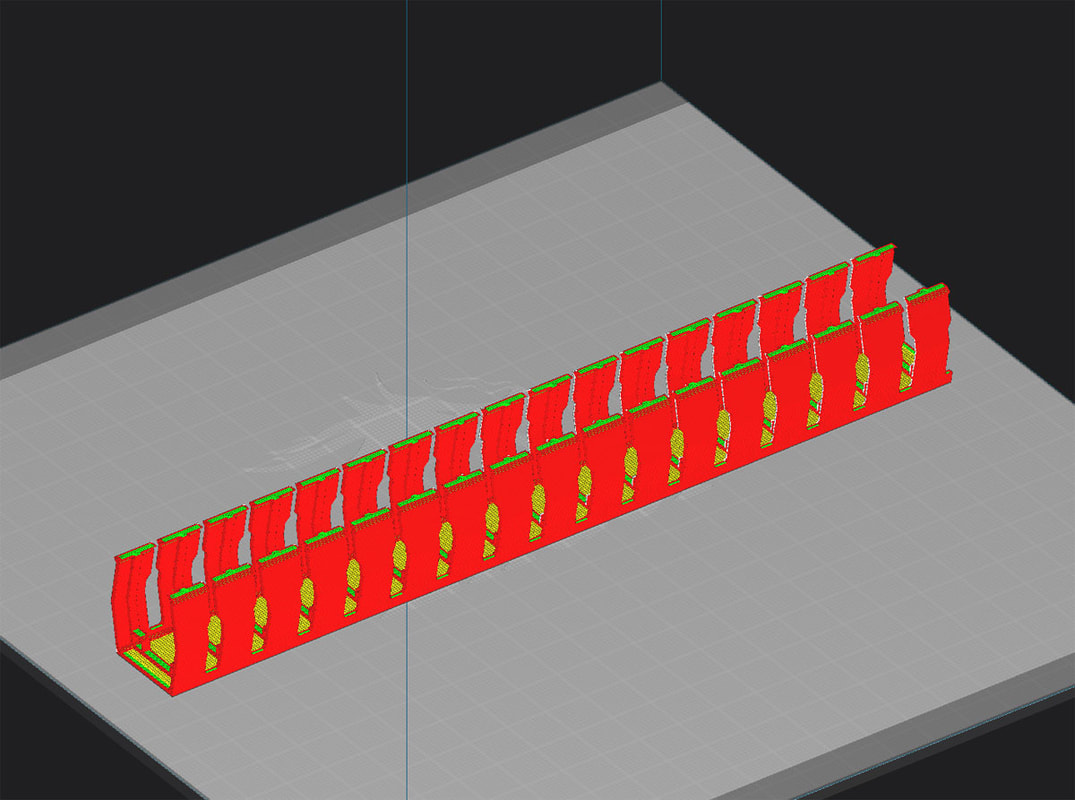
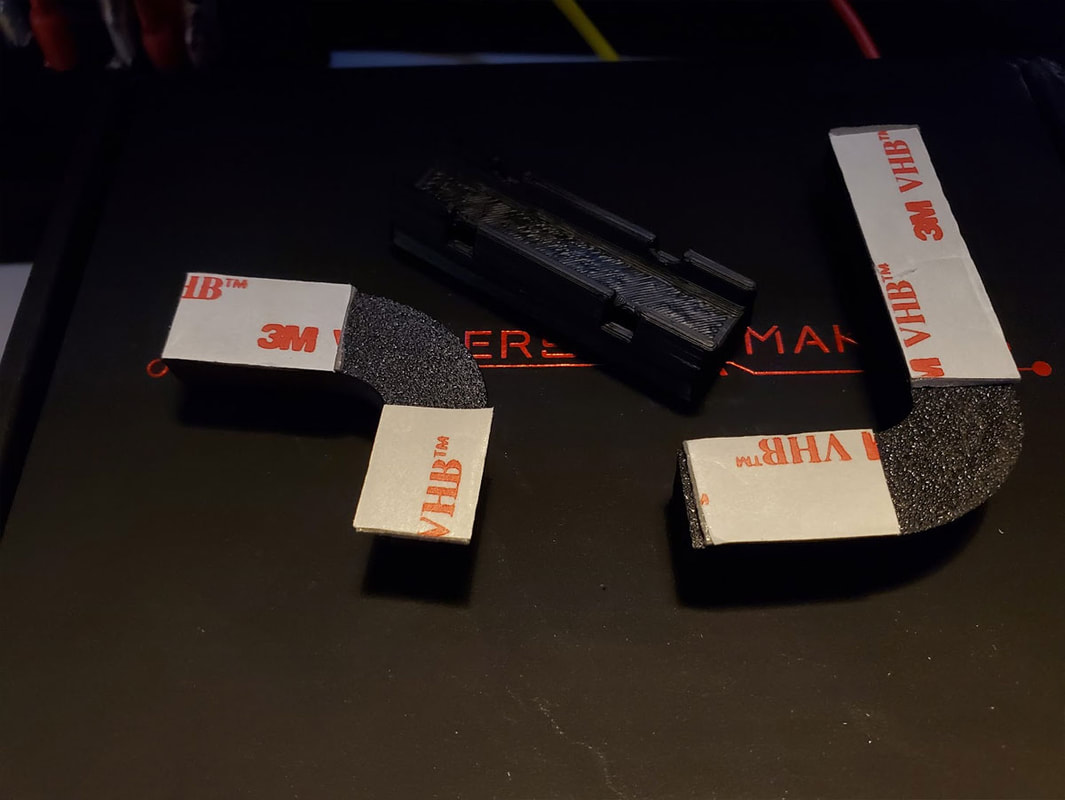
Update 5/22/2023: There was some concern about the split joint being too weak when I posted this on Reddit, so I decided to take another stab at this. The updated design is still split, but the split will be moved towards the top. Additionally there will be some more surface area, especially around the bearing, which would be a good place to add some glue or solvent weld the halves together. I have one test joint printed (pictured), and after putting it together without glue, it seems like I may need to pry it apart with a screwdriver to get the bearing out. I made one minor change to the design (to increase the thickness of the upper part which the screw heads will clamp on), and am printing that now. I should have the updated design posted later this week.

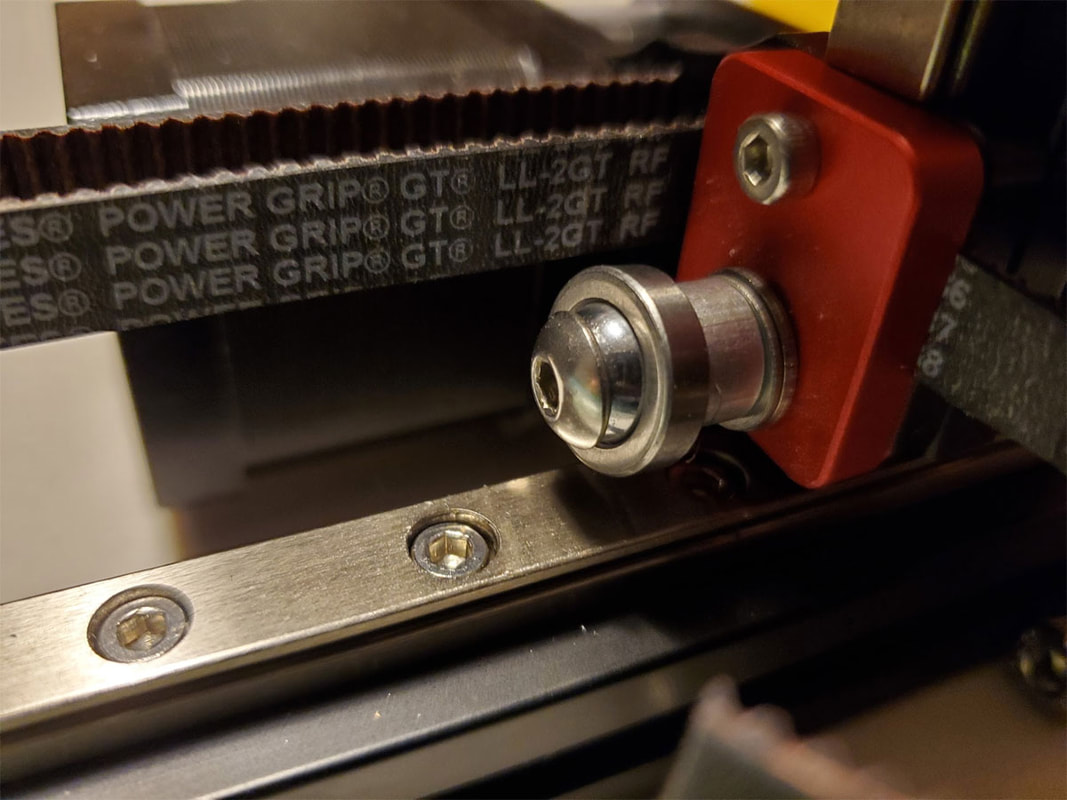
Update 5/26/2023: The design is done. I installed them, but found that more than half the bearings I received have a noticeable amount of play (backlash), which is not really acceptable. I think I have identified four OK bearings from a bag of ten, which I will use for now. However I ordered some IGUS GE5C bearings, which should be much better quality (but run $5 per bearing) and will swap them out later. Update - the IGUS Bearings appear to have no noticeable play, so I'm gonna re-print and replace the Z joints so I can use them (I have to re-print them since I glued the joints together).
I feel that the updated design is stronger now, and feels very solid (printed in ABS). I used some superglue on the joints, and had to cut the bearing out of one of them to salvage it, when I iterated the design.
The updated design can be found at the links below. If you like the model, please post a make over at Printables, since that will help get me closer to a spool of Prusament:
https://www.printables.com/model/486683-voron24-ge5c-z-joint-remix
https://www.teamfdm.com/files/file/711-voron24-ge5c-z-joint-remix/
Update 6/16/2023: After thinking about this a bit, I am not sure if this is an ideal solution since the joints need some x-y play in order to operate (think of it like a door swinging through it's arc, if you held the door at the door handle you would be pulled as it opened). If you like the idea of the GE5C mod, then this is an option though.
Update 8/11/2023: My first idea was dumb, so I'm thinking of something else which won't use the GE5C bearings. For now though, I'm going to leave it as-is.
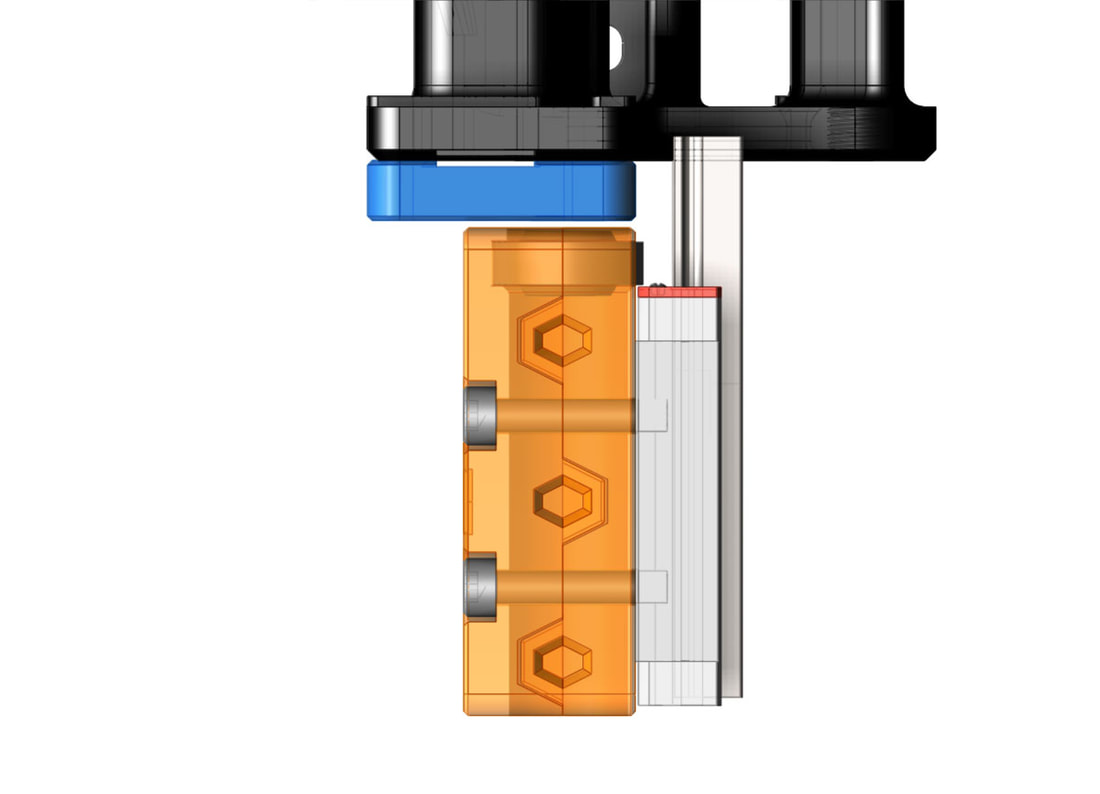
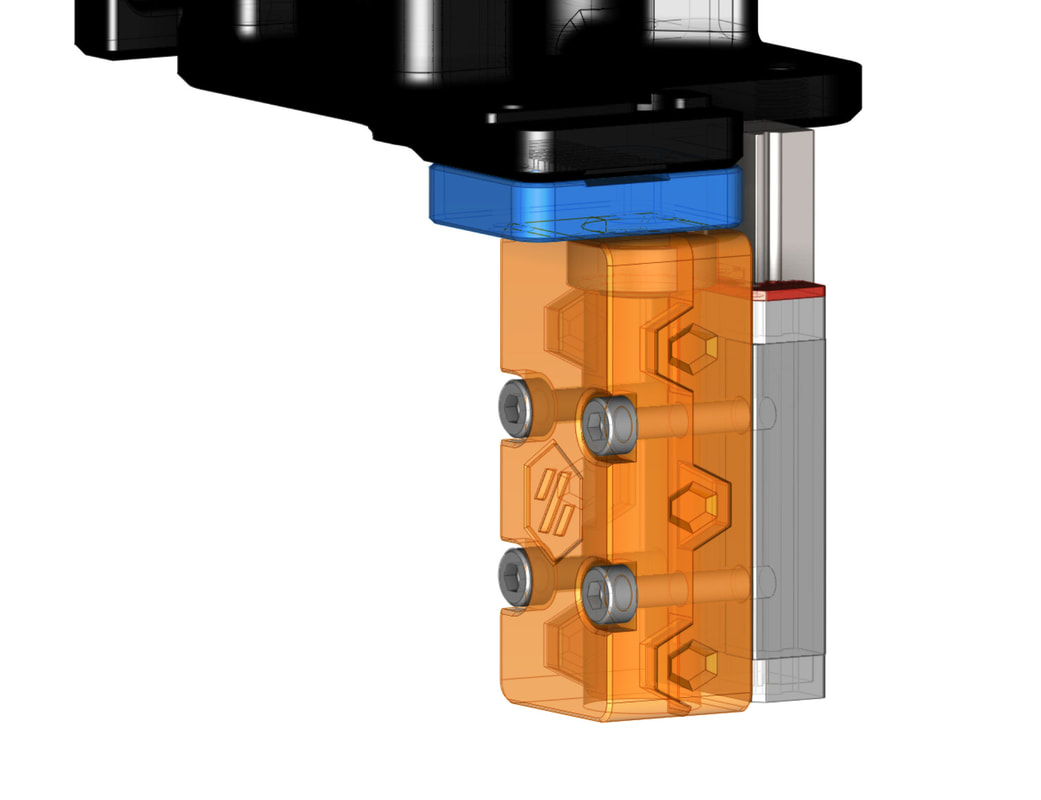
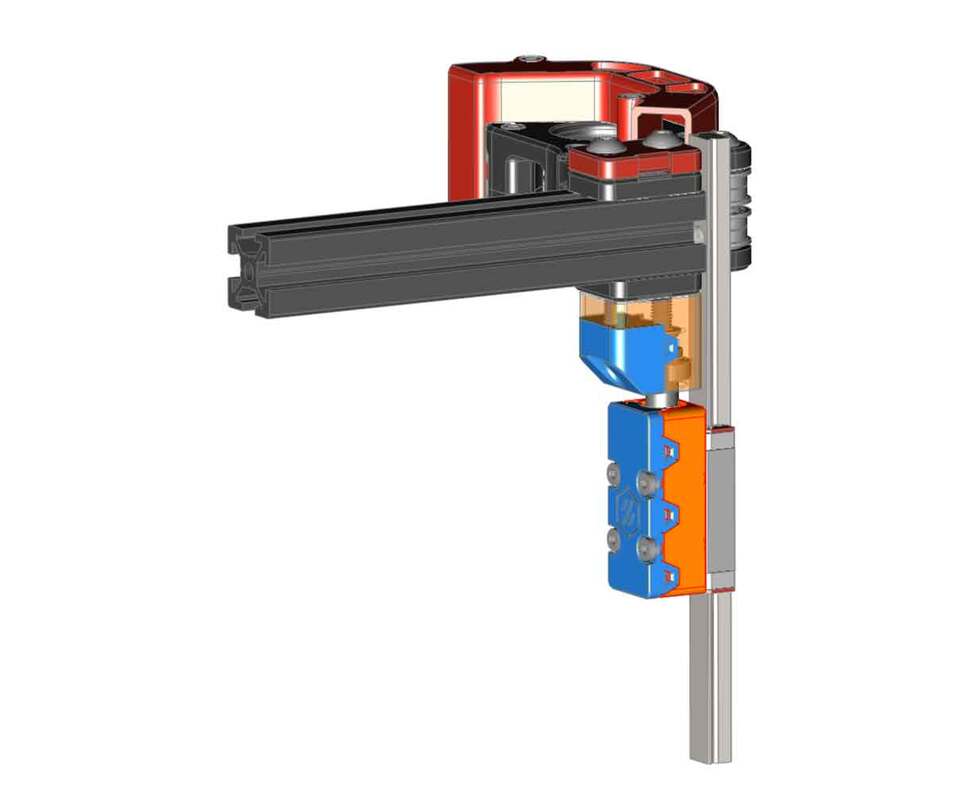
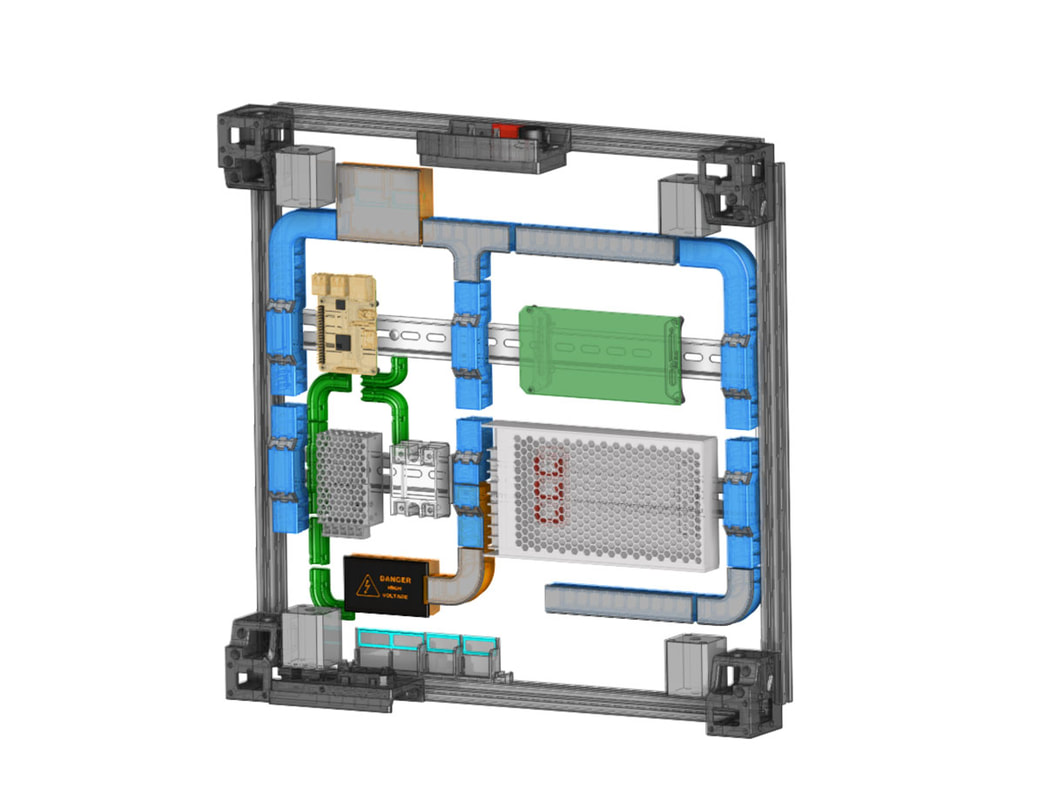
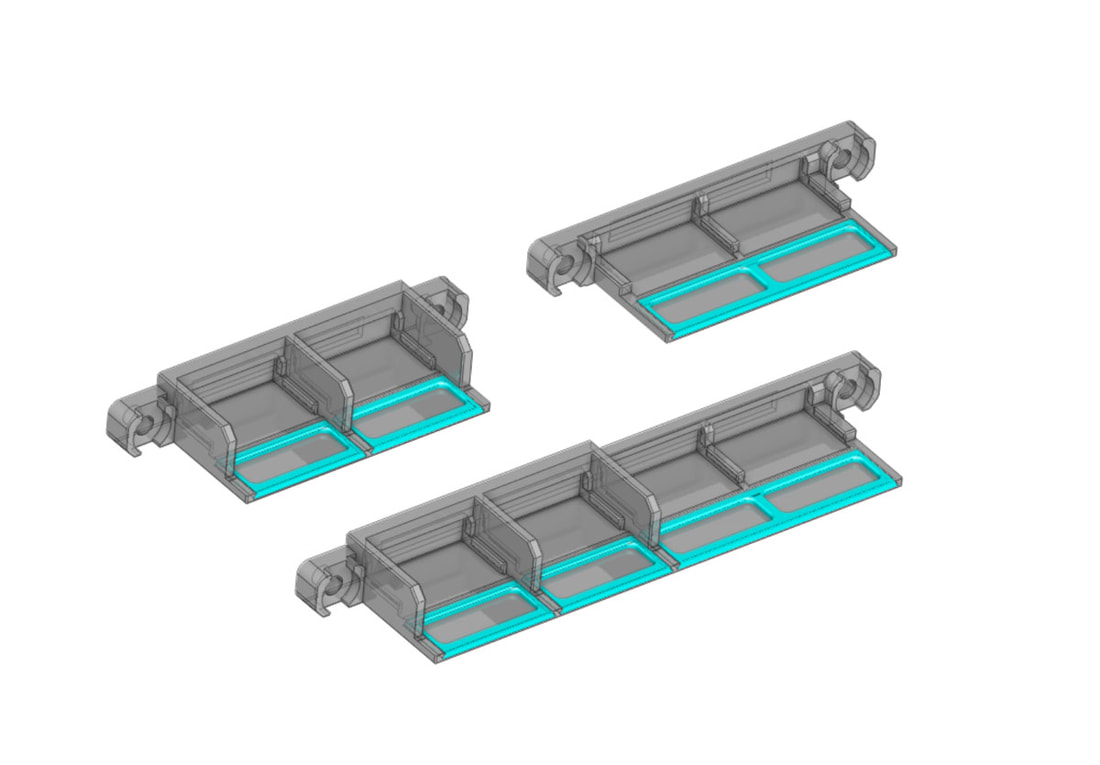
Update 8/22/2023: My second idea was also dumb, so my third idea was to move the bearing up to the part below the belt retainer, which may have some advantage being closer to the gantry, but it's neither printed nor tested. This design is on the back burner for now, and won't be posted unless somebody wants to test it and provide feedback. Note that the lower part attached to the carriage is just a placeholder, since it would be designed as a solid part, with a M5 screw going into it. The carriage mount would need to have a nut or M5 insert, but otherwise is very simple.
Update 8/11/2023: My first idea was dumb, so I'm thinking of something else which won't use the GE5C bearings. For now though, I'm going to leave it as-is.
Update 8/22/2023: My second idea was also dumb, so my third idea was to move the bearing up to the part below the belt retainer, which may have some advantage being closer to the gantry, but it's neither printed nor tested. This design is on the back burner for now, and won't be posted unless somebody wants to test it and provide feedback. Note that the lower part attached to the carriage is just a placeholder, since it would be designed as a solid part, with a M5 screw going into it. The carriage mount would need to have a nut or M5 insert, but otherwise is very simple.


 RSS Feed
