My Stoopid Stuff
  • Home
  • Projects
  • Blog
  • Lec'tronics
  • Links
  • CNC
  • Quick Recipes
  • 3D Printer Tips

Something Weird Was Going on With My CR10 BMG Extruder...

2/11/2022

0 Comments

 
I have been noticing that the flow calibrations have been coming out inconsistent on my CR10S Pro. This started after (though not directly after) some big changes to the machine including a changeover to a BMG (clone) direct drive (and updated the firmware to Tinymachines 7.4.3 for the CR10S Pro V2), so I decided to re-check my e-steps.  When I originally set it up, it was right on at E=415, but for some reason it is now all over the place.

I initially screwed up my e-steps calculation.  Since I was overextruding I had it in my mind that esteps would go down which normally they should in that case, but due to the problem I'm having (where nothing made sense) the numbers I had from the tests would have me increasing e-steps.  In any case my esteps and the values when extruding 100mm are all over the place.

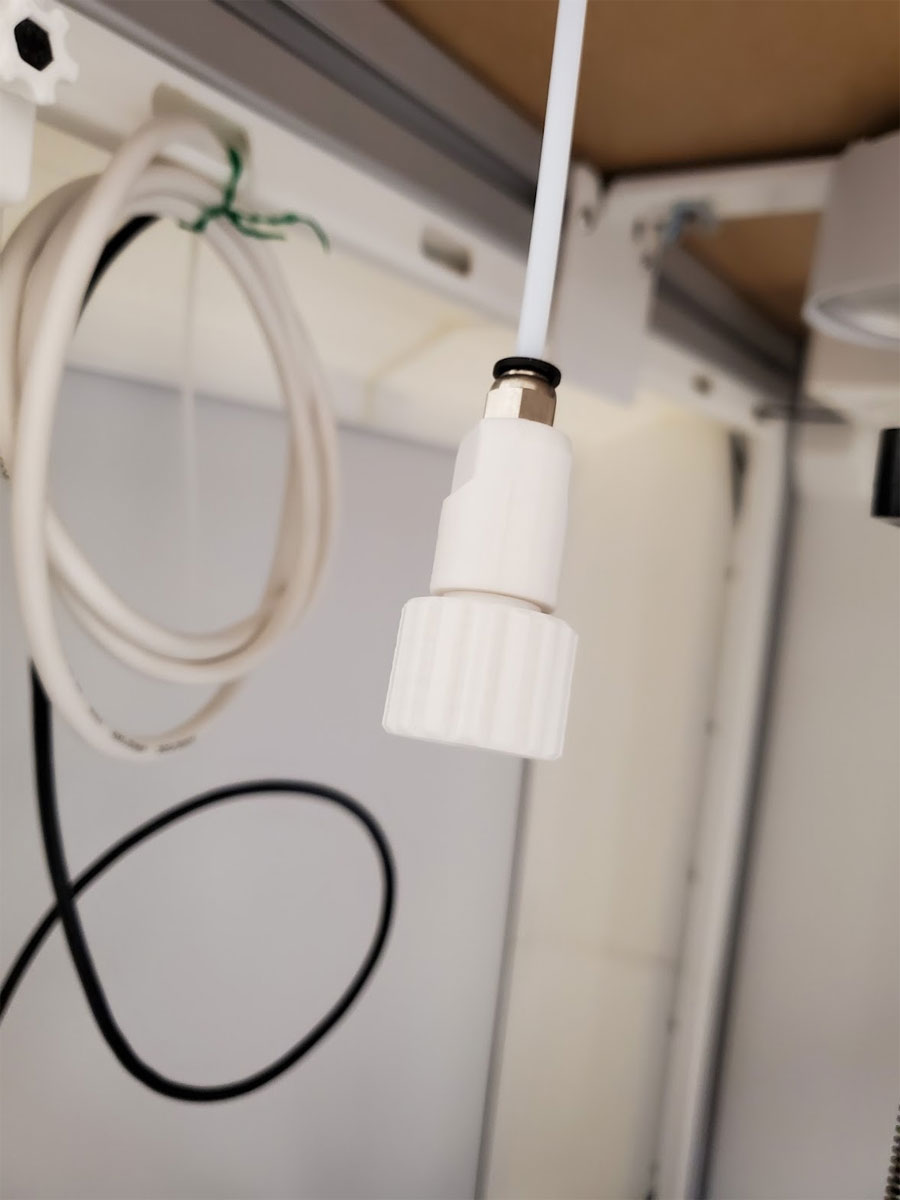
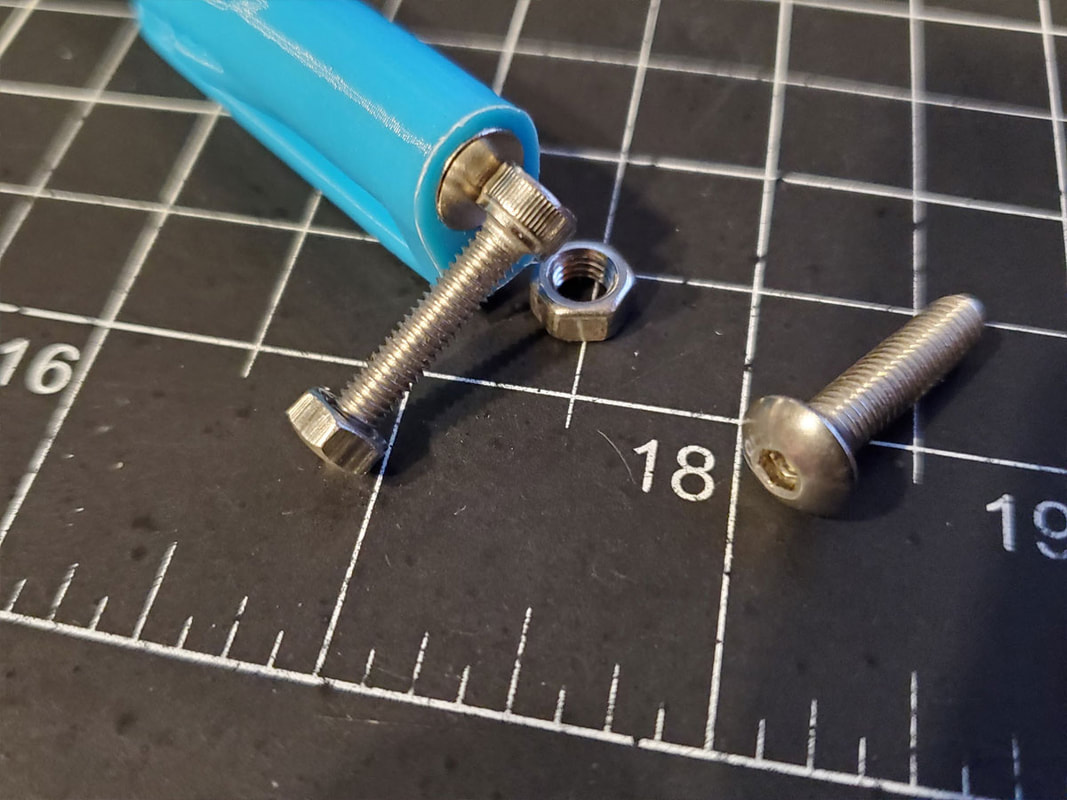
So I took apart the BMG and found the first problem:
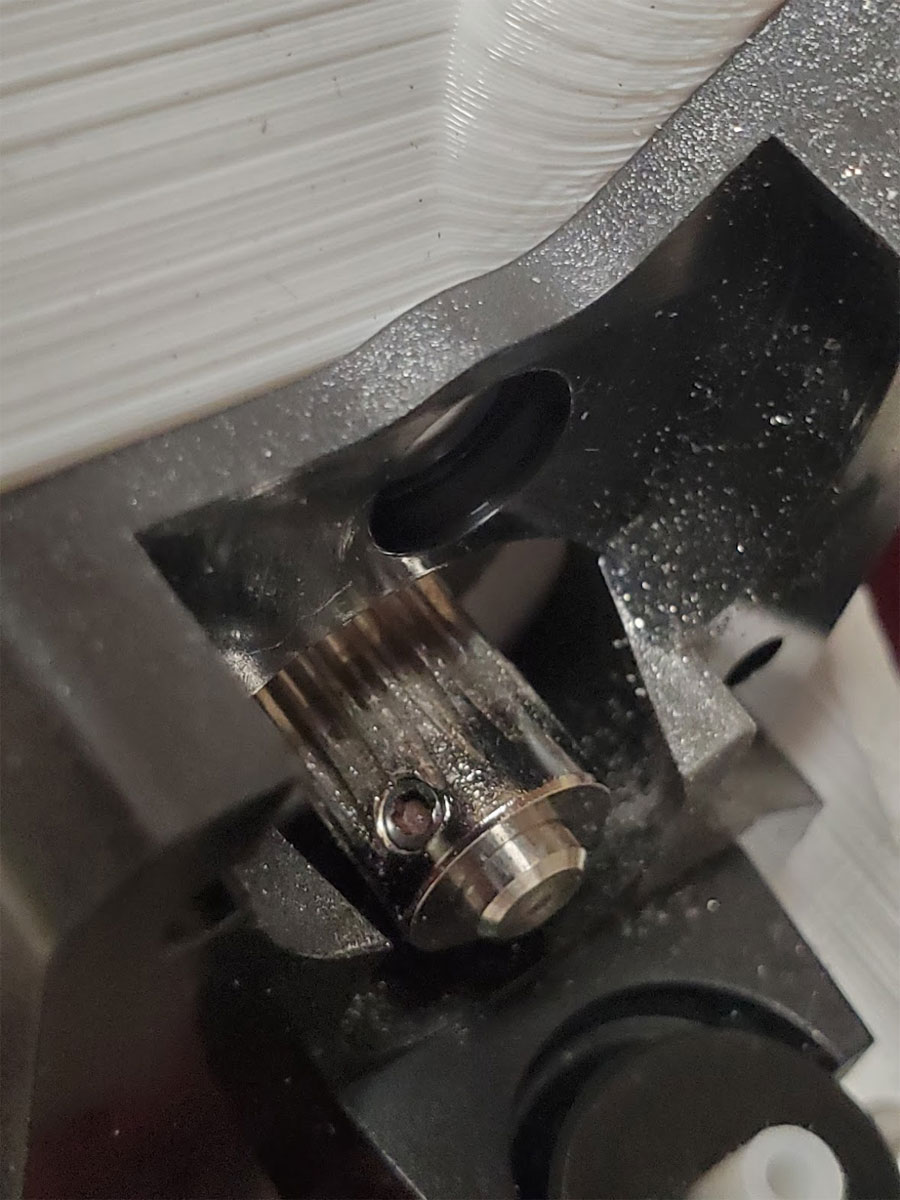
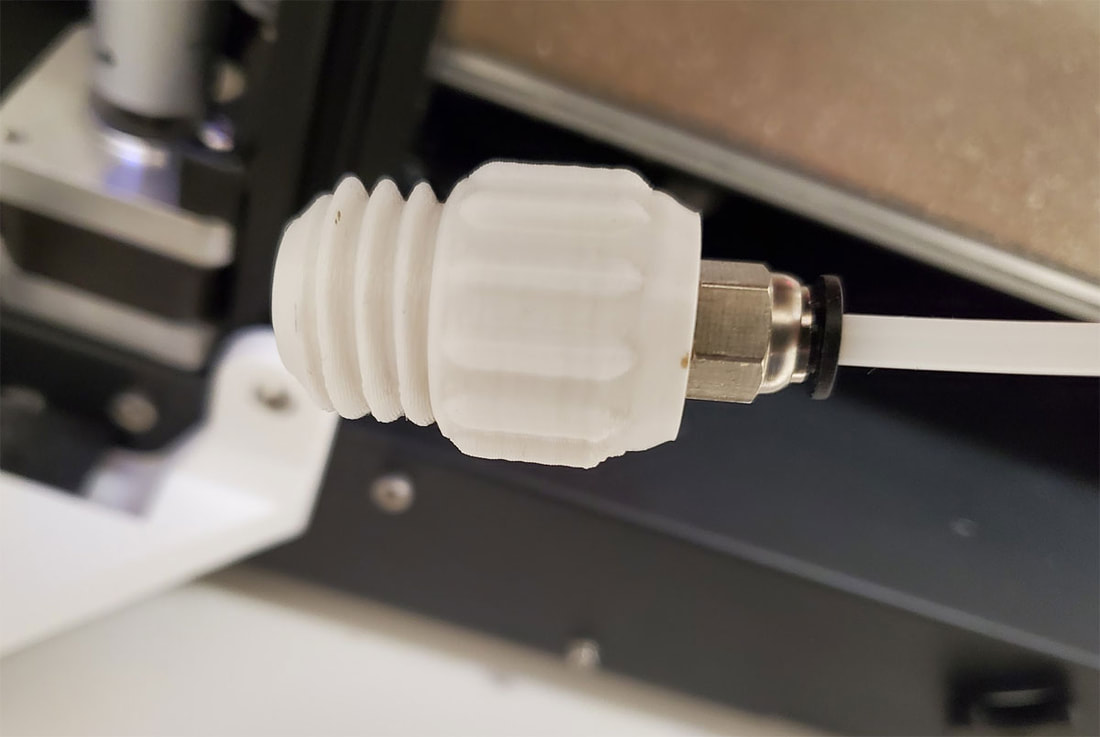
The first pic shows the gear which is installed backwards.  I flipped it around so the full depth of the teeth could engage on the nylon gear of the BMG extruder.  However that did not fix the problem...

So I removed the extruder, cleaned everything, and set it up so the hot end would be removed from the path.  Then I made sure everything was tight (especially the tensioner), and ran filament through several times.  The results were slightly more consistent but still not right.  I found that I could stop the filament from moving by holding onto it, though the extruder did not click or complain, and the stepper shaft did not stall or miss a step - which means the gears are not biting strongly enough on the filament.  I cranked the tensioner as far as I could turn it easily and tried again, but I can still stall the filament by hand.  I'm guessing that the tollerances in the BMG clone are just not quite there and there must be either a misalignment or a gap possibly.  I checked over the gear alignment as best I could with the gate swung open and it seems OK though.  

So now I least I know that this is not a problem with the stepper, vref for the e-stepper and probably not the e-steps.  It looks like a problem with the extruder which is allowing the filament to slip.

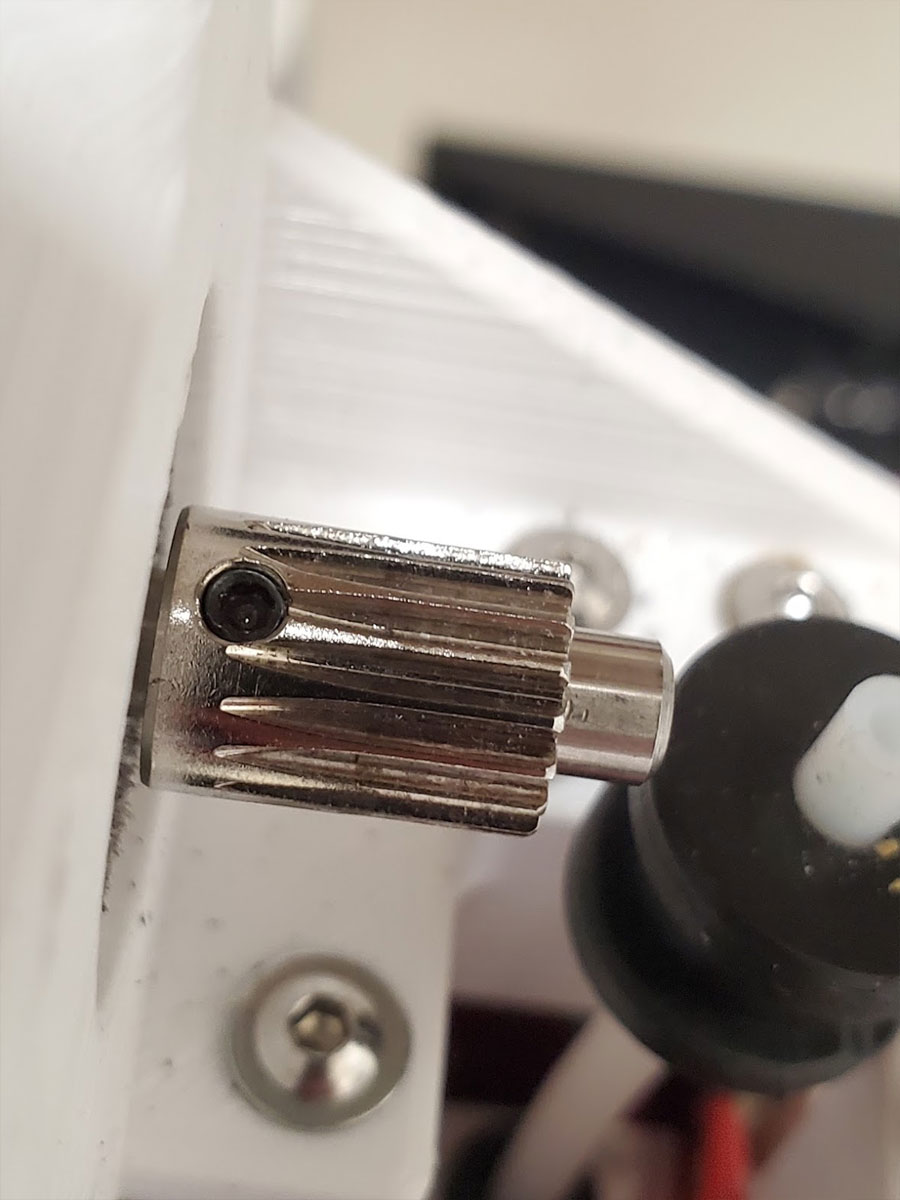
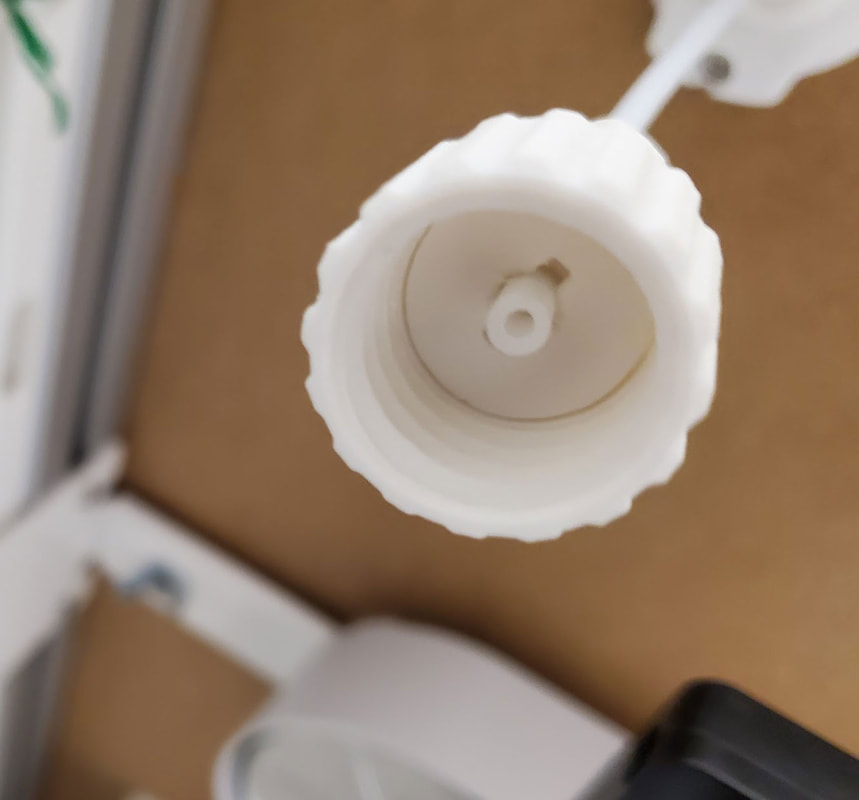
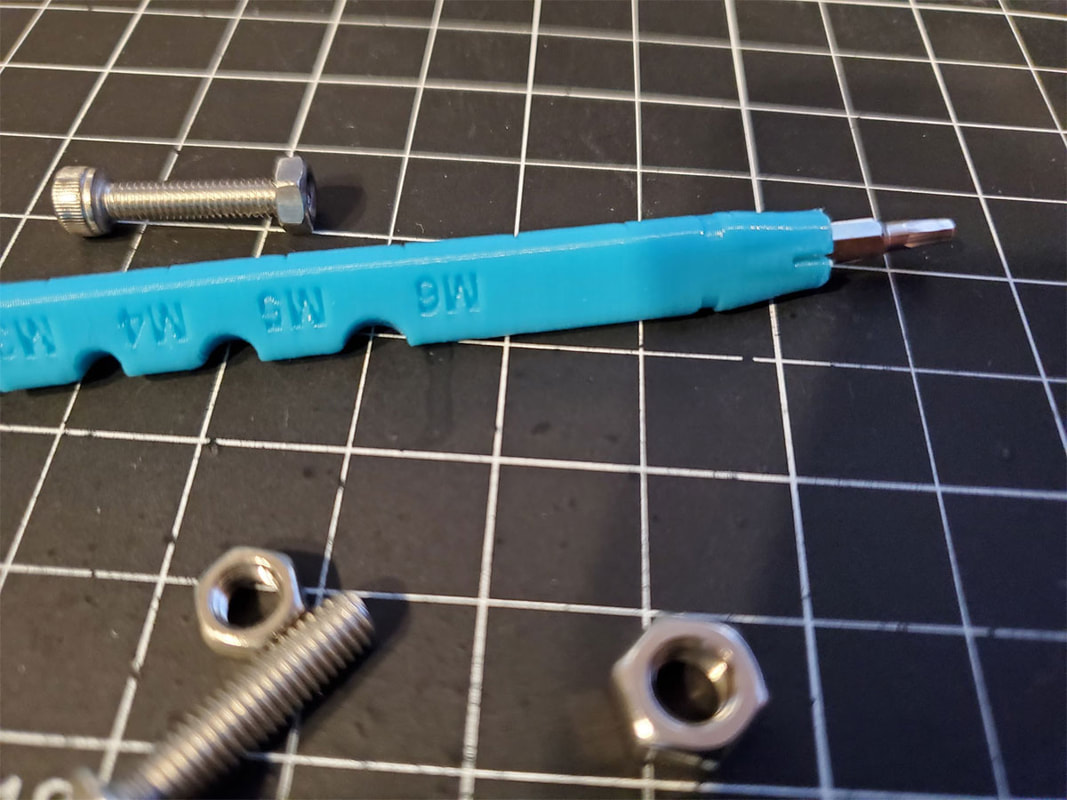
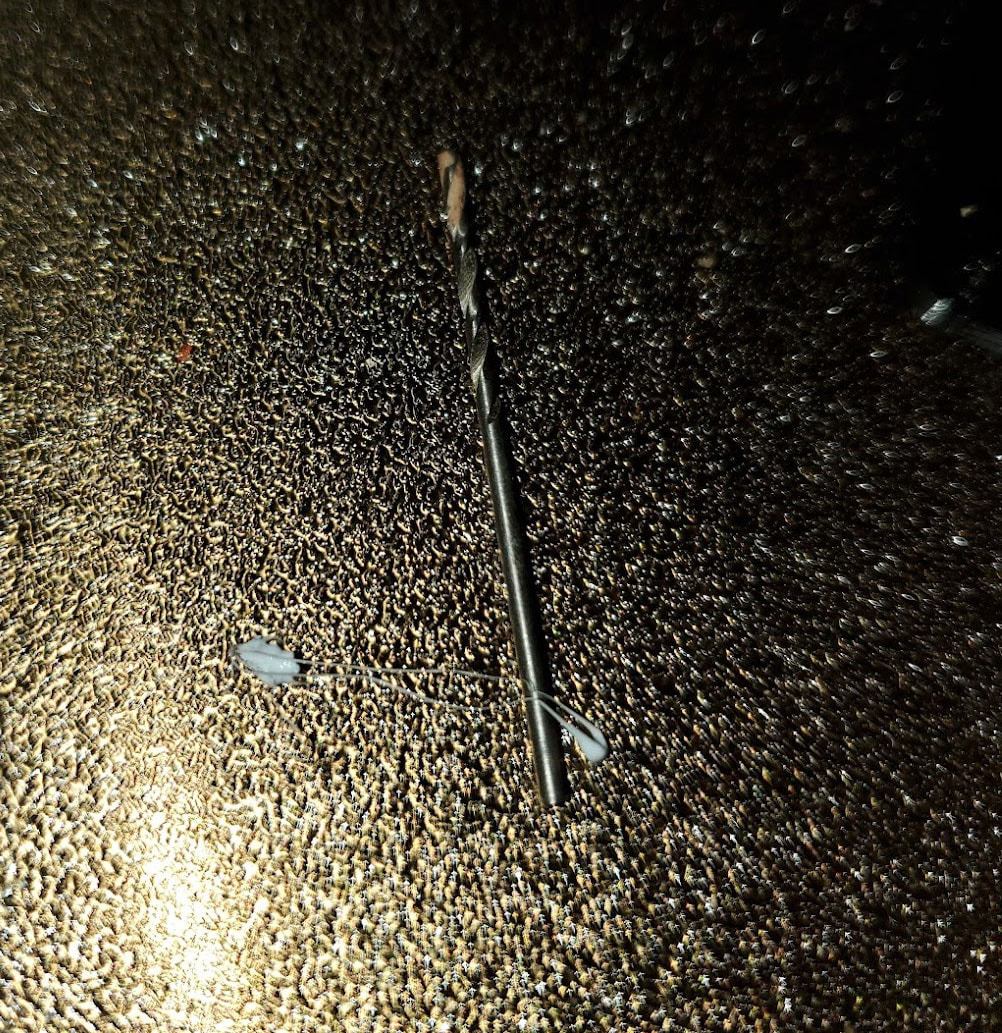
I dug further into the extruder and next found this, which I overlooked the first time I had it apart (and apparently also missed it when I put it together initially):
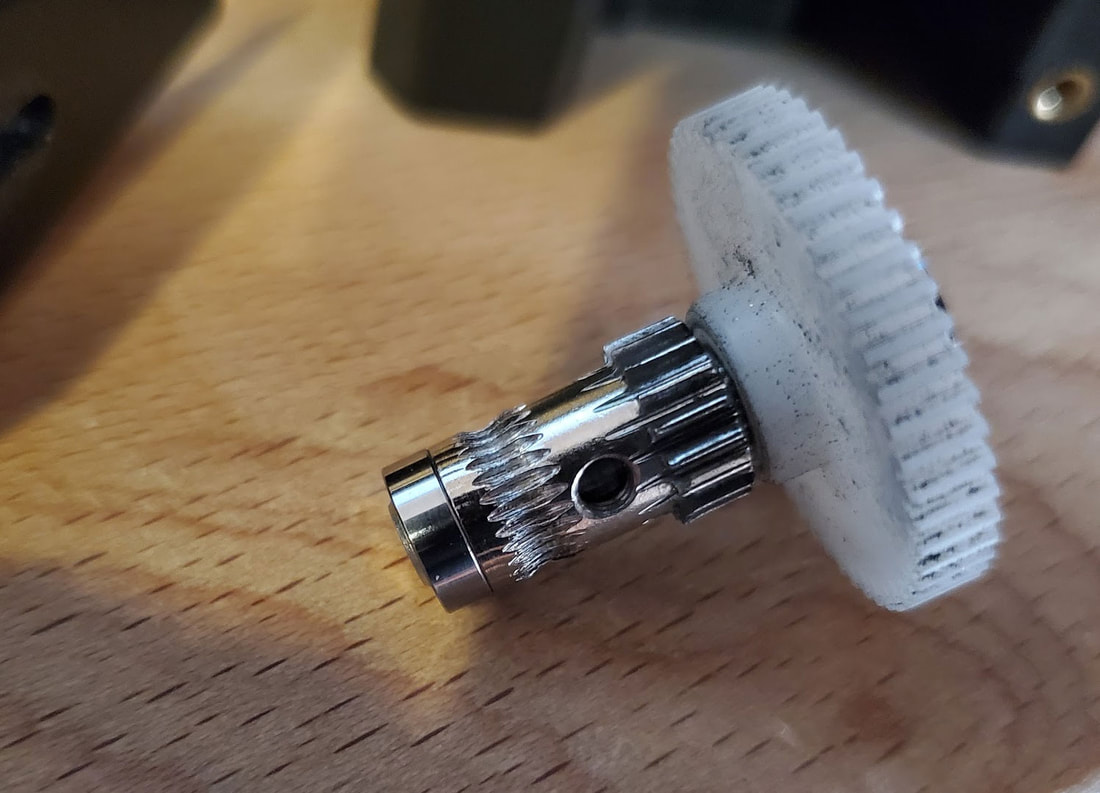
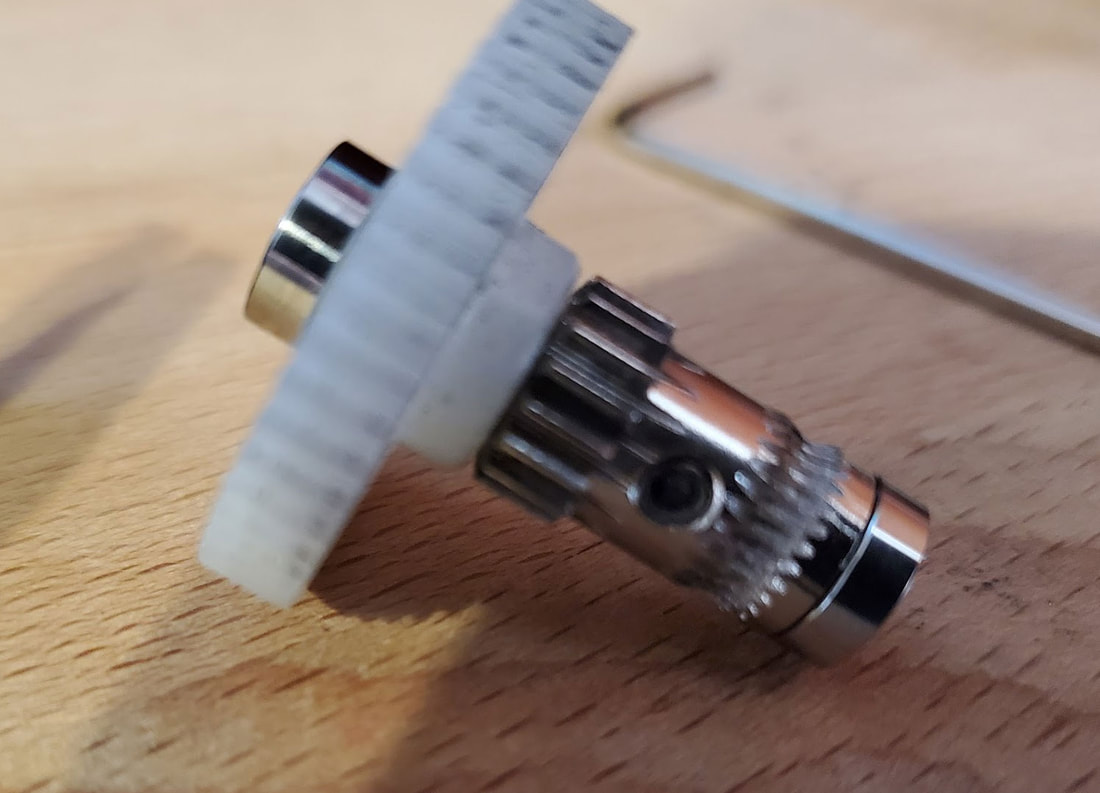
It's hard to see but there is no grub screw in there.  This gear was held in place only by the compression of the bearing and the gear pressing on it, which was not much.  I'm kicking myself for not seeing this when I installed the BMG, but I recall that this part was "assembled" when I got the stepper so I'm guessing the grub screw was never there in the first place (I did not find one loose in the assembly either).  I was fortunately able to steal one from an unused stepper and get this working again, but feel especially stoopid for missing not one but tow problems during the initial build of the stepper.  In my defense though, my eyes are not what they used to be :D

I did have to adjust the esteps again, and starting over from 415steps/mm which is the default for the BMG, I eventually landed on 421 steps/mm.  That was at least a consistent value, which I confirmed with two tests that both hit on exactly 100mm when I requested 100mm from the stepper/extruder. 

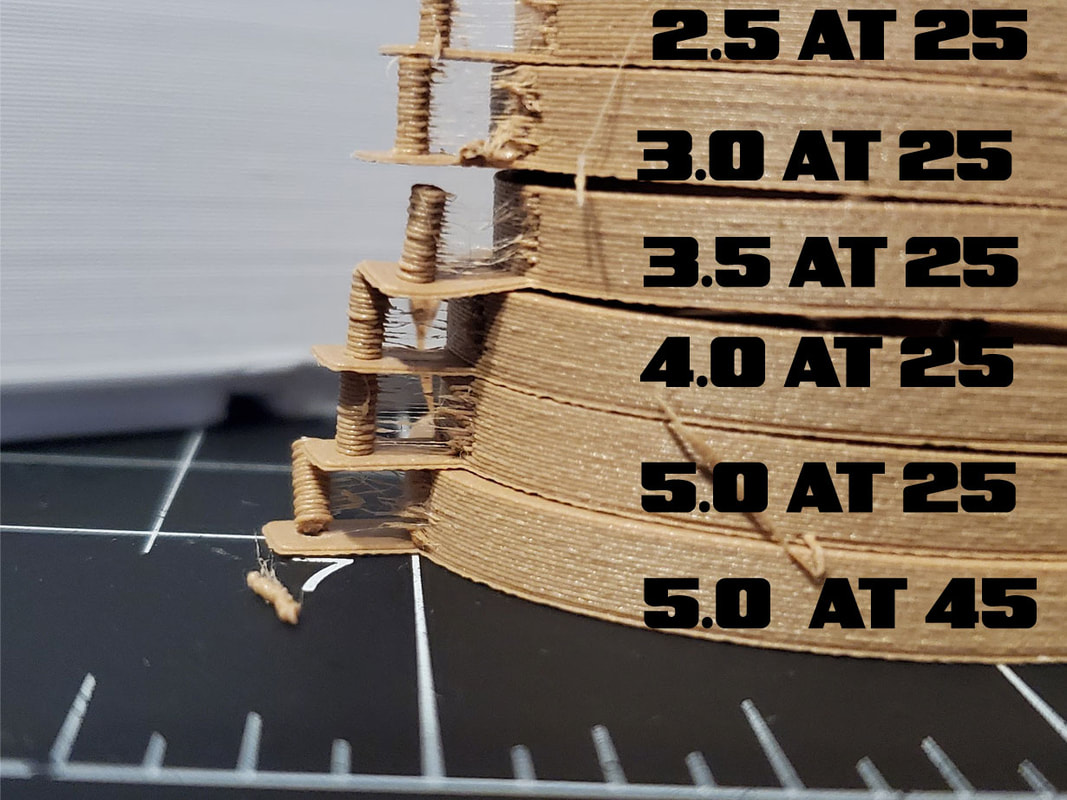
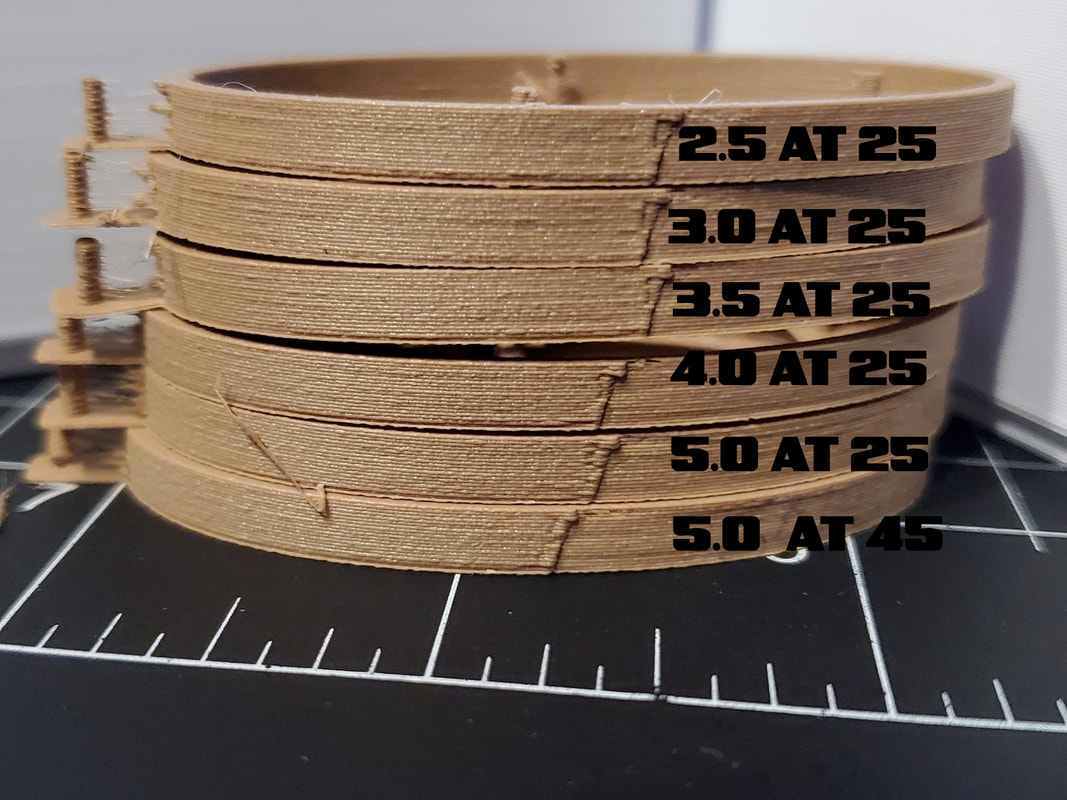
So although really dum, this was a success, and maybe even more so considering I actually have some really nice prints from the printer, even with the screwed up extruder.  That was until recently at least, when I tried to run PETG and noted the inconsistent extrusion and flow values (which I track using a Google Sheet).  I was also seeing issues with wild retraction settings when checking hatchbox wood previously (a post I will update to point here as a likely cause of that problem). 
0 Comments

Bowden Coupler

2/7/2022

0 Comments

 
Picture
Picture
This is a screw together coupler for a Bowden Tube, to allow it to be opened at some midpoint.  It is a work in progress right now but 90% there.  Once this is done, I may integrate a runnout sensor into it.
Update 2/8/2022 - I wrapped up the design on this today and it's gonna get posted later this week.  It uses a TPU insert to help seal the connection between the Bowden Tubes.  I don't know how "sealed" it is but I thought "why not" since I have the TPU.  I will also post a version that does not require the insert though.
Update 2/11/2022: This is now posted on Prusa here:

www.prusaprinters.org/prints/132363-bowden-tube-coupler-using-pc4-m10-pneumatic-fittin

0 Comments

Clogs, Damn Clogs...

2/5/2022

0 Comments

 
Picture
No, I have nothing against traditional Dutch footwear, its the clogs which jam up my printer when I do something dum that I dun' like.  In this case I know what happened, I had been messing with retraction, and ramped it up to a higher than normal value when I was testing the Hatchbox wood PLA using my BMG direct drive.  I think I must have left the retraction high when I went to print something else using regular PLA, and that must have sucked some plastic into the colder part of the heatbreak. 

I was getting prints that looked like sponges so I pulled the nozzle off and removed the heatbreak. The clog can be seen in the pic above, it almost looks like the end of a PTFE tube in a non-all metal hot end, but don't be fooled, its a nasty clog, and has to be removed to get the printer working again.  To dislodge the clog, I used the blunt end of a 1/16" drill bit bit to push it out with the block removed (with the heatbreak installed but the nozzle removed), and heated to 180°C.  Once at temp, with the plastic softened, I pushed the drill bit through a couple times to evict the clog.  After that I took the opportunity to swap in a plated MK8 (brass) 0.6mm nozzle which looks like it will work nicely.
Picture
What remains of the clog
0 Comments

Ruler Pen With Some Other Stuff (Done and Posted to PrusaPrinters)

2/3/2022

0 Comments

 
As soon as I saw that PrusaPrinters was running a quick contest to design a pen, I knew exactly what I would design if I entered it.  The design would be a pen with a mm ruler, a gauge for several sizes of metric nuts and bolts, a 4mm bit holder and finally a pen :D  I thought that a pen like that would be useful for folks who do a lot of printing or designing things to 3D print.  I didn't think I would be able to get it designed though, before the deadline for entry. 

But then I had some free time this afternoon, and thought I would take a swing at it.  Unfortunately what seems simple usually (for me) evolves into something not so simple, and so a project I though would take an hour took multiple hours - and I have still yet to print and test it.  I am pretty happy with the sliced model though, and once my Ender3 is freed up tomorrow I will try and print it.  If it all checks out, the design will be uploaded to PrusaPrinters and entered in their contest for some filament.  It is designed to use a simple pen insert which I pulled out of a BIC pen.

I took some of the inspiration for this from another handy tool I use pretty often, which is a remix of this thing.  If you need to sort a lot of nuts and bolts, that is a great tool and makes the process easier than just guessing.

UPDATE 2/4/2022 - I did a pretty comprehensive redesign of the pen after testing it.  I thought I would not like the triangular profile but since it is rounded off and tapers, it was not a problem.  I extended the profile (and the ruler) the full length of the pen, and added a magnet to the cap, and have another version with a 10x5x1 magnet that can be glued to the body of the pen (however I don't have these magnets so it will remain an untested remix once I post this).  The pen is also a bit thicker but still normal sized and should be comfortable to write with. 

Getting the fit to work with the pen refill and the 4mm bit was probably the most difficult part of this design.  I printed a half dozen test parts to get it just right - and I hope it will work similarly for other printers.  Getting tolerances right is a big pain with FDM since not everyone's printer/slicer behaves the same, and when dealing with very small close fitting parts it makes it a bit of a balancing act to try to make things work.  My printers are not perfect so that adds to the headaches.  I try to calibrate things when running test prints like these though, to limit the problems.  In any case I hope it will work as well for other folks as it did for me.  I am running a final test print now and will post it with some pics probably later today or tomorrow, once those are done.
Picture
Update 2/5/2022 - It's posted on Prusa Printers and entered in their Pens and Pencils Contest!

https://www.prusaprinters.org/prints/129703-multi-function-pen-with-a-metric-ruler-nut-and-scr
Update 2/6/2022 - I made a minor change to the design to allow the pen refill to be installed easier.  It's not a big deal but I felt like it took too much force to install the pen refill and so the updated model (updated on PrusaPrinters), has a modification to add a slight chamfer to the hole, and it was very slightly widened overall.  I printed another one using the new model and it works perfectly so that should be it for changes.
0 Comments

Hatchbox Wood PLA

2/1/2022

0 Comments

 
NOTE - SEE UPDATE FROM 2/11/2022 BELOW.

I have been using a bit of wood PLA lately and really like Amolen Dark Wood PLA which uses walnut, and also Hatchbox Wood PLA, which is lighter in color.  Both these print well, even with a 0.4mm nozzle on my ender3, and both have made some really nice prints.  I recently picked up a couple of spools of Hatchbox wood, and noted that there is quite a bit of oozing on these new spools, which I had not noticed in the past.  I normally run less than 1mm of retraction on my direct drive converted CR10S Pro, however with the Hatchbox I have found that I need to raise that quite a bit.  I have gone to 5mm, but still have significant stringing and blobs.  I just tried 6mm and it looks like that may do it, but I will try increasing the retraction speed to see if it's any better.  I have lowered the temps (to 205°C) and speeds (to 40mm/s) previously, and dropped flow (to 90%), and plan to tweak the extra prime once I get the retraction to where it looks OK.  I'm also running these tests with coasting turned off, but will tweak that after everything else is optimized as best I can get it with my printer.  I'm really interested to see if the combination of an aggressive retraction to reduce the blobs, combined with some extra prime to get things restarted after a reaction may work for a filament that is really oozy like the Hatchbox seems to be in my printer.

The Hatchbox almost seems like a foaming PLA with the way it oozes, but I have never used those before so cannot really compare.  I don't recall that happening in the past but I also did not have a camera on the nozzle to see happening live so cannot be sure.  The models I have been printing with wood PLA have not been a good test for retraction either, so they may have hidden the oozing issue.  I'm primarily interested in reducing the z-seam in my prints, since that is what my models will show the most (stringing is less of an issue).  The Hatchbox does seem to be forgiving when dropping flow however, and even though the pics show what looks like a rough surface, it is actually very consistent when viewed normally. I still think Hatchbox wood is one of the best for wood filaments, so it's worth the effort to try and get it looking as best it can. 
Picture
Picture
Update 2/3/2022 - Well I printed about 20 of these things and a few of my test cubes once I had the settings down.  I ended up by turning the flow down a bit (89%) and went with 4.5mm @ 45mm/sec for the retraction using my BMG direct drive.  I did not need to use the "Extra Prime" fortunately.  When I tested with it, it only caused more stringing with no noticeable benefit to the seams.  I'm not happy with the seams still but I gotta actually print something sometime, and found the best middle ground for stringing and seams that I could at this point.  If I figure something else out I will update here, but for now this is gonna be it.  

Update 2/11/2022 - I found a major problem with my BMG extruder (a grub screw was missing from one gear), so this was all for nothing, but the problem is at least fixed now.
0 Comments
    Picture

    Stoopid Me

    Welcome to my Stoopid corner of teh Internet.  It's mostly gonna be 3D printing stuff, but I also post some recipes, projects, and the occasional rant here as well.  More Stoopid stuff is updated regularly.

    I recently joined the Amazon Associate program, so some of the links on this site are Amazon affiliate links. This means that, at zero cost to you, I will earn an affiliate commission if you click through the link and finalize a purchase.  This will help to support this site, and pay for more Stoopid Stuff.

    Archives

    March 2023
    February 2023
    January 2023
    November 2022
    October 2022
    September 2022
    August 2022
    July 2022
    April 2022
    February 2022
    January 2022
    December 2021
    November 2021
    October 2021
    September 2021
    August 2021
    July 2021
    June 2021
    May 2021
    April 2021
    March 2021
    February 2021
    January 2021
    December 2020
    November 2020
    October 2020
    September 2020
    August 2020
    July 2020
    June 2020
    May 2020
    April 2020
    March 2020
    February 2020
    January 2020
    December 2019
    November 2019
    October 2019
    September 2019
    August 2019
    July 2019
    June 2019
    May 2019
    April 2019
    March 2019
    February 2019
    January 2019
    December 2018
    November 2018
    October 2018
    September 2018
    August 2018
    July 2018
    June 2018
    May 2018
    April 2018
    March 2018
    February 2018
    November 2017
    September 2017
    August 2017
    June 2017
    December 2016
    October 2016
    September 2016
    July 2016
    March 2016
    February 2016
    September 2015
    August 2015
    June 2015
    May 2015
    April 2015
    March 2015
    February 2015
    January 2015
    December 2014
    November 2014
    October 2014
    September 2014
    July 2014
    June 2014
    May 2014
    April 2014
    March 2014
    February 2014
    November 2013
    August 2013
    July 2013
    June 2013
    May 2013
    April 2013
    March 2013
    January 2013
    December 2012
    November 2012
    October 2012
    September 2012
    August 2012

    Categories

    All

    RSS Feed

      Contact Form (Name is optional)

    Submit
Powered by Create your own unique website with customizable templates.