My Stoopid Stuff
  • Home
  • Projects
  • Blog
  • Lec'tronics
  • Links
  • CNC
  • Quick Recipes
  • 3D Printer Tips

Fixed a broken wiper hose on a Ford C-max

11/27/2021

0 Comments

 
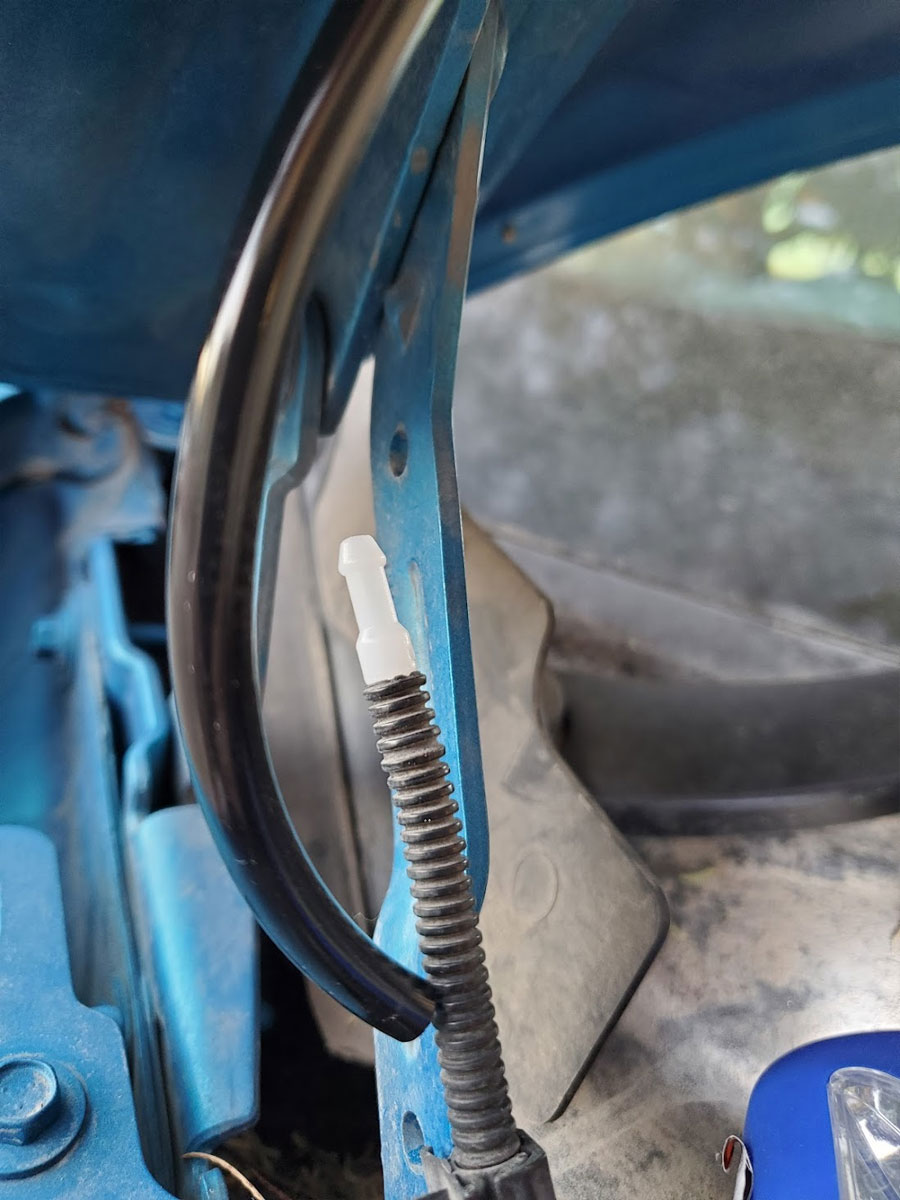
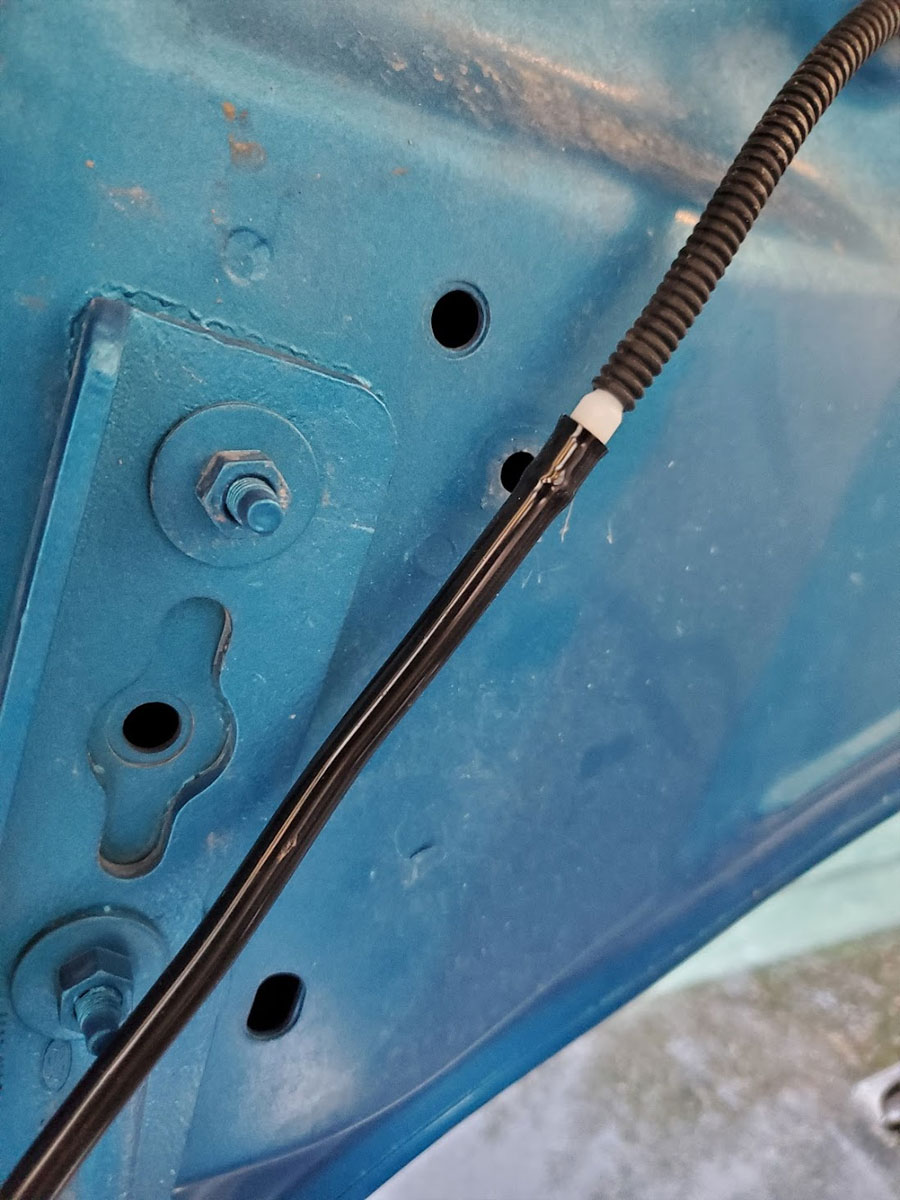
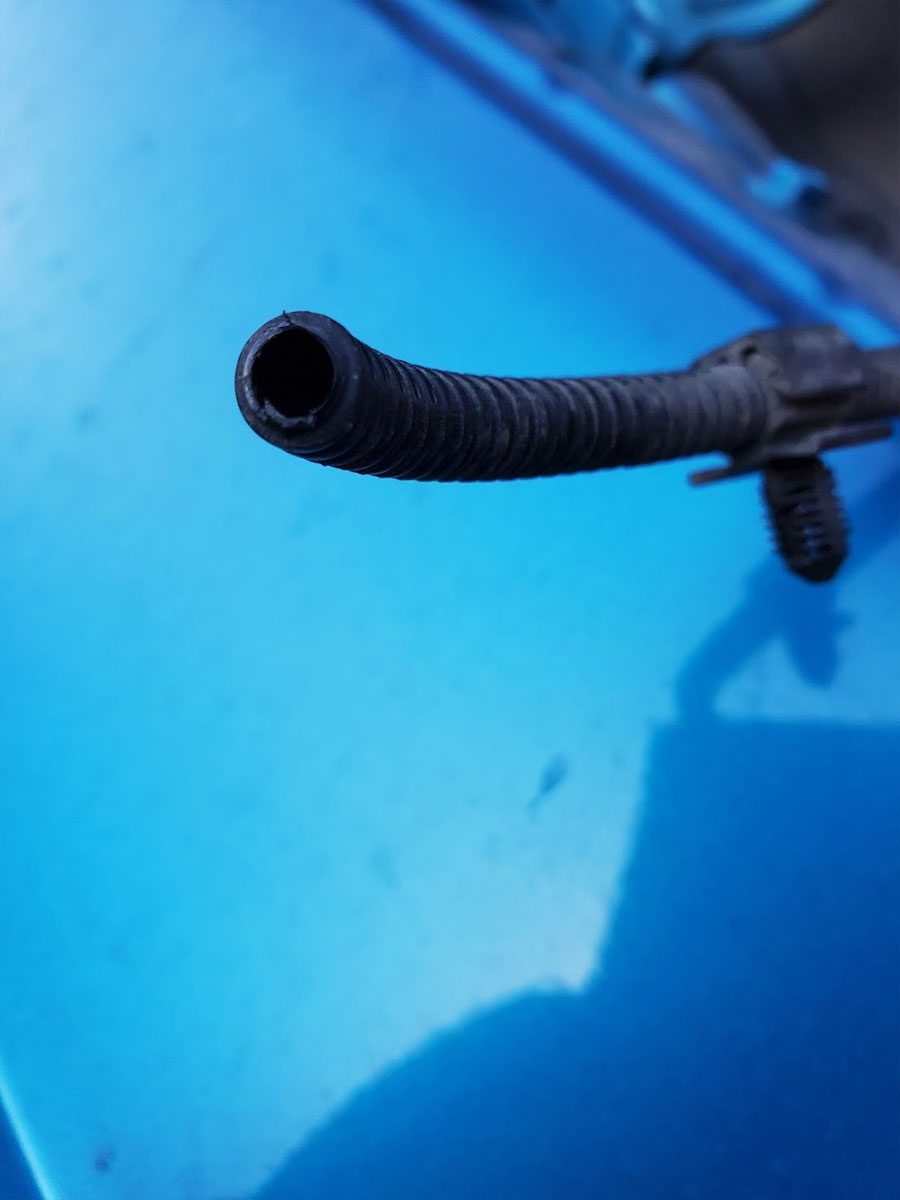
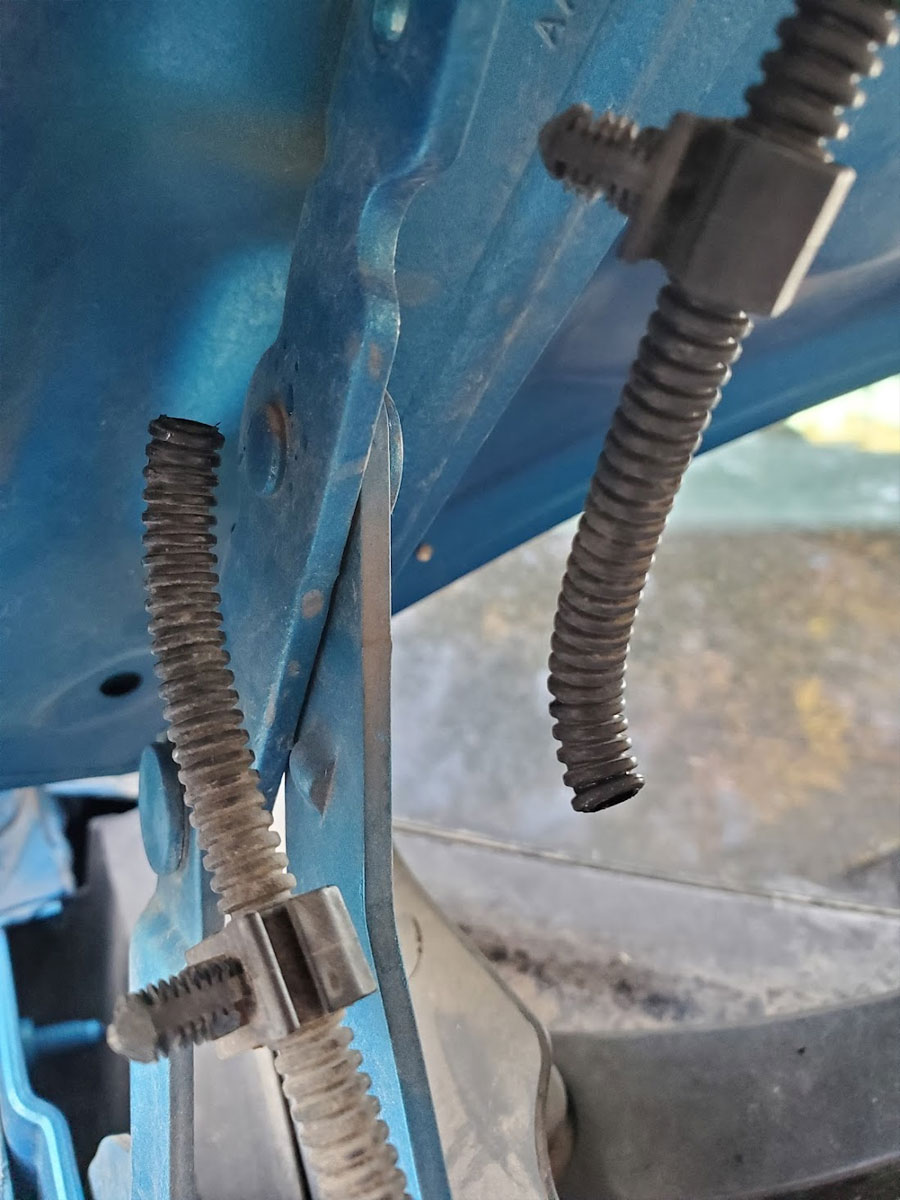
For some reason Ford decided to use a plastic hose for the wiper squirters on the C-max, which may work if the hose was static, but here the squirters are mounted on the hood, so the hose must flex every time the hood is opened and closed.  When I saw the plastic hose I thought it was just some plastic conduit over a rubber hose, but nope, there is no other hose inside.  They really just used plastic.  Thanks to their design decision which probably saved them less than a buck and helped boost some nameless VP's star in the company, there was an inevitable leak, right where the hose has to flex.  Not a huge deal, but annoying when I have to find this out the hard way, with a dirty windshield and no squirters to spray it with (fortunately I had a case of unsweetened seltzer water on hand which was handy).

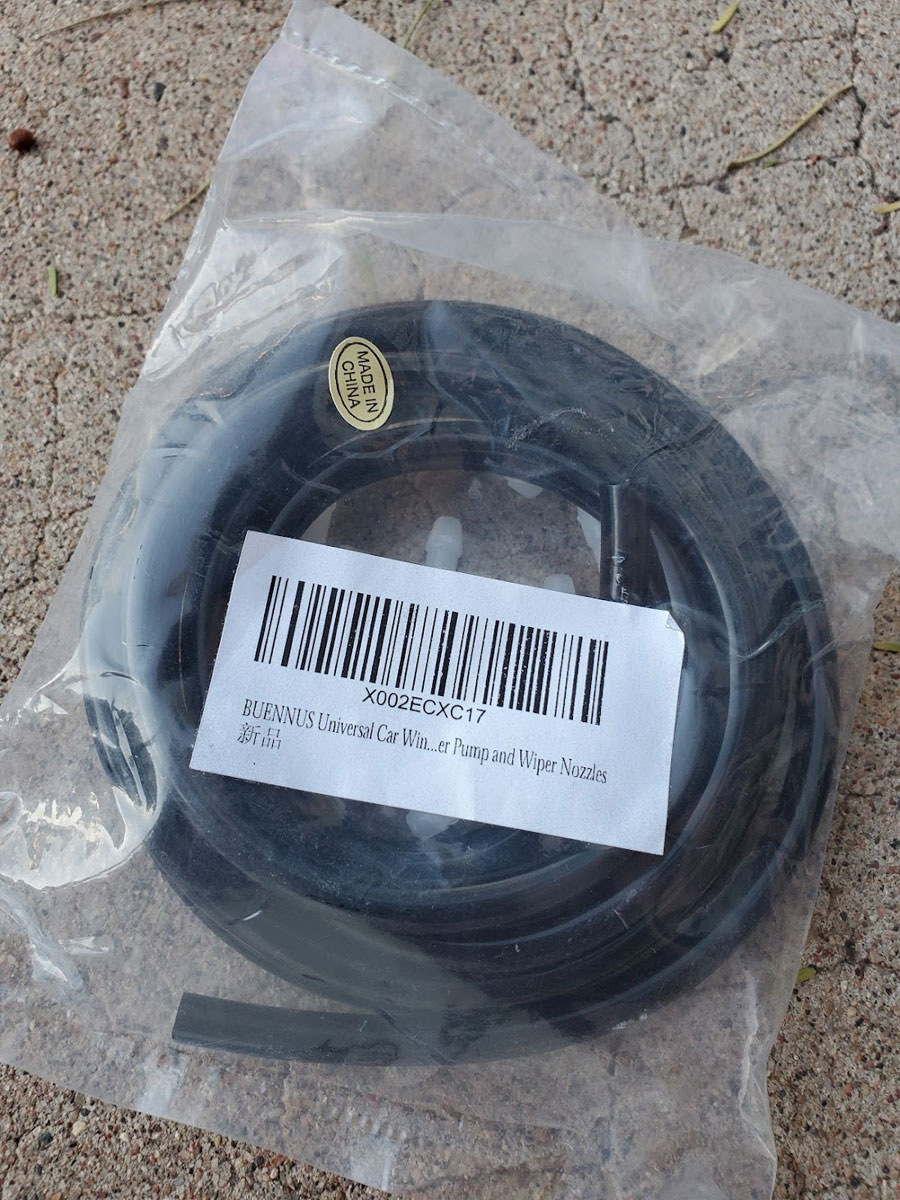
To hopefully fix this, I ordered this kit, which has an assortment of connectors, but I only needed two of the the 1-1 couplers.  The kit looks similar to many others on Amazon, and works well.  The included connectors went right into the remaining hose without much complaint.  I measured the inside and outside diameters of the stock hose and it was 7mm outside and 5mm inside, though it is corrugated.

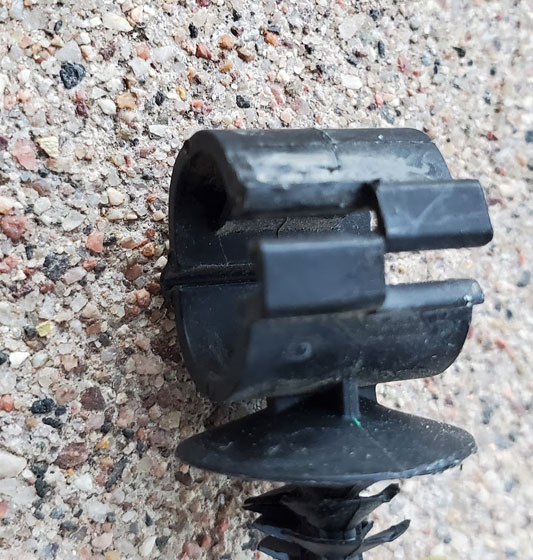
The install was simple aside from a crazy double reverse latching hose clamp, which surely deserves a design award.  I had to set a flat screwdriver in a vice (set to pry one side open) while using another flat screwdriver in one hand (to pry the other side), and held the clip in the other hand, in order to open it up.  The only thing that makes sense is that Ford has access to 3 handed alien tech, likely through their connections with the lizard persons...who I assume also have 3 hands.  Oddly the other hose clamps were of the simple (human based) one side clip design, so I'm not sure why they made this one extra spicy:
Picture
0 Comments

CR10S Pro (V1) Updates (to date)

11/13/2021

0 Comments

 
Picture
The CR10S Pro is a great printer out of the box, but I have made some minor (and major) upgrades to my version 1 CR10S Pro (which has a capacitive probe standard).  Below are some of them (updated 1/6/2022):

  • Replaced the stock Capacitive sensor with an Inductive Sensor (LJ18A3-8-Z/BX), more info is here. Update 1/6/2022 - I am now using a 3D Touch probe (BL-Touch clone), which seems to be faster, but is probably just as good as the inductive probe.  You can find these cheaper on Ebay often, they should be around 10 bucks.
  • Replaced the brass z-axis nuts with POM anti-backlash nuts, more info is here.
  • Swapped the wheels on the Y-axis with polycarbonate wheels.  I'm still testing these and have seen some white dust from them but they did solve a problem due to a faulty bearing on one of the old wheels.
  • Added a PEI sheet (310x320mm) which works great (sometimes too well on PETG and TPU though).  The GizmoDorks PEI sheet linked is great since it is thick enough to be sanded if needed.  I would sugget knocking down the corners with a razor or file though, snce the stock bed has a fillet and the sheet does not (I cut my finger on the edge before I got smart and trimmed them down).  Update 1/6/2022 - I switched to a magnetic spring steel build plate with PEI, which was difficult to install (the way I did it) and may have caused my bed to warp, but it's all good now.
  • Added the extruder arm fix from Tinymachines.
  • Added a printed cable chain for the ribbon cable (V2 version here).
  • Added a strain relief cable chain on the bed cable
  • Added a filament guide
  • Extended the micro-sd card from the display to make it easier to upgrade.
  • Updated the firmware to Tinymachines (and now DGUS Reloaded)
  • Designed a dry box system using Rubbermaid 21 Cup storage boxes.  I have it set up to feed from the top of my enclosure.
  • Micro-Swiss All Metal Hotend for the CR10S Pro (note that the CR10S Pro has a specific hot end and tne normal CR10 hot end will not work).  This was probably the best upgrade on my printer so far, however the stock hot end is no slouch either.  Some folks have different opinions of this hot end though, it has been very solid for my printer.
  • I added a BMG clone extruder as a direct drive, with my Hydra Remix for the CR10S Pro.  I'm also working on an endoscope camera mount.  The direct drive has been a great upgrade, it is amazing how much better the quality of the prints have been and I think it is down to the much lower retraction needed. 
  • It's not specific to this printer, but I also use an OctoPi with it, which runs on a Pi 4B (4G), though I have another running on a 3B+ without issues.  Now the best option is probably the Pi Zero 2 W for only $15, though there are some compromises with that vs the full size Pi3B and Pi4's.
  • I also use these leveling blocks to keep the x-axis gantry in proper trim (which I rarely need to mess with thanks to the anti-backlast nuts).


0 Comments

Just Some Pics of the Y-Axis Belt Tensioner and Gear on a CR10S Pro V1

11/12/2021

0 Comments

 
I saw a thread on Reddit regading a worn Y-Axis belt on a CR10S Pro V2, and thought I would check mine.  Fortunately it looks OK, however I can see a potential problem with the alignment of the pulley (or maybe its fine since it's not worn).  It looks however as though the tensioner should be a few mm lower.  The simple fix would be to just raise or lower the gear, but since mine is working nicely and shows no sign of wear, I'm not touching it unless that changes.  It may be that when there is wear, it is due to the gear being set just a mm too low, causing the belt to be dragging down on the idler which is a couple of stacked flange bearings.  

After thinking about this, I think the way mine is set up is correct (and of course I had nothing to do with that :D).  I think this because one edge of the belt is held in place by the lip of the flange bearing, which probably helps it to stay in position.  Also with the belt biased to the lower bearing on the idler, it may keep it from wandering or distorting as much (vs being centered on the idler between the flange bearings).  Likely the belt is just lightly riding on the lower flange bearing, but if there was more pressure there, it would probably be worn.
Picture
Picture
0 Comments
    Picture

    Stoopid Me

    Welcome to my Stoopid corner of teh Internet.  It's mostly gonna be 3D printing stuff, but I also post some recipes, projects, and the occasional rant here as well.  More Stoopid stuff is updated regularly.

    I recently joined the Amazon Associate program, so some of the links on this site are Amazon affiliate links. This means that, at zero cost to you, I will earn an affiliate commission if you click through the link and finalize a purchase.  This will help to support this site, and pay for more Stoopid Stuff.

    Archives

    March 2023
    February 2023
    January 2023
    November 2022
    October 2022
    September 2022
    August 2022
    July 2022
    April 2022
    February 2022
    January 2022
    December 2021
    November 2021
    October 2021
    September 2021
    August 2021
    July 2021
    June 2021
    May 2021
    April 2021
    March 2021
    February 2021
    January 2021
    December 2020
    November 2020
    October 2020
    September 2020
    August 2020
    July 2020
    June 2020
    May 2020
    April 2020
    March 2020
    February 2020
    January 2020
    December 2019
    November 2019
    October 2019
    September 2019
    August 2019
    July 2019
    June 2019
    May 2019
    April 2019
    March 2019
    February 2019
    January 2019
    December 2018
    November 2018
    October 2018
    September 2018
    August 2018
    July 2018
    June 2018
    May 2018
    April 2018
    March 2018
    February 2018
    November 2017
    September 2017
    August 2017
    June 2017
    December 2016
    October 2016
    September 2016
    July 2016
    March 2016
    February 2016
    September 2015
    August 2015
    June 2015
    May 2015
    April 2015
    March 2015
    February 2015
    January 2015
    December 2014
    November 2014
    October 2014
    September 2014
    July 2014
    June 2014
    May 2014
    April 2014
    March 2014
    February 2014
    November 2013
    August 2013
    July 2013
    June 2013
    May 2013
    April 2013
    March 2013
    January 2013
    December 2012
    November 2012
    October 2012
    September 2012
    August 2012

    Categories

    All

    RSS Feed

      Contact Form (Name is optional)

    Submit
Powered by Create your own unique website with customizable templates.