(Pic updated 9/27/2018)
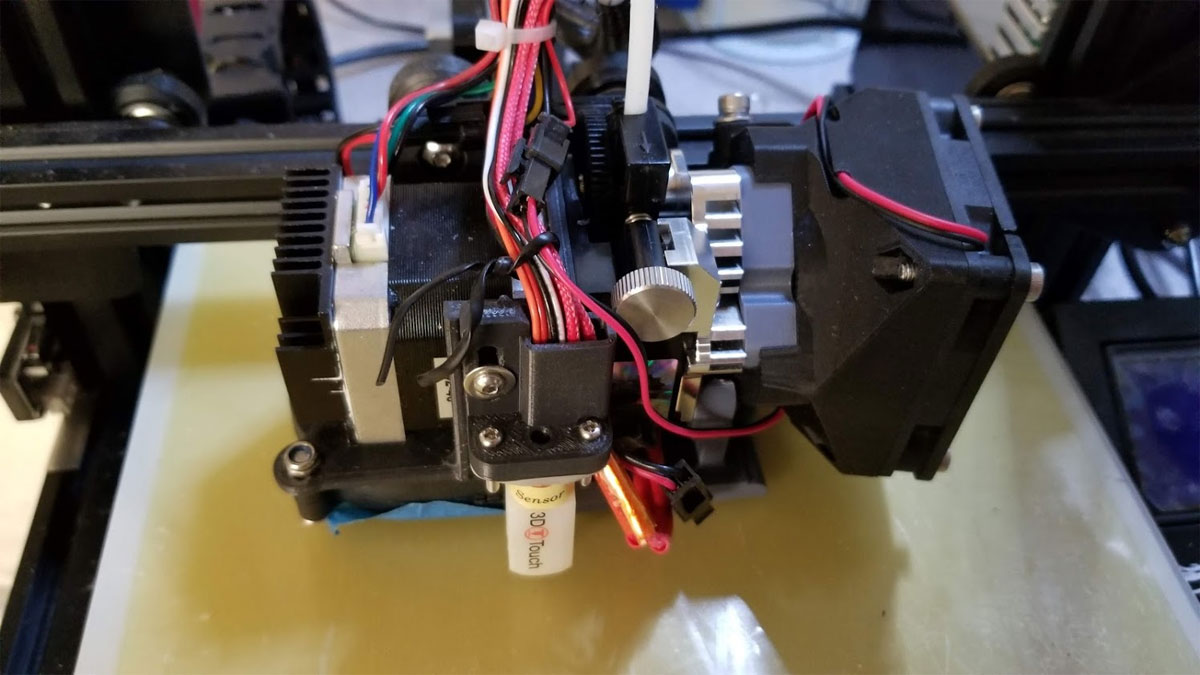
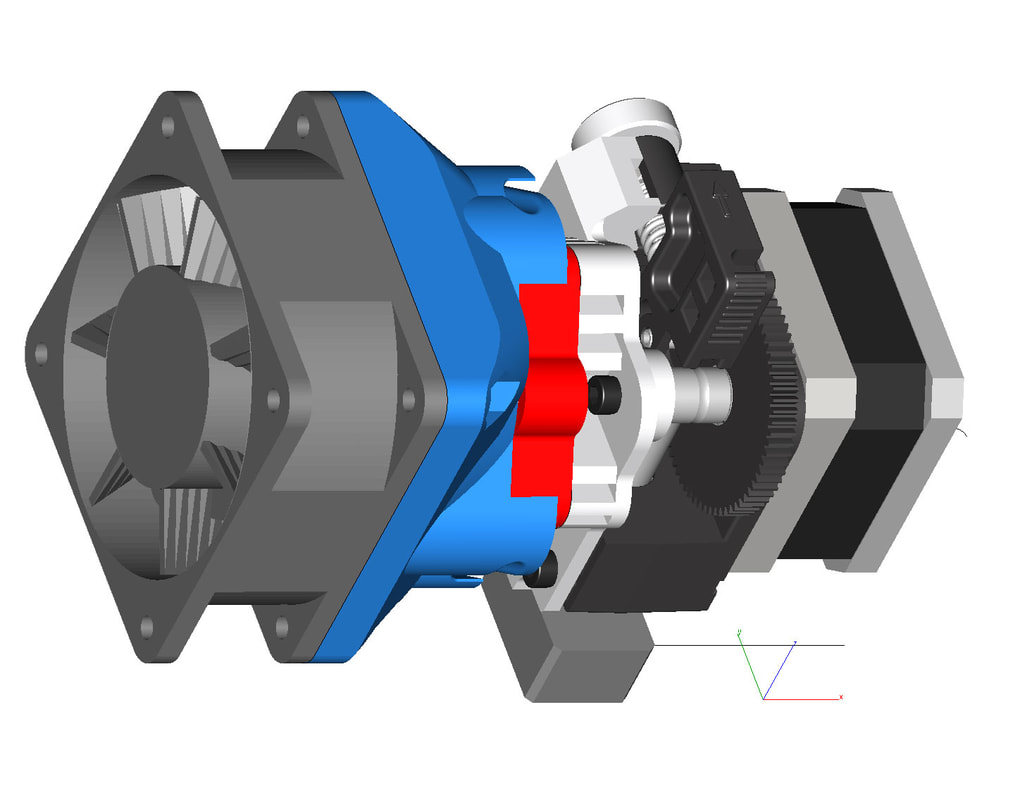
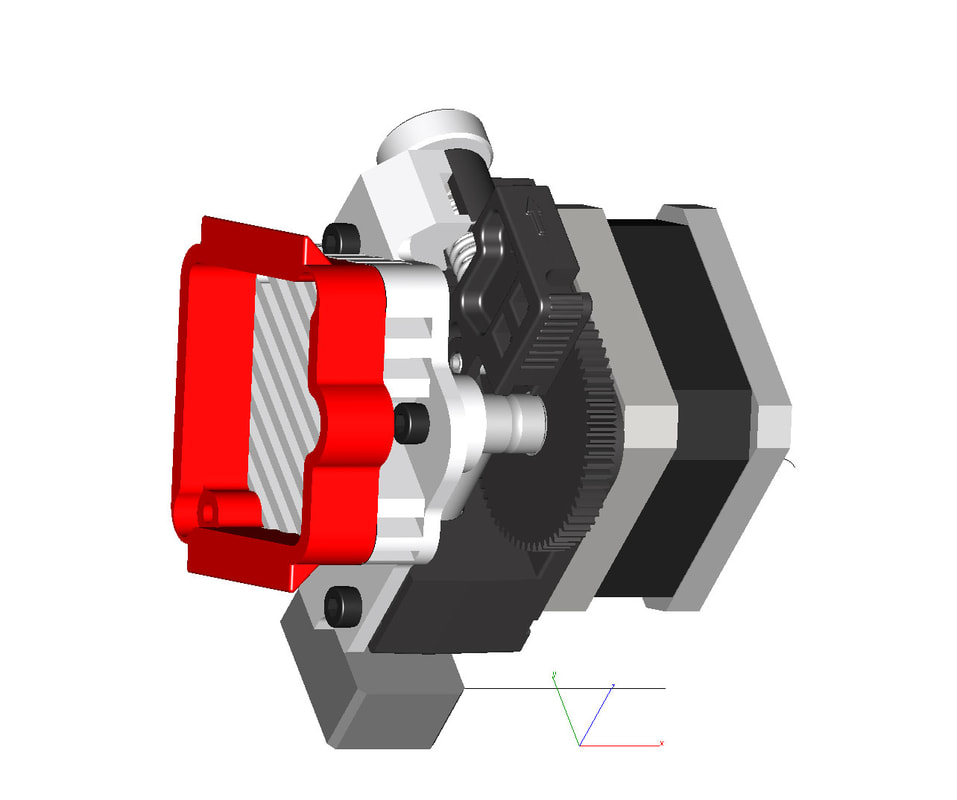
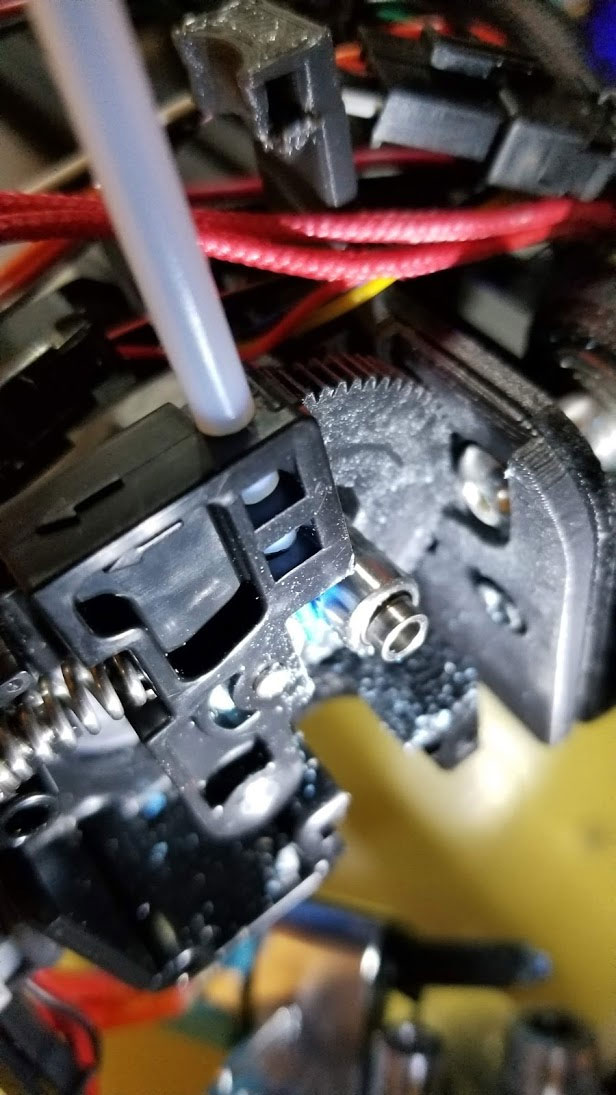
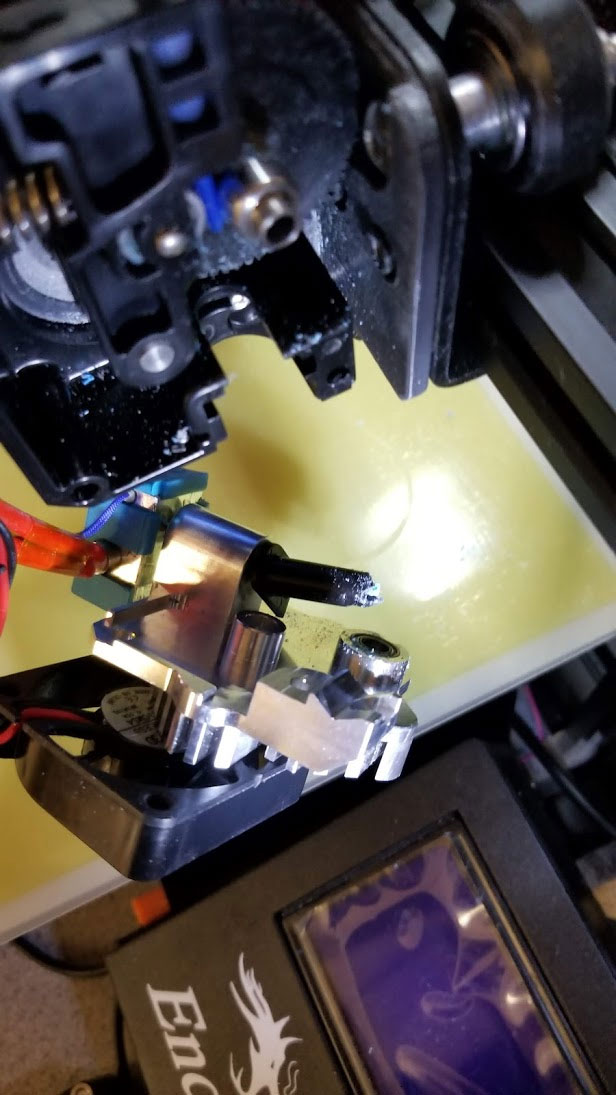
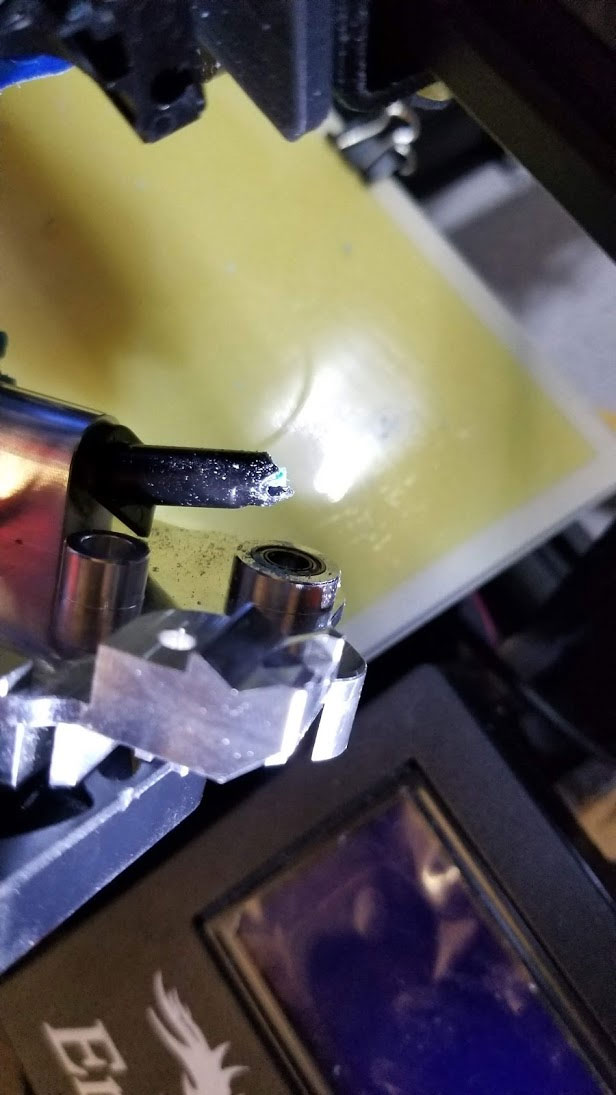
It's starting to look like I mounted a VW Mini Bus to the X axis carriage of the Ender 3. The additional cooling should help though, and I will deal with optimizing for weight when I have this damn thing working. The gray part that is mounted to the Titan Aero is designed to stay on there, which will avoid stripping the fan mounting holes in the heatsink when I need to disassemble it to clear the frequent jams. The black 40mm to 60mm fan adapter slides off the gray mount, using a couple angled rails and tilts towards the camera by 10 degrees to help clear the bolts at the end of the X axis carriage. There is a M4x14mm screw that can be used to lock it in place, and that uses an M4 insert so it will not strip out. One screw and I can slide the fan off now. Overall I am happy with this, but will probably trim it down a bit.
(Pic updated 9/27/2018)
1 Comment
Unfortunately, E3D designed the Aero in a way that requires removal of the fan to disassemble it. They also chose to use self tapping screws to mount the 40mm fan, rather than properly tapping a hole for some machine screws. That is fine if there are no problems, but my Titan Aero has been having filament jamming problems frequently, and they often require disassembly to get the broken filament out. So I was looking for a way to make it quicker to disassemble, and also save the integrity of the holes that are used for mounting the fan. Additionally I wanted to upgrade my fan since I feel that the 40mm fan and the chunky heatsink are not sufficient to keep the block of aluminum from heating too much in the already warm environment of my garage.
This is my solution (currently). The mount will accept a 60mm fan which can easily be removed by sliding it off the bracket that attaches to the Aero heatsink in place of the 40mm fan. There is a catch on the mount that is intended to be placed, so the 60mm fan will not slide off due to gravity (it could go on wrong, but should be obvious which way is correct). When the 60mm fan with it's mount are removed, the bracket will allow me to access the screw that was placed under the 40mm fan, and will not require removal of the self tapping screws that mount the bracket. It's printing now, and I already see some areas for improvement, but hopefully it will help. Note - the models of the 60mm fan and Titan Aero are not mine, they are from the following sources: E3D Titan Aero + V6 + Volcano + EZABL Mount V2 | CR-10 | CR-10S by MP23Racing https://www.thingiverse.com/thing:2721575 OpenSCAD 60mm x 25mm fan model by MiseryBot https://www.thingiverse.com/thing:8063 The Titan Aero is still derp'ing in the worst possible way. I had a 7 hour print which was a bust of Lincoln, which was nearly perfect for the first 2/3'rds of the print, and then nothing. I was able to clear the clog by just running some cleaning filament though, which suggests it was not really a solid clog or filament related. The temp I am running on the hot end is more than sufficient to have a good flow of filament (218 degrees C). I have read that some folks have noted that they have to run a higher temp with the Titan, which I suspect has less to do with the heatsink doing a great job at cooling, and more with it having a higher capacity of holding heat than a smaller more efficient design like the V6 heatsink. The Aero is a decent size chunk of aluminum and only a small area of it appears dedicated to radiating heat away. I googl'ed "40 watt heat sink" and found several results which show examples that appear to have a great deal more surface area dedicated to cooling, below is an example: https://www.cree.com/led-components/products/led-accessories-heat-sinks/40w However not all those watts are going into the heatsink, but even so, this is what a 30W heat sink looks like: https://www.cree.com/led-components/products/led-accessories-heat-sinks/30w So just comparing the Aero to purpose-built heatsinks, I'm starting to think that the Titan Aero heatsink may not be very efficient, and in a hot environment probably less so. My printer is located in an un-cooled garage and temps get hot in there. So I think there are three things that come to mind with the way this is failing. 1. Retraction. Where the problem began was at the point where the extruder would probably be performing more retractions as it worked up the beard and head of the model, and that suggests that it was possibly too aggressive on the retraction. However, I am only using 1mm retraction currently, and the rest of the model was perfect so that suggests that retraction was probably OK. The filament was hanging lose on the spool so it was not caught up there. Likely the retraction setting is fine. 2. Heat. The problem began hours into the print and probably as the mid-day temps in the garage were ramping up. Everything in the extruder, stepper and the heatsink will get hotter and expand. When that happens it makes sense that things would get tighter and that could lead to some binding. When everything cools off, it works fine. Since the heatsink is also a mechanical part of the design that holds the bearings, there could be some binding in the extruder related to heat expansion. Although there is a fair amount of slop in the design, two areas that seem to be less tolerant of misalignment are large gear shaft which needs to be aligned between bearings in the plastic base and the aluminum heatsink, and the alignment of the large gear shaft and the stepper's shaft. To get an idea of what the expansion could be (ballpark), I used the calculator linked below, to see what the temp difference of 32-49 degrees C would mean for a 10mm length of Alumunim. The linear expansion would only be 0.00374mm. Even at 3x that amount, I cannot measure it with my calipers, so it probably is not going to be a factor. https://www.amesweb.info/StructuralAnalysisBeams/Linear-Thermal-Expansion.aspx If the heat sink is not cooling effectively though, the problem could be heat creep, that seems likely. 3. Bearings. I had read in one forum that E3D had some problem with bearings which they had changed the lubricant out on due to a corrosive effect it was having on their poly-carbonate covers for the Titan extruders. The replacement lubrication however was not up to the task (https://e3d-online.com/blog/2018/01/22/bearinggate/). A redditor(https://www.reddit.com/r/3Dprinting/comments/7ho3kx/titan_aero_extruder_grinding_filament/), suggested that since the supplied bearings are crap anyway, just swap them with ceramic bearings like these: 4 Pack - SMR95C-YZZ (5 x 9 x 3 mm) Ceramic Ball Bearing Given the above possibilities, I think that retraction is not a problem since I am running only 1mm currently. The heat (creep) and bearings seem to be the most likely cause of the problems. I can't really make the Titan Aero a better heat sink, so I can only add more airflow. So the plan right now has several parts
Update 9/26/2018: Everything above except for #4 is done now and I am gonna test it tomorrow. Getting the bearings out was interesting though - I found a post on Reddit where "CHenderson2010" suggested using water and freezing it with some canned air (just read his post). I didn't think it would work, but it did, and that was after bending the tip of a long nose pliers trying to pop the bearing out, so thank you Interwebs! (I Updated this part below on 9/26/2018 to remove some incorrect info and clarify some other info) An additional problem I have noted with my Titan Aero is that the filament path has several points where there is resistance when installing a new filament. This resistance is probably not the cause of any jamming, but I would like to reduce it anyway. The first point of resistance is where the filament must thread into the guide. I may print the part below to see if that helps: https://www.thingiverse.com/thing:2600963 Update - I printed the top piece of the above part and it does help align the filament, but I did not use the tube part since the stock tube worked after adding a chamfer - see below. The next point where I could feel resistance, is where the filament feeds into the PTFE tube that goes into the heatsink. I added a chamfer to the inside edge of the PTFE tube to help with that, and the filament no longer catches. The last point where there could be some resistance, and it is harder to tell with this one, is at the ramp for the filament to feed into the heat break tube. This is the hardest to fix and seems to be the least of the problems however so I am not going to worry about it. So the plan to help smooth the filament path is:
I will update if any of this helps (after I re-test). Update 10/19/2018: After the mods, I have no longer been having problems with the Titan Aero jamming. I think the two mods that did the most to fix the problems were the filament guide (which I only used the top part): https://www.thingiverse.com/thing:2600963 And the new bearings: 4 Pack - SMR95C-YZZ (5 x 9 x 3 mm) Ceramic Ball Bearing The fan and stepper heatsinks did help in my case, but generally if the stepper is not getting hot, and the printer is in a climate controlled area, those may not be necessary. Now that the Titan Aero is working, it has been reliable and I can finally call it an "upgrade". Something about the smell of Ikea's chipboard furniture reminds me of Christmas. It must be that it is almost identical to the smell of old cardboard boxes, full of dusty Christmas stuff that have been sitting up in the attic all year. That or I just had a mini stroke... Ikea does make some decent furniture (decent, not great), and when I saw the ALEX drawer units, I thought they would be a good base to build a cabinet and shelf organizer. So this is what I came up with: This was all done with just one saw cut (for the slide out shelf) and a drill. I designed some 3D printed brackets to hold the shelves, and some other parts for it, and it seems to be working really well. I've been able to consolidate much of my small parts and odds and ends into the storage boxes or the drawers which has really helped get the workspace under control. Due to the design of the brackets, I can even take it down if I need to move it, just undo some bolts, and the shelves will slip out.
Aside from the brackets, these are the parts used: Two ALEX drawer units: https://www.ikea.com/us/en/catalog/products/10192824/ and several of these KOMPLEMENT shelves (mine measure 28" x 22 1/2" but online they show them as 29 1/2" x 22 7/8"): https://www.ikea.com/us/en/catalog/products/40277968/ I used these handles which have some space to put a paper label card in: WEICHUAN 16PCS Zinc Alloy 3-1/4 Inch X 1-5/8 Inch Antique Bronze Card Holder Drawer Pull/Label Holders/Label Frames - Vintage Drawer Box Case Cabinet Cupboard Carpenter Repair Decoration Hardware I don't have the link for the drawer sliders but I got them at Lowes and they measure 22 1/2 inches when closed. And these are the storage bins I used: Stack-On DCY-10 Deep Cup Parts Storage Organizer Stanley 25 Compartment box (Mfr #: 014725R) Stanley 10Compartments box (Mfr #: 014710R) Parts used from Thingiverse: Shelf brackets and feet: https://www.thingiverse.com/thing:3099565 Stanley organizer bin dividers and lidded bins: Dividers: https://www.thingiverse.com/thing:3091544 Medium lidded bin: https://www.thingiverse.com/thing:3094761 Large lidded bin with dividers: https://www.thingiverse.com/thing:3097911 "Christine" as I have started to call my Ender 3 (which is really more like an Ender 8 by now), is still giving me headaches. The latest attempt to get decent prints was adding a Titan Aero from E3D, which is what this post is about more than the Ender 3. After the problems I had matching slightly different Chinese clone parts to kludge together a clone Titan Aero, I just sprang for the real deal. The Titan and Titan Aero is another of those things that gets a good rep from most folks, and when it works I can see it's merits. The genuine Titan Aero is a heck of a lot better than the clone kludge I was using (though I am not sure how much better it is than a Titan Aero clone that was sold as one unit). Certainly the materials in the genuine are much better than the clones and the tolerances are quite a bit better as well.
After using the genuine Titan Aero though, I have to wonder what all the love is about. I had used the clone and understood the design quirks, but had wondered if they were possibly less of a problem on the real deal. Just because I am pointing out some of the problems does not mean I have put any thought into how to fix them, but that may be next (but really fixing this damn printer is starting to be a part time job). So what am I talking about, and why the hate for the beloved E3D Titan Aero? For starters, the proper assembly requires tweaking of the screws that hold the assembly together. The manual states "If the gear is hard to move, loosen off the corresponding M3 screw in the Aero sink until it moves freely." In reality it is all the screws that need to be loosened. The problem is that the heat sink is pressing too hard against the Acetal gear and binding it up (and this assumes a properly set up extruder gear). IMHO, that's really a crap way to design something, since the assembly that holds the whole mess from falling apart should be able to handle a proper tightening of screws. However in practice, even a quarter turn to snug the screws can seize up the whole works. I end up just having the screws make a mere suggestion at being snug, and then back that off by a half to quarter turn, otherwise things start to bind up (and it is not due to some misalignment, it just is the way it works). This however is not the worst fault of the Titan Aero, but I will get to that later. The fan is another sore point, which normally would be a one time deal, just put it on and forget it right? Well, due to the Titan Aero's "quirks", the way the fan blocks access to the screws that hold the heat sink on and thus the holds the whole thing together, the fan mounting becomes a bit more frustrating. To disassemble the Aero, the fan needs to have at least one screw (a sheet metal screw!?!), removed before disassembly. Why does that matter? Well since I installed the Titan Aero last week, I have had it apart no less than 20 times due to one thing or another (not all faults of the extruder). Some cases which required a tear down however, I can put firmly in E3D's corner. I am referring to how the filament path is inaccessible once the filament goes into the guide on the idler arm - there is no way to fix any problems aside from tearing the whole extruder apart and then removing the problem filament. It is also nigh impossible to visually check anything aside from possible grinding going on inside the filament path. Practically, this means, if the filament breaks between the top of the plastic filament guide and the top hole on the idler arm, and cant back it out with the gear, I have to take it apart to clear. If the tension is set a half turn too tight, and it grinds through the filament after printing nicely for 20 layers (which is what happened in the pics), I have to take it apart to clear. If the filament runs out, I may get lucky and can push the end down into the filament guide with the new filament, but that is sort of like pushing a noodle with another noodle, so possibly it's going to be another 15minutes to take it apart and clear the last 20 to 30mm of remaining filament. And each time I take it apart, that sheet metal screw holding the fan on is becoming a more questionable mounting solution (I have taken to leaving one screw off the fan). So why is the Titan Aero such a popular upgrade? It does direct drive which is still better than a Bowden setup, and those are not without problems that require occasional disassembly to clear a clog or a jam, but it is generally quite a bit simpler than a Titan. The Aero will also do flexible filaments, but I can't imagine they are easy to set up. When I first got the Aero installed, and after it clogged up the first time, I tried running some cleaning filament though and it somehow looped itself up as it was going into the hole in the heatsink (so again I had to take the whole thing apart to clear the jam). I will probably keep the Aero on there since I have spent a lot of money on it, and I need to try and make it work. Once tuned at least for PLA and ABS, I expect the problems may become less frequent, but things like cold "atomic" pulls take on a lot more risk of time lost if the filament breaks in the wrong place inside the Aero. Anyway, it's just a damn printer and I will win, or it will ender up in the parts bin. At least my Kossel is working like a champ now. The Raspberry Pi that I use as an Octoprint server gets moved around a lot, and I have another Pi 3B+ that I am looking to add, so I can have a spare while I work on getting both printers to 100% functionality. Anyways, I went looking for a case, and decided that what I really needed was a mount for the Pi that would allow me to remove it without screws. This is what I have come up with so far - it is a mash up of a Quick Release mount I made and this case. I like that case because it is a nice clean design, and most importantly it is a simple rectangular shape. I'm working the bugs out now, but my first print of the base part seems to work just fine. It uses a spring from a cheap pen and just slides and snaps together. The orange part is a button that releases the case from the mount and the case can go in either way. One or two screws is all that is needed to mount the whole mess to a 2020 extrusion.
Get it here: https://www.thingiverse.com/thing:3087817 |
Stoopid MeWelcome to my Stoopid corner of teh Internet. It's mostly gonna be 3D printing stuff, but I also post some recipes, projects, and the occasional rant here as well. More Stoopid stuff is updated regularly. Archives
December 2024
Categories |