My Stoopid Stuff
  • Home
  • Projects
  • Blog
  • Lec'tronics
  • Links
  • CNC
  • Quick Recipes
  • 3D Printer Tips
  • Voron 2.4

Gridfinity 4 Unit (6 Covered Divided Bins) Remix

1/27/2024

0 Comments

 
Working on STL's is a bit of a pain with my CAD program.  I have to first convert them to a solid which may or may not work, and usually takes a long time for the processing (over 10 minutes is not uncommon).  When an STL does convert, they end up with so many vertices that ViaCAD (v12 pro) will sometimes (often) choke on using the converted solid for anything useful.  That means I have to get creative in order to add or remove from a converted solid, which can mean rebuilding parts of the model or using other tools like spitting and copying.  That was the case with this remix, which should have been a quick change, but due to the combination of crashing, long waits to save (which I do frequently due to the crashes), and long waits for the program to process cuts and adds to the model, it took several hours to complete this.  In any case, I think it's done now, and I have it printing.  This is not really a dig on ViaCAD though, when it works, it works well, and for native models it is pretty stable.  It's just not great for working with converted STL models with lots of ugly vertices, or really complex designs with many edits in the history.

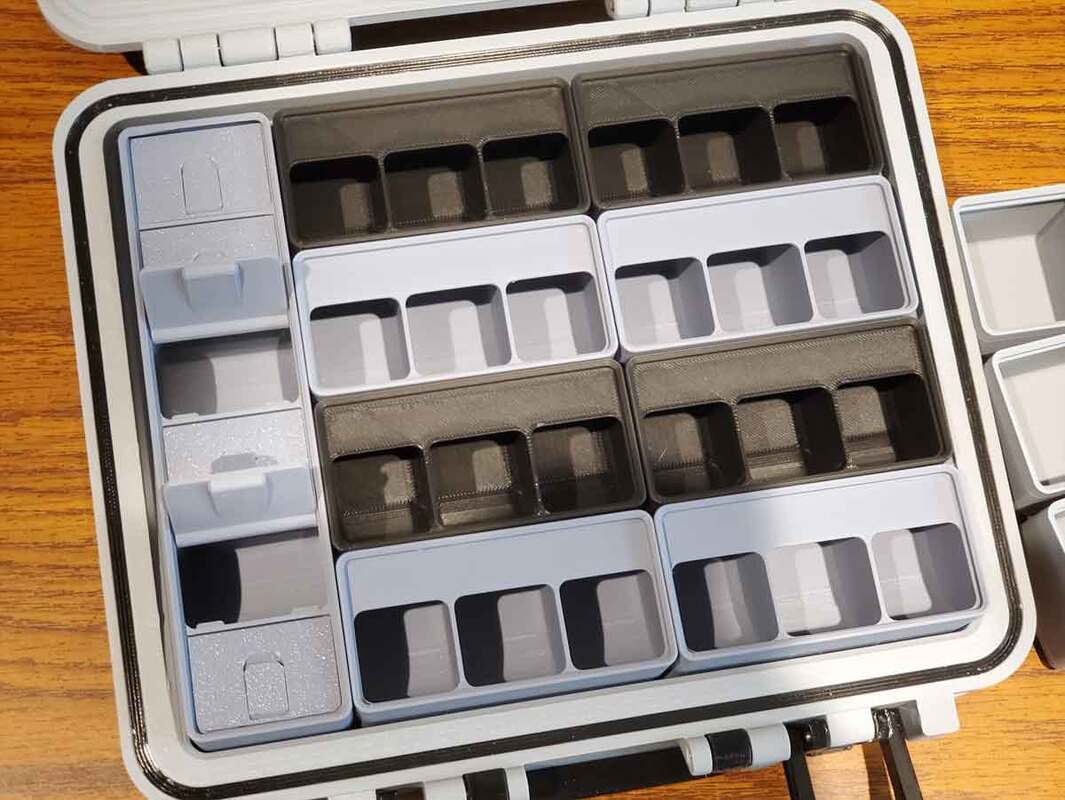
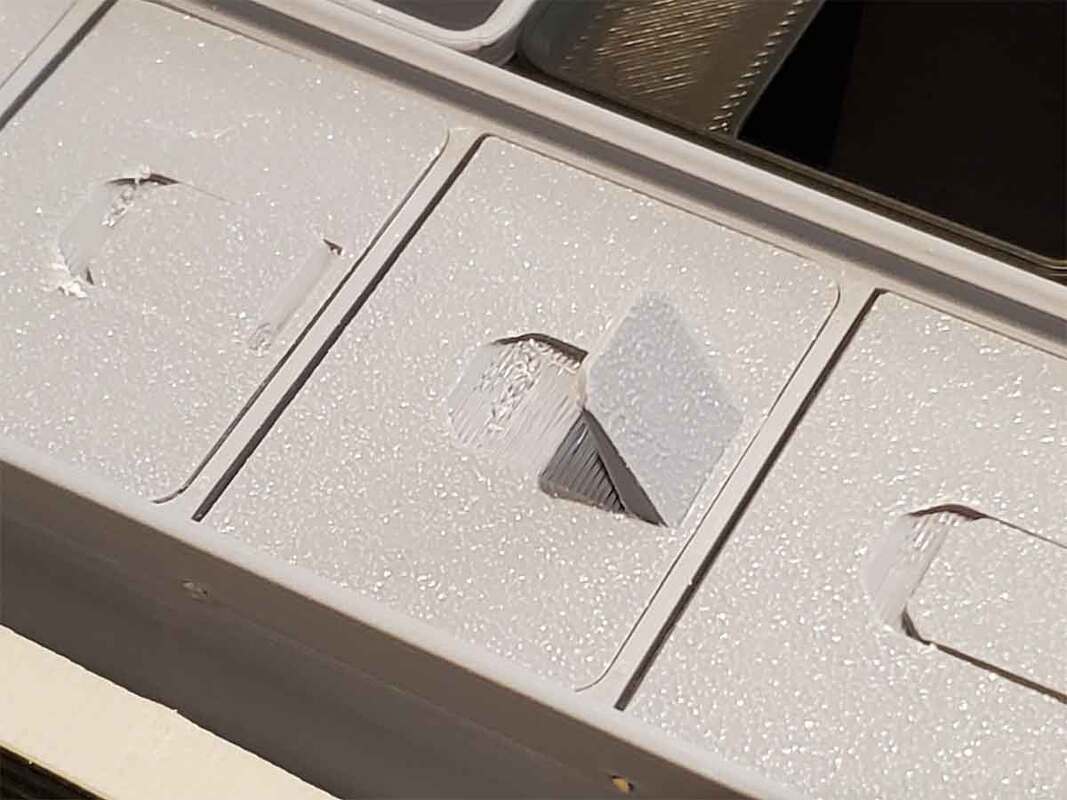
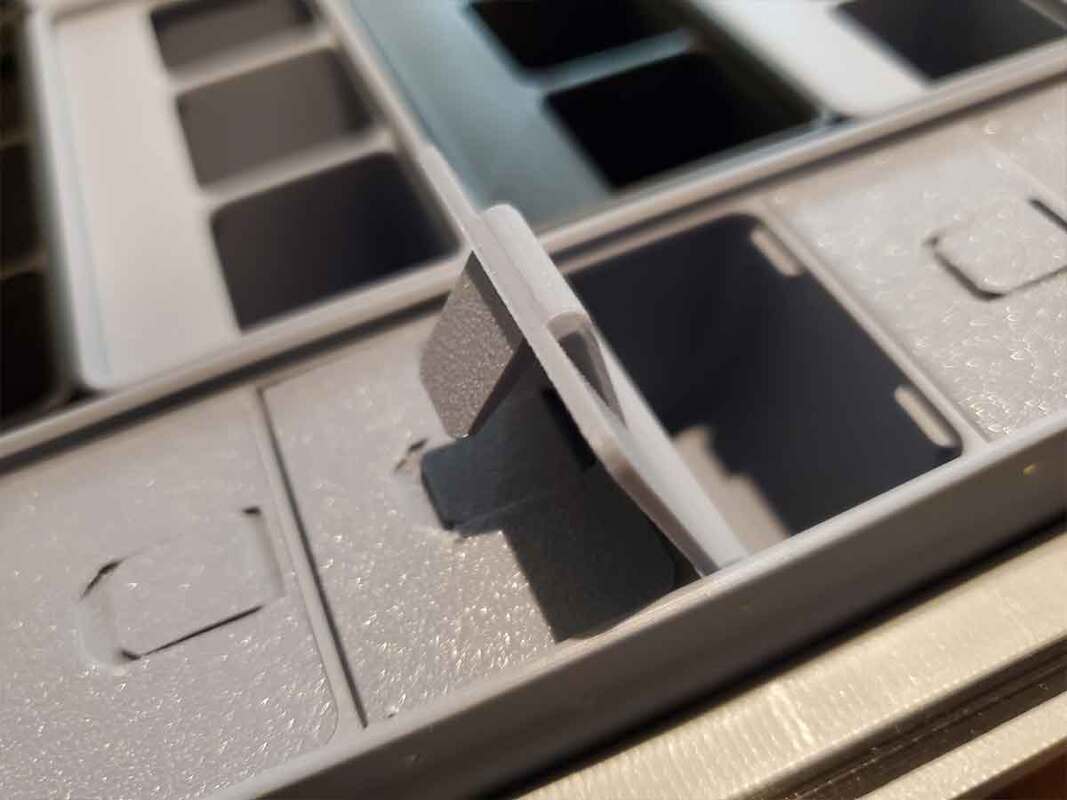
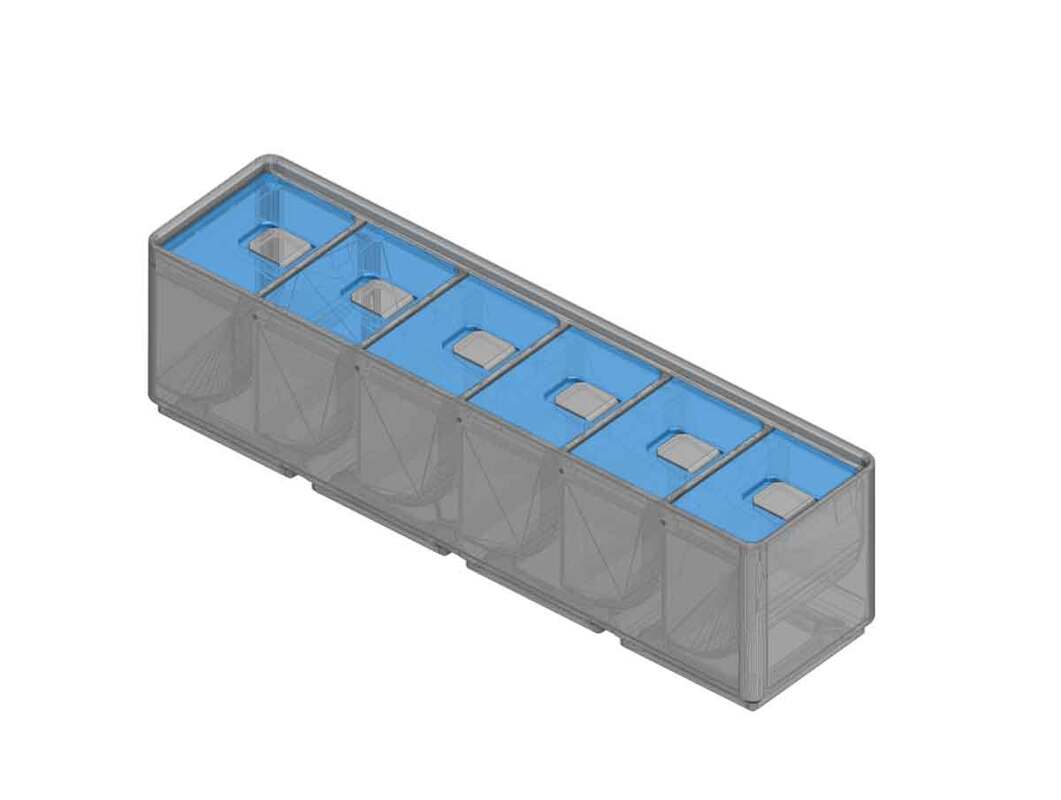
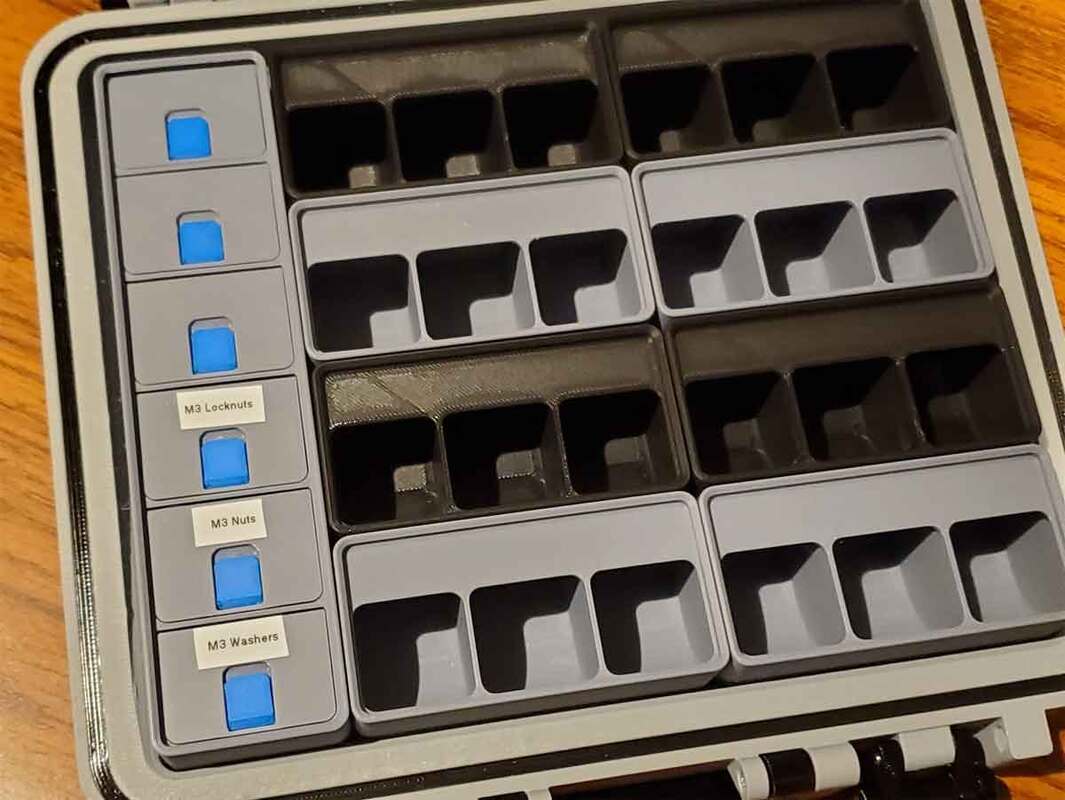
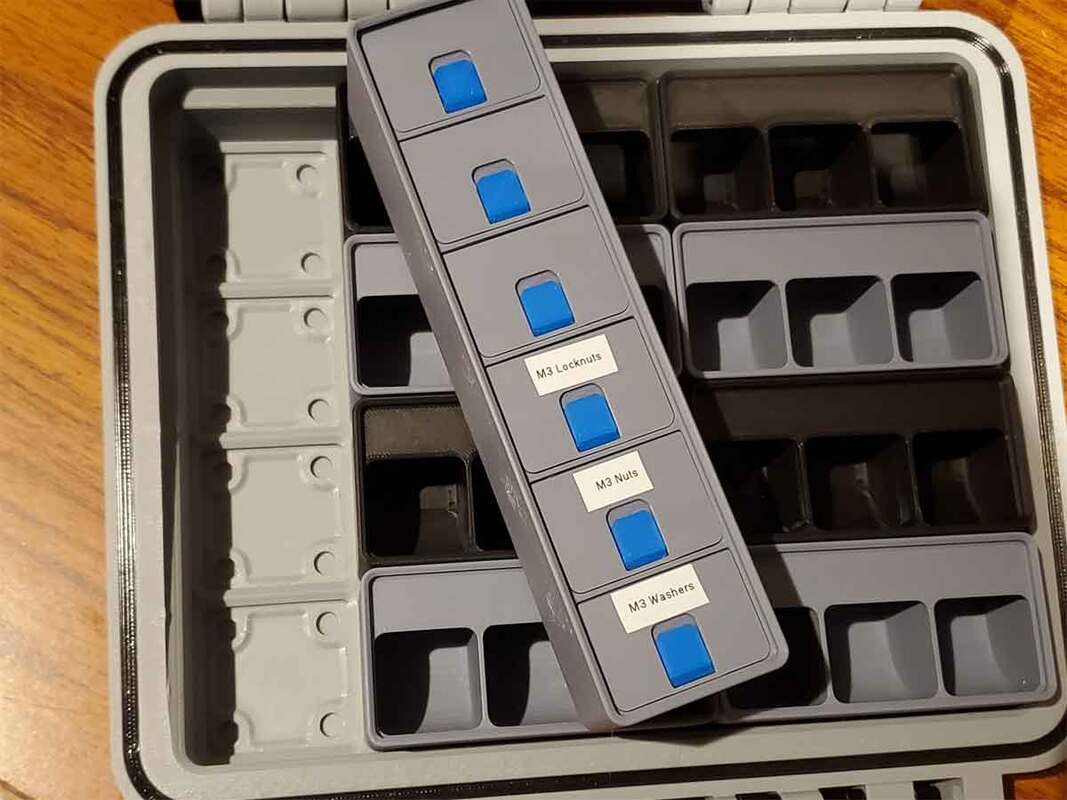
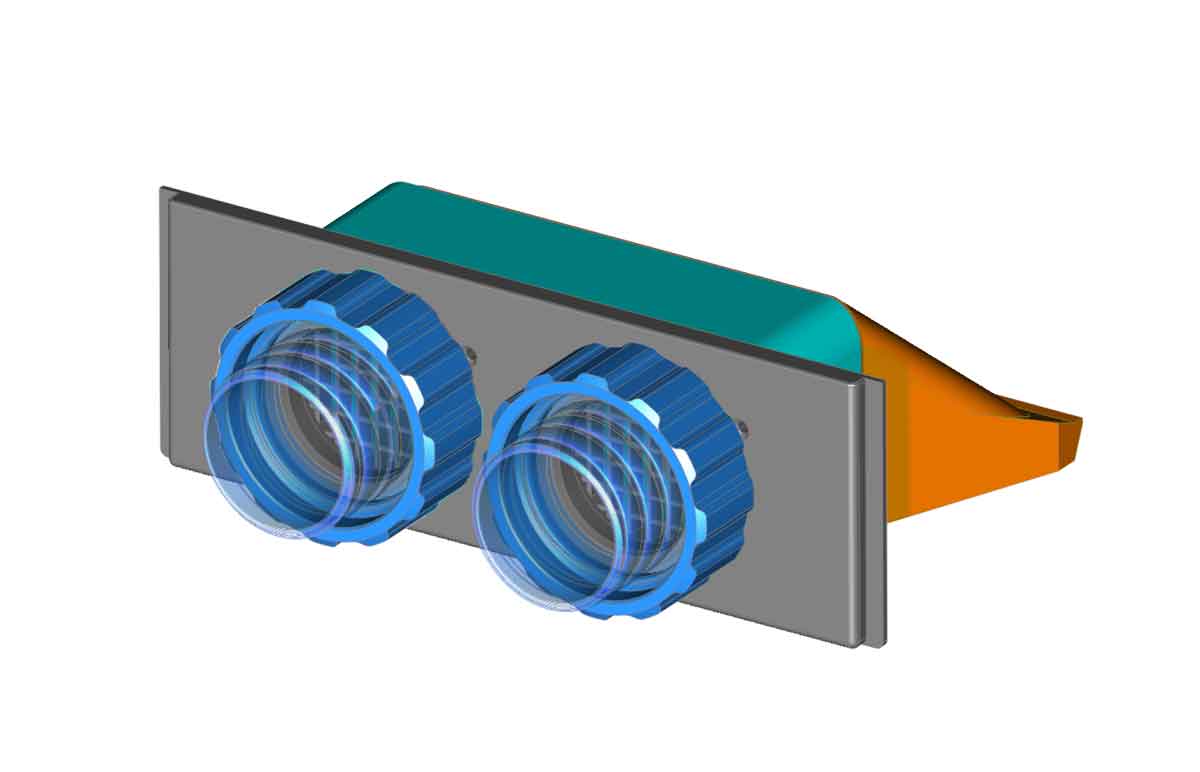
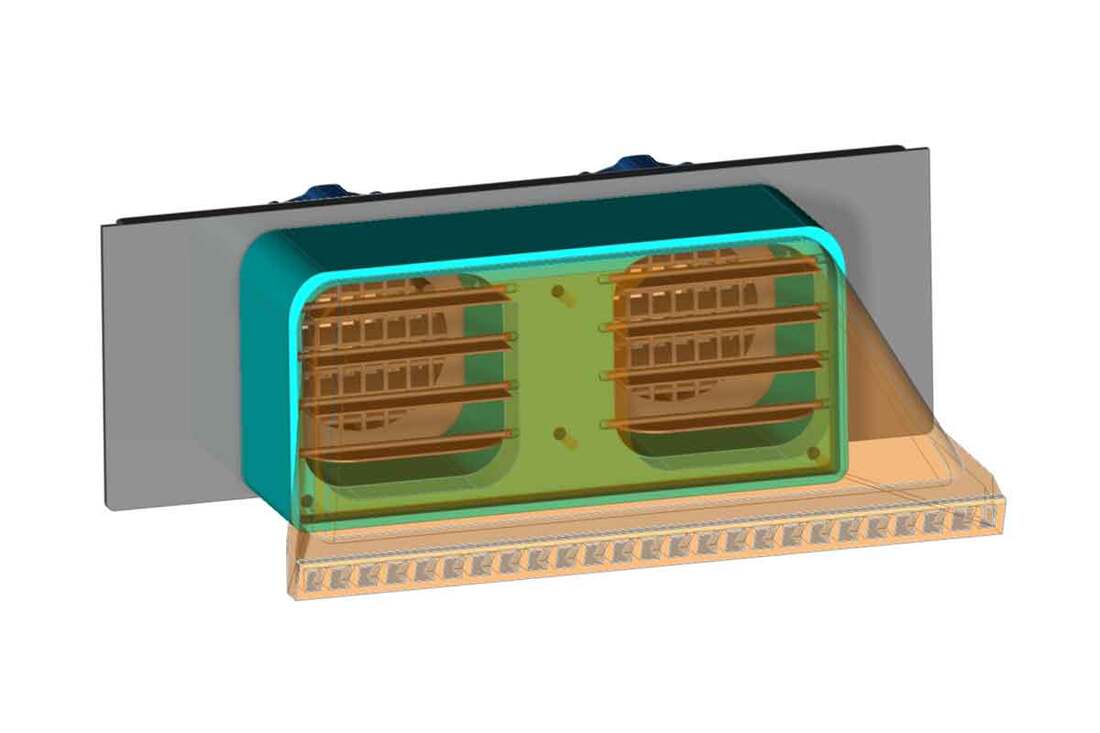
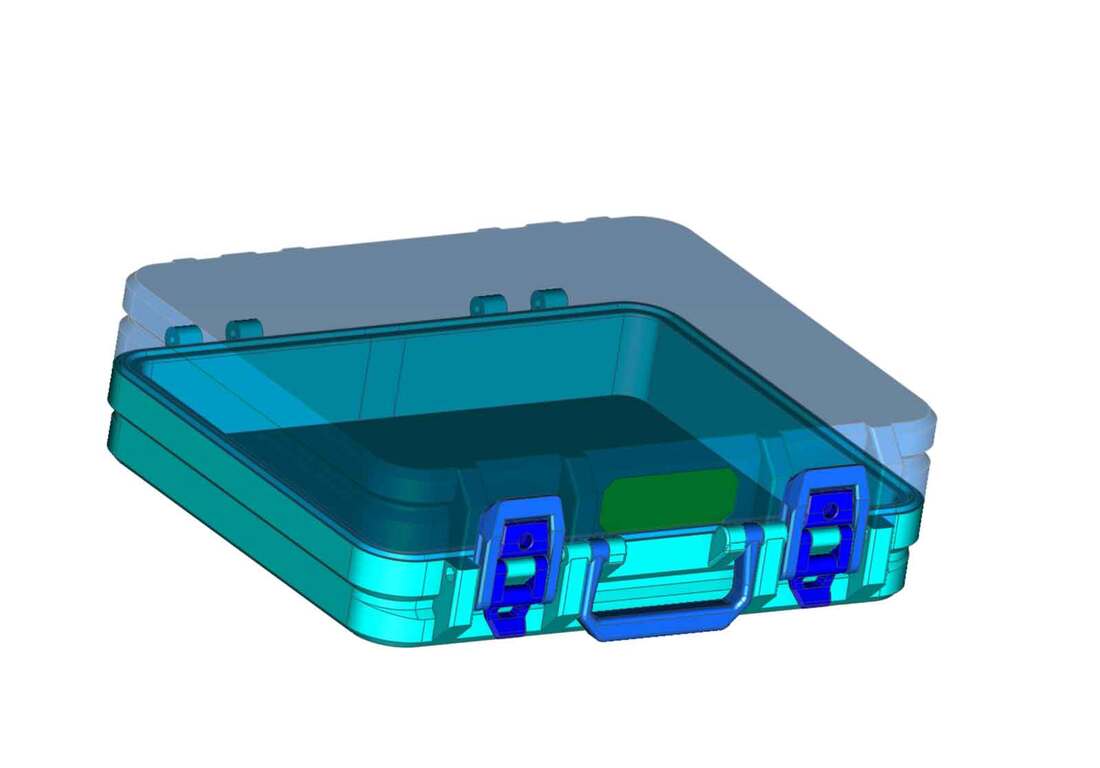
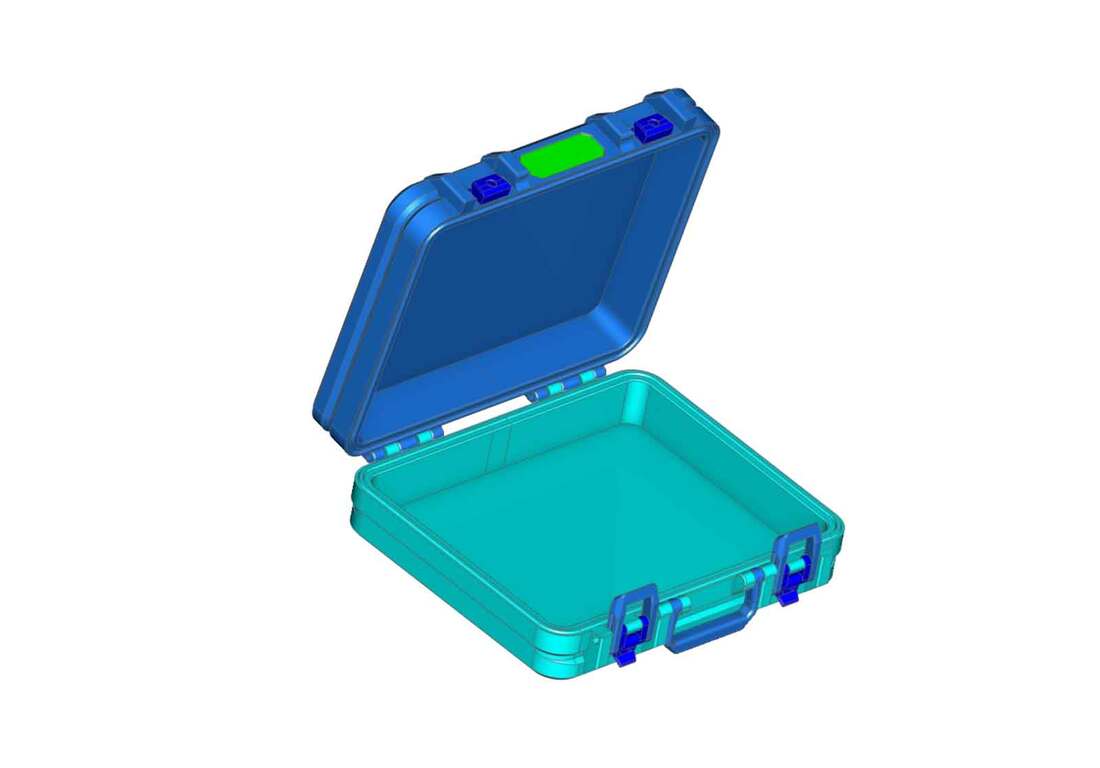
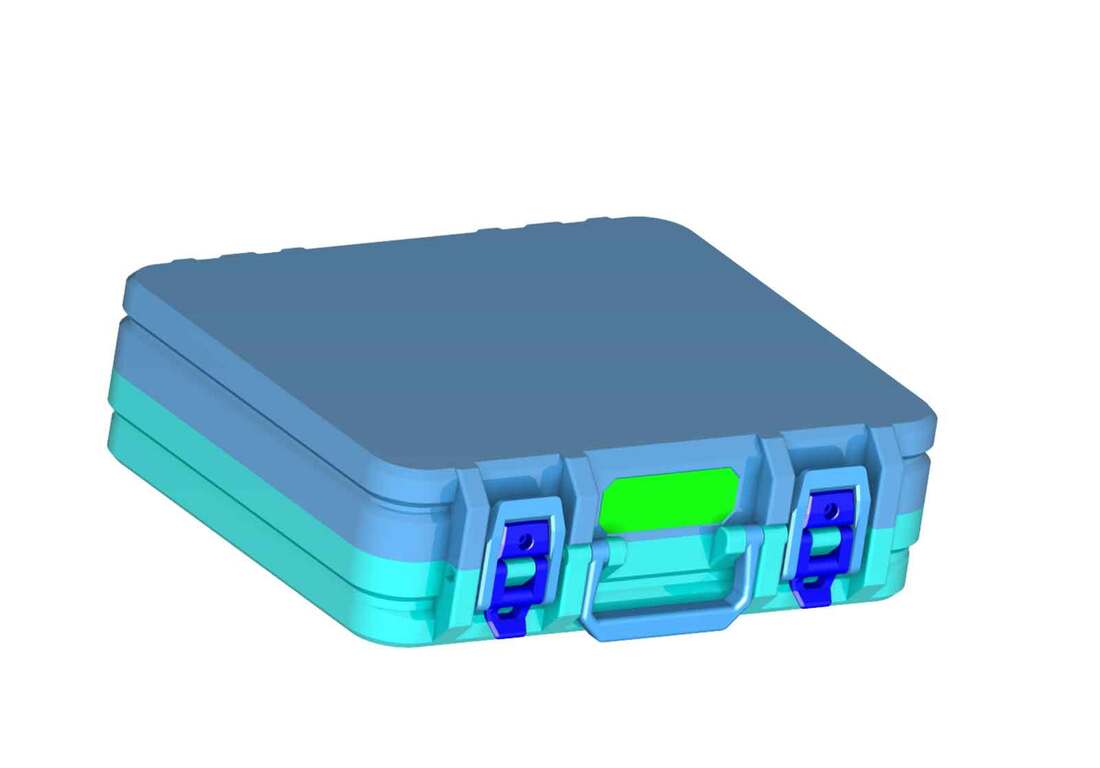
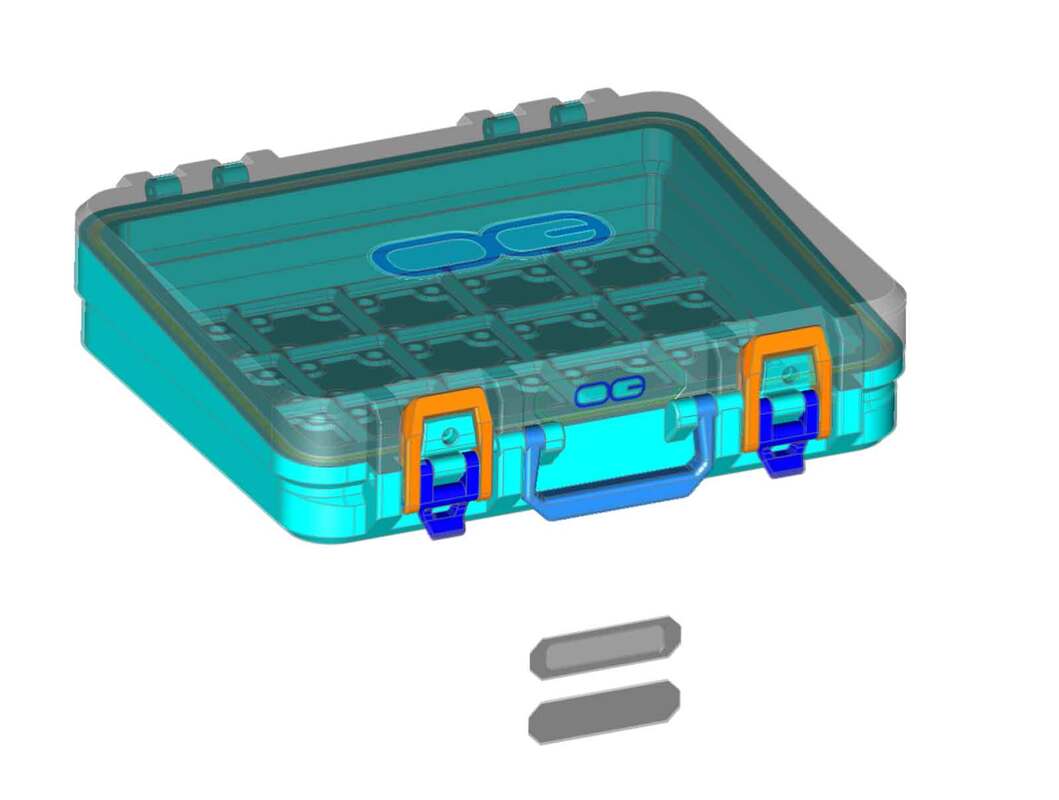
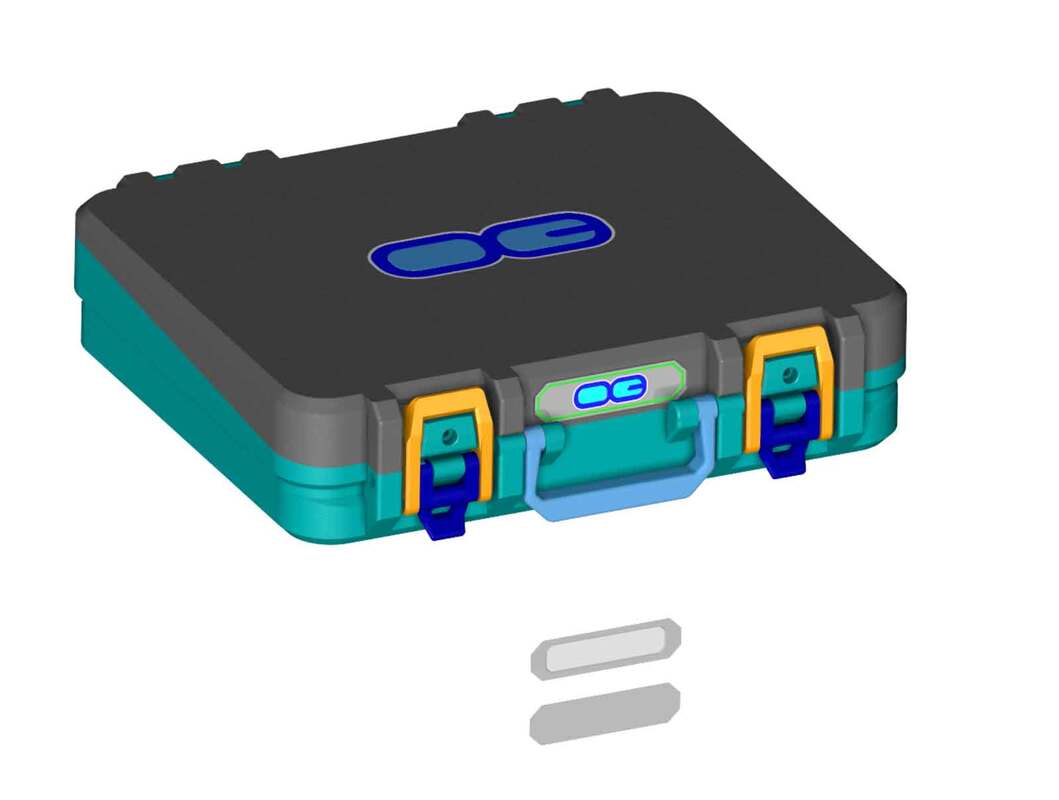
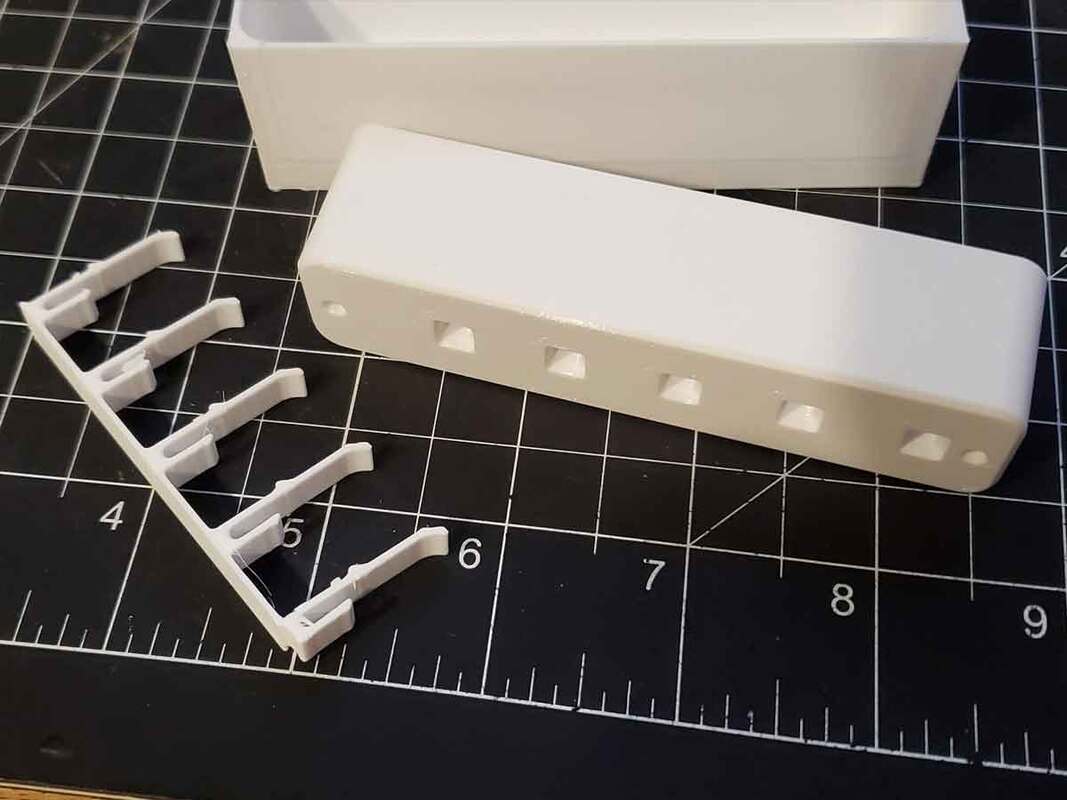
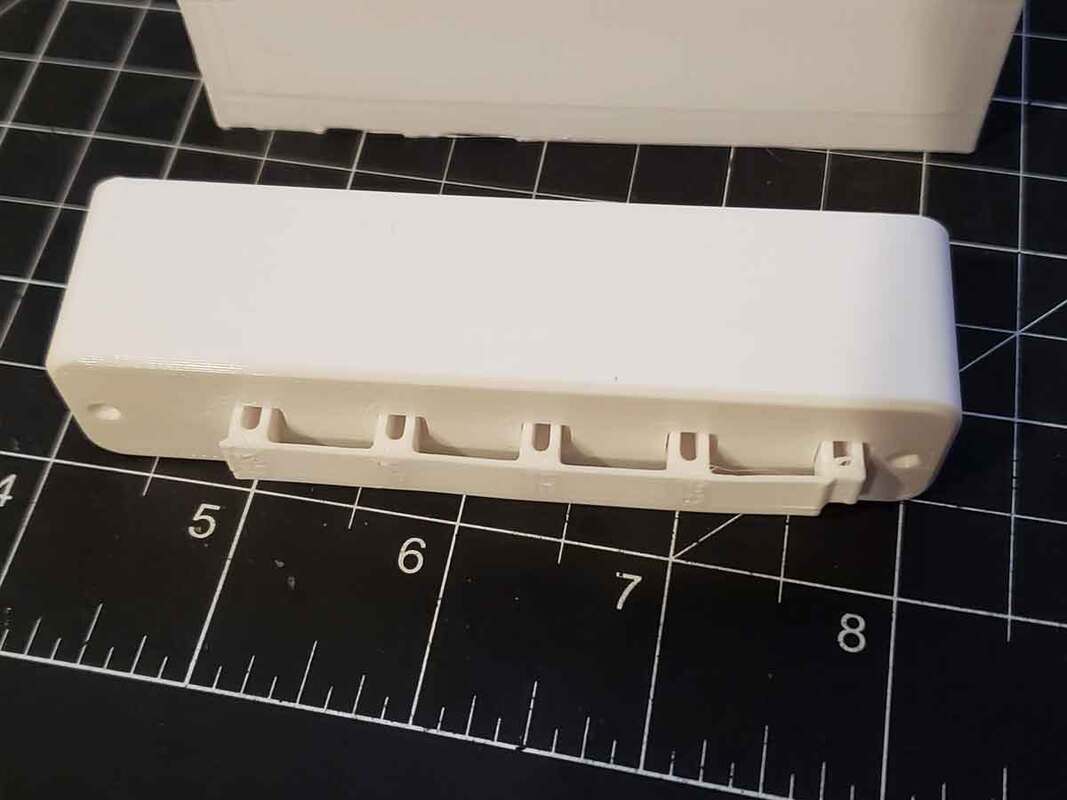
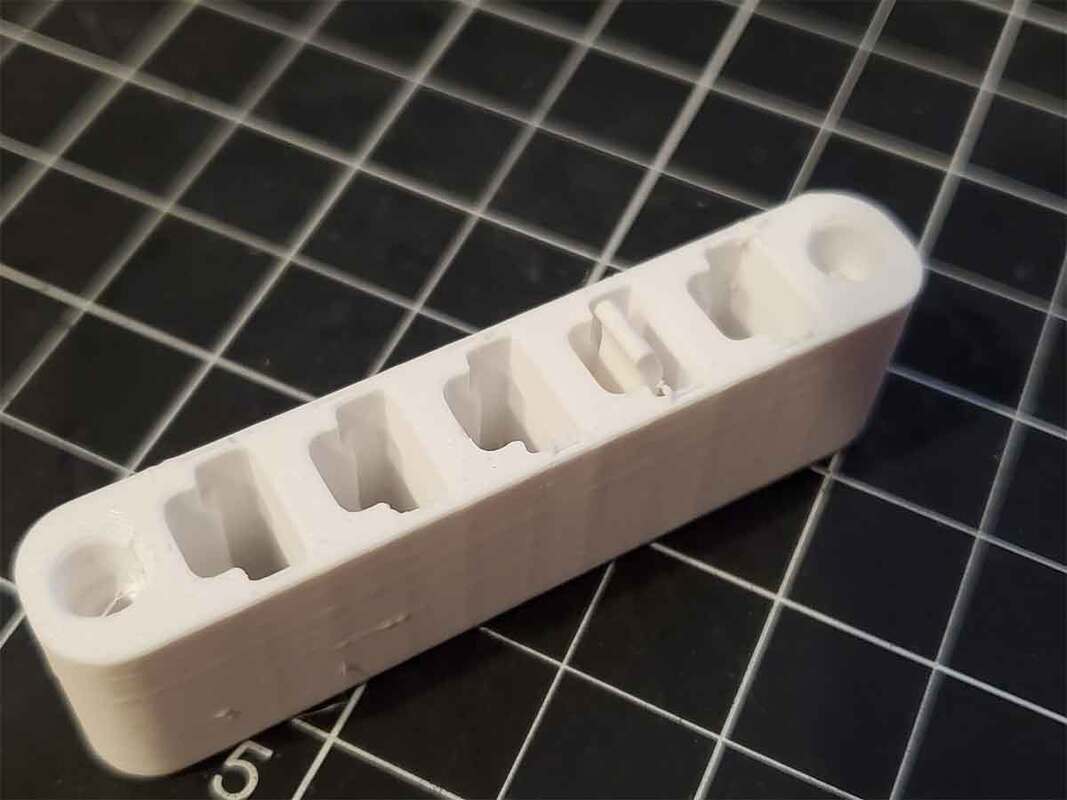
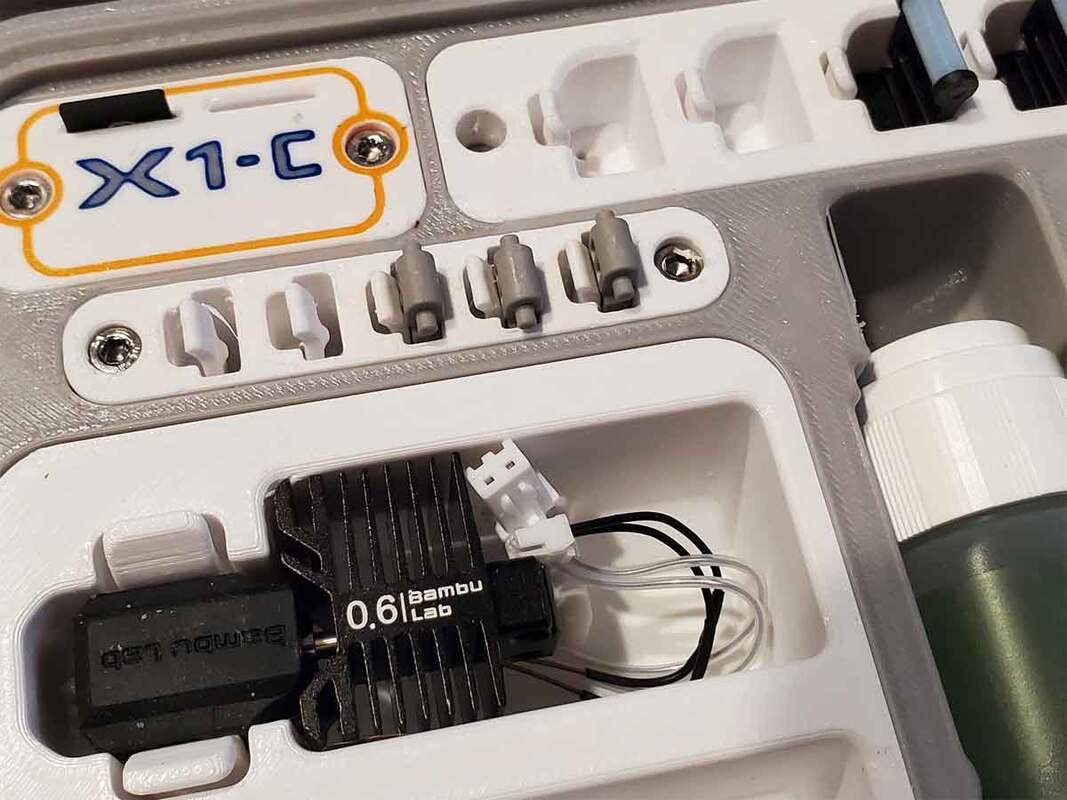
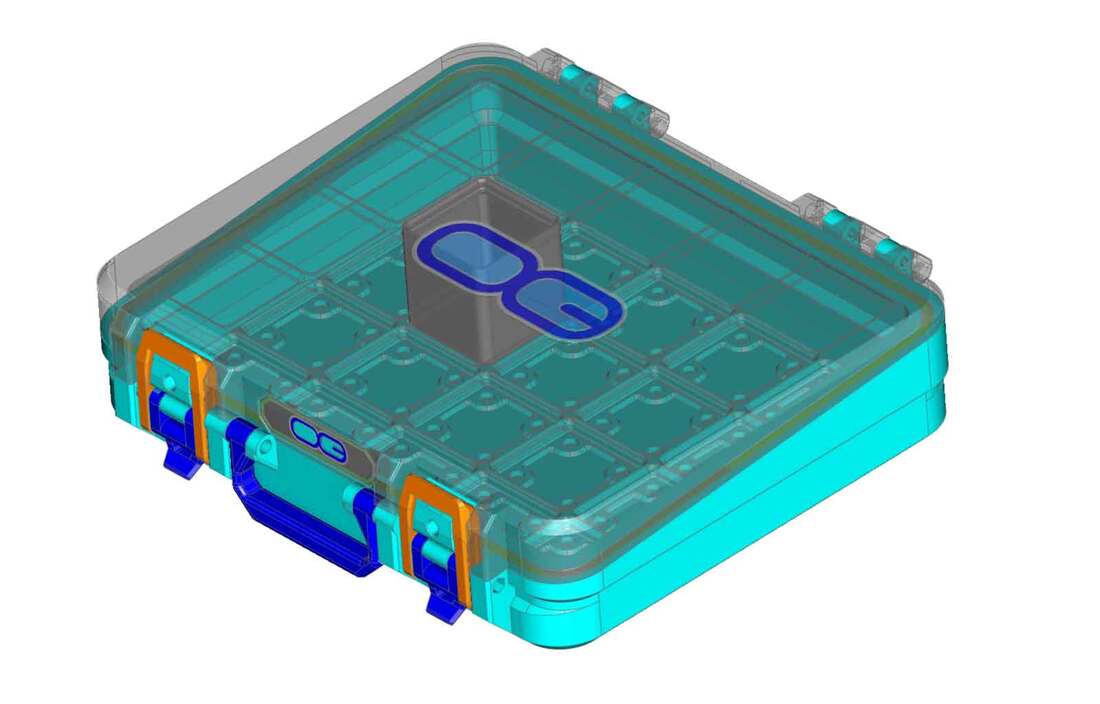
That started to go off the rails... So what "it" is, is a remix of a 6 bin Gridfinity bin, which is 4x1x6 units (4 bins long, divided into 6 bins, 6U high).  The reason for the remix is to use the bin with very small parts which could otherwise migrate between bins (such as washers), so I added some lids.  There are tabs on each lid, which act as a flip up pull to open each bin, since the tops need to be flush for the application (they will go in my Gridfinity Box For Stuff v2.0).  The bin was remixed from Ch3vr0n's (@Printables.com) Gridfinity Boxes for Gridfinity Box For Stuff 20 bin version.  The covers will use large paperclip wires for the hinges, but the tabs are print in place.  If all works out well, I plan to post this remix today, and will update this post with a link.  Due to the way this remix was put together though, I don't plan on making other types at this time.  Though that could change if I can find a way to get some clean STEP files for the Gridfinity bins (I'm not going through converting another STL for one of these bins again lol).
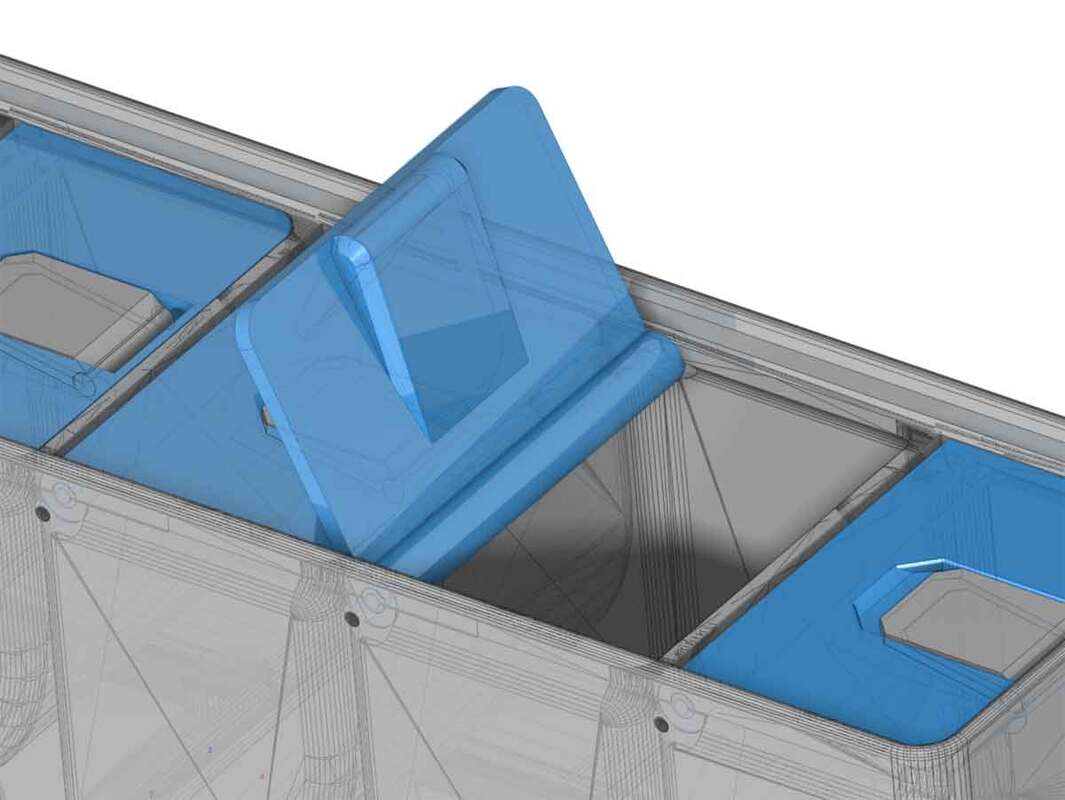
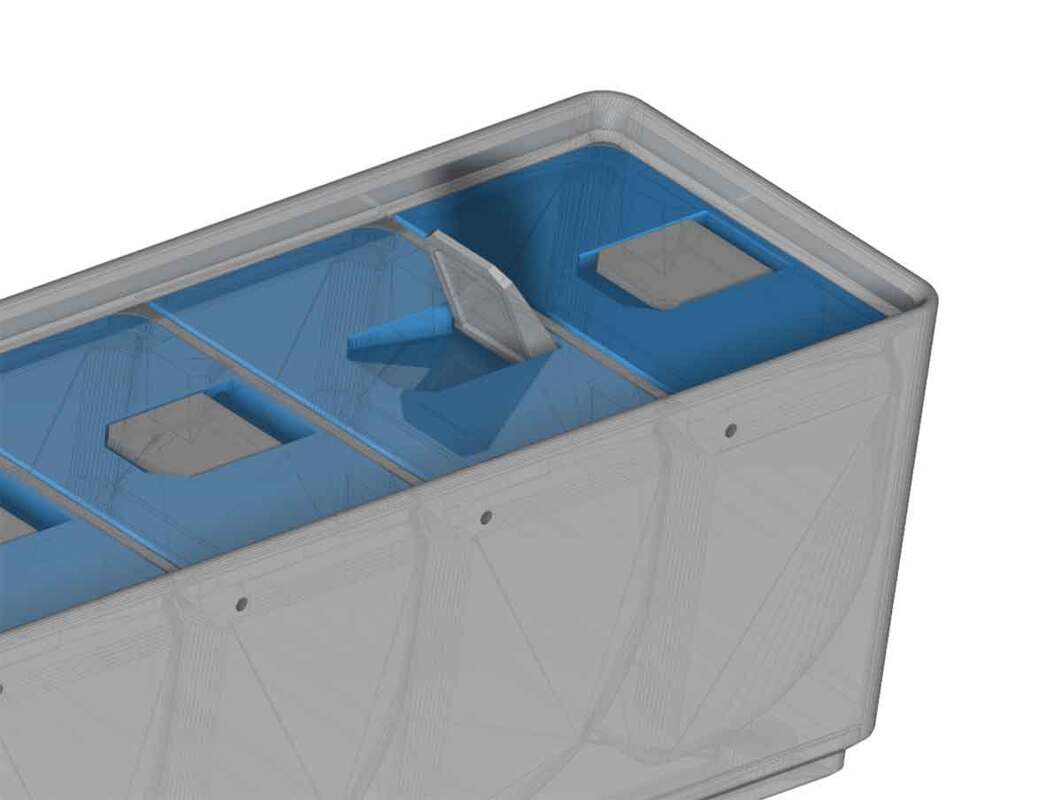
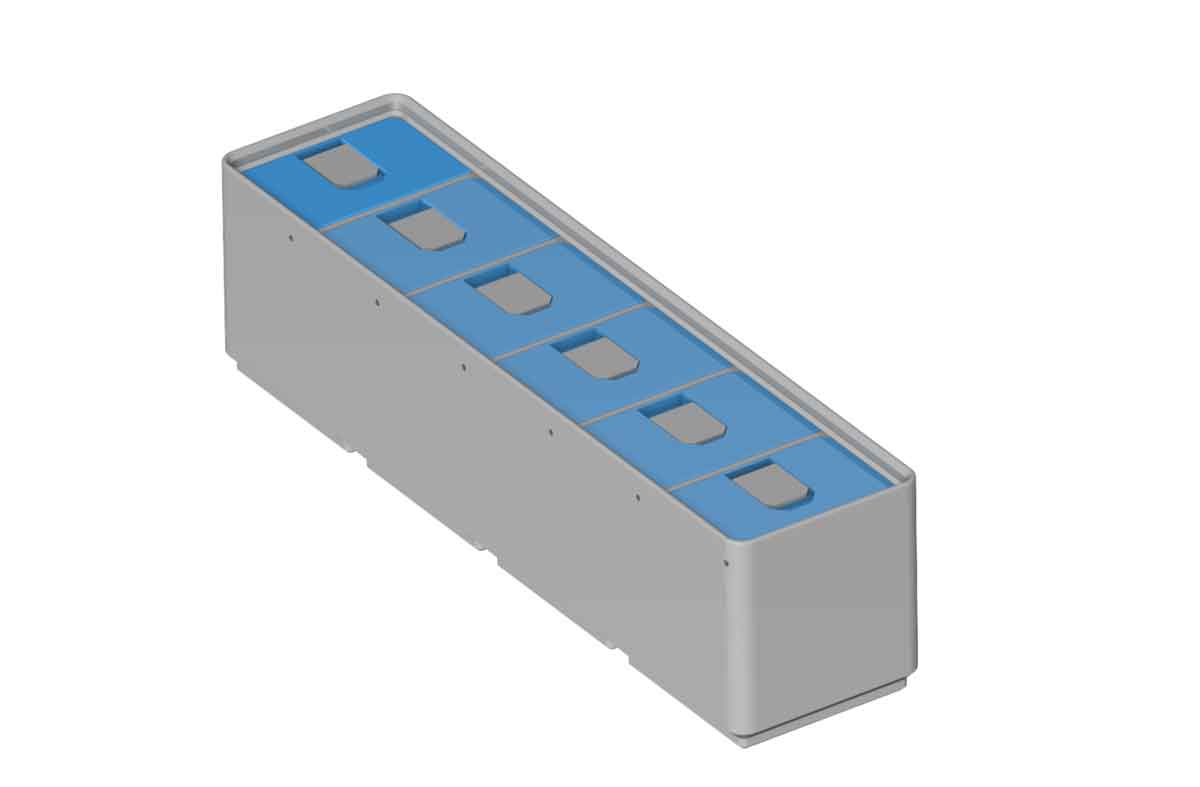
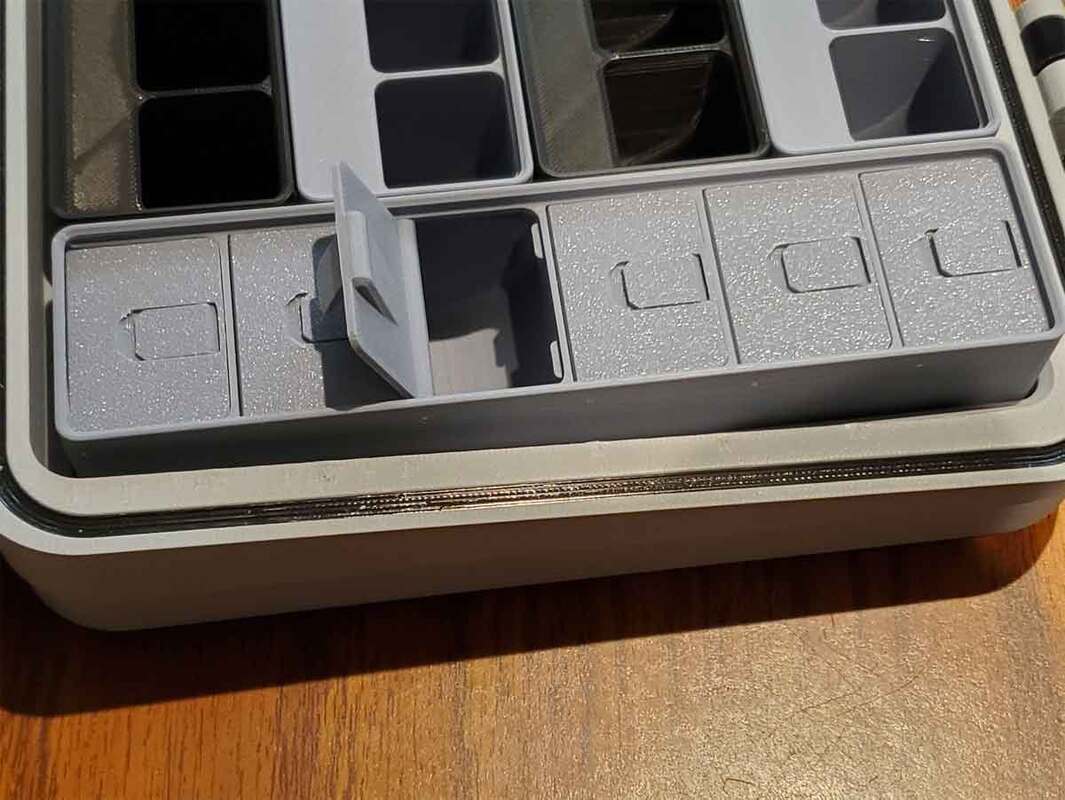
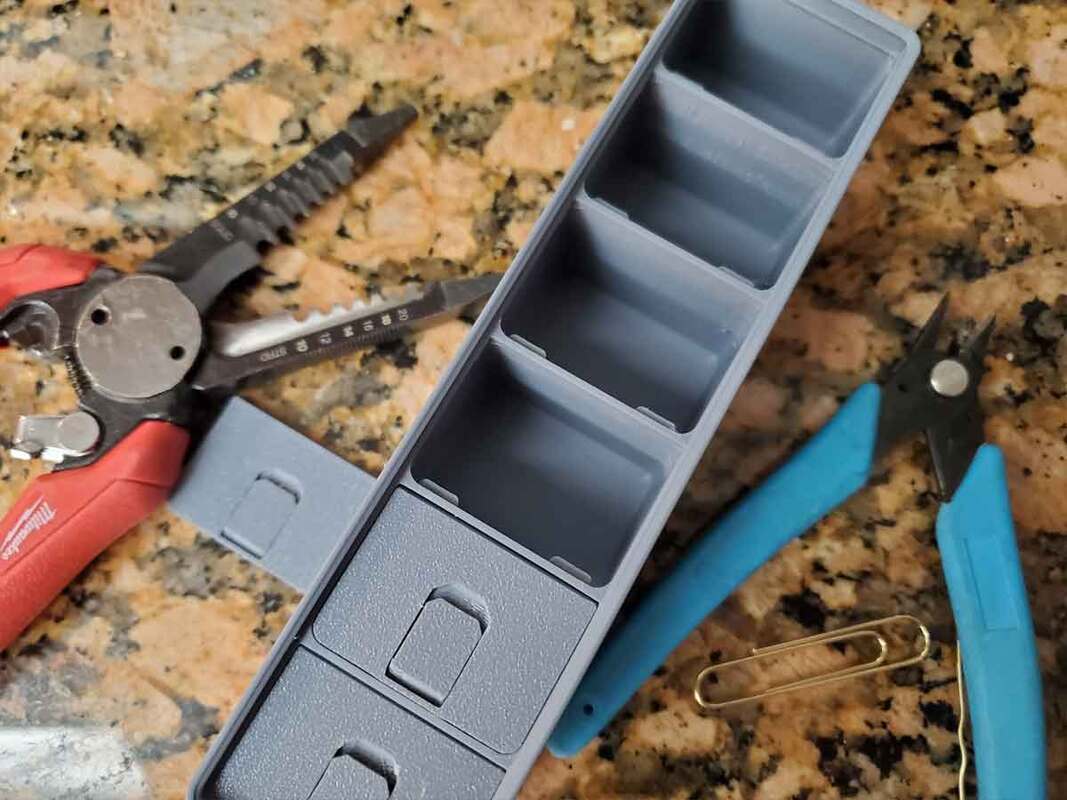
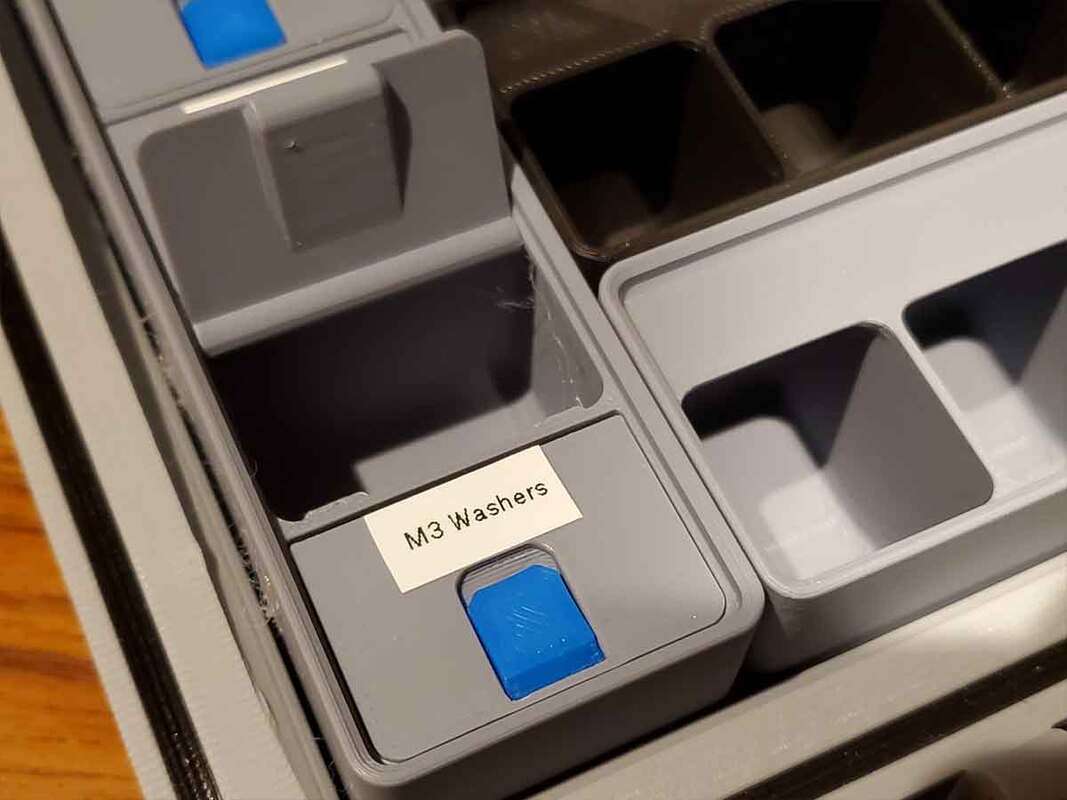
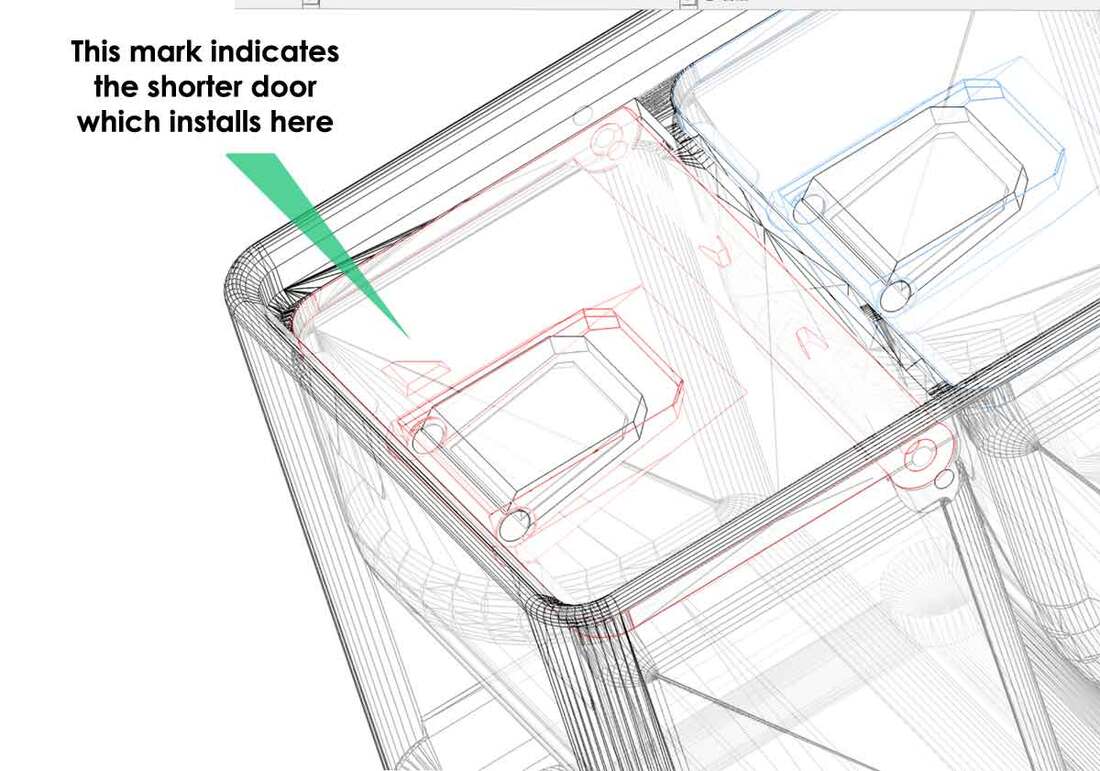
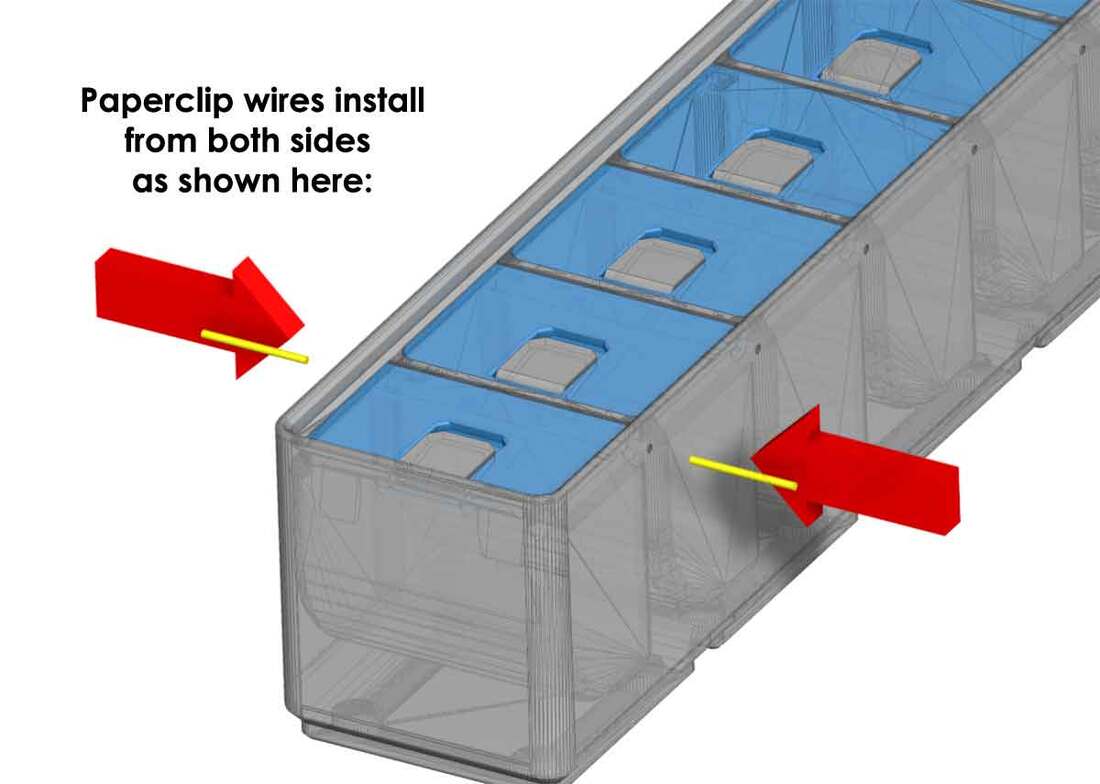
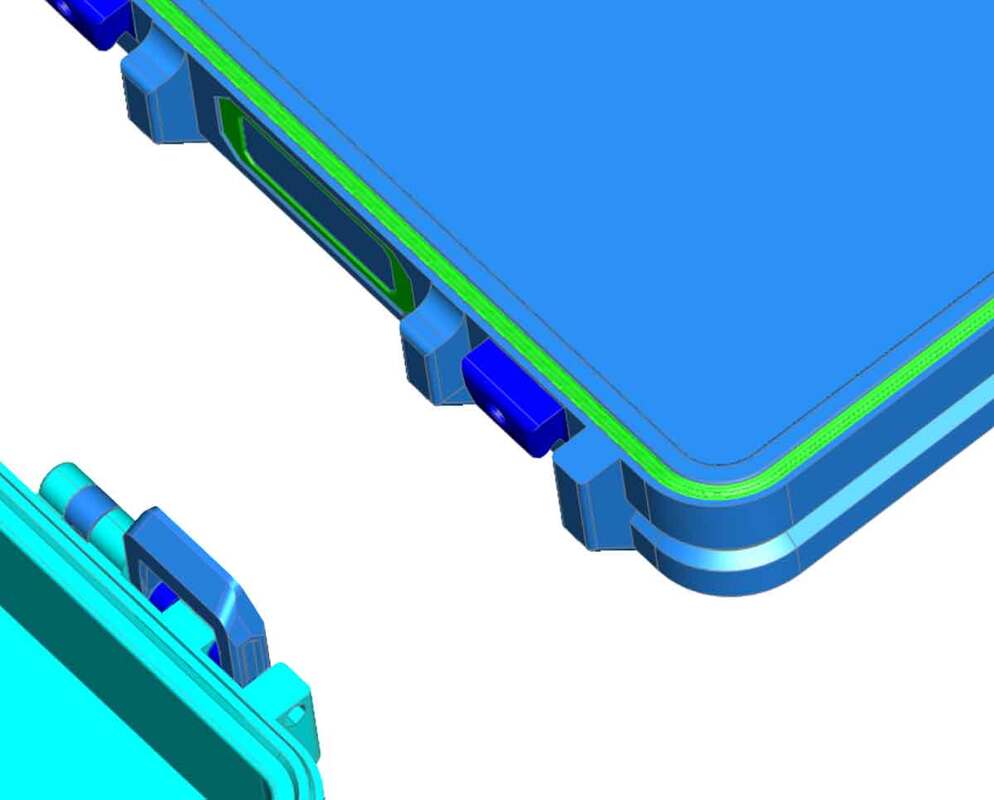
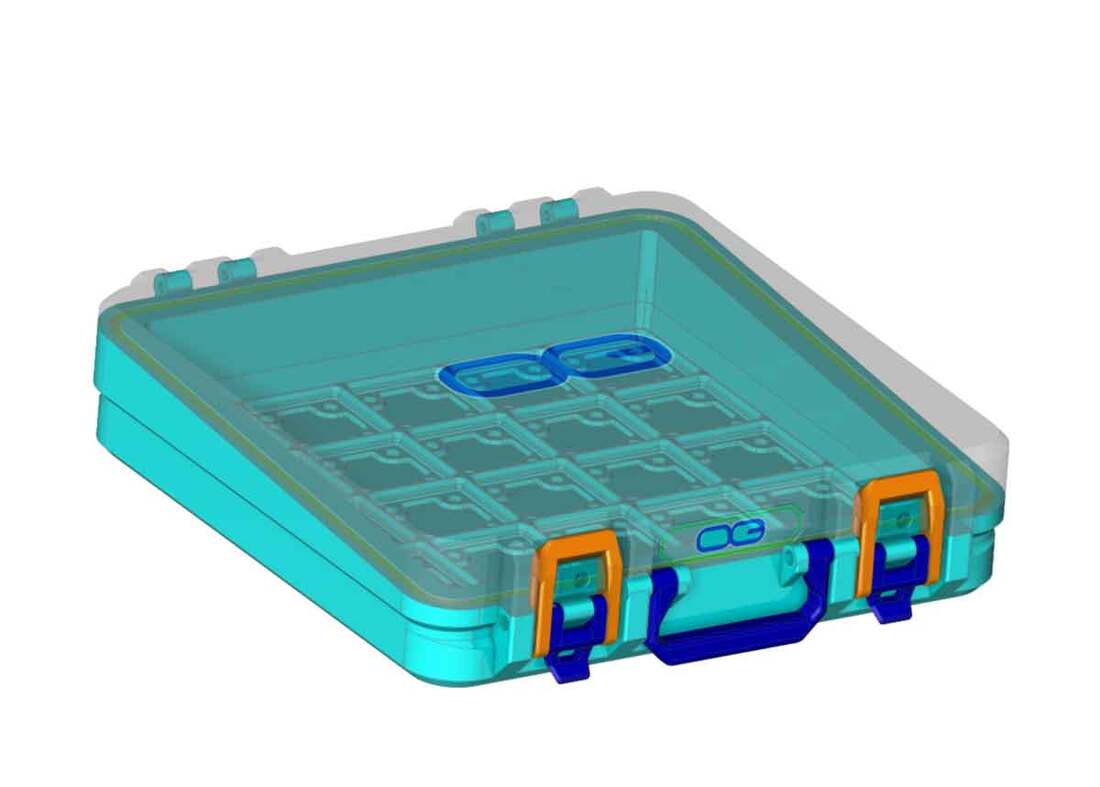
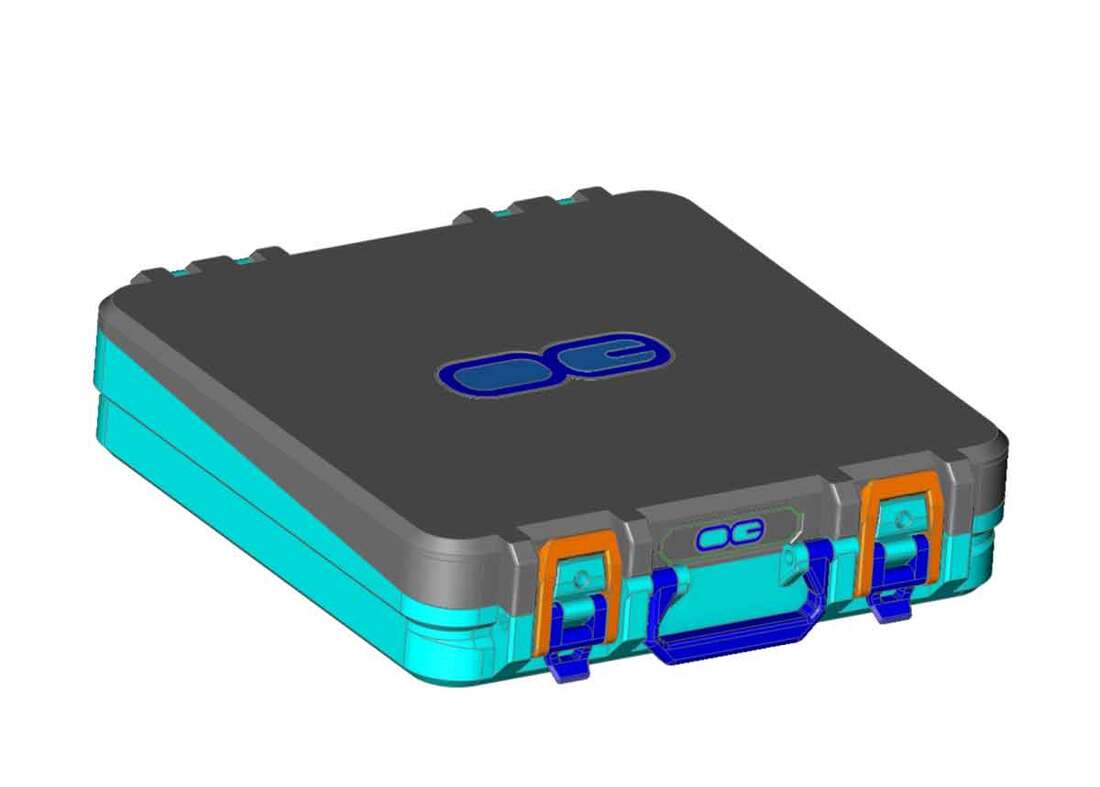
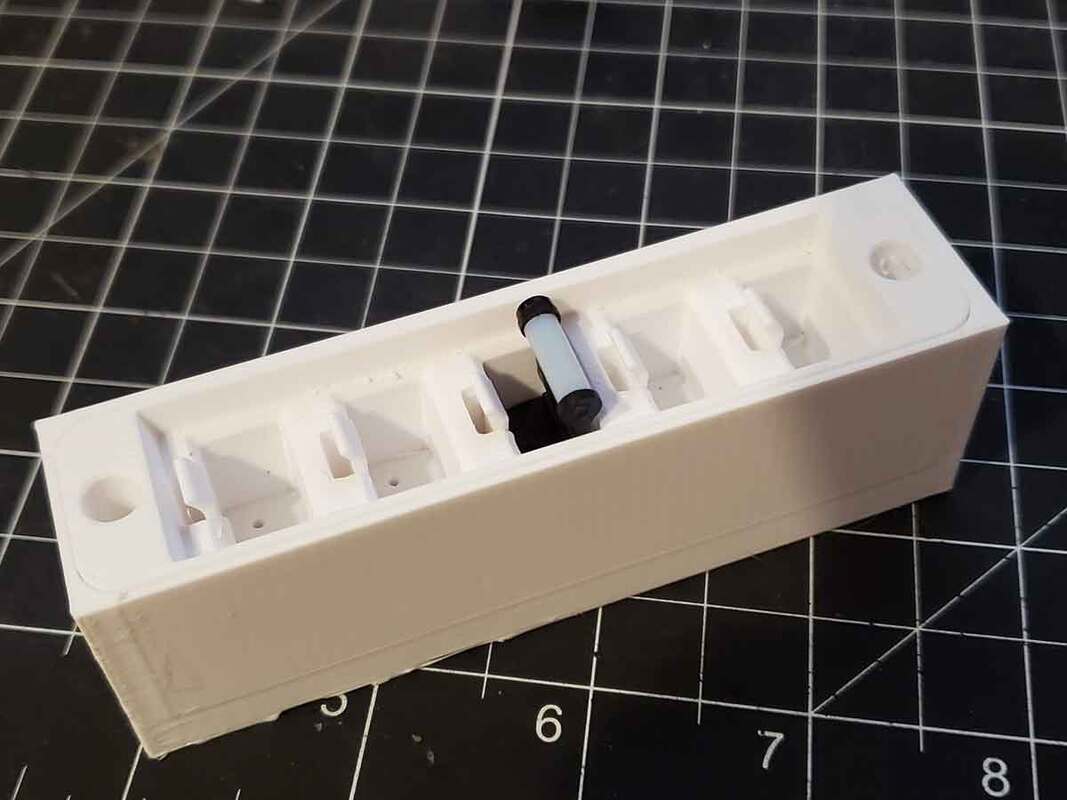
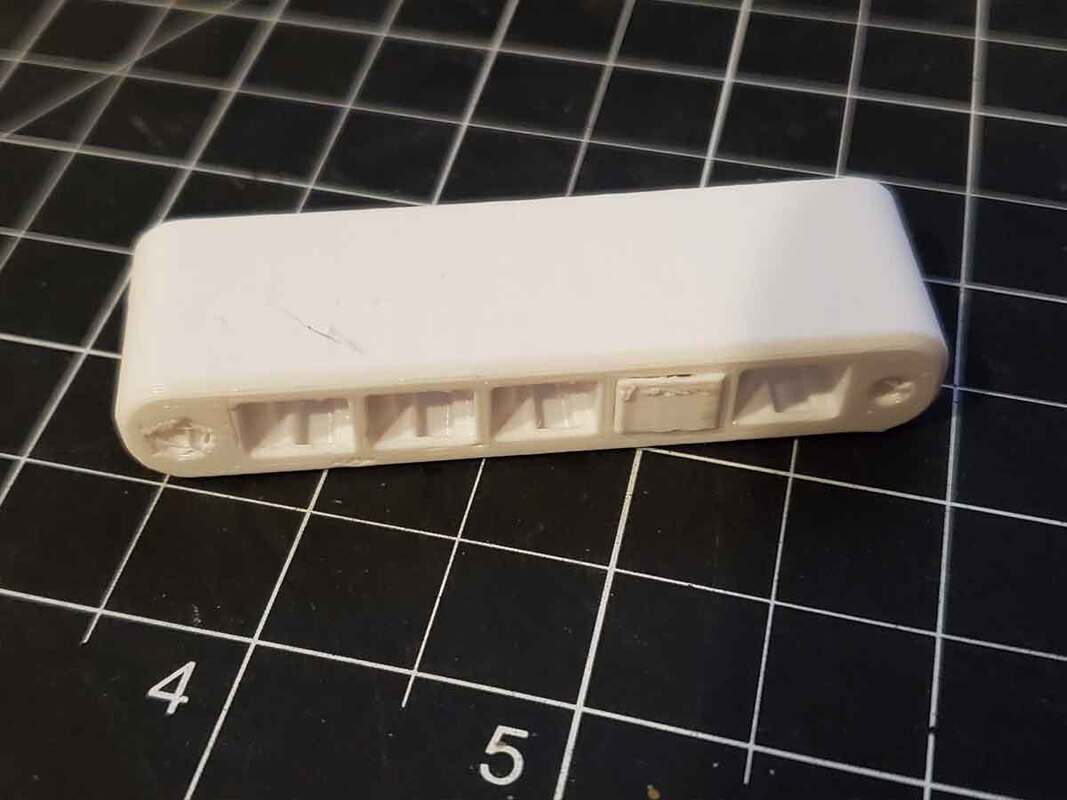
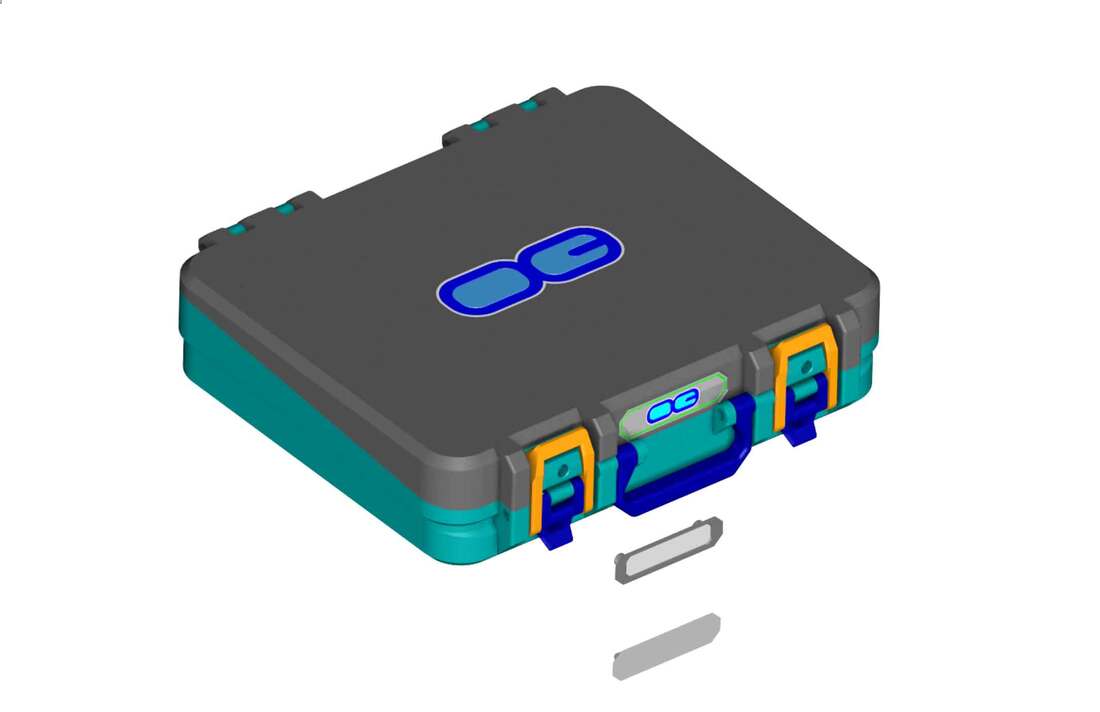
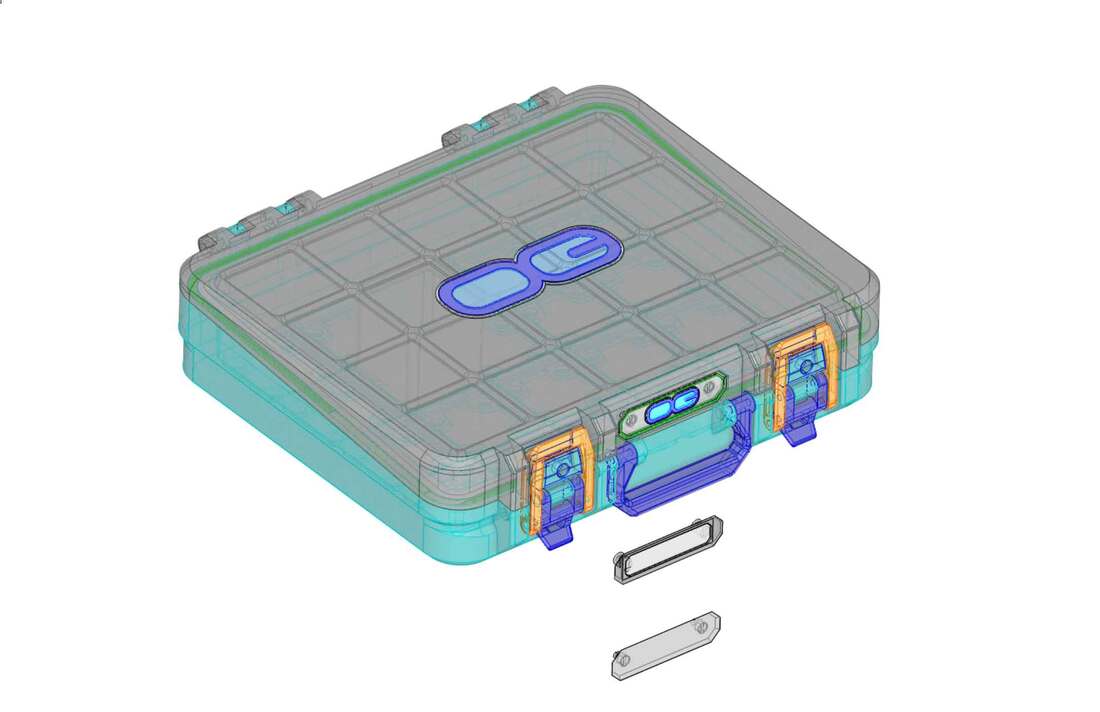
Update 1/28/2024:  After printing the doors I realized that there was not enough room for a label, which requires about 9mm, so I modified the design slightly and am re-printing it to test.  I'm also gonna print it with a smooth PEI plate so I can apply the 9mm Brother P-Touch labels.  There was another minor change which I made to make this safer to build.  The holes for the wire hinge are 1.25mm diameter, and the paperclip wire is about 1.05mm, so it goes in snug.  When I was assembling it I realized that it would be better to install two 15mm lengths from each side, rather than one long piece through the center.  So I partly blocked the hole through the doors with a tapered section so the paperclip cannot be passed all the way through the doors.  That will require that 15mm wires are installed from each side to form each hinge.  The last pic shows the modified design.  Other than those changes, it should be done (once it's tested).
Update 1/29/2024:  The design is now posted on Printables at the link below:

https://www.printables.com/model/742954-gridfinity-bin-1x4-divided-into-6-compartments-wit 
0 Comments

Doggie Door Pass-Trough for A Printer Exhaust Duct

1/21/2024

0 Comments

 
My printer is currently ducted outside via an unused doggie door, and it's been working well.  However I want to connect two printer ducts now (and the current pass through only allows one).  Additionally, I thought it would be worth trying to add some flappers on the outlet, to help keep bugs from getting into the hose.  Any bugs that do get in, cannot get in the house since they would be stopped by a HEPA filter, but it's still better to keep them out as much as possible.  One part of this is a bit too large for my X1C, so I will either need to split it, or hook up my CR10S Pro to spit it out (I'll probably just split it).  Once I get this pass though installed, I can then install my booster duct fan and test it out with the X1C.  
Update 1/22/2024: Whoopsie :D Somewhere along the line during the drawing of the plate with the vents in it, I mirrored the one side with threads, which is a no-no.  It resulted in left hand threads on one side (this can be seen in the left pic above though its difficult due to the resolution).  Fortunately I split the plate, so I only need to re-print one side.  After going back to the model though, I decided to add a version which can use brass inserts, and also increased the wall thickness around the inserts (which are M4).  I'm printing it now, and expect this will be a day or two, since it's almost a day or print time between all the parts.
Update 1/27/2024: It printed well and is installed.  I added a TPU gasket between the front plate and the box that holds the "flappers" to compensate for any gaps. It works well with both my current enclosure vent fan and the single fan booster fan, which means it should also work with the double fan ducted booster fan as well.  I plan to release this design along with the booster fans, which are mostly completed, but not fully tested.  The last image shows the flappers in action, with the weaker single fan booster (with the blue coupler) blowing air through about 5 feet of 2.5" hose before the outlet.  The weaker single fan booster does not open all four of the flaps (just the bottom two), but the flow seemed OK.  The more powerful enclosure fan (gray coupler) will move all the flaps into their open position.  I used some D profile gasket to help seal up the transitions in the doggie door.
0 Comments

A few Box for Stuff Updates Have Been Posted - Version 2.1

1/20/2024

0 Comments

 
This post is updated on 2/11/2024.

There have been some really helpful suggestions from folks who have made the Bambu Box For Stuff, as well as the Gridfinity BFS, so I've updated the models with some changes.  All the current versions are now updated to version 2.1 (latest version).

These updates took longer than expected, and hopefully they will be good for a while.  I still plan to work on a 16x Gridfinity and maybe other sizes, when time permits.  But I'm gonna be focusing on other projects in the near term, since I have several that need attention.

The Version 2.1 updates for all the different boxes include the following improvements:

​
  1. Optional TPU gasket.  The TPU gasket will not make the box water tight, since there are too many variables that can affect that.  My prototype did not completely stop leaks when submerged, but was a bit better than the box without the gasket.
  2. Improved label design with more robust pins.
  3. Additional label for use with 18mm Brother P-Touch Labels.
  4. Improved handle design (which should be easier to install)
  5. Increased the hole diameter where the M3 SHCS install into the hinges (increase to 5.8mm)  (v2.1) ​

The Basic BFS Version 2.1:

The Basic Box for Stuff is posted on Printables.

Gridfinity BFS 20 Bin and 25 Bin Version 2.1 Updates:

The 20 Bin Gridfinity Case is available on Printables and MakerWorld.
The 25 Bin Gridfinity Case (untested) is available on Printables (if you make it, please provide feedback).

Bambu X1C Tool Kit Version 2.1 Updates:

In addition to the Version 2.1 updates listed above, the Bambu Spare Parts Case is also updated with all of the above changes, plus the following:
  1. Updated Wiper bin, which will print in 2 parts (due to reports of tabs breaking)
  2. Updated Cutter bin, which will print in multiple parts (due to reports of tabs breaking.
The Bambu Tool Kit is available on MakerWorld and Printables.
0 Comments

Maybe A 25 Bin Gridfinity Box For Stuff? (Work in Progress)

1/12/2024

0 Comments

 
Picture
I posted the 20 bin Box for Stuff today and also posted it to Reddit in r/FunctionalPrint, where somebody asked if there would be a 25 bin version (for 1x1x6 bins).  I initially said not at this time, but long story short, I had some time tonight, and gave it a shot.  The result is pictured above, and I'm 99% sure it's gonna work, but I can never be 100% sure until I test it.  The problem though, is that I cannot test it, since it has a footprint of 242x265mm, and that is too large for my X1C (and my CR10S Pro is on ice right now).  Still, I plan to post this up as an untested remix, so it can be tested (just not by me, since my X1C is too small to print this version).  

Please note though, the 20 bin version of the Box For Stuff is fully tested (by me) and works without issues. 

UPDATE - The larger 25 bin version is posted on Printables, but it has not been tested, so print it at your own risk (but please provide feedback on it if you do make it).

https://www.printables.com/model/719788-gridfinity-25-bin-box-for-stuff-untested-remix


Update 1/18/2024:
After getting some helpful feedback and suggestions, I'm re-working this 25 bin Gridfinity box, so it will fit on an X1C bed (which will speed up printing quite a bit over most larger printers).  The design is almost ready to test, however I need to update some other minor changes to the design before it's posted.


Update 1/20/2024: The  25 bin Gridfinity box has been updated to v2.0 with the following changes:
  1. Redesigned to fit on the bed of a Bambu X1C (256x256), and requires the full bed area.
  2. Improved label design with more robust pins.
  3. Improved handle design (which should be easier to install)
 https://www.printables.com/model/719788-gridfinity-25-bin-box-for-stuff-version-20-unteste
0 Comments

Another Dummy 13 Sci-Fi Weapons Pack V4.0 (Completed)

1/11/2024

0 Comments

 
Picture
Just a quick update and teaser for the next Weapons Pack for Dummy 13.  Just like the last one, this will have some Sci-Fi inspired weapons, and they will be in a card kit format (and will not require supports).  I've only completed (but not tested) the designs for the two weapons shown, and I feel it needs at least two more, so that will take some time (and I need to decide which type will be added).  I will add updates on the progress here.

UPDATE 1/13/2024: I added one more blaster pistol to the pack, so I now just need to make another rifle and I think it should be done (well, I gotta test them too, then it would be done).

UPDATE #2 1/13/2024: The 2nd rifle is done, and the first test print was pretty cool.  I made some changes to fix some minor issues, and added some integrated supports due to a failure of the print of the blaster pistol in the right side pic below.  The updated design is printing now.
UPDATE 1/14/2024: I made some minor cosmetic changes after printing the design shown previously, and I think it's done.  I'm write it up and post it soon.
Picture
UPDATE #2 1/14/2024: Its done and posted on Printables:

https://www.printables.com/model/721487-dummy-13-weapons-pack-v40-star-wars-sci-fi-inspire

These weapons go great with Mici's Scout Trooper remix for Dummy 13 too.  I used the upper arms and thighs from my Astronaut remix for Dummy 13, since the parts have cargo pockets, which I though would look cool.  The chest is from Andrew Gipson's Blank Chest for Dummy 13.   
0 Comments

Finally Getting Back to The Gridfinity Box For Stuff

1/7/2024

0 Comments

 
The Gridfinity Box For Stuff (and the updated BFS v2.0) have been on the back burner for a while now, and since I had some time today, I got back to work on it.  The design is completed (and has been mostly completed for a while now).  But the earlier test prints I had were not great (likely due to poor quality filament), so I re-printed the top, and added the "Unofficial Gridfinity Logo" to it as well.  I also printed a few 1x1x6 unit bins to test (and they fit).  The box will hold 20 bins, but I only printed 4 of them to test the box out.  I'm now re-printing some of the other small parts, and a new front label for the top.  If it all works out, I may be able to get this posted soon (maybe this week even).  

UPDATE 1/12/2024: It's (finally) posted on Printables, you can find it here:

https://www.printables.com/model/710154-gridfinity-box-for-stuff-bfs
Update 1/20/2024: The 20 bin Gridfinity box has been updated to v2.0 with the following changes:
  1. Improved label design with more robust pins.
  2. Improved handle design (which should be easier to install)

https://www.printables.com/model/710154-gridfinity-box-for-stuff-bfs-20-bin-version-20

0 Comments

Weird Export Problem with ViaCAD 12.0 Pro (with a fix)

1/6/2024

0 Comments

 
I'm posting this more for my own reference, in case it happens again.  I use ViaCAD V12 Pro, and although it works relatively well most of the time, it's not flawless.  It can crash out with some degree of regularity, which has forced me into the habit of saving many, many times during a project (sometimes a hundred or more times).  The issue I had today though was much different, and pretty much crippled the ability to export any STL's or STEP, or really anything.  I uninstalled it and re-installed it, and even rolled back windows using system restore, but nothing worked.  Then I resorted to google, and found the following post, which explained a similar issue, and a fix suggestion - which sadly did not work for the person who started the post, but it did work for me (happily enough).  The person with the issue in the post did get their issue resolved though, eventually.

forums.punchcad.com/default.aspx?g=posts&m=26930#post26930

To summarize that post, in case it gets lost some day, the author said that ViaCAD stores the location of dialog boxes in a ".ini" file located here (in Windows):

/Users/<accountname>/AppData/Local/Punch!/ViaCAD Pro/VCPDialogs.ini

And by renaming or deleting that file, it will force the program to create a new one, so any corrupted stuff will be wiped away.  It turns out that is what fixed my weird issue, since it was the export dialog box that was not showing up.  I suspect it had to do with the recent installation of a 3rd monitor in my setup.  I have observed strange dialog box behavior with ViaCAD in the past when using multiple monitors, so in hindsight this makes sense.  When I went to look at the contents of the old (broken) file, in the export category it had the following location:

[Export]
CurFilter=STL
AllowCollapse=FALSE
LRCollapseMode=NONE
TBCollapseMode=NONE
UpperLeftPos=-506,527

vs the newly generated file, which has this (and this one works):

[Export]
CurFilter=STL
AllowCollapse=FALSE
LRCollapseMode=NONE
TBCollapseMode=NONE
UpperLeftPos=856,507

So it seems that the dialog box was popping up off screen, as the X value was negative.  Possibly moving the monitors around, or swapping the primary monitor would have allowed me to see it.  In any case, I'm really happy removing/renaming the .ini file worked, since I was about to re-image my PC, and that would have been a bit of work.  
0 Comments

Weapons Pack v3.0 (Completed and Posted to Printables)

1/4/2024

0 Comments

 
Picture
Since the Halo Dude was getting a bit jealous of the small arsenal (pardon the pun) that my other Dummy 13's can pick from, so I decided to give it some more choices.  The (Halo/Sci-Fi inspired) Weapons Pack v3.0 is still a work in progress, but the design is (hopefully) completed, and all I need to do now is test print it.  

Update 1/4/2024:  The Weapons Pack v3.0 is now posted to Printables.com, you can find it at the link below:

www.printables.com/model/707049-dummy-13-weapons-pack-v30-halo-si-fi-inspired-weap


There were a few minor tweaks made since the design which I posted pics of earlier.  These were to help with printing and also a minor change to the handle, which improves the removal of the weapons from the Dummy 13 hands.
0 Comments
    Picture

    Stoopid Me

    Welcome to my Stoopid corner of teh Internet.  It's mostly gonna be 3D printing stuff, but I also post some recipes, projects, and the occasional rant here as well.  More Stoopid stuff is updated regularly.

    I recently joined the Amazon Associate program, so some of the links on this site are Amazon affiliate links. This means that, at zero cost to you, I will earn an affiliate commission if you click through the link and finalize a purchase.  This will help to support this site, and pay for more Stoopid Stuff.

    Currently, there are no active authorized sellers of my designs.  If you see my stuff (such as my Dummy 13 Weapons) for sale on Amazon, Etsy or AliExpress, the seller is using my designs without permission.

    If you want to help out with my parts and filament budget, you can also "Buy Me A Coffee" using the link below.
    ​​

    Buy Me A Coffee

    Archives

    March 2025
    February 2025
    January 2025
    December 2024
    November 2024
    October 2024
    September 2024
    August 2024
    July 2024
    June 2024
    May 2024
    April 2024
    March 2024
    February 2024
    January 2024
    December 2023
    November 2023
    October 2023
    September 2023
    August 2023
    July 2023
    June 2023
    May 2023
    April 2023
    March 2023
    February 2023
    January 2023
    November 2022
    October 2022
    September 2022
    August 2022
    July 2022
    April 2022
    February 2022
    January 2022
    December 2021
    November 2021
    October 2021
    September 2021
    August 2021
    July 2021
    June 2021
    May 2021
    April 2021
    March 2021
    February 2021
    January 2021
    December 2020
    November 2020
    October 2020
    September 2020
    August 2020
    July 2020
    June 2020
    May 2020
    April 2020
    March 2020
    February 2020
    January 2020
    December 2019
    November 2019
    October 2019
    September 2019
    August 2019
    July 2019
    June 2019
    May 2019
    April 2019
    March 2019
    February 2019
    January 2019
    December 2018
    November 2018
    October 2018
    September 2018
    August 2018
    July 2018
    June 2018
    May 2018
    April 2018
    March 2018
    February 2018
    November 2017
    September 2017
    August 2017
    June 2017
    December 2016
    October 2016
    September 2016
    July 2016
    March 2016
    February 2016
    September 2015
    August 2015
    June 2015
    May 2015
    April 2015
    March 2015
    February 2015
    January 2015
    December 2014
    November 2014
    October 2014
    September 2014
    July 2014
    June 2014
    May 2014
    April 2014
    March 2014
    February 2014
    November 2013
    August 2013
    July 2013
    June 2013
    May 2013
    April 2013
    March 2013
    January 2013
    December 2012
    November 2012
    October 2012
    September 2012
    August 2012

    Categories

    All

    RSS Feed

Powered by Create your own unique website with customizable templates.