My Stoopid Stuff
  • Home
  • Projects
  • Blog
  • Lec'tronics
  • Links
  • CNC
  • Quick Recipes
  • 3D Printer Tips

Making printable threads

12/27/2018

0 Comments

 
Picture
Picture
Picture
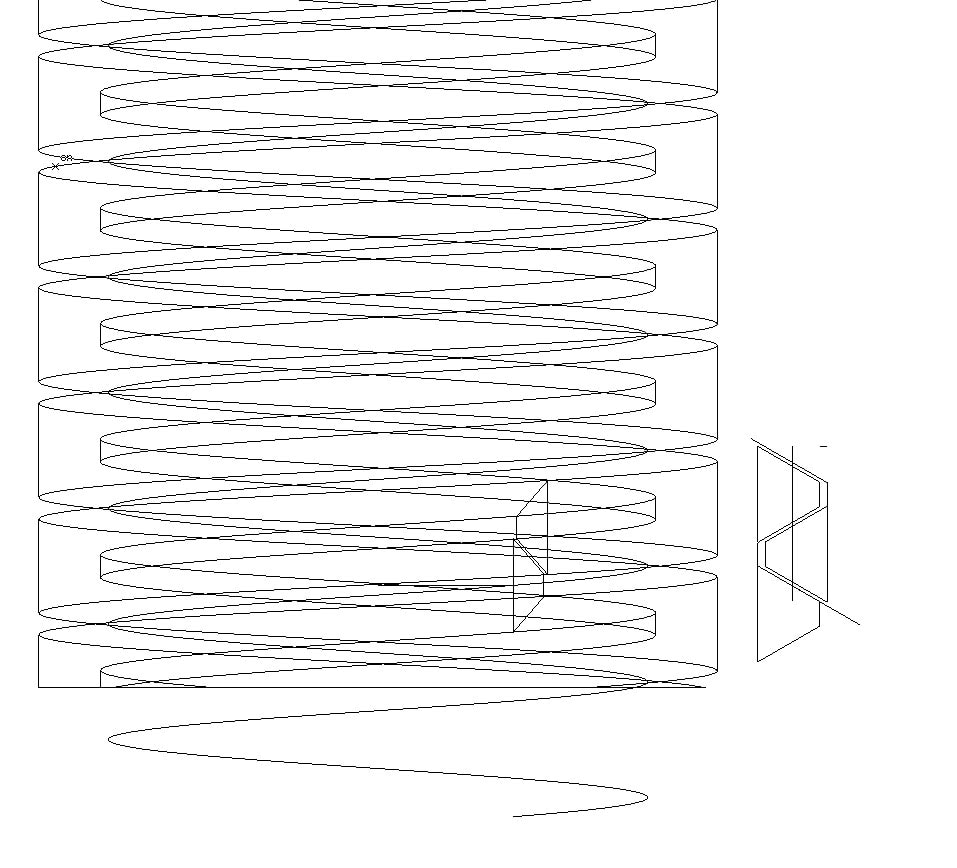
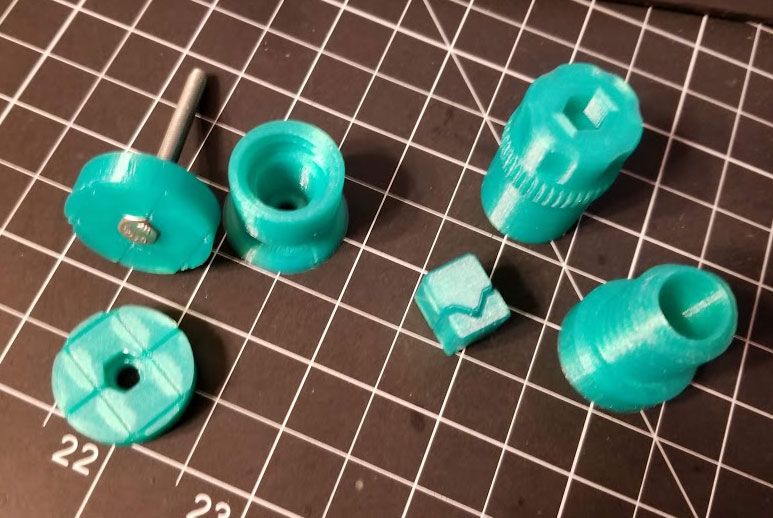
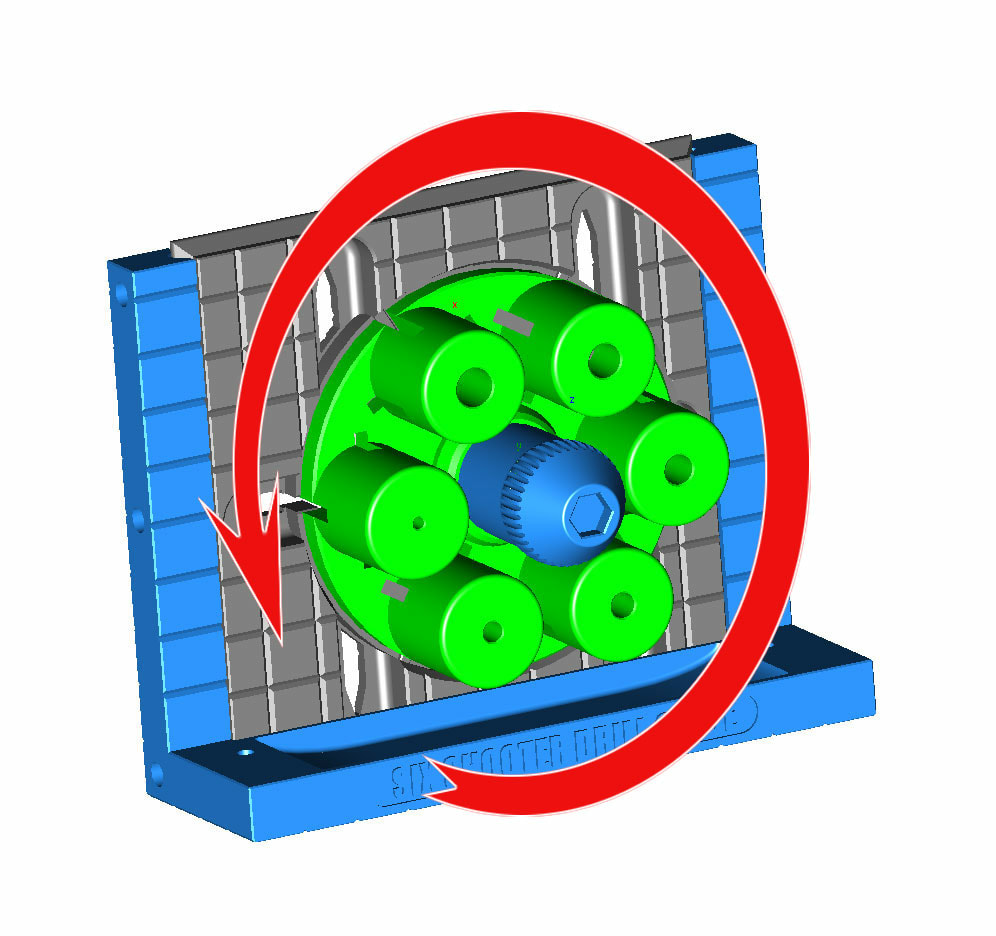
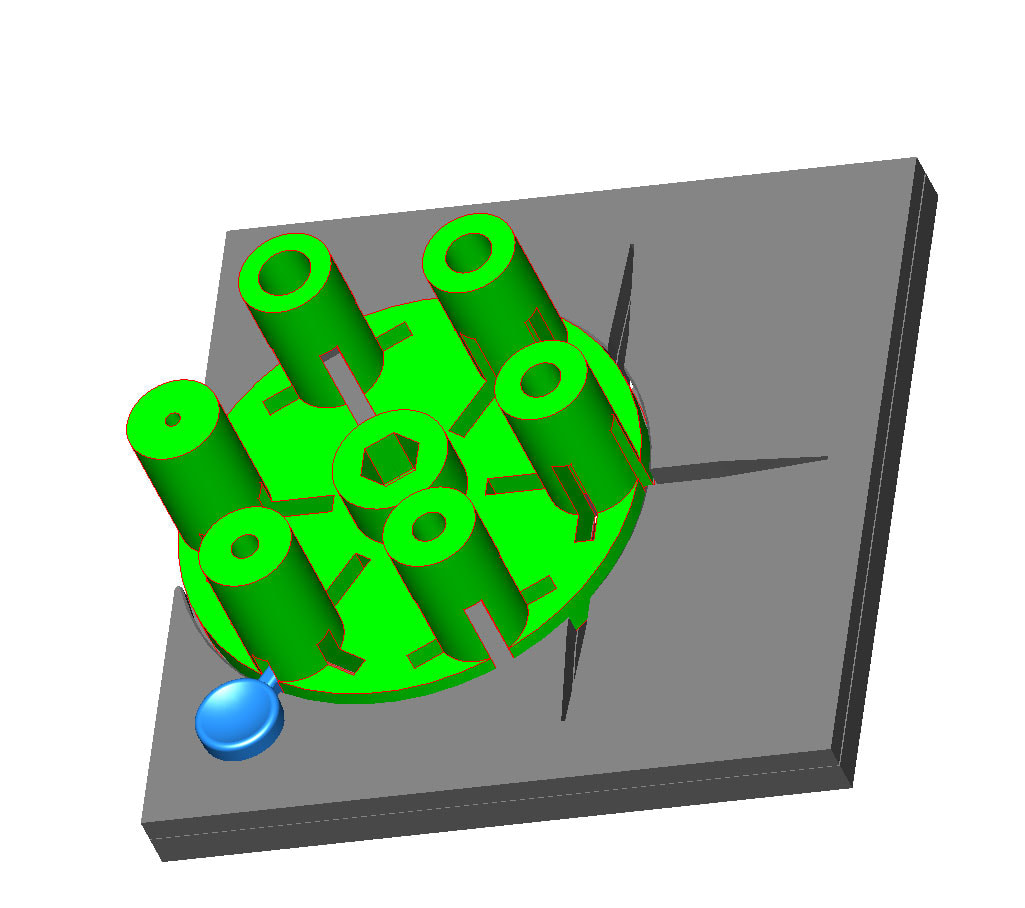
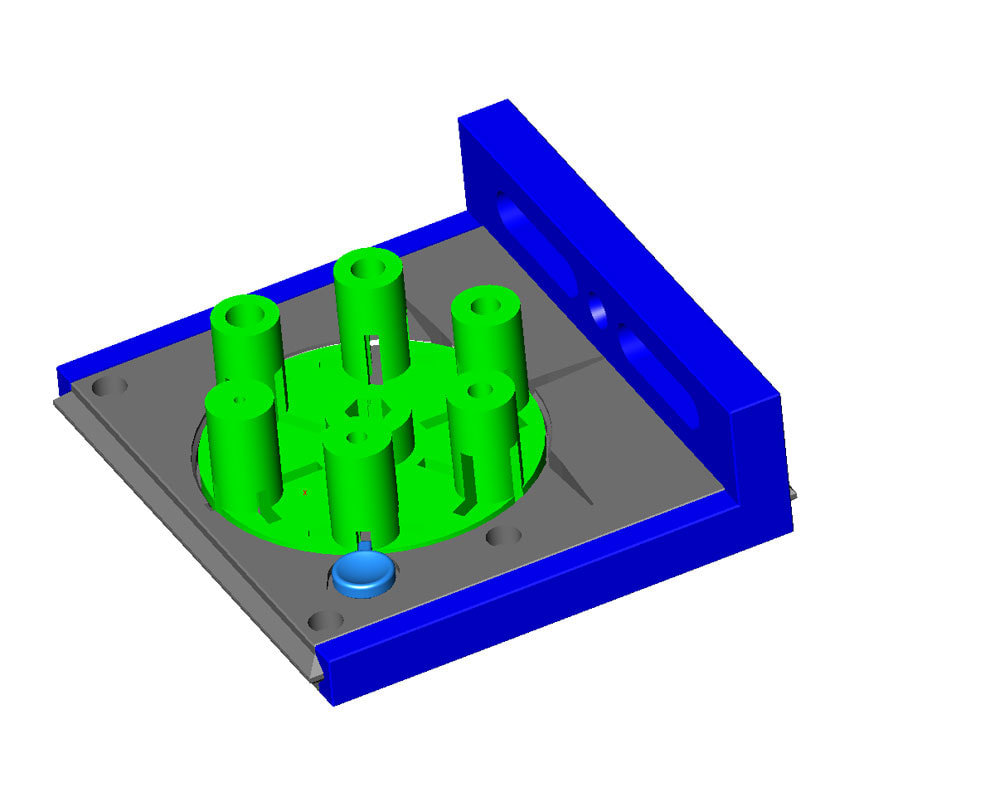
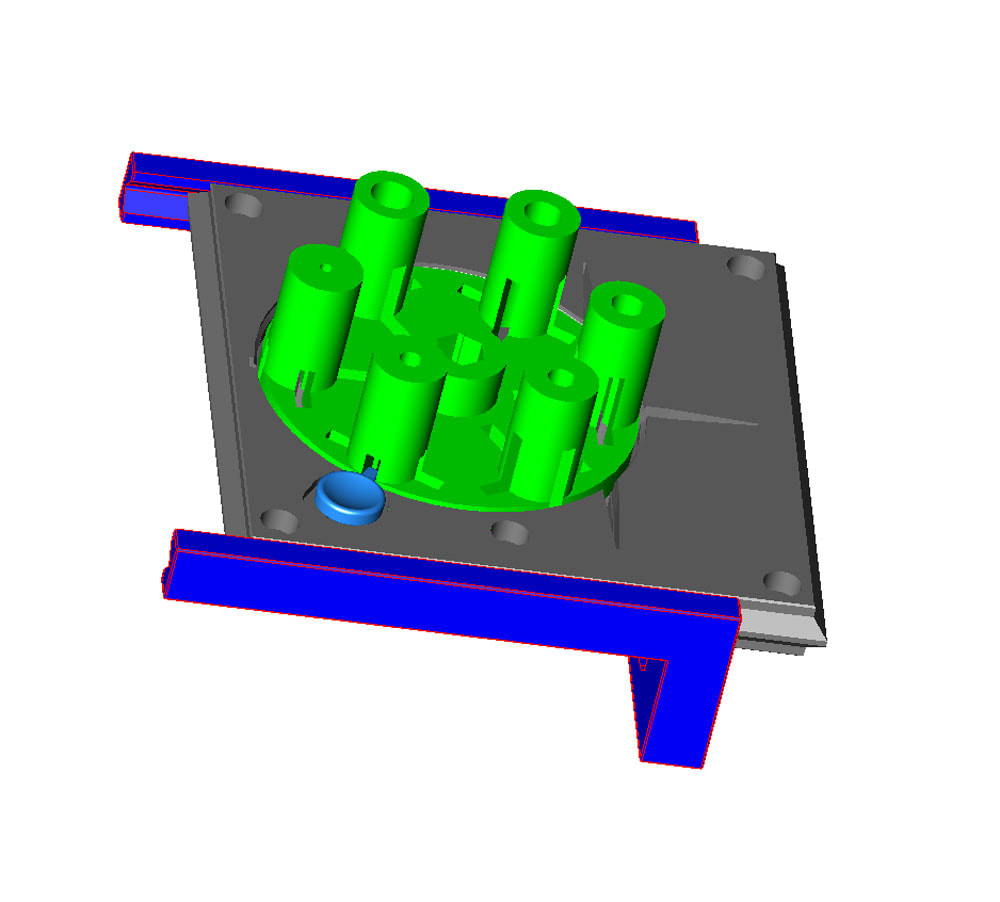
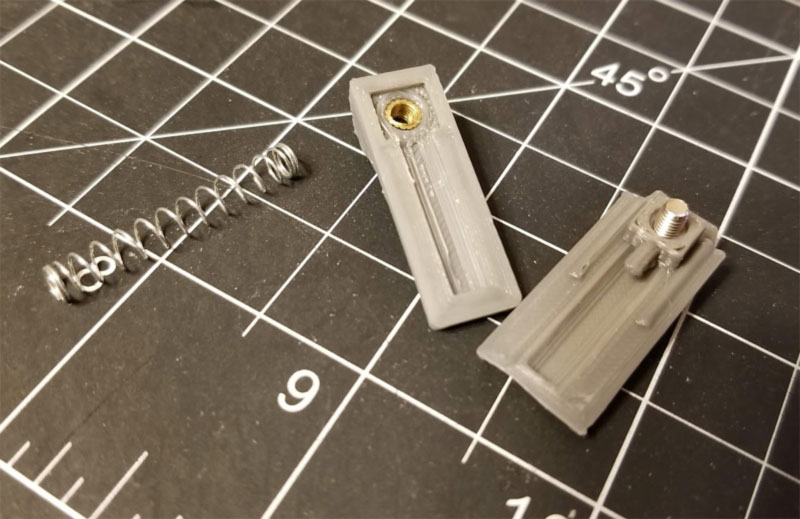
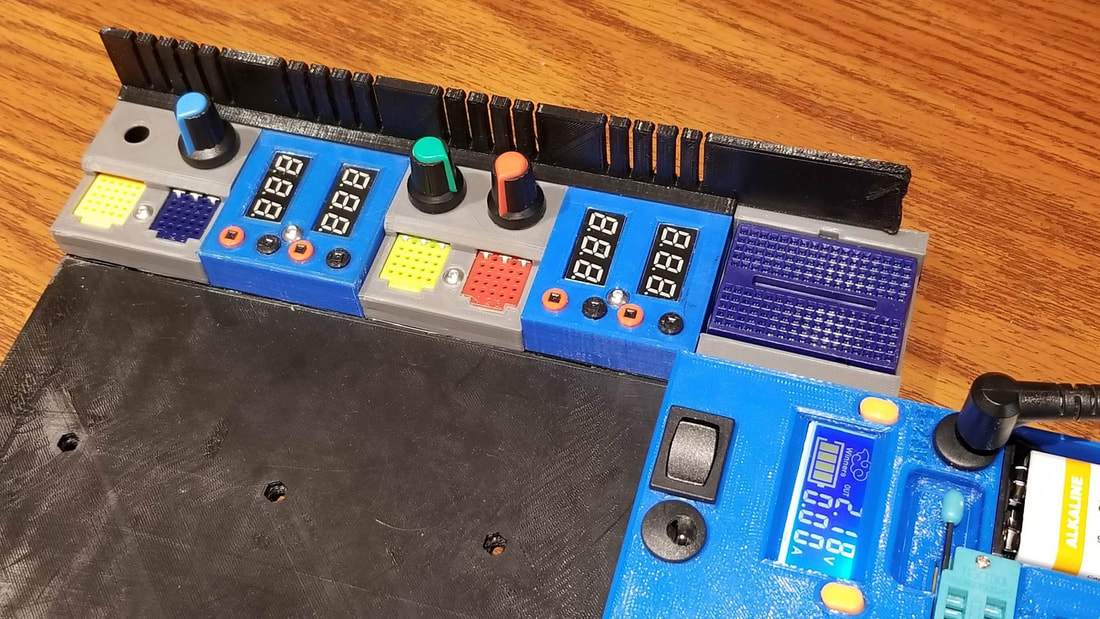
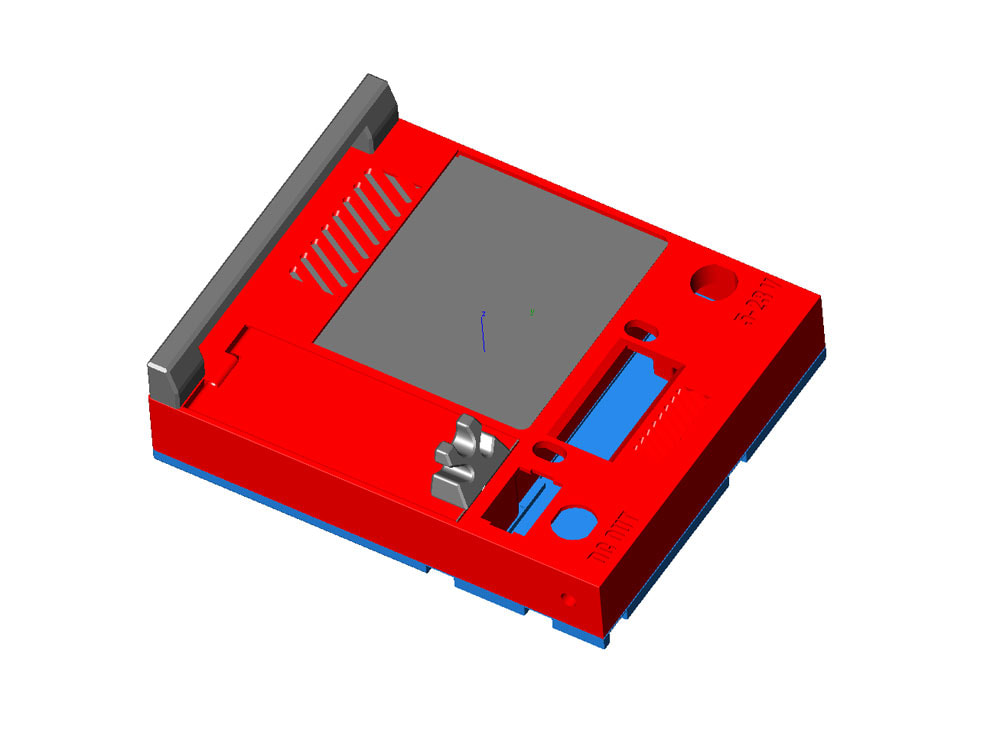
Not really a how-to, but I found that using ViaCAD 9, I could make a reasonable printable thread by first making a closed surface of the thread profile, then mating that up with a helix spline that was set up with the correct pitch and diameter I needed for the threads (in this case 3mm pitch and I think it was 14mm diameter).  After that I used the one rail sweep solid tool to spin the thread profiles up the helix, and bam!  I had threads.  The only problem I had after that was finding the balance to make them usable on a printed part.  My first test was was too tight to turn by hand.  I ended up with a gap between the threads around 0.4-0.5mm (closer to 0.5mm) and that was able to work with a layer height of 0.15mm when printed.  The thread profile in the pic does not reflect the final design since I had to tweak the threads with the push/pull tool to get the correct gap.  Since I knew I was gonna have problems with the threads I printed some smaller test parts first to dial in the threads.  Now just gotta print the part.
0 Comments

Adjustable "Six Shooter" Drill Guide MKII

12/26/2018

0 Comments

 
Picture
Picture

Did a 90% redesign of the drill guide, and this is hopefully now the final version.  The current design is set up for 5/64, 9/64, 11/64, 13/64, 15/64 and 17/64 drills, but of course these holes could be themselves drilled out to larger sizes.  The "cylinder" will be swappable pretty easily (though not as easily as I had hoped).  It will still require removing a nut, a washer and a spring to do the swap.  I'm printing a few test parts now to verify that I provided enough clearance for the threads and other parts, but if it works, I think this will be done.

Update 1/4/2019 - well this was not the final version, but close.  I have mostly wrapped this one up and posted it here.  It is still a "work in progress" but once I get the fence printed it will be done (100%, officially and for sure... done).
Picture
Picture
0 Comments

Adjustable "six shooter" Drill Guide

12/24/2018

0 Comments

 
Picture
I saw a really cool drill guide on thingiverse that I was going to make, but then thought of a way to make it adjustable.  This is sort of a six shooter version of it, and when completed will have an adjustable fence that will ride a pair of dovetails on the sides.  I also plan to include a dust catcher which was also something I am borrowing.
Update, got bored after giving out half my paycheck today, finished up (hopefully) the design:
Picture
Picture
Actually after thinking about it, I am re-designing this again. 

And also, Merry Christmas!
0 Comments

Fine Layers (0.06mm) and clogs with the Titan Aero

12/24/2018

2 Comments

 
Picture

Picture
I was attempting to print the above model at 0.06mm layer height on my Ender 3, which is set up with a Titan Aero.  The problem shown in the right side pic is that the filament got ground down and it stopped extruding correctly.  The filament grinding however seems like it is probably a symptom since I have not had this problem running the same PLA at 0.2mm layer heights (and have run several prints with it with the same tension in the extruder).  After some searching, I found a post which described how retraction is the likely problem:

https://www.thingiverse.com/groups/prusa-i3/forums/general/topic:9008

So I now suspect the problem with the above print is due to heat creep, thanks to the lower flow with the shorter layers the heat likely has time to build up in the heat tube.  To try and remedy this, I have set the retraction down to 0.8mm as a test (this is probably where it should have been for PLA based on what I have read online).  Additionally I dropped the retraction speed to 30mm/s (from 40), and dropped the temps for this MakerGeeks PLA (pearl green or something) which is recommended to run at the very hot 235, turned down to 232.  Will see how the next try goes...

Changes:
Retraction Distance 0.8mm (was 1.8mm)
Retraction Speed 30mm/s (was 40mm/s)
Printing Temperature 232 (was 235)
Increased the tension by about 1/3 turn of the knob on the extruder

Update - below is the result with the above settings, seems that it was running good for most of the print, but then seems to have experienced heat creep when the legs started to merge (or probably more likely due to the narrowing of the top side model which started at the neck).  Nice that stringing was not too bad with this config except on the supports:
Picture
Next up, will try these:

Retraction Distance 0.6mm (was 0.8mm)
Retraction Speed 25mm/s (was 30mm/s)
Printing Temperature 230 (was 232)

Update - well that didn't work to well:
Picture
Next up, will try these:

Retraction Distance 0.5mm (was 0.6mm)
Retraction Speed 25mm/s (was 30mm/s)
Printing Temperature 234 (was 230) - went back up with the temps, seems that 230 may have been too cold

I also tightened the extruder thumbscrew another 1/2 turn.

And POW, that did it, the model however did not look too great scaled down even printed at 0.06mm LH, so not sure I can use it (still debating and may give it a shot of primer to see how many details show up).  Looking at the settings, it appears this was probably run at 60mm/s, where I normally use 40mm/s, so I think if I ran it at slower speed, the fingers would look better.
Picture

Quick update - had some more of the same problems with another print that was running at 0.1mm LH, and the fix seems to have been to drop the retraction further (hard to believe 0.1mm really could make a difference, though it was the only thing I changed):

Retraction Distance 0.4mm (was 0.5mm)
Retraction Speed 25mm/s
Printing Temperature 234

2 Comments

Don't forget your postman/lady

12/23/2018

0 Comments

 
Picture
As usual things get busy with cleaning and getting stuff ready for the holiday and I almost forgot to tip the mailman.  With all the stuff I order from Amazon and Ebay, I keep him pretty busy, and he is a great guy so I don't want to forget him this year.

Unfortunately the rules say no cash, but gifts up to $20 are OK (well most gifts).

More info here on what is cool or not.

https://www.thoughtco.com/the-right-gift-for-the-mailman-3321106
0 Comments

For F' sake Amazon?!?

12/14/2018

0 Comments

 
Picture
This box contained one thing, and although I am happy it was delivered, what waste of resources.  This package made me think about the waste that comes with buying some things from Amazon.  There is really no reason for me to buy TP, paper towels or other bulky items online (though I have).  In my experience at least, things like these are often double boxed too, which may keep the TP un-squeezed, but seems very unnecessary.  I spent 10minutes earlier this week breaking down and taking several large boxes out to the recycling bin, for things I could have just bought at the grocery store less than a mile away.  I think that no matter how good the deal is, I won't be doing that again.
0 Comments

Finished up the Breadboard Kit (Finally)

12/13/2018

0 Comments

 
This project took waaaay too much time, but I learned a few things about designing enclosures (at least I think I did).  Anyway, enjoy the pics.
0 Comments

Making another module for the Breadboard Kit

12/7/2018

0 Comments

 
Picture
Picture
I decided to make another module for a DSO112A which is a small touchscreen 1 channel DSO.  It is not as bad as it sounds, but it is also pretty rough.  I already had one though and this is a good place for it.  There is also a small compartment to hold the leads.  Still working out the problems with this and made some fixes to the one in the picture (forgot to add a hole for the USB port (doh!). 
0 Comments
    Picture

    Stoopid Me

    Welcome to my Stoopid corner of teh Internet.  It's mostly gonna be 3D printing stuff, but I also post some recipes, projects, and the occasional rant here as well.  More Stoopid stuff is updated regularly.

    I recently joined the Amazon Associate program, so some of the links on this site are Amazon affiliate links. This means that, at zero cost to you, I will earn an affiliate commission if you click through the link and finalize a purchase.  This will help to support this site, and pay for more Stoopid Stuff.

    Archives

    March 2023
    February 2023
    January 2023
    November 2022
    October 2022
    September 2022
    August 2022
    July 2022
    April 2022
    February 2022
    January 2022
    December 2021
    November 2021
    October 2021
    September 2021
    August 2021
    July 2021
    June 2021
    May 2021
    April 2021
    March 2021
    February 2021
    January 2021
    December 2020
    November 2020
    October 2020
    September 2020
    August 2020
    July 2020
    June 2020
    May 2020
    April 2020
    March 2020
    February 2020
    January 2020
    December 2019
    November 2019
    October 2019
    September 2019
    August 2019
    July 2019
    June 2019
    May 2019
    April 2019
    March 2019
    February 2019
    January 2019
    December 2018
    November 2018
    October 2018
    September 2018
    August 2018
    July 2018
    June 2018
    May 2018
    April 2018
    March 2018
    February 2018
    November 2017
    September 2017
    August 2017
    June 2017
    December 2016
    October 2016
    September 2016
    July 2016
    March 2016
    February 2016
    September 2015
    August 2015
    June 2015
    May 2015
    April 2015
    March 2015
    February 2015
    January 2015
    December 2014
    November 2014
    October 2014
    September 2014
    July 2014
    June 2014
    May 2014
    April 2014
    March 2014
    February 2014
    November 2013
    August 2013
    July 2013
    June 2013
    May 2013
    April 2013
    March 2013
    January 2013
    December 2012
    November 2012
    October 2012
    September 2012
    August 2012

    Categories

    All

    RSS Feed

      Contact Form (Name is optional)

    Submit
Powered by Create your own unique website with customizable templates.