My Stoopid Stuff
  • Home
  • Projects
  • Blog
  • Lec'tronics
  • Links
  • CNC
  • Quick Recipes
  • 3D Printer Tips
  • Voron 2.4

A couple more things are in the works for the breadboard kit

1/27/2019

0 Comments

 
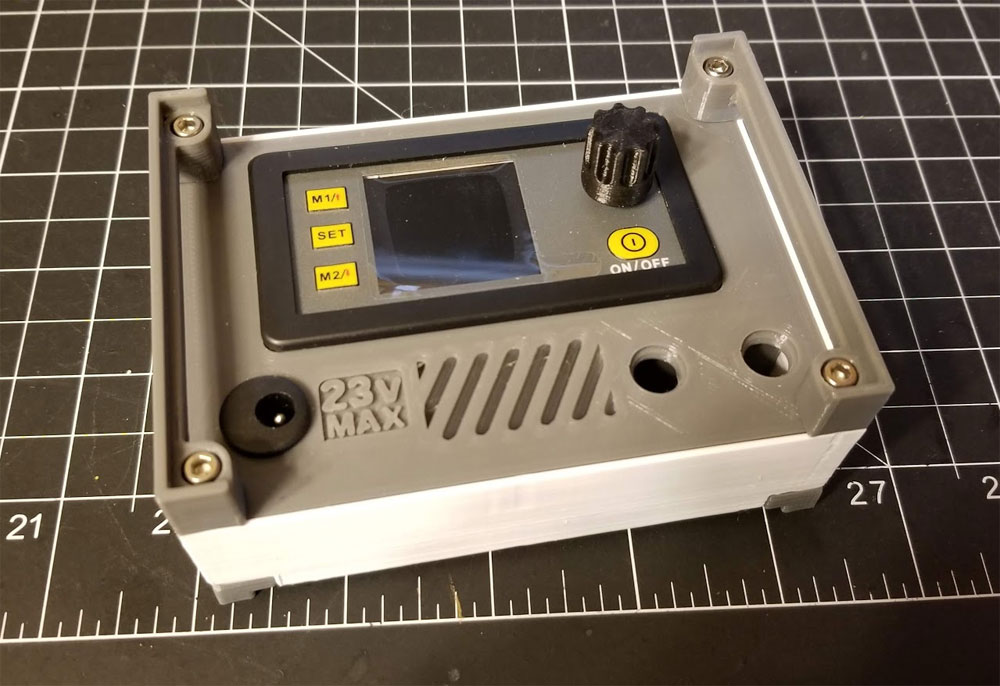
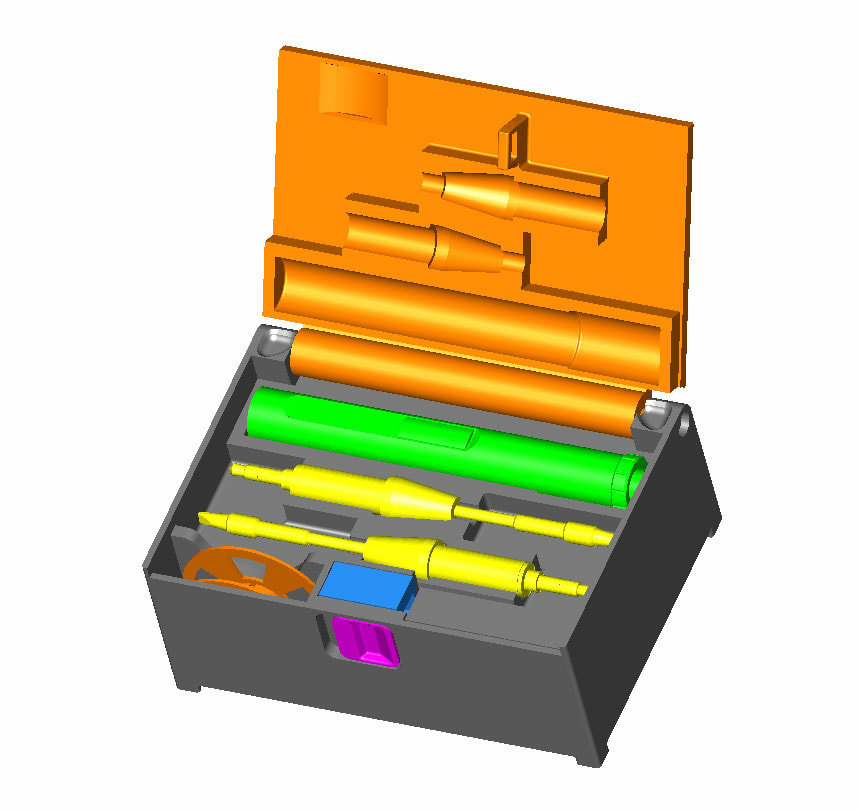
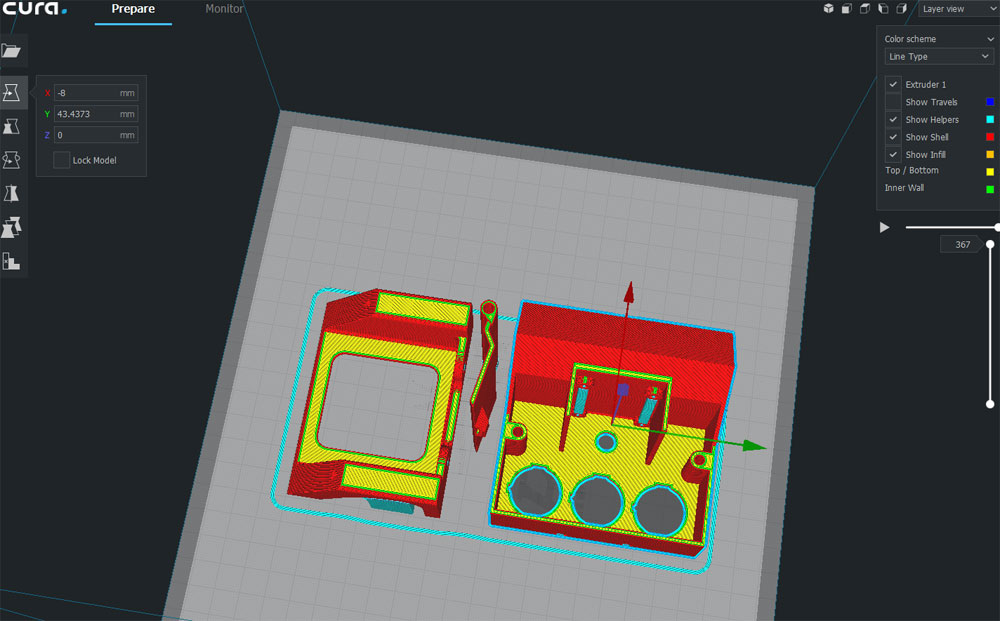
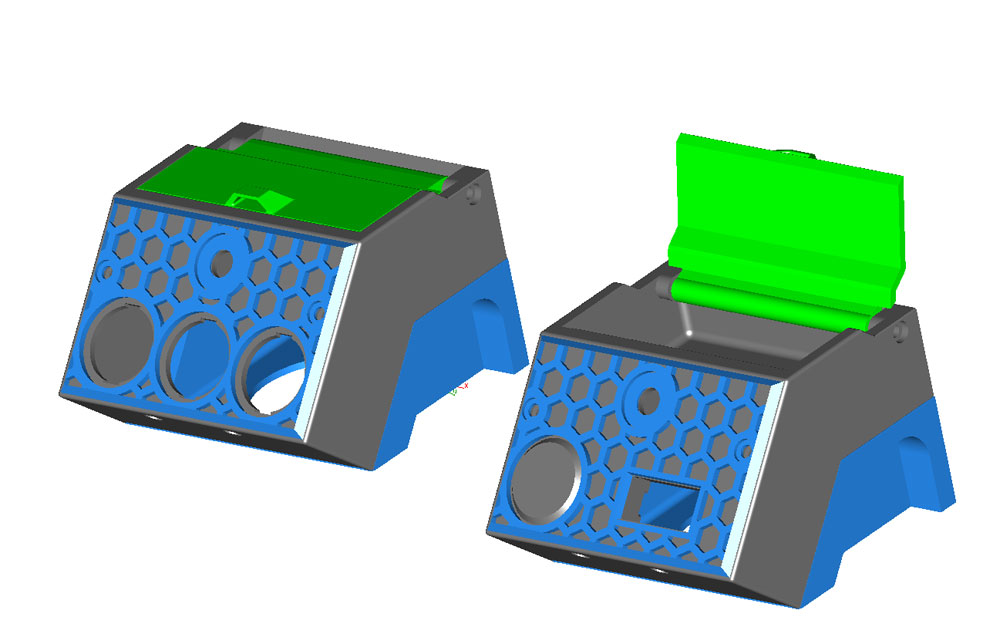
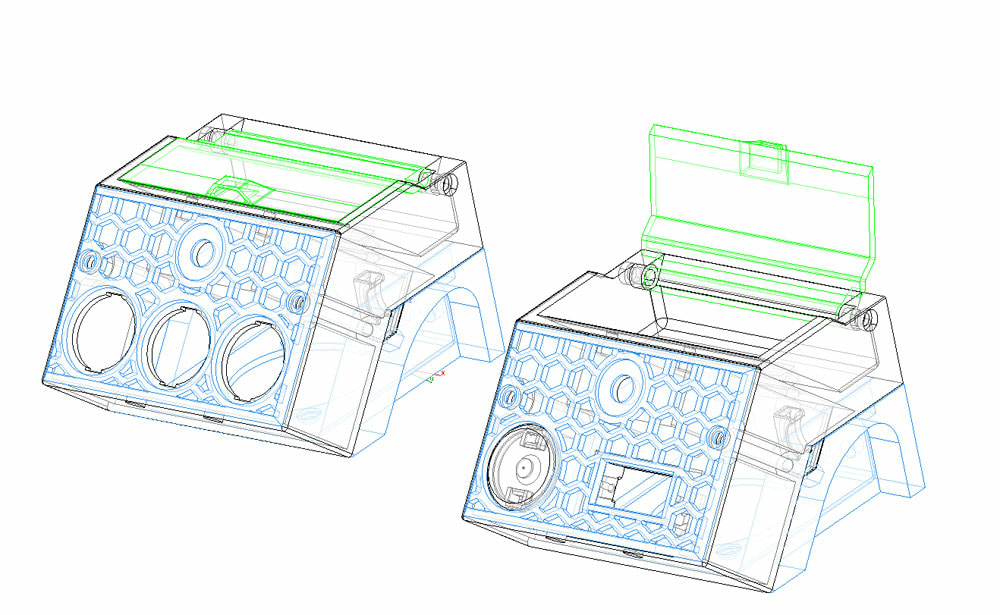
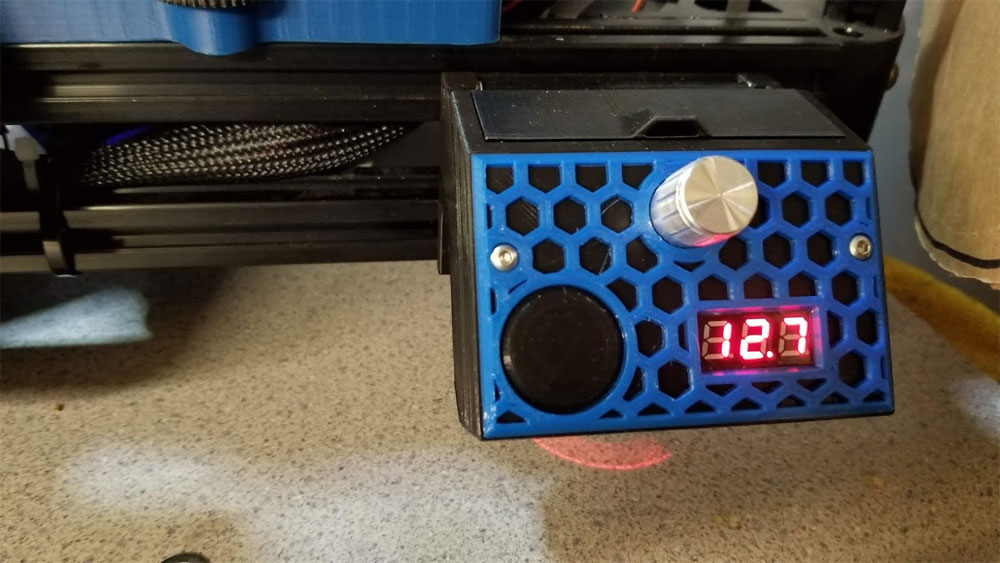
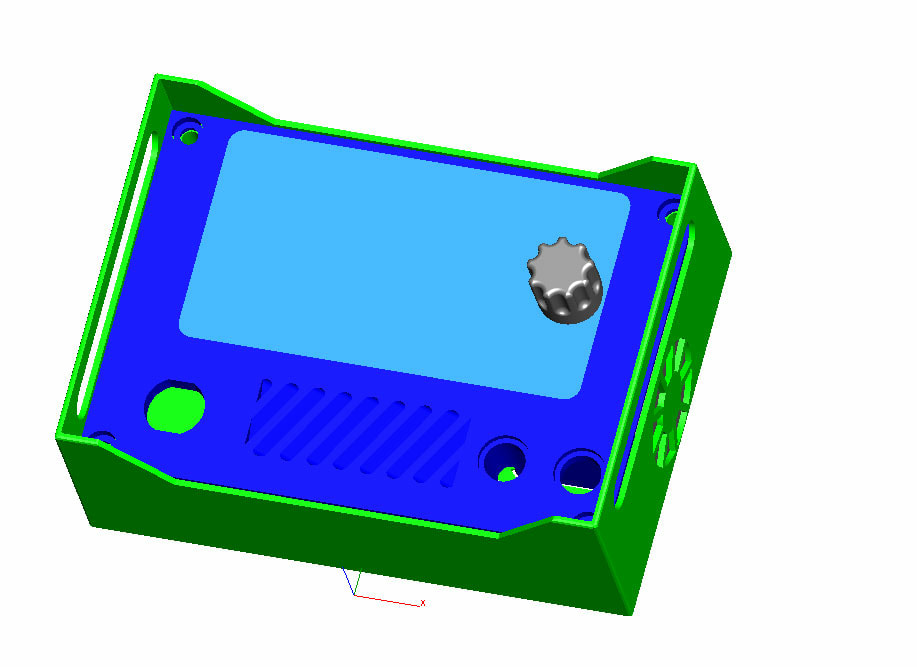
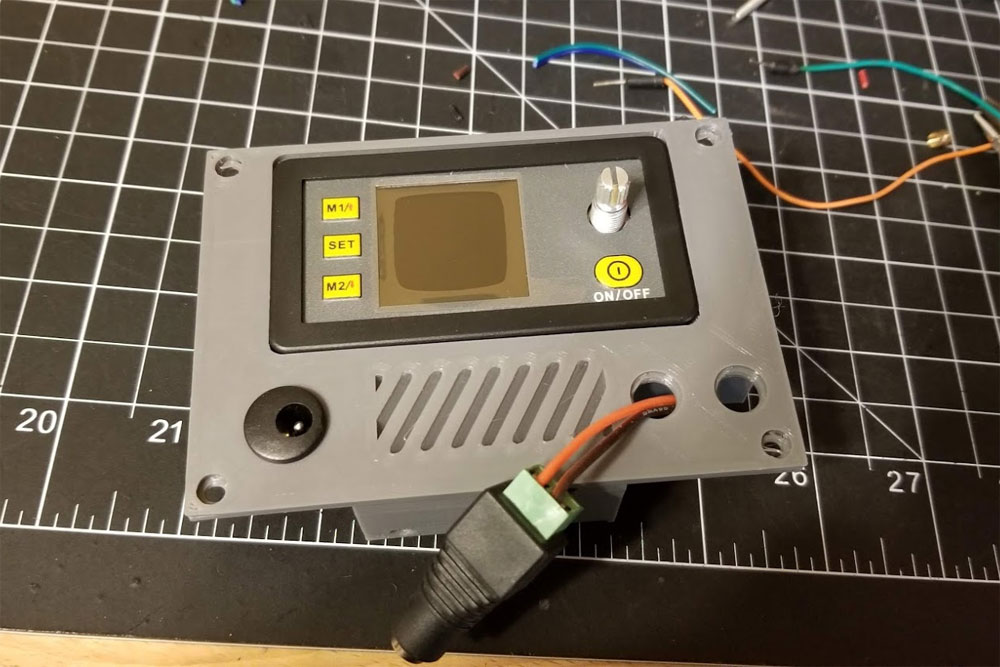
I've been working on a couple more projects for the breadboard kit - three actually.  The first is a the DS20V2A supply already posted on thingiverse, and the other two will be a TS-80 case and a solder fume extractor.  I think I may be close to done on the TS-80 case and likewise am nearly done with the fume extractor - though still waiting on parts for the fume extractor before I finalize the design.  When these are done, they will fit in the STANLEY 014725R organizer case with the breadboard kit.  I am also working on a slightly improved breadboard kit that can swap modules between the left and right handed versions, but that is on the backburner for now since it is just a really small change, but requires time and filament to test.

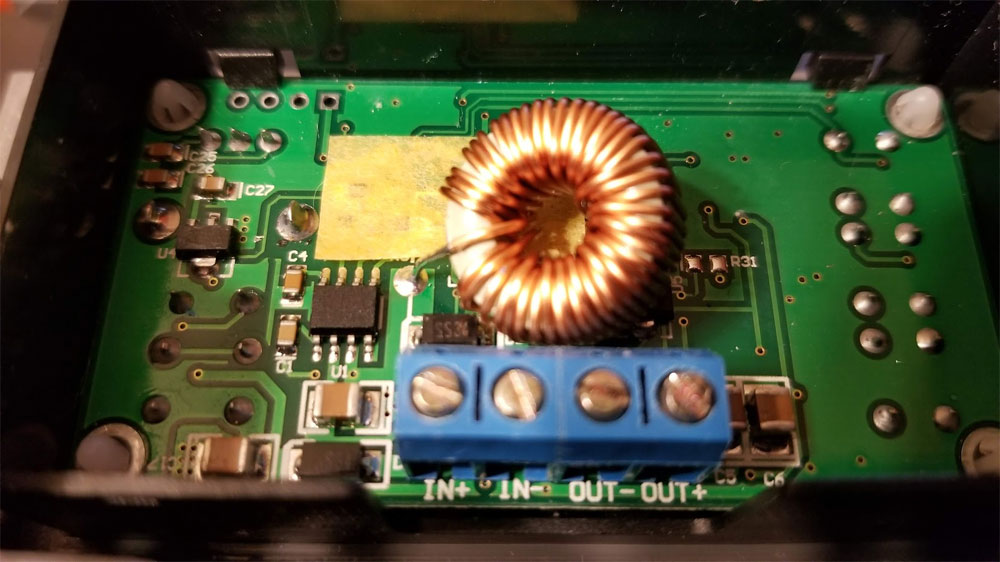
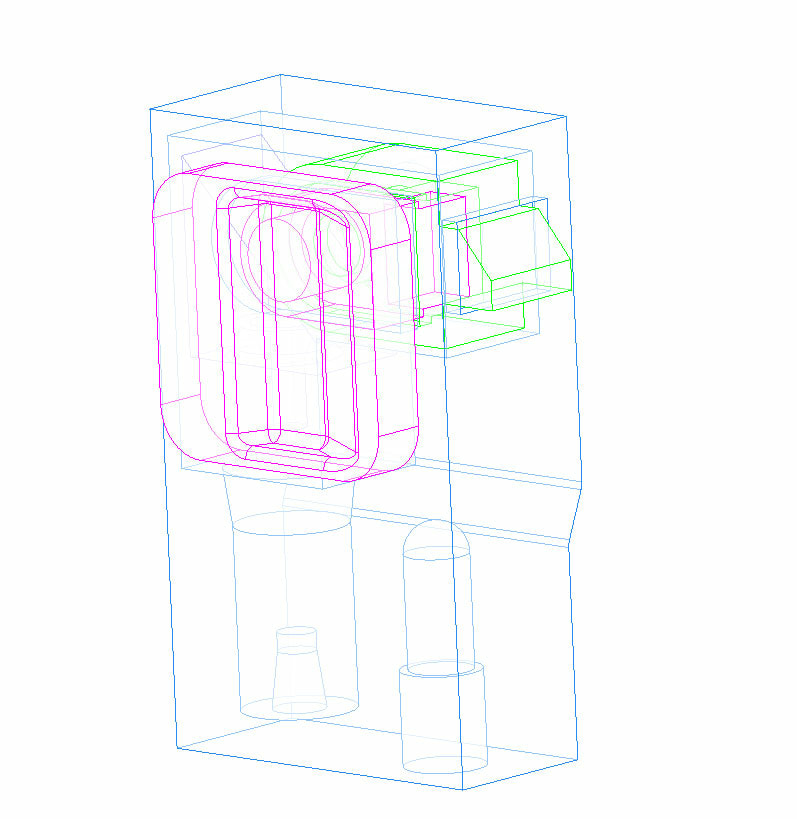
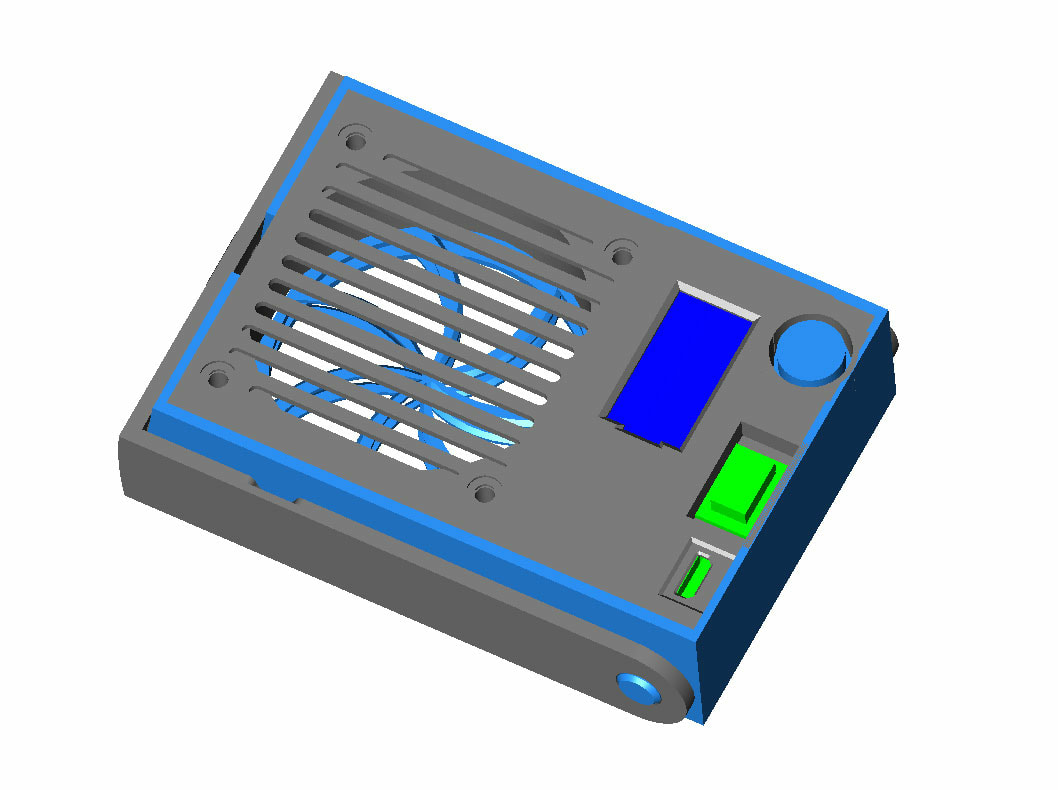
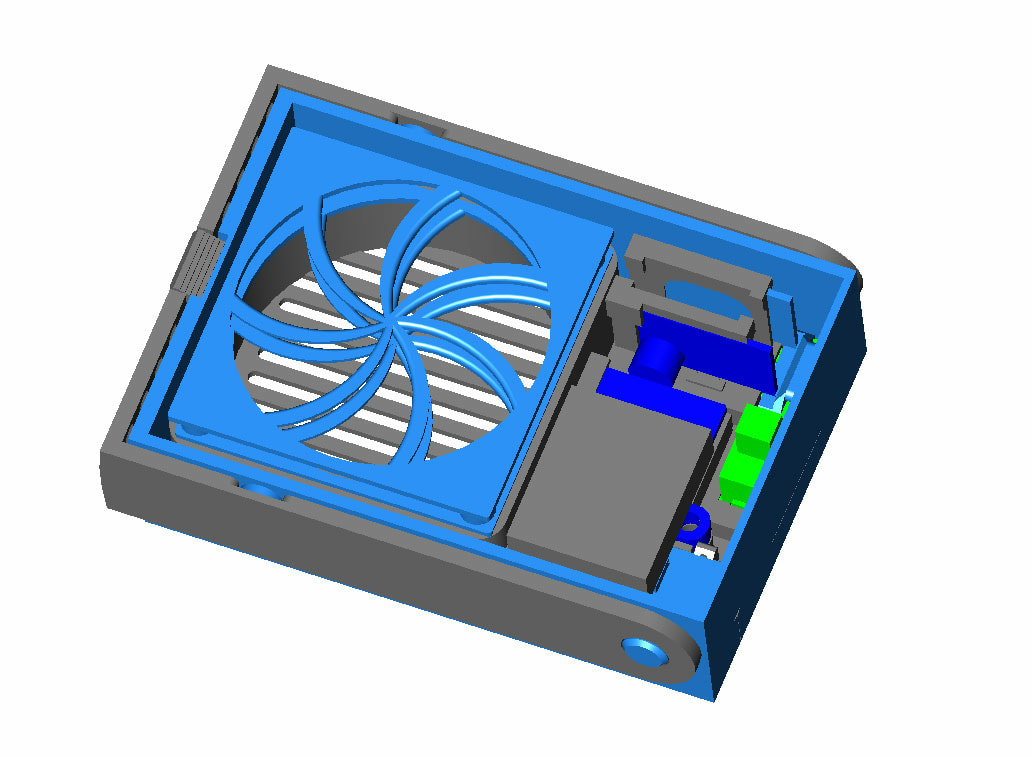
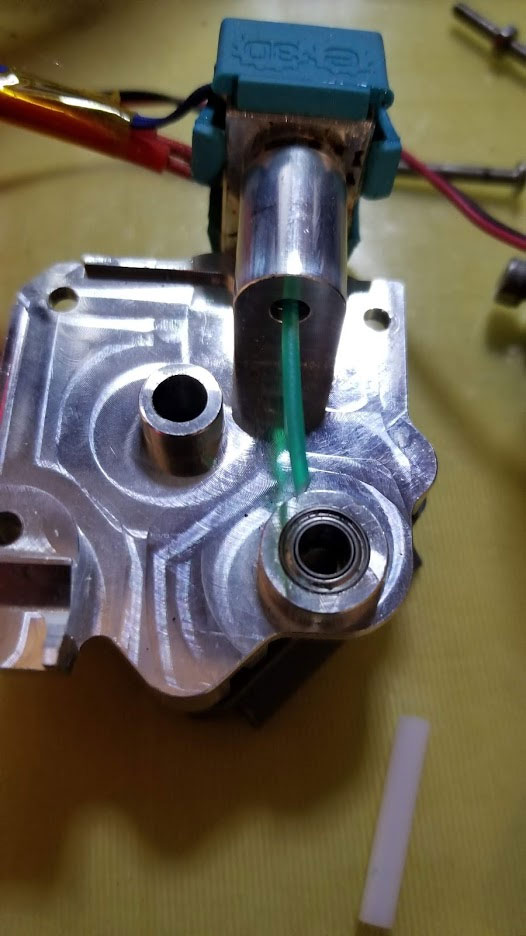
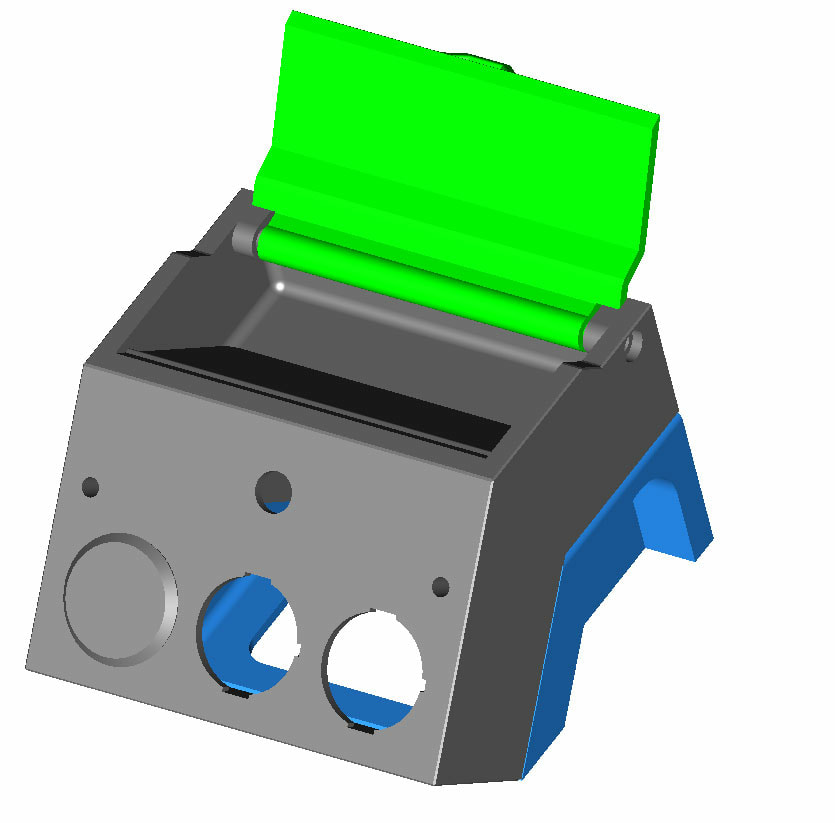
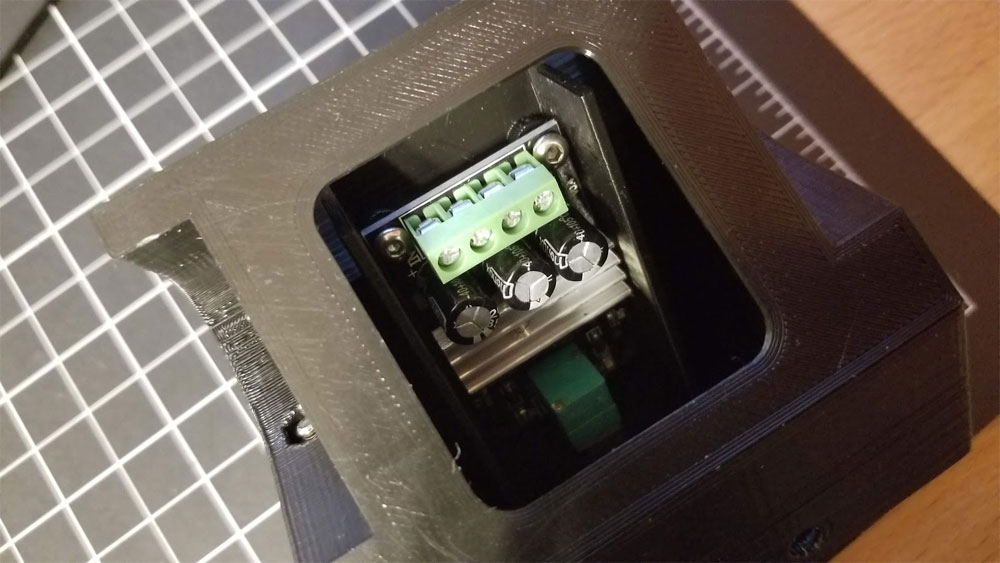
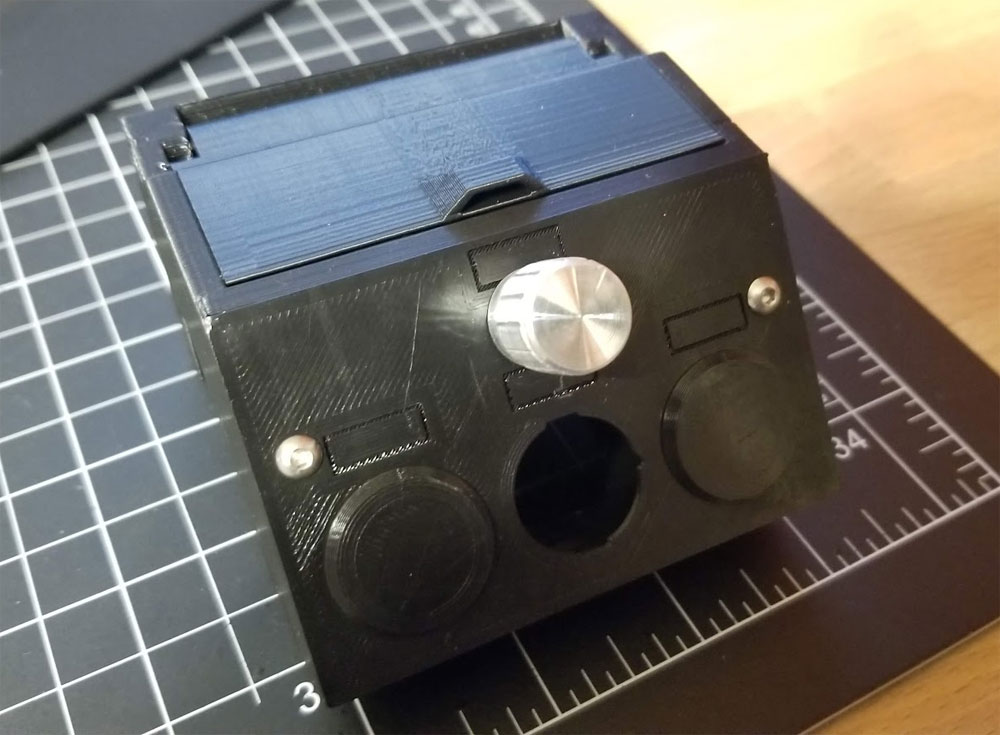
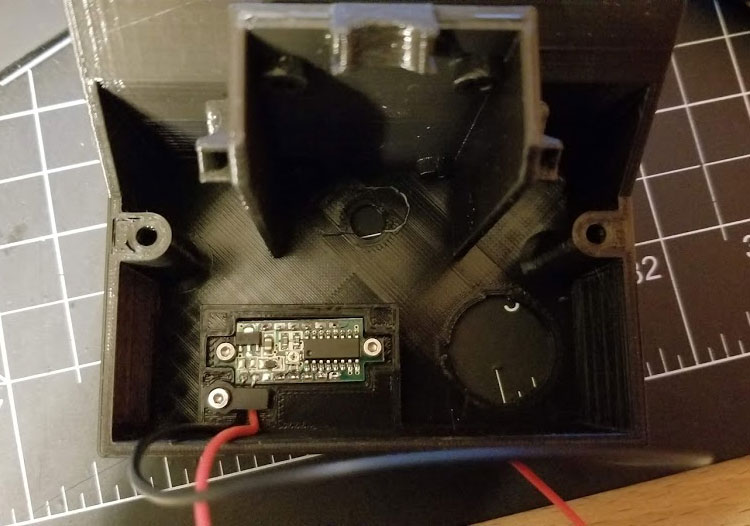
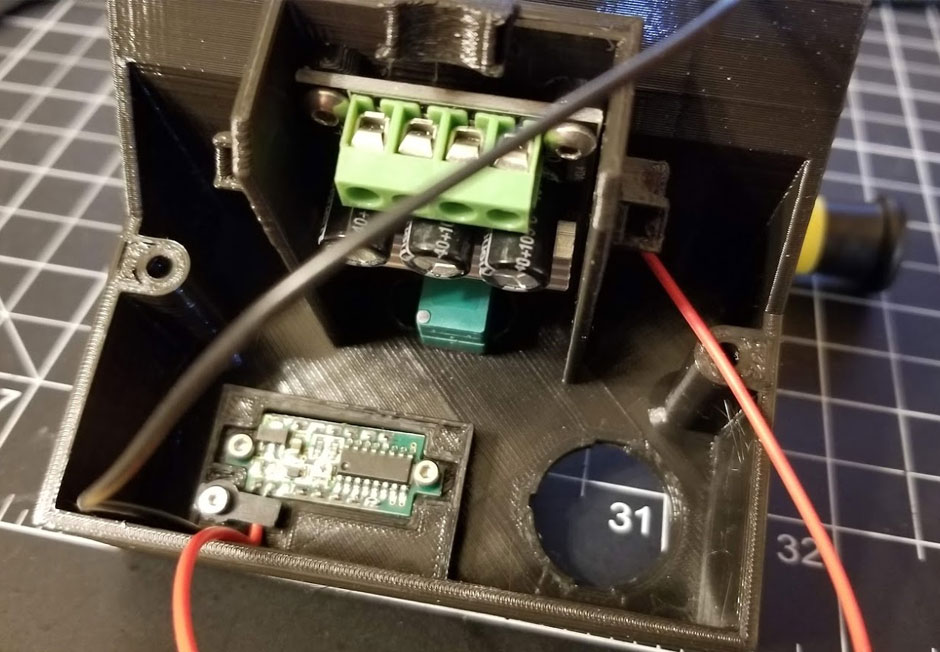
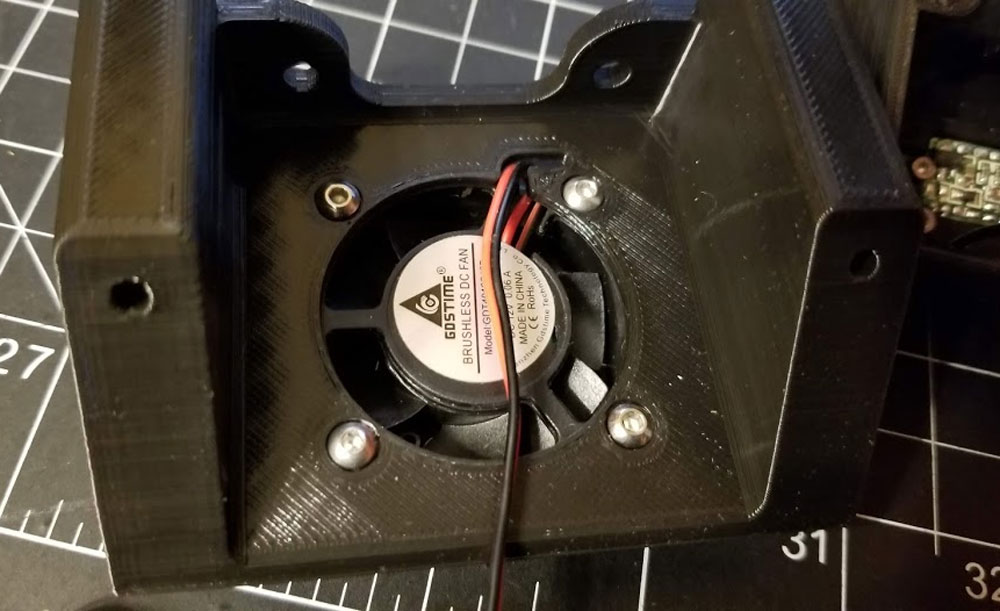
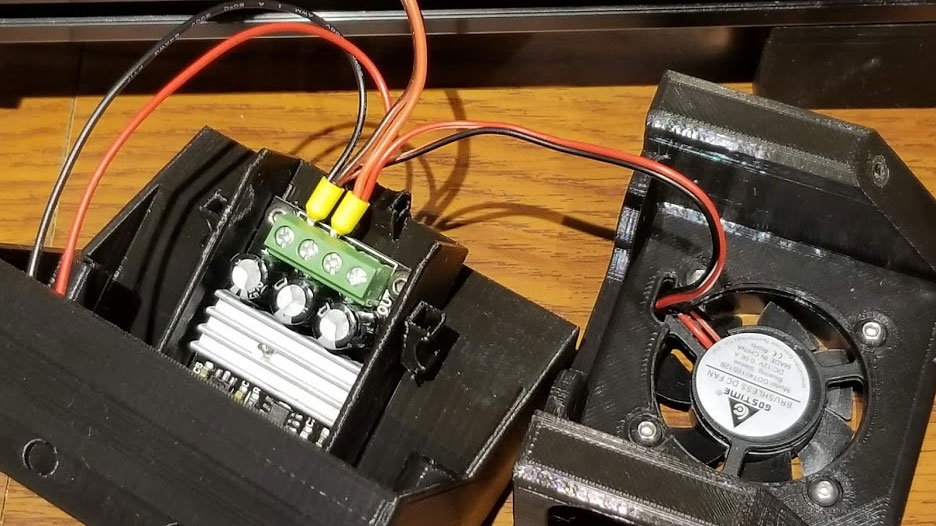
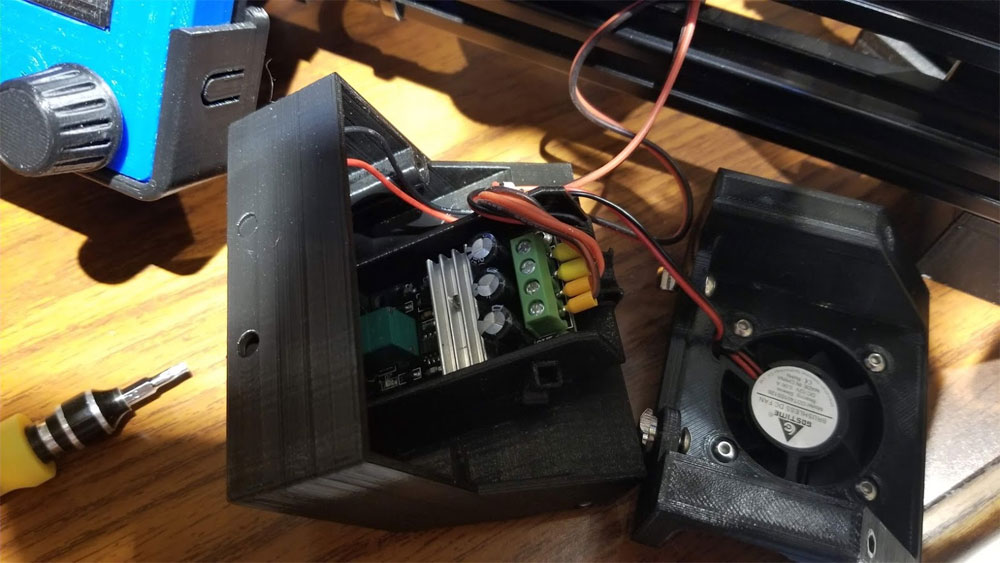
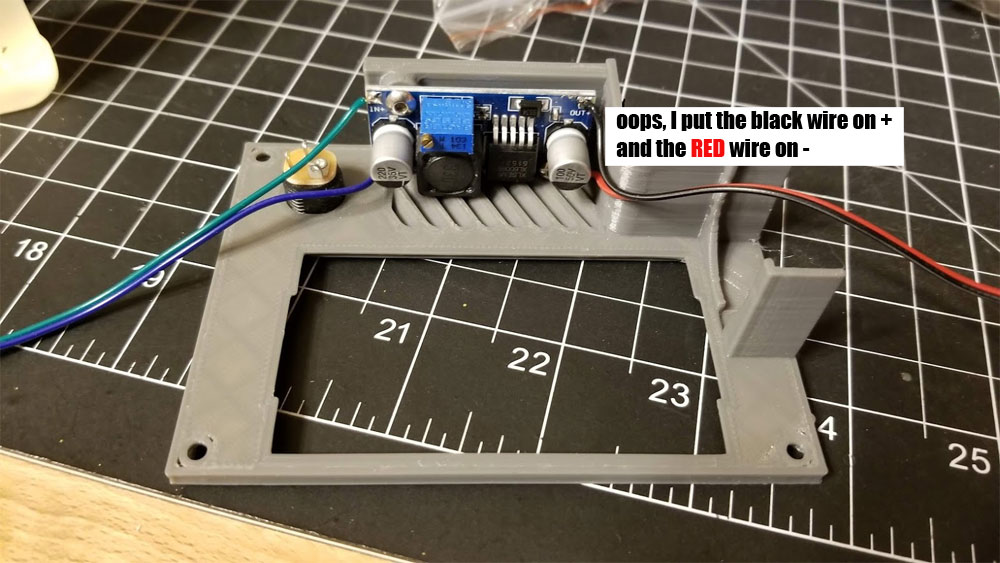
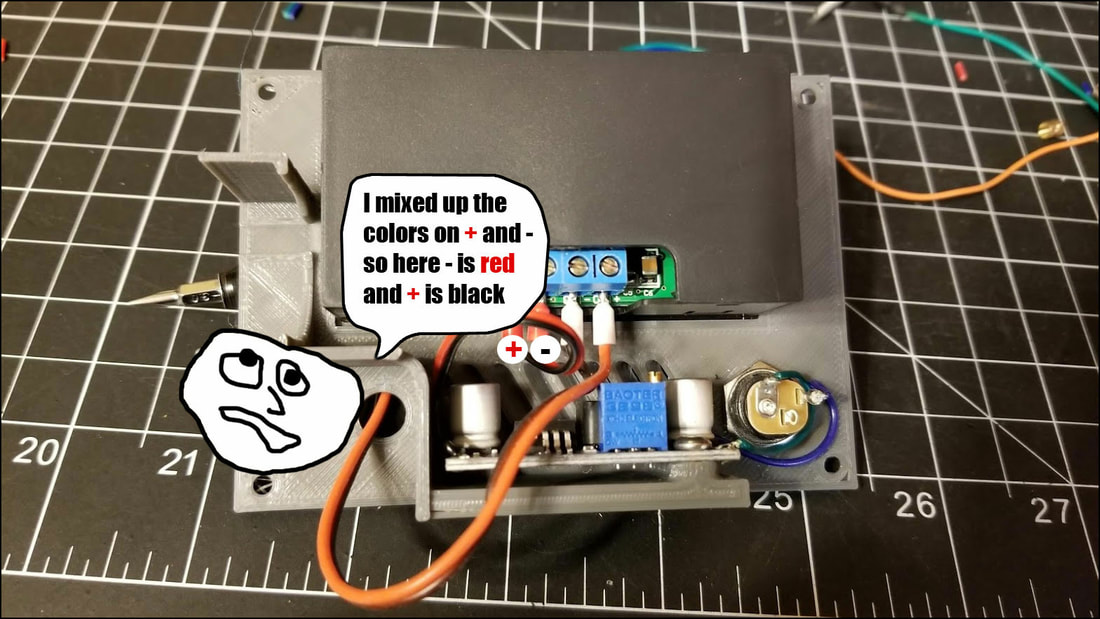
The solder fume extractor will use a 20x60mm fan and will be powered by a Li-Ion pack.  The electronics are packed into a module which can be assembled outside the enclosure, then placed inside when everything checks out.  It will include a USB battery charger and protection circuit for the Li-ion cell, a boost converter for the 12v fan and a display for the battery level which will be controlled with a momentary switch.  Getting that stuff to all work was the largest chunk of work and wasted some time and filament getting things right, but it's better than printing the whole mess to find out one switch does not work.  I also now have some useful modules to use in other projects.

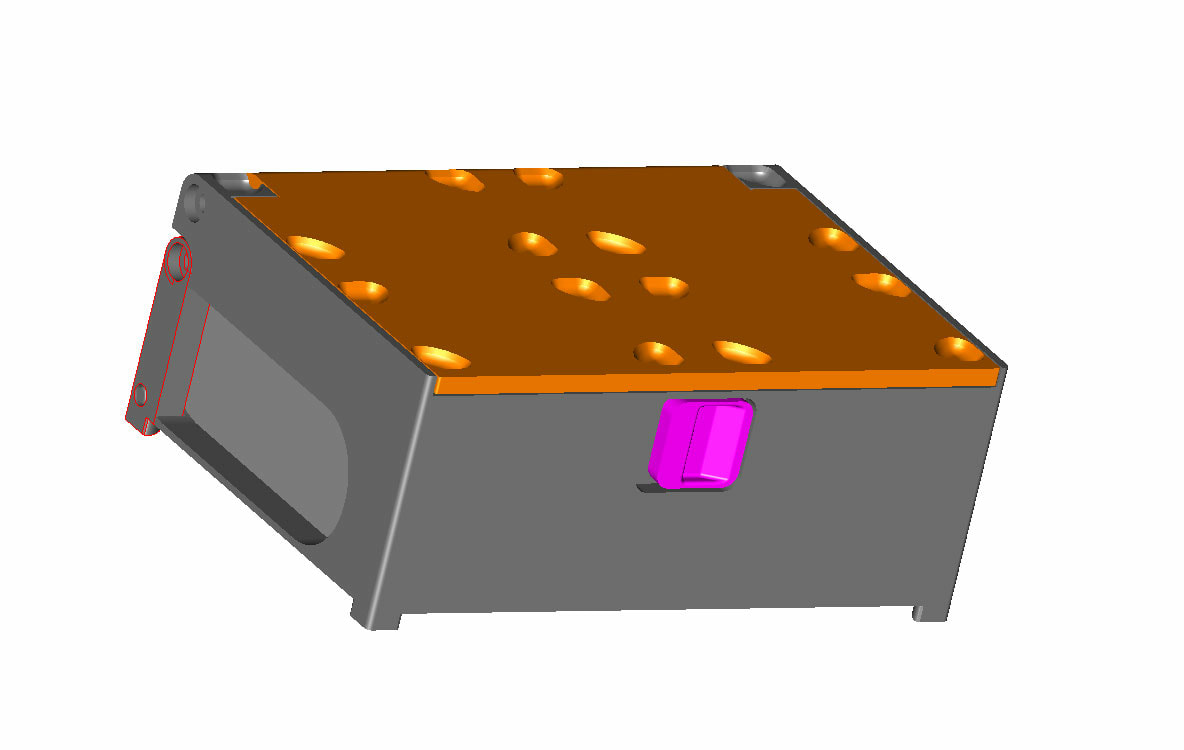
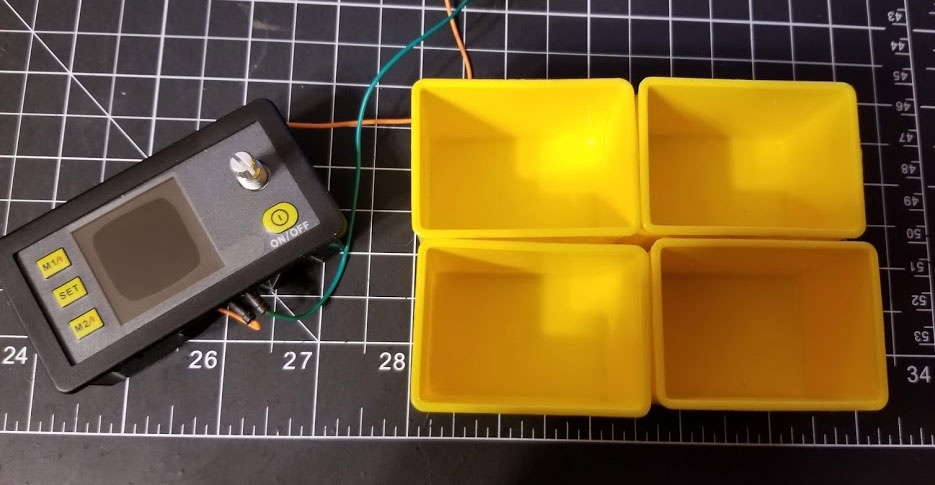
The TS-80 case will also hold a power bank, specifically this one from Anker.  That power bank is only 10k mAh, but it does work with the TS-80 well enough that I can get some usage from it before it dips too low to use.  The primary thing it has going for it is the QC 3.0 and the size which make it ideal for fitting in my Stanley Case.

It will probably be a couple more weeks for this stuff to get finalized and posted up.  The power supply is posted here.

Update - the TS-80 case is posted here.
0 Comments

Bad luck comes in pairs, at least with 3D printers

1/12/2019

0 Comments

 
Picture
Picture
Picture
Today both my delta and my Ender 3 decided to clog up, and not in the easy just atomic pull type of clog.  These were tear apart the extruder clogs and spend the next half hour questioning why I didn't pick up some easier hobby.  Anyway, hopefully there is something interesting here.

First the Ender 3 with the Titan Aero clogged up and ground the filament down.  This has not happened in some time, but looking at the inside, it was full of ground up green filament and not much else, so that seems to indicate that the problem just started.  I cleaned out the crap, and noticed that the filament was pretty well jammed in the hot end which seems to indicate heat creep.  This green filament is PLA, but it is suggested to run it at 235 which is closer to ABS.  I have however run this same filament many times in the Ender 3 without issue.  My retraction is very low (0.4mm) so it is probably not that.  It's a puzzle to me right now what caused this.

So the next clog was my delta printer which has a V5 hot end.  I have been wanting to swap it out for a long time, but just don't have the time right now.  This one was well and truly clogged, I tried all the regular tricks, atomic pull (oops, broke the filament before the clog), stuck those tiny needles up the nozzle - they just hit a solid jam several mm in.  I removed the nozzle to see if I could possibly push the clog out from the top or bottom.  That last one was successful, but I did not have anything that was really designed for knocking out a clog like this.  The clog was above the heat creep zone where heating the hot end does not loosen it and it was pretty well stuck.  I ended up using a 1/16" drill bit (my last one), which I chucked in my cordless drill for some extra grip.  I carefully lined it up and inserted it into the heat break tube from the bottom (with the nozzle removed), then heated the hot end up and when it was at temperature, I started to push the drill bit up through the heat break which finally dislodged the clog.  I was then able to pull out the approximately 5mm segment of PLA that was causing the problems from the top of the hot end using some tweezers.  I need to grab some more 1/16" bits since they may come in handy.

The most likely reason for the clog on the delta was some stop gcode which did a 1mm retract followed by a 5mm retract after finishing a job.  My retraction on this printer is 3mm so I suspect that the extra retractions at the end of a print were sucking molten PLA up into the top of the heat break tube which then formed the clog.  Supporting that possibility is that the prior print completed, but it was clogged when I tried to run the next print.  The Delta had been down for a while and I did not think there was any issue with the old start/stop gcode I had been using, but I hope removing the retractions from the stop gcode fixes the problem. 


Well nope...the delta still has clogging problems, and this morning, after clearing one clog and pushing some filament throug by hand it immediately clogged again.  Just about broke my hand pulling this clog out (and yep it was pre-heated), and the bowden couplers had some sort of death grip on the PTFE tube, will need to swap them out for something that will release as well as hold the bowden tube (which also ended up pretty messed up after the ordeal of trying to get that little plug or melted PLA out).  So the bowden couplers and PTFE tube were collateral damage but at least for the couplers, they were probably bad anyway.  I think the next step is a full tear apart of the V5 hot end to see what the deal is with this gap that is allowing a plug to form.  Another weekend half shot thanks to printer problems, which I think is my cue to give up for a bit on this for a while.  Will figure it out, just not today.
Picture
Picture
So the delta may be back in business, but so far I have only run small quick prints on it.  I swapped the bowden tube and the coupler on the hot end.  Hopefully this will keep working, but the last print I ran, the delta was doing some crazy air printing - after the part was completed.  I have seen this once before, and I now suspect it has to do with sending the data from octopi.  Since there is no error checking with gcode sent from Octopi, and I have had problems with the Octopi terminal stopping (while the printer still seems to be sending temperature data back), I think it may be time for a better and shorter USB cable (currently I am using one that is about 6 feet long due to the location of the Pi).  Could be barking up the wrong tree, but my Ender 3 never does this, and I use OctoPi with that all the time (with a 1 foot USB cable).

Update - Jan 27, 2019

The Delta had more problems with clogging and I found the problem, which was a loose wire to the hot end cooling fan.  It was making enough contact that it would come on when it was stationary, but as it moved it would become intermittent.  However I am not going to swap the original hot end with the one below, which sports a custom touch probe mount (27mm offset).  I am hopeful that I can get this working in the next week when I get some more time since I have to also update the firmware and wire it up (most of that is done, but I have not installed it yet). 
Picture
Picture
Picture
0 Comments

PWM Fan Controller and Switch Panel for the Delta

1/7/2019

0 Comments

 
Picture
I recently installed a more powerful blower fan on my delta (for the electronics case) but damn if it doesn't sound like it will take off.  To tame the fan a bit I needed a PWM controller (for a 3 wire fan).  I ordered one like this, and made a case for it which will also have space for three illuminated switches. I'm still waiting on parts so am not 100% everything will fit, but I printed it anyway.  If it works out when I get the rest of the parts, it will get posted up to Thingiverse.

Jan 11, 2019

The final version of this is now posted on Thingiverse here.  I say final, but it is still a "work in progress", still I think it will be the last revision of this model since everything seems to fit so far (still waiting on switches).  There is also a face plate which is purely cosmetic that is being printed right now (so no pics of that yet).

Below are some new pics, I have it mounted on the delta and the PWM fan controller is doing a good job of keeping the blower under control.
0 Comments

DP20V2A Case for the Stanley Organizer

1/4/2019

0 Comments

 
Picture
Picture
I've been trying to pimp out my Stanley 014725R organizer for electronics projects and decided to add another adjustable power supply.  The size of this will be the same as a 2x2 arrangement of the small cups for the organizer.  This power supply is a bit more advanced than the others I have used with the organizer, but I am not sure how much I will end up using it.  It may take the place of my bench supply for some stuff though, and that would be cool.  I got some inspiration from seeing this thing, and I used this for the case. 

There is a big compromise for the small form factor that can fit in the Stanley case however.  Due to the low height requirement, I had to use the DP20V2A supply which has a max input voltage of 23V.  24V sucks a bit though, since I have some 24V stuff.  I already had one these though, so thought I could use it.  The parts I am planning to use for this are:

DP20V2A CV/CC Programmable Control Step-down Power Supply
XL6009E1  DC-DC Adjustable Step-up Power Converter Module

DC 24V Brushless Cooling Fan 25mm 25x25x10mm - this may not be used.  I need to test to see how well it will work with 22V.

Once I get this printed I will post it up (if it works that is).

Update - Jan 14, 2019

I did get this printed but had some issues with it, which I think are now fixed in the 2nd version (printing that now).  Everything seems to fit in the old version pictured, but the handles are flimsy and I wanted to be able to use a dual banana jack which has 3/4" spacing (19.05mm).  So that required some re-working (a lot really).  The latest version is pictured last and will be uploaded when/if it works out.  I am still waiting on parts from China so I may just post it up as a work in progress since I am 99% sure the parts will fit (waiting on the 4mm banana jacks).
Update Jan 16, 2019

My DP20V2A supply fried itself last night though it never received more than the max 23V input (never more than 22V actaully).  Looking at the board I suspect that the inductor may have been pressed against a component on the board due to a manufacturing error, but since it was an Ebay purchase I am doubtful there will be anything the seller will do.  Went ahead and ordered another one which will take a couple weeks to arrive.  I did make some more changes to optimize the design a bit more (pic below).  Once I get it printed and tested, I will upload it and post a link.
Picture
0 Comments
    Picture

    Stoopid Me

    Welcome to my Stoopid corner of teh Internet.  It's mostly gonna be 3D printing stuff, but I also post some recipes, projects, and the occasional rant here as well.  More Stoopid stuff is updated regularly.

    I recently joined the Amazon Associate program, so some of the links on this site are Amazon affiliate links. This means that, at zero cost to you, I will earn an affiliate commission if you click through the link and finalize a purchase.  This will help to support this site, and pay for more Stoopid Stuff.

    Archives

    March 2023
    February 2023
    January 2023
    November 2022
    October 2022
    September 2022
    August 2022
    July 2022
    April 2022
    February 2022
    January 2022
    December 2021
    November 2021
    October 2021
    September 2021
    August 2021
    July 2021
    June 2021
    May 2021
    April 2021
    March 2021
    February 2021
    January 2021
    December 2020
    November 2020
    October 2020
    September 2020
    August 2020
    July 2020
    June 2020
    May 2020
    April 2020
    March 2020
    February 2020
    January 2020
    December 2019
    November 2019
    October 2019
    September 2019
    August 2019
    July 2019
    June 2019
    May 2019
    April 2019
    March 2019
    February 2019
    January 2019
    December 2018
    November 2018
    October 2018
    September 2018
    August 2018
    July 2018
    June 2018
    May 2018
    April 2018
    March 2018
    February 2018
    November 2017
    September 2017
    August 2017
    June 2017
    December 2016
    October 2016
    September 2016
    July 2016
    March 2016
    February 2016
    September 2015
    August 2015
    June 2015
    May 2015
    April 2015
    March 2015
    February 2015
    January 2015
    December 2014
    November 2014
    October 2014
    September 2014
    July 2014
    June 2014
    May 2014
    April 2014
    March 2014
    February 2014
    November 2013
    August 2013
    July 2013
    June 2013
    May 2013
    April 2013
    March 2013
    January 2013
    December 2012
    November 2012
    October 2012
    September 2012
    August 2012

    Categories

    All

    RSS Feed

      Contact Form (Name is optional)

    Submit
Powered by Create your own unique website with customizable templates.