I hooked up a 3D Touch to a co-worker's Ender3 Pro (with the 1.1.3 board) and thought it would be a good idea to add some links here to helpful videos and sites.
A quick overview though. The Ender3 and Ender3 Pro have a board that requires a bootloader. The simplest way to do that (for me) is to use an arduino. After the bootloader, the software is installed (Marlin or in this case TH3D - which is a fork of Marlin). Then the 3Dtouch was wired up and installed.
I've done this a few times already but it has been a while, so I sought out some videos, and found these covered it very well (none of these are mine, but I found them helpful):
And this video from TH3D which goes over the whole setup for a bootloader.
If that is too long, well the basics are:
- Set up the Arduino as an ISP
- Make sure the Ender3 is unplugged and powered off - the update process is done without power to the printer.
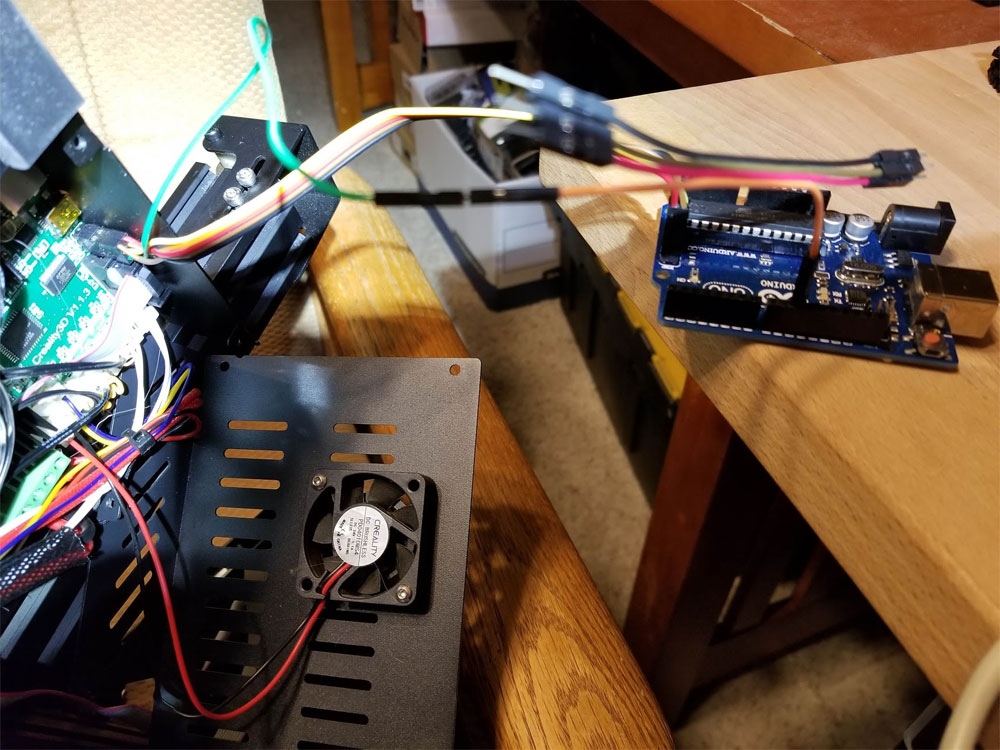
- Connect the Arduino ISP to the Ender3 ISP header (connections are one to one, except for reset which goes from the ISP reset on the Ender3 to pin 10 on the Arduino. It helps to have the Arduino and the Ender3 Boards positioned as they are in the above video from TH3D here. Watch the videos above if you are not sure about anything though, they cover everything.
- Double check everything before powering up the Arduino (which will power the Ender3 board).
- Make sure you have the Sanguino third party hardware add-on installed (https://github.com/Lauszus/sanguino) and to install it see here.
- Watch this to make sure you have the correct settings in your Arduino IDE youtu.be/U9MGIlQgzkg?t=460
- Then just upload the code.
The next part is installing the 3DTouch. I won't go over the software side, but if using TH3D, you can use their configurator tool here which should help with the setup.
The following video from 3D Printing Canada is a very good overview of setting up a BLTouch probe on the Ender3 (3D touch is the same basic setup). Note however the 3D Touch has slightly different wire colors.
Brown = GROUND
Red = +5V
Orange = Signal
The Black and White wires remain the same as the Bl-Touch.
A couple tips though.
- Use good quality wire, I used some silicone 22 AWG UL3132 wire to make the harness and added some latching connectors to replace the duponts on the probe end.
- Additionally, on the board side, I soldered the signal (orange) wire to the cable connector for the display (rather than just adding a connector),
- I soldered what I am pretty sure was a "JST xH" connector to the black and white wires (pay attention to polarity it matters on this). I salvaged the JST connector from an old 2 pin fan.
- The other pins were just wired up with duponts on the board side and I dabbed some hot glue on all the board side connectors but did not get it all over the ISP header.
Again it pays to double and triple check connections before applying power and closing up the control box.

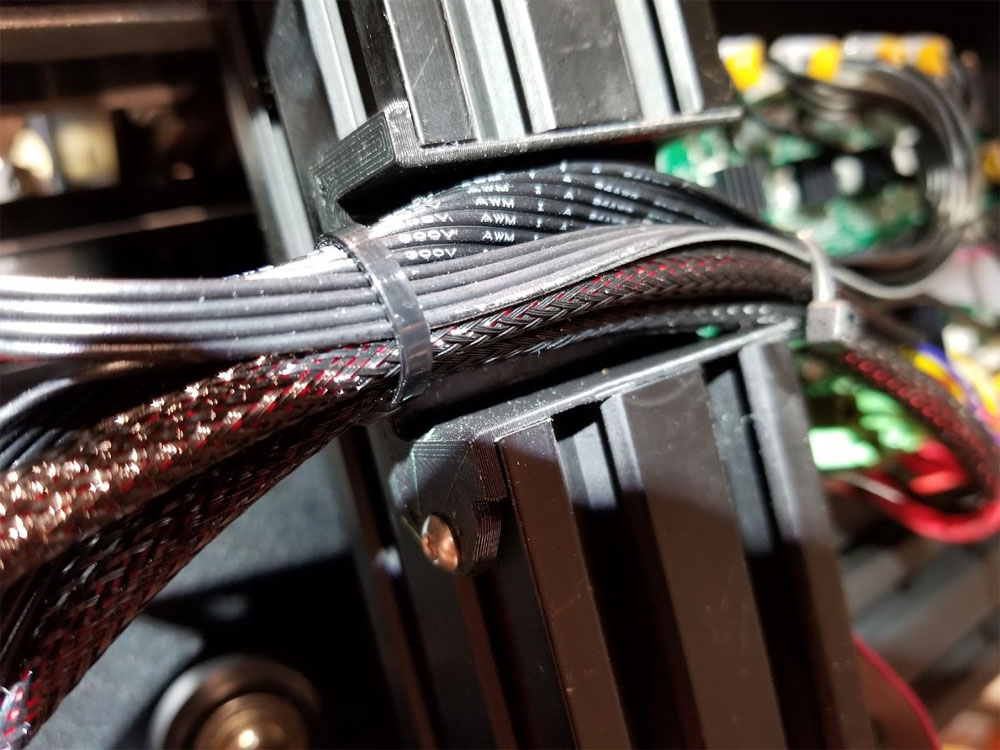
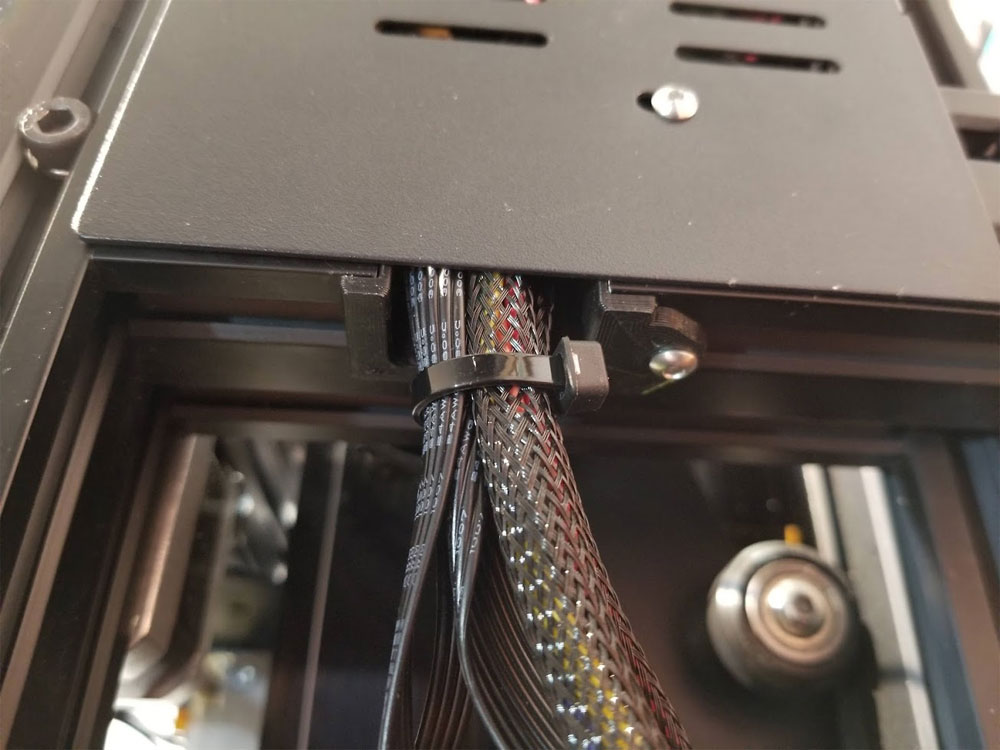
I also added a cable protector while I had the printer control box opened. This is I feel necessary since Creality cut a pass through for the cables though the aluminum extrusion which has some very sharp edges. I designed a protector for the ender3 some time ago and just uploaded one for the Ender3 Pro as well, you can find them on thingiverse.
Ender3 Pro Cable Pass Through Protector
Ender3 Cable Pass Through Protector
 |  |
One final note, I gave the printer back after upgrading the software and getting the 3DTouch working, however I did not test it with an autolevel or print due to time constraints. I was told however that the probe will home, and autolevel without a problem, but that the probe drops once it begins printing. I suspect that the problem is due to the probe needing to be re-magnetized, or possibly the grub screw needs to be adjusted. If that is necessary, the following video from Crosslink on YouTube, has tips on how to resolve it:
Update - I forgot to update this before, but I was able to work on the printer shortly after the last post and get it working. I tried re-magnetizing the grub screw, adjusting the grub and finally tried trimming the heat shrink which holes the magnetic bead to the pin. Unfortunately I must have trimmed too much and messed it up, but I am pretty sure it was the problem I just too off twice what was needed. Fortunately however, I had a spare probe at home which I just stole the pin from and swapped it into the one with the problem, and that did the trick. Most of the time it should be problem free, but seems that some of the QA is not the best on the clones (however I have had 6 of the 3D Touch probes and only had the problem with one). For what they cost ($10 on Ebay), it's worth getting a spare since once you have one, you will not want to print without it.
Updated 5/12/2022
Updated 5/12/2022


 RSS Feed
