 |  |  |
"Christine" as I have started to call my Ender 3 (which is really more like an Ender 8 by now), is still giving me headaches. The latest attempt to get decent prints was adding a Titan Aero from E3D, which is what this post is about more than the Ender 3. After the problems I had matching slightly different Chinese clone parts to kludge together a clone Titan Aero, I just sprang for the real deal. The Titan and Titan Aero is another of those things that gets a good rep from most folks, and when it works I can see it's merits. The genuine Titan Aero is a heck of a lot better than the clone kludge I was using (though I am not sure how much better it is than a Titan Aero clone that was sold as one unit). Certainly the materials in the genuine are much better than the clones and the tolerances are quite a bit better as well.
After using the genuine Titan Aero though, I have to wonder what all the love is about. I had used the clone and understood the design quirks, but had wondered if they were possibly less of a problem on the real deal. Just because I am pointing out some of the problems does not mean I have put any thought into how to fix them, but that may be next (but really fixing this damn printer is starting to be a part time job).
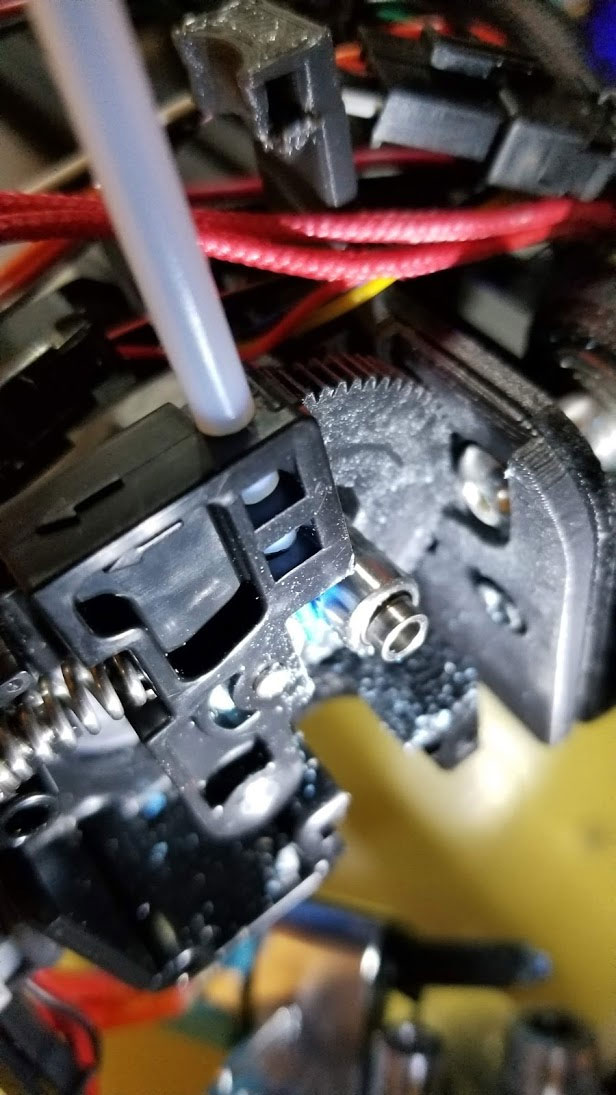
So what am I talking about, and why the hate for the beloved E3D Titan Aero? For starters, the proper assembly requires tweaking of the screws that hold the assembly together. The manual states "If the gear is hard to move, loosen off the corresponding M3 screw in the Aero sink until it moves freely." In reality it is all the screws that need to be loosened. The problem is that the heat sink is pressing too hard against the Acetal gear and binding it up (and this assumes a properly set up extruder gear). IMHO, that's really a crap way to design something, since the assembly that holds the whole mess from falling apart should be able to handle a proper tightening of screws. However in practice, even a quarter turn to snug the screws can seize up the whole works. I end up just having the screws make a mere suggestion at being snug, and then back that off by a half to quarter turn, otherwise things start to bind up (and it is not due to some misalignment, it just is the way it works). This however is not the worst fault of the Titan Aero, but I will get to that later.
The fan is another sore point, which normally would be a one time deal, just put it on and forget it right? Well, due to the Titan Aero's "quirks", the way the fan blocks access to the screws that hold the heat sink on and thus the holds the whole thing together, the fan mounting becomes a bit more frustrating. To disassemble the Aero, the fan needs to have at least one screw (a sheet metal screw!?!), removed before disassembly. Why does that matter? Well since I installed the Titan Aero last week, I have had it apart no less than 20 times due to one thing or another (not all faults of the extruder). Some cases which required a tear down however, I can put firmly in E3D's corner.
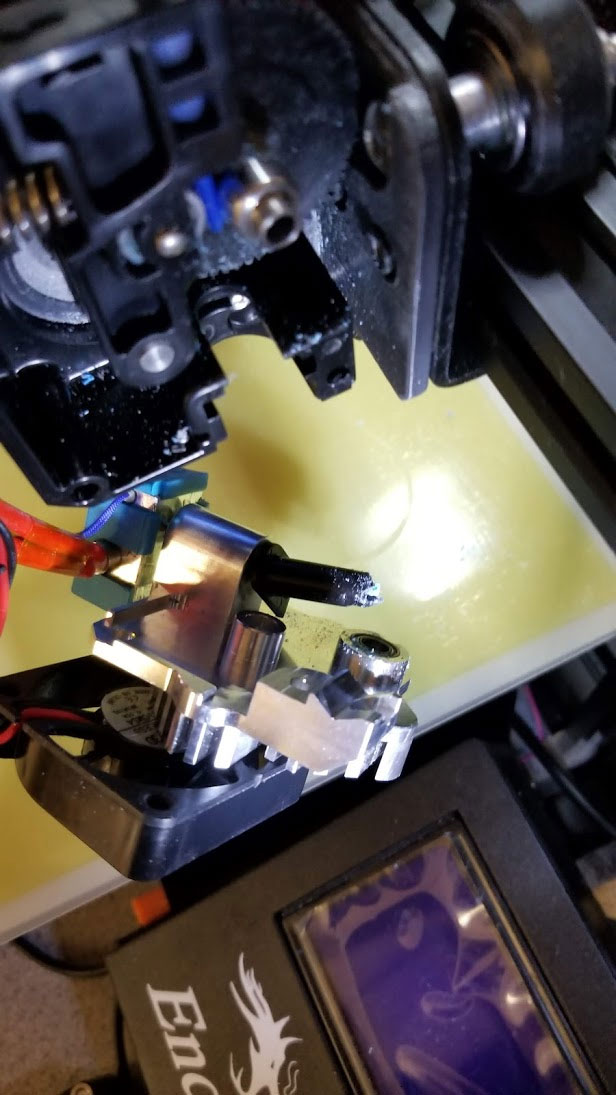
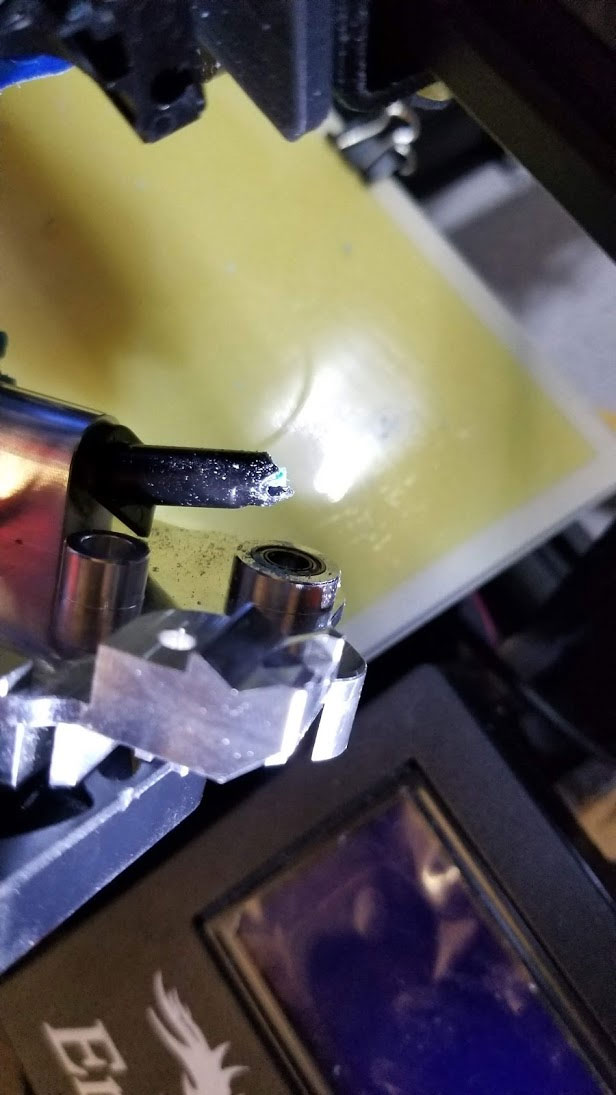
I am referring to how the filament path is inaccessible once the filament goes into the guide on the idler arm - there is no way to fix any problems aside from tearing the whole extruder apart and then removing the problem filament. It is also nigh impossible to visually check anything aside from possible grinding going on inside the filament path. Practically, this means, if the filament breaks between the top of the plastic filament guide and the top hole on the idler arm, and cant back it out with the gear, I have to take it apart to clear. If the tension is set a half turn too tight, and it grinds through the filament after printing nicely for 20 layers (which is what happened in the pics), I have to take it apart to clear. If the filament runs out, I may get lucky and can push the end down into the filament guide with the new filament, but that is sort of like pushing a noodle with another noodle, so possibly it's going to be another 15minutes to take it apart and clear the last 20 to 30mm of remaining filament. And each time I take it apart, that sheet metal screw holding the fan on is becoming a more questionable mounting solution (I have taken to leaving one screw off the fan).
So why is the Titan Aero such a popular upgrade? It does direct drive which is still better than a Bowden setup, and those are not without problems that require occasional disassembly to clear a clog or a jam, but it is generally quite a bit simpler than a Titan. The Aero will also do flexible filaments, but I can't imagine they are easy to set up. When I first got the Aero installed, and after it clogged up the first time, I tried running some cleaning filament though and it somehow looped itself up as it was going into the hole in the heatsink (so again I had to take the whole thing apart to clear the jam). I will probably keep the Aero on there since I have spent a lot of money on it, and I need to try and make it work. Once tuned at least for PLA and ABS, I expect the problems may become less frequent, but things like cold "atomic" pulls take on a lot more risk of time lost if the filament breaks in the wrong place inside the Aero. Anyway, it's just a damn printer and I will win, or it will ender up in the parts bin. At least my Kossel is working like a champ now.
After using the genuine Titan Aero though, I have to wonder what all the love is about. I had used the clone and understood the design quirks, but had wondered if they were possibly less of a problem on the real deal. Just because I am pointing out some of the problems does not mean I have put any thought into how to fix them, but that may be next (but really fixing this damn printer is starting to be a part time job).
So what am I talking about, and why the hate for the beloved E3D Titan Aero? For starters, the proper assembly requires tweaking of the screws that hold the assembly together. The manual states "If the gear is hard to move, loosen off the corresponding M3 screw in the Aero sink until it moves freely." In reality it is all the screws that need to be loosened. The problem is that the heat sink is pressing too hard against the Acetal gear and binding it up (and this assumes a properly set up extruder gear). IMHO, that's really a crap way to design something, since the assembly that holds the whole mess from falling apart should be able to handle a proper tightening of screws. However in practice, even a quarter turn to snug the screws can seize up the whole works. I end up just having the screws make a mere suggestion at being snug, and then back that off by a half to quarter turn, otherwise things start to bind up (and it is not due to some misalignment, it just is the way it works). This however is not the worst fault of the Titan Aero, but I will get to that later.
The fan is another sore point, which normally would be a one time deal, just put it on and forget it right? Well, due to the Titan Aero's "quirks", the way the fan blocks access to the screws that hold the heat sink on and thus the holds the whole thing together, the fan mounting becomes a bit more frustrating. To disassemble the Aero, the fan needs to have at least one screw (a sheet metal screw!?!), removed before disassembly. Why does that matter? Well since I installed the Titan Aero last week, I have had it apart no less than 20 times due to one thing or another (not all faults of the extruder). Some cases which required a tear down however, I can put firmly in E3D's corner.
I am referring to how the filament path is inaccessible once the filament goes into the guide on the idler arm - there is no way to fix any problems aside from tearing the whole extruder apart and then removing the problem filament. It is also nigh impossible to visually check anything aside from possible grinding going on inside the filament path. Practically, this means, if the filament breaks between the top of the plastic filament guide and the top hole on the idler arm, and cant back it out with the gear, I have to take it apart to clear. If the tension is set a half turn too tight, and it grinds through the filament after printing nicely for 20 layers (which is what happened in the pics), I have to take it apart to clear. If the filament runs out, I may get lucky and can push the end down into the filament guide with the new filament, but that is sort of like pushing a noodle with another noodle, so possibly it's going to be another 15minutes to take it apart and clear the last 20 to 30mm of remaining filament. And each time I take it apart, that sheet metal screw holding the fan on is becoming a more questionable mounting solution (I have taken to leaving one screw off the fan).
So why is the Titan Aero such a popular upgrade? It does direct drive which is still better than a Bowden setup, and those are not without problems that require occasional disassembly to clear a clog or a jam, but it is generally quite a bit simpler than a Titan. The Aero will also do flexible filaments, but I can't imagine they are easy to set up. When I first got the Aero installed, and after it clogged up the first time, I tried running some cleaning filament though and it somehow looped itself up as it was going into the hole in the heatsink (so again I had to take the whole thing apart to clear the jam). I will probably keep the Aero on there since I have spent a lot of money on it, and I need to try and make it work. Once tuned at least for PLA and ABS, I expect the problems may become less frequent, but things like cold "atomic" pulls take on a lot more risk of time lost if the filament breaks in the wrong place inside the Aero. Anyway, it's just a damn printer and I will win, or it will ender up in the parts bin. At least my Kossel is working like a champ now.


 RSS Feed
