My Stoopid Stuff
  • Home
  • Projects
  • Blog
  • Lec'tronics
  • Links
  • CNC
  • Quick Recipes
  • 3D Printer Tips

CR10S PRO Capacitive Sensor Failed

1/17/2020

8 Comments

 
I went to home my printer after running a print and found that the Z sensor was not working (crashed the hot end into the bed).  I ran M119 and it was not showing as triggered even though I had triggered it and could see the red indicator LED was lit on the sensor.  To be sure though, I tested it out, and since I am lazy I googled to see if it was an NPN or PNP, and turns out it is NPN - and mine is dead - though it is strange the LED still indicates correctly (broken wire or connection maybe?).  The pinout on these sensors is Black (output), Blue (ground), Brown (V in).  I connected it up to my adjustable supply set for 12v, and connected the 10K Ohm pullup resistor between the black wire (output) and the 12V in, and when triggered, it never dropped the voltage on the output pin so seems to be dead. 

No biggie though, these are cheap and it gives me a reason to swap it for an inductive probe.  I bought the one linked in the how-to video by Nexi-Tech here (and also picked up a capacitive sensor just in case I decide to switch back.

https://www.nexi-tech.com/creality-cr10s-pro-autolevel-sensor-upgrade/

This did get me thinking about spare parts for the CR10S Pro, and how they are actually not easy to find beyond the basics.  Fortunately there is always some other way to fix something on most of these printers, than just dropping a genuine spare part in, but it is often not as easy as just swapping like for like.  But my search for the genuine spare did lead me to find this:

https://www.ebay.com/itm/Creality-CR-10S-PRO-3D-Printer-800mm-tall-Ribbon-Cable-Extended-MAX-Free-ship/283676658044

Which unfortunately I cannot find more info about over at opembuilds (despite what is in the listing).  Looks like a simple mod  as mods go, and could be really cool - but now that I have my enclosure for my printer it is not on the menu anytime soon.  I think that kind of mod would also need to have some upgrades to the rigidity of the bed unless the speeds were slowed down quite a bit.  Really cool upgrade though, maybe someday I will do it.
Picture
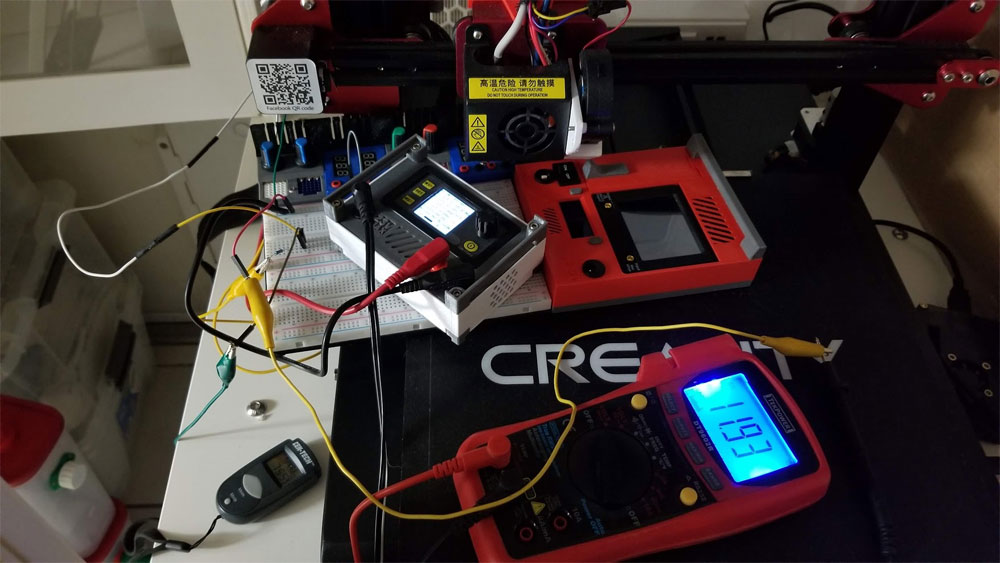
Not triggered, 12V in and 11.93V on the meter which measures the black wire (output).
Picture
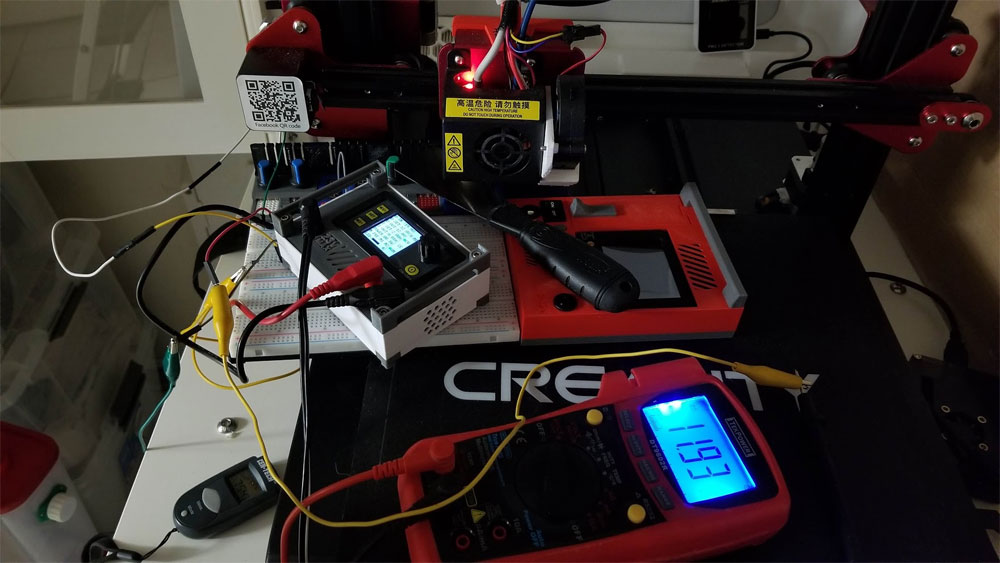
Triggered and no change to the voltage on the black wire. It should have dropped to almost zero volts since the NPN transistor inside the sensor would have closed the circuit to ground, but that did not happen.
8 Comments
Tom Bauer
8/13/2020 01:37:23 pm

my output wire, black, never has power but led works. does this mean it is bad? It has 24vdc supply voltage.

Reply
Tom Bauer
8/13/2020 08:01:00 pm

To expand, the pullup resistor is 10K and there is 24 vdc and ground. With the distribution board completely unplugged the pullup resistor measures 10K. With only the main ribbon cable plugged in it measures 3K and less than 1 vdc on black wire pin which never gets pulled to ground but it is so low already. Problem seems to be at other end of cable. Ideas??

Reply
Mike link
8/17/2020 11:40:54 pm

Hi, I never really looked close at the breakout board but I found this: https://www.antclabs.com/creality3d-board which shows the schematic for it. It shows an Opto-Isolator on it, and also an indicator LED on the signal line (which I never noticed either). I just checked mine and the LED is on normally, and goes out when triggered as expected (it's late here). The 10K you see when the sensor is unplugged looks correct, but not really sure on the 3K when connected, where were the test points when you saw the 3k and 1v?

There could be something with the board, but it would be strange that the sensor would be the only problem if that is the case. If the blue LED on the breakout is working though, that would indicate the sensor is OK. If the blue LED does not function then I think what I would try is to test the sensor off the machine.

Venom
11/14/2020 09:10:25 am

I recently acquired two CR-10s Pro V1s that have had numerous issues due to the original owner but I’m having the issue with both probes. I replaced the circuit board near the motors and still have the same issue. Is it the motherboard or what needs to be replaced after the probe and circuit board have both been replaced?

Reply
Tom Bauer
11/14/2020 09:21:13 am

Does the sensor red LED come on? Does the LED on the connection board go out at the same time. If the board LED does not go out you have broken wire.

Reply
Mike link
11/14/2020 12:29:37 pm

Hi, just to add to what Tom suggested, and if the LED is working on the breakout board, then you could test the ribbon cable continuity as well, there is a pin out here (note that I have not tested this is accurate but it should be a start - and there will be a difference between the V1 and V2 since they use different probes):
https://imgur.com/gallery/YRRrEmX

If you have access to the serial console (through Octoprint or Pronterface) you could also check to see if the probe is triggering using M119.

It seems really strange though that two printers would have the same failure. Are the replacement probes both the NO (normally open) type?

Reply
Venom
11/15/2020 06:51:49 am

Honestly I’m not sure. The original owner in a way scammed me and told me these were in working order and ordered probes on my behalf. They seem to be the same except without the Philips adjustment screw at the top

Reply
Mike link
2/24/2021 11:30:51 pm

Sorry for the late reply, just saw this here when going through some comments today. I hope you got this worked out, but really sux that the seller did that.

Reply


Leave a Reply.

    Picture

    Stoopid Me

    Welcome to my Stoopid corner of teh Internet.  It's mostly gonna be 3D printing stuff, but I also post some recipes, projects, and the occasional rant here as well.  More Stoopid stuff is updated regularly.

    I recently joined the Amazon Associate program, so some of the links on this site are Amazon affiliate links. This means that, at zero cost to you, I will earn an affiliate commission if you click through the link and finalize a purchase.  This will help to support this site, and pay for more Stoopid Stuff.

    Archives

    March 2023
    February 2023
    January 2023
    November 2022
    October 2022
    September 2022
    August 2022
    July 2022
    April 2022
    February 2022
    January 2022
    December 2021
    November 2021
    October 2021
    September 2021
    August 2021
    July 2021
    June 2021
    May 2021
    April 2021
    March 2021
    February 2021
    January 2021
    December 2020
    November 2020
    October 2020
    September 2020
    August 2020
    July 2020
    June 2020
    May 2020
    April 2020
    March 2020
    February 2020
    January 2020
    December 2019
    November 2019
    October 2019
    September 2019
    August 2019
    July 2019
    June 2019
    May 2019
    April 2019
    March 2019
    February 2019
    January 2019
    December 2018
    November 2018
    October 2018
    September 2018
    August 2018
    July 2018
    June 2018
    May 2018
    April 2018
    March 2018
    February 2018
    November 2017
    September 2017
    August 2017
    June 2017
    December 2016
    October 2016
    September 2016
    July 2016
    March 2016
    February 2016
    September 2015
    August 2015
    June 2015
    May 2015
    April 2015
    March 2015
    February 2015
    January 2015
    December 2014
    November 2014
    October 2014
    September 2014
    July 2014
    June 2014
    May 2014
    April 2014
    March 2014
    February 2014
    November 2013
    August 2013
    July 2013
    June 2013
    May 2013
    April 2013
    March 2013
    January 2013
    December 2012
    November 2012
    October 2012
    September 2012
    August 2012

    Categories

    All

    RSS Feed

      Contact Form (Name is optional)

    Submit
Powered by Create your own unique website with customizable templates.