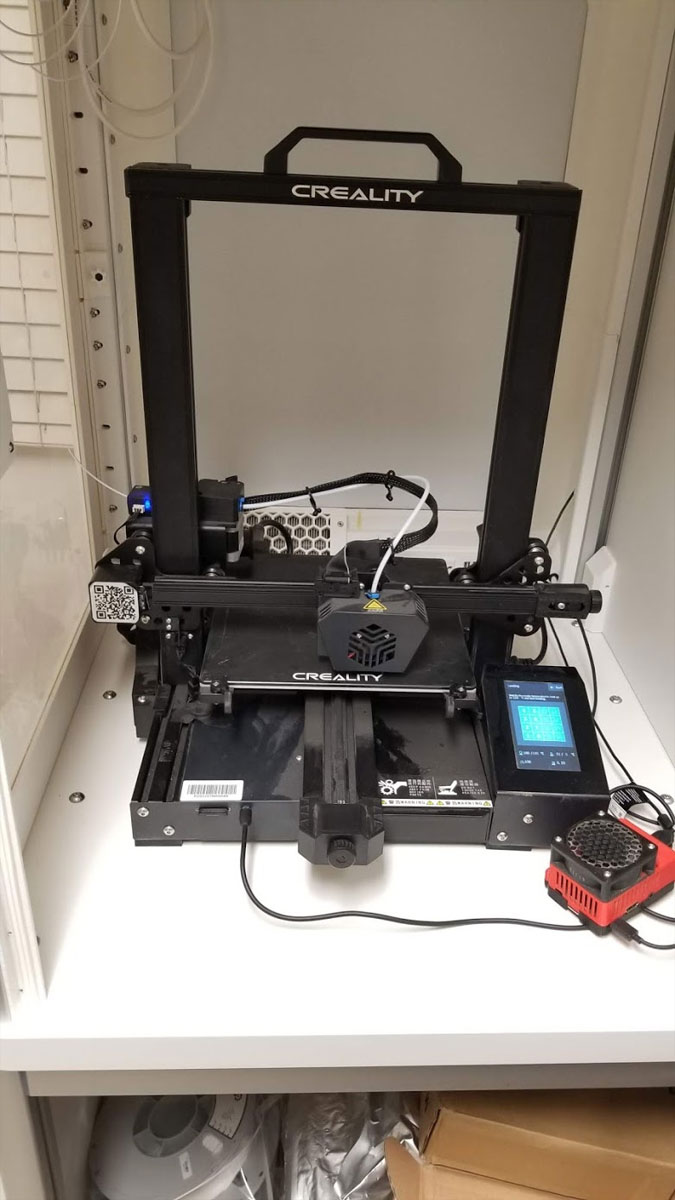
 The CR10S Pro didn't disappear, it's only giving up it's throne for a couple days so I can use the ducted enclosure to test the CR6 SE.
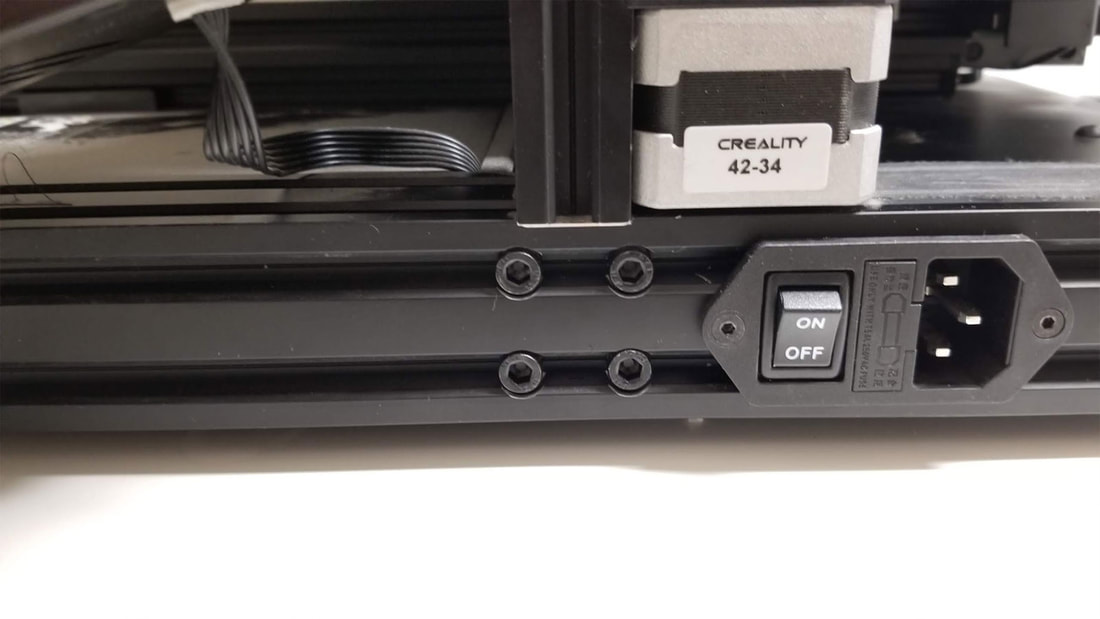
 A buddy got a sweet deal on a gently used CR6-SE, but it had some issues. He said he was having multiple failed prints early on, which he suspected an problem with the extruder to be the cause. His printed also told me the power switch was bad. I'm not sure if this was an early or late Kickstarter CR6 SE, but he said that he did not trust the power switch, and so he was just powering it on using the mains and leaving the switch in the on position. I don't know the whole backstory on the faulty power switches on the CR6 SE, but apparently there were problems with a poor quality power switch on some of these. In any case I found a replacement switch for $3 at TH3D Studio, and swapped it out for him.
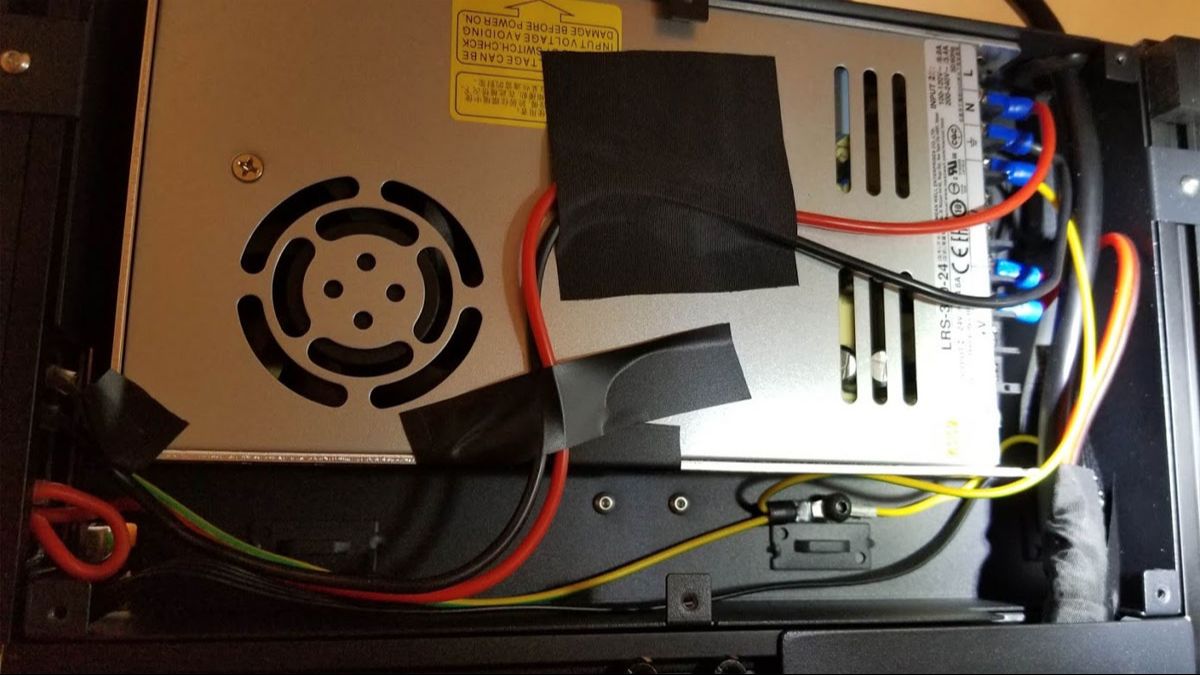
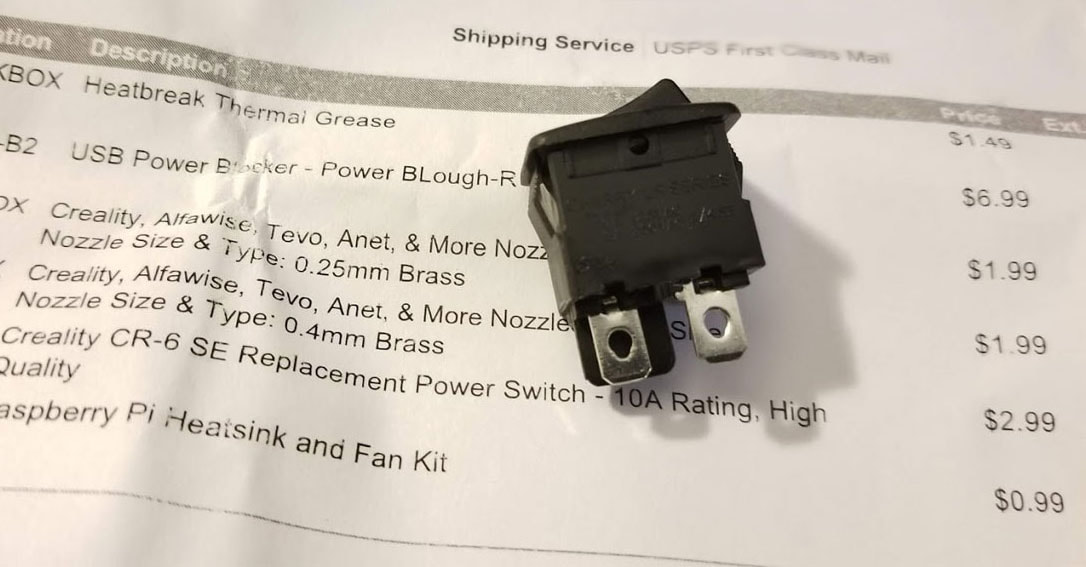 The replacement switch is a Cherry SPST rated for 10A @ 120V(AC) Rated. The old switch (Part KCD1-104) also claims a 10A @ 125VAC rating, but was suspected to be faulty. | 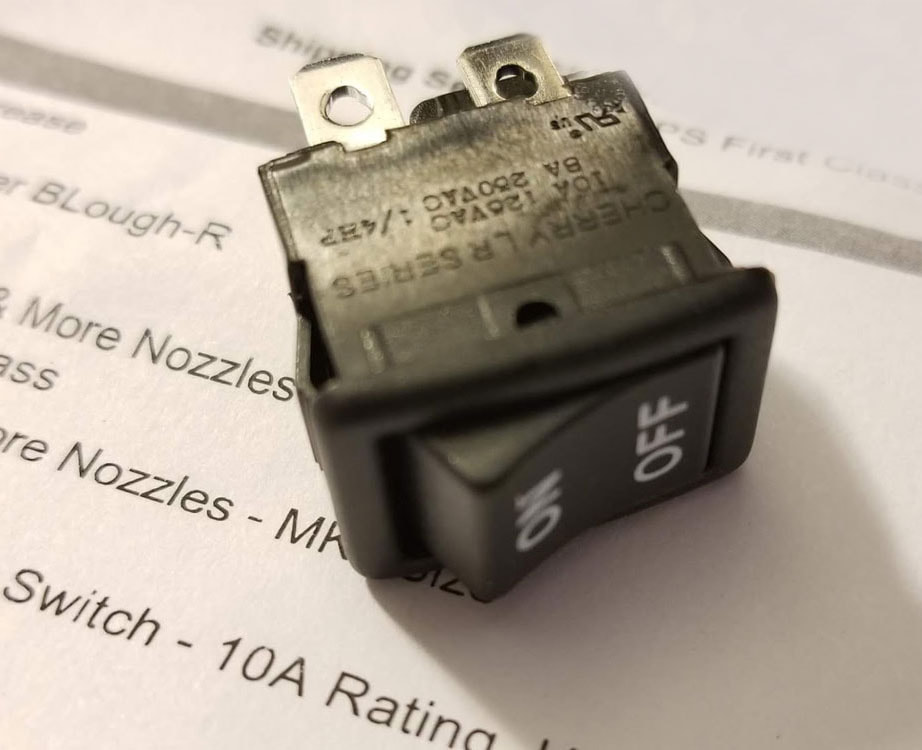 | 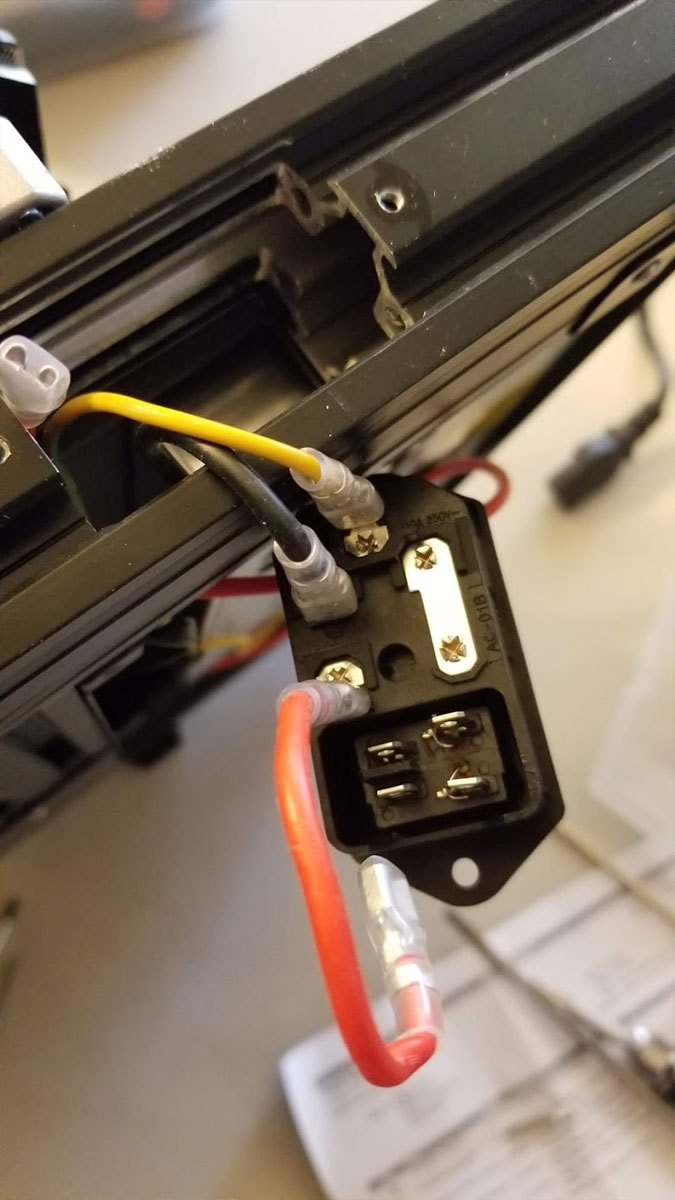 Removing the old switch. In this pic, all the wires are removed from the old switch to make it simpler to remove. To remove it, I had to release clips which are along the short side of the switch. Then I just snapped the new on in it's place and reconnected the wires as they were before. |
I also added some black electrical tape around any areas where wires could have rubbed inside the power supply compartment before buttoning it up. It was nice to see a genuine Mean Well Supply in there, though I heard they used them in this printer so it wasn't really a suprise.
Once the power switch was swapped and the case buttoned up, I checked and tightened all the wheels, some of which were quite loose.
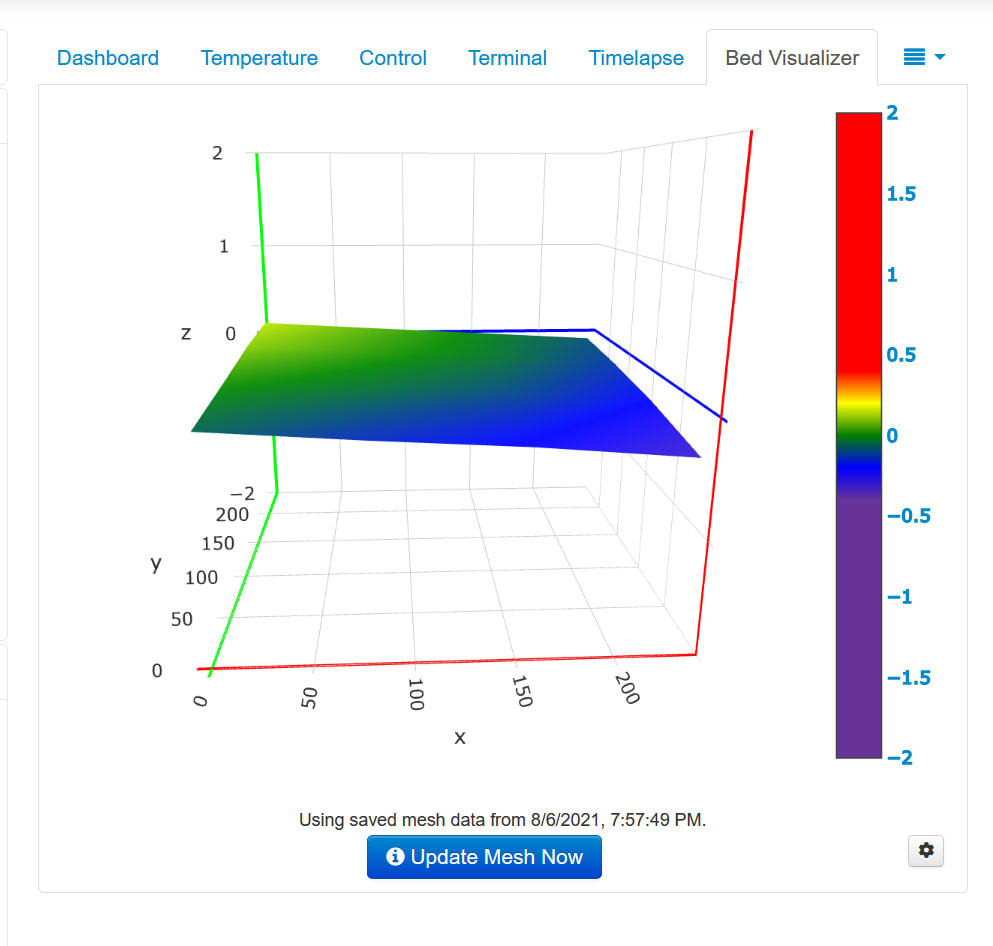
Then I ran an autolevel, and it looked pretty bad. Unfortunately with this printer there are no bed leveling screws (it is fixed). That may be fortunate depending on your point of view, but in this case I realized that the bed skew had to have something to do with the z screws being misconfigured, the bed itself or possibly even the frame (or all of these things). I first tightened down all the bed screws, which were only a bit loose so I did not expect they were an issue. I checked the gantry to bed measurement from both sides of the gantry and noted that the printer was about 1mm higher on the right side. I knew I would need to fix this but first something else was bugging me.
Then I ran an autolevel, and it looked pretty bad. Unfortunately with this printer there are no bed leveling screws (it is fixed). That may be fortunate depending on your point of view, but in this case I realized that the bed skew had to have something to do with the z screws being misconfigured, the bed itself or possibly even the frame (or all of these things). I first tightened down all the bed screws, which were only a bit loose so I did not expect they were an issue. I checked the gantry to bed measurement from both sides of the gantry and noted that the printer was about 1mm higher on the right side. I knew I would need to fix this but first something else was bugging me.

This a heat map of the bed prior to any corrections.
I had earlier noticed that the printer had a definite wobble when placed on a flat surface, so I loosened the eight large bolts which hold the sides on (not loose but just enough to allow me to adjust the frame). Then I set it on a flat surface and firmly pushed the opposing ends of the feel down until the wobble was gone. I also checked that the bolts holding the gantry frame to the base were tight (they were). Adjusting the base to take the wobble out did not take much force, but it made a big difference, and the printer now sits perfectly flat. Unfortunately these adjustments did not help much with the bed leveling.
The four screws in the center of the pic were slightly loosened (on both sides). Then I applied firm pressure to the opposing (high) corners of the printer base while it was on a flat surface. Once the wobble was gone I re-tightened the bolts (I tightened them in a "X" pattern).
So I was back to dealing with the gantry and the z-screws being misconfigured. Based on the bed leveling heat map I could see that a good deal of the problem was with the out of step dual Z screws, but not all of the problem was there (which I was hoping the frame straightening would help correct). In any case I adjusted the right side Z screw down just a bit to get it level with the left side. To do that I just loosened the grub screws on the top of the right side (the side without the X stepper) and then turned the right side z coupler enough to bring that side down to the same level as the left side. I had to hold the loosened gear at the top of the right side Z screw, to make sure that the turns on the right side screw did not translate to the left side. When the gantry to bed height was equal on the left and right sides, I just tightened up the grub screws on the right side which I was adjusting from. To make the measurements, I used a vernier caliper and rested the butt end of it on the gantry and the tip of the post that extends, on the bed. The grub screws can be easily stripped so care is needed not to over tighten these.
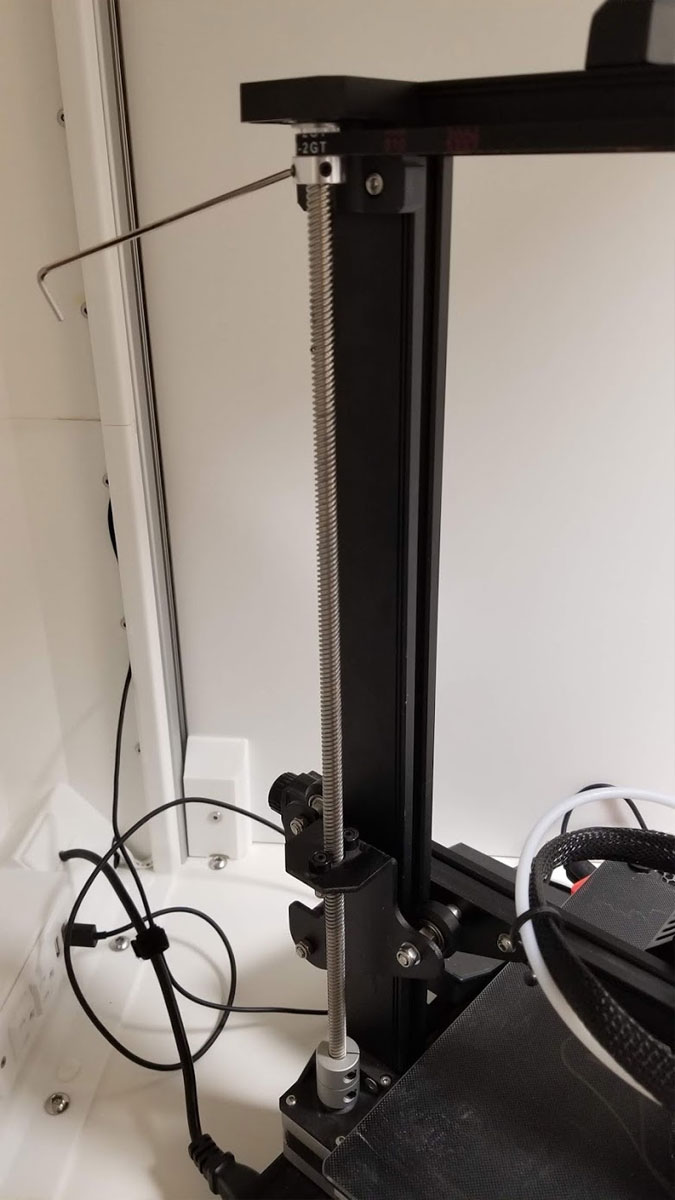 This is the right Z screw seen from the back of the printer. The gear at the top was loosened and held steady (so it would not rotate) while I rotated the coupler at the base to adjust the right side height above the bed to equal the left side. | 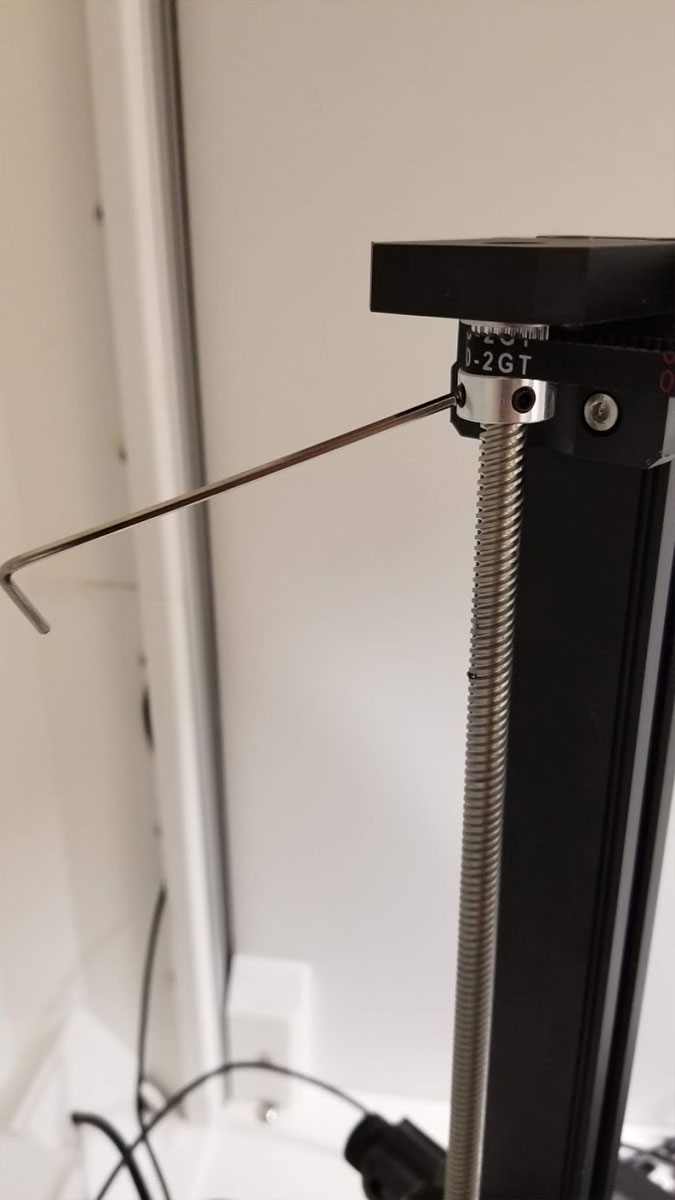 Close up of the right side z-screw gear. The hex wrench was of course removed once I was done. These two grub screws can strip out so care should be taken with them (aluminum threads and a steel grubscrew). |
This adjustment helped a bit and I could probably spend more time to get the level a bit better from left to right. But I think I will leave it here (even though I'd like to get it closer to level), since I think the auto-leveling can compensate for it. From the bed heat map there is still some diagonal problem going on.
This shows an improvement over the initial test (this was actually the 3rd or 4th test I ran but it was the last one. Im sure with some more time it could be improved but this seems acceptable since the auto leveling should take care of it. If it looks like a problem I will spend some more time to see if it can be improved further.
I then checked the e-steps and found that it was off by 7mm over 100mm (I asked the printer for 100mm and it only extruded 93mm). I verified that the extruder was tight and not slipping, and re-ran it again to verify it was really off by 7mm.
The M503 output from the printer showed the following:
Recv: echo: M92 X80.00 Y80.00 Z400.00 E93.00
Since the original Esteps were 93 steps/mm, and my adjustment factor is 100mm requested / 93mm actual, I ended up with an new esteps value of 100 steps/mm - so I ran the following:
M92 E100.0
M500
I re-checked the e-steps and it was a perfect 100mm when requesting 100mm on the extruder. Its a puzzle why they are so far off, but the difference was repeatable and the fix was confirmed in a third test.
Finally I decided to print My Stoopid Test Cube and discovered what I suspect was the cause of the problems my buddy was having, which he attributed to the extruder. That is the z-offset was set too low. It was set as 0.2mm and I had to raise it to 0.4mm before my 0.2mm feeler gauge would slip between the nozzle and bed (I later dropped it to 0.30mm since adhesion was suffering). I'm still tweaking things before I try an larger print.
I can't help but throw in some thoughts on this printer. Aside from the inability to level the bed I really like the CR6 SE, the load cell auto leveling sensor is a great idea, and it looks solidly built. It's like a little CR10S Pro for ease of use and assembly. Unless there was a compelling reason like price or amazing speed or some leap in quality, I don't think I would buy another ender3 class printer though, they are just too limited in volume. For a beginner the CR6 SE may be or may not be a good printer. It has a lot of bells and whistles, but that also means it can be harder to fix. That said it's a good printer, this one just needs some love.


 RSS Feed
