My Stoopid Stuff
  • Home
  • Projects
  • Blog
  • Lec'tronics
  • Links
  • CNC
  • Quick Recipes
  • 3D Printer Tips

Fixing? my NexTec 12v Drill "Clicks of Death" - Updated 9/30/2013

5/10/2013

7 Comments

 
Picture
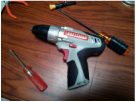
This is the second NextTec 12V drill that started the clicks of death.  I was not going to let this one go quietly into the light, so I decided to do some exploratory surgery.  I did not find the problem, but amazingly it now works.  There is now a suggested fix for the slipping selector switch wire, which is the likely cause of the problem, thanks to a a comment by Jeremy - Read more about it here.

7 Comments
Jeremy
9/22/2013 12:59:35 pm

I just want to say thank you for post, you were spot on about the Hi-Low switch causing the problem. I was able to (hopefully) permanently fix it by adding some tension to both sites of the metal rod attached to the switch with a small piece of plastic wire tie. Now the Low gears fully engage each time I toggle the Hi-Low switch and so far so good.
A little trick to taking it all apart
1. Remove the chuck
2. Set clutch to 1 and loosen but do not remove the 4 screws on the front of the chuck. Loosen them enough so that you can pull the chuck forward about 1 inch.
3. Remove all case screws
4. Remove the clip from the battery area
5. Use a razor blade to cut the thick Craftsman sticker right down following the line where the cover separates. This way you don't have to remove the sticker and have to worry about it peeling back if the glue doesn't hold afterwards.
6. Pull the chuck forward and also the plastic cover behind it enough so that you remove the screw side of the case.
Aside from this design flaw, I'd have to say this is the best cordless drill for the price. I was able to get mine for under $30 during one of the Sears sales last year as part of the Multi-tool combo pack. Charger and battery included.

Reply
Mike link
9/22/2013 01:50:37 pm

Thanks Jeremey,
I have a question about the fix you used for the metal rod - I can't really visualize where the plastic wire would go - did you use a zip tie?

I'll have to give your suggestions on the dissassembly a try if I have to do this again. I agree there are nice drills (aside from the problem with the clicks which has not returned yet). Also do you mind if I add your suggestions to the original entry (with credit of course)?

Reply
Jeremy
9/29/2013 04:39:24 am

I don't know how to post a picture but if you look at the original post, the middle and last pictures in the set of three show the metal rod that I added the twist tie to. It is the same rod that holds the Hi-Lo switch. It wraps around the housing fairly close so it seems that it just needs a little more friction to keep it from slipping under pressure. It took a little coaxing to wedge the plastic tie in there but once it was on both ends, it seems that I will never run into this problem again. Looking at the middle picture, you will see the slot that the rod moves between. There is a small gap that runs directly above the slot, that is where I wedged the tie in.
In step 2 of my suggestion, I say to loosen and not remove the 4 chuck screws. This is because it is very greasy and complicated to put back together if you don't take note on how everything is aligned before it comes out. By only loosening the screws and not removing them completely, you may risk having the screwdriver peel away some paint and chuck numbers when you remove the 4 case screws holding the clutch case. I used a Craftsman #2 Philips to remove those screws so this may not have happened if I used a thinner driver.
Again, thank you for your post. It was the only one that saved my drill. I was only 4 months out of warranty and Sears did not want to do any exchanges. Thanks to your post, I realize that this is something that I would have run into again with a replacement anyway so I'm glad to have fixed it understand how it all works. My only problem now is finding the right grease to regrease the clutch with.

Reply
Mike link
9/29/2013 11:04:31 am

Awesome! Thanks again for the explanation. I found a pic from when the drill was apart and posted it in the original thread. I edited the pic to show where I think you wrapped the twist tie to take the slack out of the selector rod. Can you take a look and see if it shows the fix correctly?

Reply
Jeremy
9/29/2013 09:17:32 pm

That's the spot. I used the tie on both sides.

Reply
Mike link
9/30/2013 01:03:13 pm

Thanks Jeremy, I will update the project with your fix.

Reply
David
10/10/2016 07:05:33 am

Thank you and Jeremy for your posts. The information provided in both help me save my trusty Nextec drill and eliminate the clicking issue. I found disassembly to be much easier with the removal of the chuck and clutch. I also used sections of zip tie to shim up the loosened spring as shown in these photos.

http://tinyurl.com/j5scns8

Reply


Leave a Reply.

    Picture

    Stoopid Me

    Welcome to my Stoopid corner of teh Internet.  It's mostly gonna be 3D printing stuff, but I also post some recipes, projects, and the occasional rant here as well.  More Stoopid stuff is updated regularly.

    I recently joined the Amazon Associate program, so some of the links on this site are Amazon affiliate links. This means that, at zero cost to you, I will earn an affiliate commission if you click through the link and finalize a purchase.  This will help to support this site, and pay for more Stoopid Stuff.

    Archives

    March 2023
    February 2023
    January 2023
    November 2022
    October 2022
    September 2022
    August 2022
    July 2022
    April 2022
    February 2022
    January 2022
    December 2021
    November 2021
    October 2021
    September 2021
    August 2021
    July 2021
    June 2021
    May 2021
    April 2021
    March 2021
    February 2021
    January 2021
    December 2020
    November 2020
    October 2020
    September 2020
    August 2020
    July 2020
    June 2020
    May 2020
    April 2020
    March 2020
    February 2020
    January 2020
    December 2019
    November 2019
    October 2019
    September 2019
    August 2019
    July 2019
    June 2019
    May 2019
    April 2019
    March 2019
    February 2019
    January 2019
    December 2018
    November 2018
    October 2018
    September 2018
    August 2018
    July 2018
    June 2018
    May 2018
    April 2018
    March 2018
    February 2018
    November 2017
    September 2017
    August 2017
    June 2017
    December 2016
    October 2016
    September 2016
    July 2016
    March 2016
    February 2016
    September 2015
    August 2015
    June 2015
    May 2015
    April 2015
    March 2015
    February 2015
    January 2015
    December 2014
    November 2014
    October 2014
    September 2014
    July 2014
    June 2014
    May 2014
    April 2014
    March 2014
    February 2014
    November 2013
    August 2013
    July 2013
    June 2013
    May 2013
    April 2013
    March 2013
    January 2013
    December 2012
    November 2012
    October 2012
    September 2012
    August 2012

    Categories

    All

    RSS Feed

      Contact Form (Name is optional)

    Submit
Powered by Create your own unique website with customizable templates.