marlinfw.org/docs/configuration/configuration.html#safetyI wanted to add some notes (in one place) on the initial setup for my delta in case I need to refer back in the future. These notes are from my notes and memory, and of course I did not come up with this myself but unfortunately I don't have the links for the many places this info was gleaned from (if I find the links I will add them here for reference). This is all done after the firmware upgrade, when the printer is fully functional and end stops are all confirmed to be working. The last part utilizes a z-probe.
I am by no means an expert on this, and I still have some questions on the ideal calibration temp to use if the plan is to run PLA and ABS as I do, but I used the following. This assumes a standard configuration where the heated bed, nozzle and hot end fan are connected correctly and Marlin is set up correctly for the board. Like all info on the Internets, take it with a grain of salt - and verify it for yourself.
Before anything is calibrated, I checked the endstops and that temps are reporting:
Checked all the endstops using M119:
Send: M119
Recv: Reporting endstop status
Recv: x_max: open
Recv: y_max: open
Recv: z_min: TRIGGERED
Recv: z_max: open
Recv: ok
Triggered is just what it means. I went through and triggered each end stop manually, to confirm they were connected and working. I found though this, that I incorrectly inverted the logic on the Z-Probe (which is on Z-min) so I had to go back and fix that in Marlin's configuration.h and re-load the firmware. below is the corrected config:
// Mechanical endstop with COM to ground and NC to Signal uses "false" here (most common setup).
#define X_MIN_ENDSTOP_INVERTING false // set to true to invert the logic of the endstop.
#define Y_MIN_ENDSTOP_INVERTING false // set to true to invert the logic of the endstop.
#define Z_MIN_ENDSTOP_INVERTING false // set to true to invert the logic of the endstop.
#define X_MAX_ENDSTOP_INVERTING false // set to true to invert the logic of the endstop.
#define Y_MAX_ENDSTOP_INVERTING false // set to true to invert the logic of the endstop.
#define Z_MAX_ENDSTOP_INVERTING false // set to true to invert the logic of the endstop.
#define Z_MIN_PROBE_ENDSTOP_INVERTING false// set to true to invert the logic of the probe.
I also checked the temp probes were reporting in Octoprint.
Running the PID calibration for the hot end - gcodes:
PID tuning is done to optimize the heat up time for the bed and nozzle. These can either be configured in the configuration.h in Marlin before compiling, or set in the EEPROM after the firmware is loaded using gcodes. Since adding them to the conifguration.h is not possible until the printer is running the firmware, I think it is simpler to just do it afterwards using gcodes. If I were to upgrade Marlin later, I would just add these to the configuration.h since I have the values now.
PID values are specific to each printer, so even though a printer may be the same model with all the same components, the PID values will be different.
I monitored the temps when running PID tuning to make sure the correct temp probe was reporting the temps expected (so if tuning the bed, I made sure the bed temp probe was reporting the higher temp), and then the same for the hot end. I also allowed things to cool down between running the bed and nozzle calibrations. This confirmed that the temp probes were correctly set up and not connected to the wrong places on the board.
This is how I ran the PID AutoTune, so use this info at your own risk. If you have issues with your printer maintaining temps, I suggest checking that the thermistor is not loose/damaged/broken, and is making good contact with the block before changing PID vales.
Not directly related to PID, but please be aware that some older Versions of Marlin firmware DO NOT have Marlin's Thermal Runaway Protection enabled. Some factory installed firmwares are also using older verisons of Marlin which are missing Thermal Runaway Protection. It would be a good idea to update to newer firmware which has Thermal Runaway Protection, on a printer that does not have it.
Bed:
M303 E-1 C8 S90
Explanation:
E-1 = Bed
C8 = run the test for 8 iterations
S90 = run the test at 90 degrees C
Recv: bias: 129 d: 125 min: 89.74 max: 90.25 Ku: 632.41 Tu: 22.26
Recv: Classic PIDR
ecv: Kp: 379.45 Ki: 34.09 Kd: 1055.81
Recv: PID Autotune finished! Put the last Kp, Ki and Kd constants from below into Configuration.h
Recv: #define DEFAULT_bedKp 379.45
Recv: #define DEFAULT_bedKi 34.09
Recv: #define DEFAULT_bedKd 1055.81
Recv: ok
to set the values (this is an example based on the above output, DON'T USE THESE VALUES):
M304 P379.45 I34.09 D1055.81
M500
http://marlinfw.org/docs/gcode/M303.html
http://marlinfw.org/docs/gcode/M304.html
Nozzle:
M106 S255
M303 E0 C8 S200
Explanation:
M106 S255 = sets fan to 100% (visually check to be sure the hot end fan is turned on)
M303 (PID AutoTune):
E0 = nozzle
C8 = run the test for 8 iterations
S200 = run the test at 200 degrees C
Recv: bias: 125 d: 125 min: 194.41 max: 207.14 Ku: 24.99 Tu: 29.95
Recv: Classic PIDRecv: Kp: 15.00 Ki: 1.00 Kd: 56.14
Recv: PID Autotune finished! Put the last Kp, Ki and Kd constants from below into Configuration.h
Recv: #define DEFAULT_Kp 15.00
Recv: #define DEFAULT_Ki 1.00
Recv: #define DEFAULT_Kd 56.14
to set the values (this is an example based on the above output, DON'T USE THESE VALUES):
M301 P15.00 I1.00 D56.14
M500
http://marlinfw.org/docs/gcode/M106.html
http://marlinfw.org/docs/gcode/M303.html
http://marlinfw.org/docs/gcode/M301.html
For each of these calibrations, and at each step where they were set, I used M500 to save the config to EEPROM and M501 and M503 to confirm the values are in EEPROM.
The output above also gives the configs that would be used in configuration.h (in bold) which could be set when Marlin is re-compiled. I am fine with keeping them in EEPROM however so won't re-compile just for this.
Touch probe offset setup
Before running the G33 the auto calibration, I had to set up a touch probe. In my case, the probe used is the stock z-probe that shipped with the Anycubic Kossel Linear Plus (shown below in a state of being disassembled):
I am by no means an expert on this, and I still have some questions on the ideal calibration temp to use if the plan is to run PLA and ABS as I do, but I used the following. This assumes a standard configuration where the heated bed, nozzle and hot end fan are connected correctly and Marlin is set up correctly for the board. Like all info on the Internets, take it with a grain of salt - and verify it for yourself.
Before anything is calibrated, I checked the endstops and that temps are reporting:
Checked all the endstops using M119:
Send: M119
Recv: Reporting endstop status
Recv: x_max: open
Recv: y_max: open
Recv: z_min: TRIGGERED
Recv: z_max: open
Recv: ok
Triggered is just what it means. I went through and triggered each end stop manually, to confirm they were connected and working. I found though this, that I incorrectly inverted the logic on the Z-Probe (which is on Z-min) so I had to go back and fix that in Marlin's configuration.h and re-load the firmware. below is the corrected config:
// Mechanical endstop with COM to ground and NC to Signal uses "false" here (most common setup).
#define X_MIN_ENDSTOP_INVERTING false // set to true to invert the logic of the endstop.
#define Y_MIN_ENDSTOP_INVERTING false // set to true to invert the logic of the endstop.
#define Z_MIN_ENDSTOP_INVERTING false // set to true to invert the logic of the endstop.
#define X_MAX_ENDSTOP_INVERTING false // set to true to invert the logic of the endstop.
#define Y_MAX_ENDSTOP_INVERTING false // set to true to invert the logic of the endstop.
#define Z_MAX_ENDSTOP_INVERTING false // set to true to invert the logic of the endstop.
#define Z_MIN_PROBE_ENDSTOP_INVERTING false// set to true to invert the logic of the probe.
I also checked the temp probes were reporting in Octoprint.
Running the PID calibration for the hot end - gcodes:
PID tuning is done to optimize the heat up time for the bed and nozzle. These can either be configured in the configuration.h in Marlin before compiling, or set in the EEPROM after the firmware is loaded using gcodes. Since adding them to the conifguration.h is not possible until the printer is running the firmware, I think it is simpler to just do it afterwards using gcodes. If I were to upgrade Marlin later, I would just add these to the configuration.h since I have the values now.
PID values are specific to each printer, so even though a printer may be the same model with all the same components, the PID values will be different.
I monitored the temps when running PID tuning to make sure the correct temp probe was reporting the temps expected (so if tuning the bed, I made sure the bed temp probe was reporting the higher temp), and then the same for the hot end. I also allowed things to cool down between running the bed and nozzle calibrations. This confirmed that the temp probes were correctly set up and not connected to the wrong places on the board.
This is how I ran the PID AutoTune, so use this info at your own risk. If you have issues with your printer maintaining temps, I suggest checking that the thermistor is not loose/damaged/broken, and is making good contact with the block before changing PID vales.
Not directly related to PID, but please be aware that some older Versions of Marlin firmware DO NOT have Marlin's Thermal Runaway Protection enabled. Some factory installed firmwares are also using older verisons of Marlin which are missing Thermal Runaway Protection. It would be a good idea to update to newer firmware which has Thermal Runaway Protection, on a printer that does not have it.
Bed:
M303 E-1 C8 S90
Explanation:
E-1 = Bed
C8 = run the test for 8 iterations
S90 = run the test at 90 degrees C
Recv: bias: 129 d: 125 min: 89.74 max: 90.25 Ku: 632.41 Tu: 22.26
Recv: Classic PIDR
ecv: Kp: 379.45 Ki: 34.09 Kd: 1055.81
Recv: PID Autotune finished! Put the last Kp, Ki and Kd constants from below into Configuration.h
Recv: #define DEFAULT_bedKp 379.45
Recv: #define DEFAULT_bedKi 34.09
Recv: #define DEFAULT_bedKd 1055.81
Recv: ok
to set the values (this is an example based on the above output, DON'T USE THESE VALUES):
M304 P379.45 I34.09 D1055.81
M500
http://marlinfw.org/docs/gcode/M303.html
http://marlinfw.org/docs/gcode/M304.html
Nozzle:
M106 S255
M303 E0 C8 S200
Explanation:
M106 S255 = sets fan to 100% (visually check to be sure the hot end fan is turned on)
M303 (PID AutoTune):
E0 = nozzle
C8 = run the test for 8 iterations
S200 = run the test at 200 degrees C
Recv: bias: 125 d: 125 min: 194.41 max: 207.14 Ku: 24.99 Tu: 29.95
Recv: Classic PIDRecv: Kp: 15.00 Ki: 1.00 Kd: 56.14
Recv: PID Autotune finished! Put the last Kp, Ki and Kd constants from below into Configuration.h
Recv: #define DEFAULT_Kp 15.00
Recv: #define DEFAULT_Ki 1.00
Recv: #define DEFAULT_Kd 56.14
to set the values (this is an example based on the above output, DON'T USE THESE VALUES):
M301 P15.00 I1.00 D56.14
M500
http://marlinfw.org/docs/gcode/M106.html
http://marlinfw.org/docs/gcode/M303.html
http://marlinfw.org/docs/gcode/M301.html
For each of these calibrations, and at each step where they were set, I used M500 to save the config to EEPROM and M501 and M503 to confirm the values are in EEPROM.
The output above also gives the configs that would be used in configuration.h (in bold) which could be set when Marlin is re-compiled. I am fine with keeping them in EEPROM however so won't re-compile just for this.
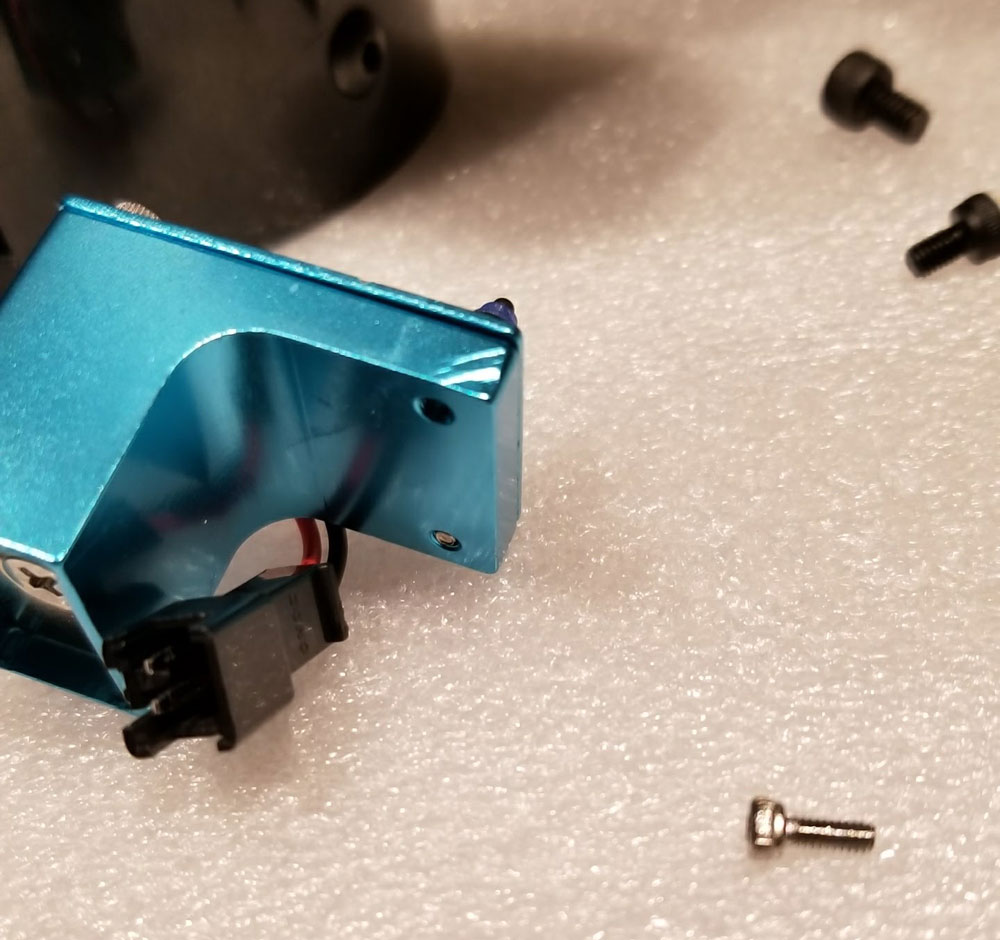
Touch probe offset setup
Before running the G33 the auto calibration, I had to set up a touch probe. In my case, the probe used is the stock z-probe that shipped with the Anycubic Kossel Linear Plus (shown below in a state of being disassembled):
To set up a touch probe, the offsets need to be determined for the X, Y and most importantly the Z. Normally these can be found in the notes for whatever bracket was used to mount the probe. I set the X and Y offsets up in Marlin before it was complied (in configuration.h):
#define X_PROBE_OFFSET_FROM_EXTRUDER 0 // X offset: -left +right [of the nozzle]
#define Y_PROBE_OFFSET_FROM_EXTRUDER 0 // Y offset: -front +behind [the nozzle]
#define Z_PROBE_OFFSET_FROM_EXTRUDER -14.90 // Z offset: -below +above [the nozzle], Anycubic Leveling Module v1:-18.0, v2:-14.9
For my printer, the X and Y offsets are zero since the probe sits right over the nozzle (the X and Y offsets need to be integers BTW, Marlin will complain if they are floating point (numbers with a decimal place). The Z offset that I set in configuration.h was just a guess, and was not correct so I had to adjust that later. The corrected Z-offset was found by a process that is summarized as follows:
After that I ended up with a value of -15.44 which was pretty spot on.
One problem that could be run into, is that the printer will just stop slightly above the bed when running the auto calibration or setting the delta height automatically - and there would be an error. I found that this happened if the Z-offset is too small to begin with (the value used in configuration.h is too small). When this error happened, I just manually set the delta height a bit taller so it would not error, until I could get everything correctly calibrated. Once the offset was figured out, I ran the delta height calibration again to set the correct value again for delta height. I think that has to do with bot the " Z_PROBE_OFFSET_FROM_EXTRUDER" being too small and the "Z_PROBE_LOW_POINT" being too small. The "Z_PROBE_LOW_POINT" is used as a soft limit to keep the nozzle from crashing too far into the bed but it is what caused the error I think (it was working as designed, I just had the values for the Z-offset too small).
G33 Delta Auto Calibration
Delta Auto Calibration is awesome, and worked great once the probe was set up. Running it also provides some values to be set in EEPROM for the tower angels and radius which are correction factors to compensate for an imperfect machine. There does not seem to be a set number of iterations that the calibration will run for, it just keeps going until the standard deviation gets below a pre-determined value which I think is 0.01. To run the auto-calibration I used the following gcode:
G33 P7 V2
Send: G33 P7 V2
<...>
Recv: Iteration : 04 std dev:0.041
Recv: .Height:274.03 Ex:-1.33 Ey:+0.00 Ez:-2.22 Radius:135.31
Recv: . Tx:+0.97 Ty:-0.26 Tz:-0.71
Recv: Iteration : 05 std dev:0.022
Recv: .Height:274.06 Ex:-1.34 Ey:+0.00 Ez:-2.18 Radius:135.41
Recv: . Tx:+0.96 Ty:-0.26 Tz:-0.70
Recv: Calibration OK rolling back.
Recv: .Height:274.03 Ex:-1.33 Ey:+0.00 Ez:-2.22 Radius:135.31
Recv: . Tx:+0.97 Ty:-0.26 Tz:-0.71
Recv: Save with M500 and/or copy to Configuration.h
Then I used M500 to save the values and then M501 and M503 to confirm they were set and used. They show up on the following line:
Recv: echo: M665 L271.50 R135.31 H274.03 S160.00 B93.00 X0.97 Y-0.26 Z-0.71
In Marlin configuration.h, these would be set under the following (below are my settings from before the auto calibration):
#define DELTA_RADIUS 134.4 //mm Get this value from auto calibrate
// Trim adjustments for individual towers
// tower angle corrections for X and Y tower / rotate XYZ so Z tower angle = 0
// measured in degrees anticlockwise looking from above the printer
#define DELTA_TOWER_ANGLE_TRIM { 0.0, 0.0, 0.0 } // get these values from auto calibrate
The following links are for tweaking the tower trim and radius by printing and then measuring a test object. It can help verify the settings based on the above are correct and provide new values to try:
https://www.thingiverse.com/thing:1274733
https://docs.google.com/spreadsheets/d/1HcnZ0aDC2wujHhPHVeYFcPekEpY6Y4wLSMfCxJ18e1o/edit#gid=1292102991
Extruder Calibration
Linked below is the best guide I found for calibrating the extruder steps.
https://mattshub.com/2017/04/19/extruder-calibration/
It is simple to do, with one gotcha - Marlin will not allow cold extrusion by default so if trying to extrude cold just to test, it will not work. I usually have calibrated the extruder steps hot, with the hot end connected up. But sometimes I have tried to save filament because there was a problem requiring re-checking the extruder steps several times over (and I had things disconnected so the filament could just be run though). In those cases I ran into this issue. The prevent cold extrusion configs can be confirmed in Marlin's configuration.h below:
#define PREVENT_COLD_EXTRUSION
#define EXTRUDE_MINTEMP 170
#define X_PROBE_OFFSET_FROM_EXTRUDER 0 // X offset: -left +right [of the nozzle]
#define Y_PROBE_OFFSET_FROM_EXTRUDER 0 // Y offset: -front +behind [the nozzle]
#define Z_PROBE_OFFSET_FROM_EXTRUDER -14.90 // Z offset: -below +above [the nozzle], Anycubic Leveling Module v1:-18.0, v2:-14.9
For my printer, the X and Y offsets are zero since the probe sits right over the nozzle (the X and Y offsets need to be integers BTW, Marlin will complain if they are floating point (numbers with a decimal place). The Z offset that I set in configuration.h was just a guess, and was not correct so I had to adjust that later. The corrected Z-offset was found by a process that is summarized as follows:
- Auto Home
- Attach the probe, and go to "set delta height" (prepare>Delta calibration > set delta height), run that, then save settings (or M500).
- I then removed the probe and manually jogged the Z down to set the nozzle on the bed (use a piece of paper) and noted the value. I then added the thickness of the paper minus about 0.05 or so.
- Using the value from step 3, I adjusted value and added (or subtracted) it from the Z-offset being used by Marlin (which is in Control>Motion), that was -14.90 in my case since that was what was set when I compiled Marlin.
- Set the new Z-offset (which was -15.44 in my case) in Control>Motion>Set Z-Offset to the new value.
- Save settings (or M500)
- I re-attached the probe, homed it and then ran the "set delta height" routine.
- When it is done, I tested the offset by removing the probe, and jogged the Z back down to the bed. If it was calibrated correctly, it will hit zero when it gets to the bed (use the paper again to gauge). If not, readjust the Z-offset, save and re-run the "set delta height"
After that I ended up with a value of -15.44 which was pretty spot on.
One problem that could be run into, is that the printer will just stop slightly above the bed when running the auto calibration or setting the delta height automatically - and there would be an error. I found that this happened if the Z-offset is too small to begin with (the value used in configuration.h is too small). When this error happened, I just manually set the delta height a bit taller so it would not error, until I could get everything correctly calibrated. Once the offset was figured out, I ran the delta height calibration again to set the correct value again for delta height. I think that has to do with bot the " Z_PROBE_OFFSET_FROM_EXTRUDER" being too small and the "Z_PROBE_LOW_POINT" being too small. The "Z_PROBE_LOW_POINT" is used as a soft limit to keep the nozzle from crashing too far into the bed but it is what caused the error I think (it was working as designed, I just had the values for the Z-offset too small).
G33 Delta Auto Calibration
Delta Auto Calibration is awesome, and worked great once the probe was set up. Running it also provides some values to be set in EEPROM for the tower angels and radius which are correction factors to compensate for an imperfect machine. There does not seem to be a set number of iterations that the calibration will run for, it just keeps going until the standard deviation gets below a pre-determined value which I think is 0.01. To run the auto-calibration I used the following gcode:
G33 P7 V2
Send: G33 P7 V2
<...>
Recv: Iteration : 04 std dev:0.041
Recv: .Height:274.03 Ex:-1.33 Ey:+0.00 Ez:-2.22 Radius:135.31
Recv: . Tx:+0.97 Ty:-0.26 Tz:-0.71
Recv: Iteration : 05 std dev:0.022
Recv: .Height:274.06 Ex:-1.34 Ey:+0.00 Ez:-2.18 Radius:135.41
Recv: . Tx:+0.96 Ty:-0.26 Tz:-0.70
Recv: Calibration OK rolling back.
Recv: .Height:274.03 Ex:-1.33 Ey:+0.00 Ez:-2.22 Radius:135.31
Recv: . Tx:+0.97 Ty:-0.26 Tz:-0.71
Recv: Save with M500 and/or copy to Configuration.h
Then I used M500 to save the values and then M501 and M503 to confirm they were set and used. They show up on the following line:
Recv: echo: M665 L271.50 R135.31 H274.03 S160.00 B93.00 X0.97 Y-0.26 Z-0.71
In Marlin configuration.h, these would be set under the following (below are my settings from before the auto calibration):
#define DELTA_RADIUS 134.4 //mm Get this value from auto calibrate
// Trim adjustments for individual towers
// tower angle corrections for X and Y tower / rotate XYZ so Z tower angle = 0
// measured in degrees anticlockwise looking from above the printer
#define DELTA_TOWER_ANGLE_TRIM { 0.0, 0.0, 0.0 } // get these values from auto calibrate
The following links are for tweaking the tower trim and radius by printing and then measuring a test object. It can help verify the settings based on the above are correct and provide new values to try:
https://www.thingiverse.com/thing:1274733
https://docs.google.com/spreadsheets/d/1HcnZ0aDC2wujHhPHVeYFcPekEpY6Y4wLSMfCxJ18e1o/edit#gid=1292102991
Extruder Calibration
Linked below is the best guide I found for calibrating the extruder steps.
https://mattshub.com/2017/04/19/extruder-calibration/
It is simple to do, with one gotcha - Marlin will not allow cold extrusion by default so if trying to extrude cold just to test, it will not work. I usually have calibrated the extruder steps hot, with the hot end connected up. But sometimes I have tried to save filament because there was a problem requiring re-checking the extruder steps several times over (and I had things disconnected so the filament could just be run though). In those cases I ran into this issue. The prevent cold extrusion configs can be confirmed in Marlin's configuration.h below:
#define PREVENT_COLD_EXTRUSION
#define EXTRUDE_MINTEMP 170


 RSS Feed
