Over a year ago I bought an Enclosure Monitor System board from JKTech, and because I wasn't sure where or how I was gonna wire things up in my enclosure (still working out the details), and then I lost the kit, it never got checked out. However I found it recently, and am making an effort to get things wired up in the enclosure now, so I thought I would share some pics and initial thoughts of his product.
The kit ships with the board only, which has the 5V buck converter installed and configured. It takes 12v in, and everything is well labeled. The Arduino, 3.5" Nextion touchscreen, and temp/humidity sensors are all purchased separately. What I got was a very well designed and assembled board, and the code to run on the Arduino and the touchscreen software as well, which is a good deal in my opinion. I have no affiliation with JKTech, but it is currently on sale for €35 or about $41 plus reasonable shipping.
The kit ships with the board only, which has the 5V buck converter installed and configured. It takes 12v in, and everything is well labeled. The Arduino, 3.5" Nextion touchscreen, and temp/humidity sensors are all purchased separately. What I got was a very well designed and assembled board, and the code to run on the Arduino and the touchscreen software as well, which is a good deal in my opinion. I have no affiliation with JKTech, but it is currently on sale for €35 or about $41 plus reasonable shipping.
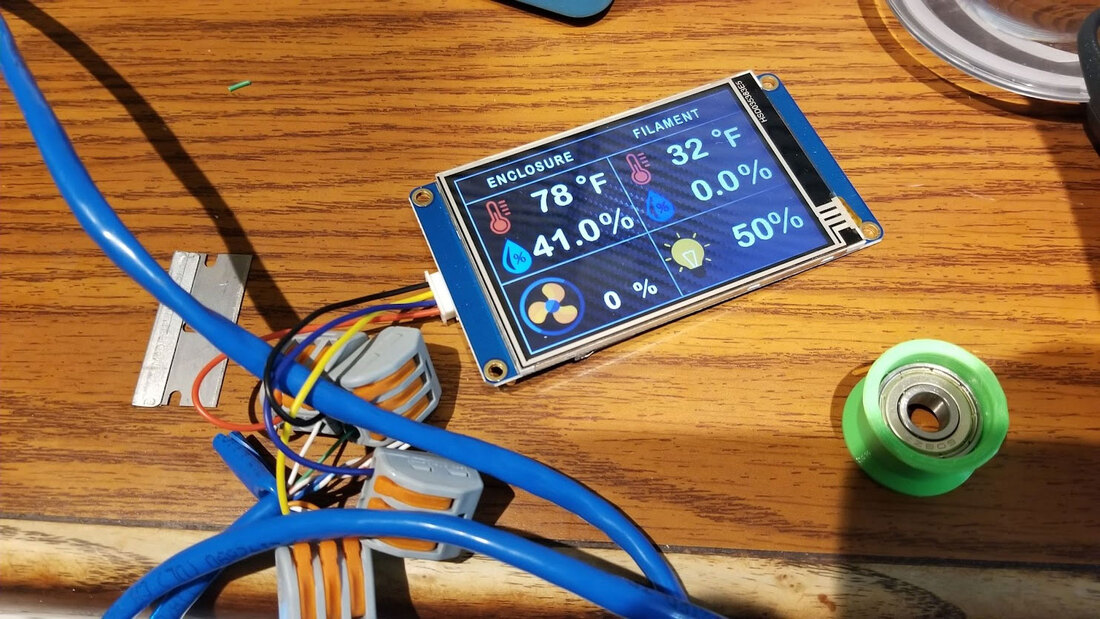
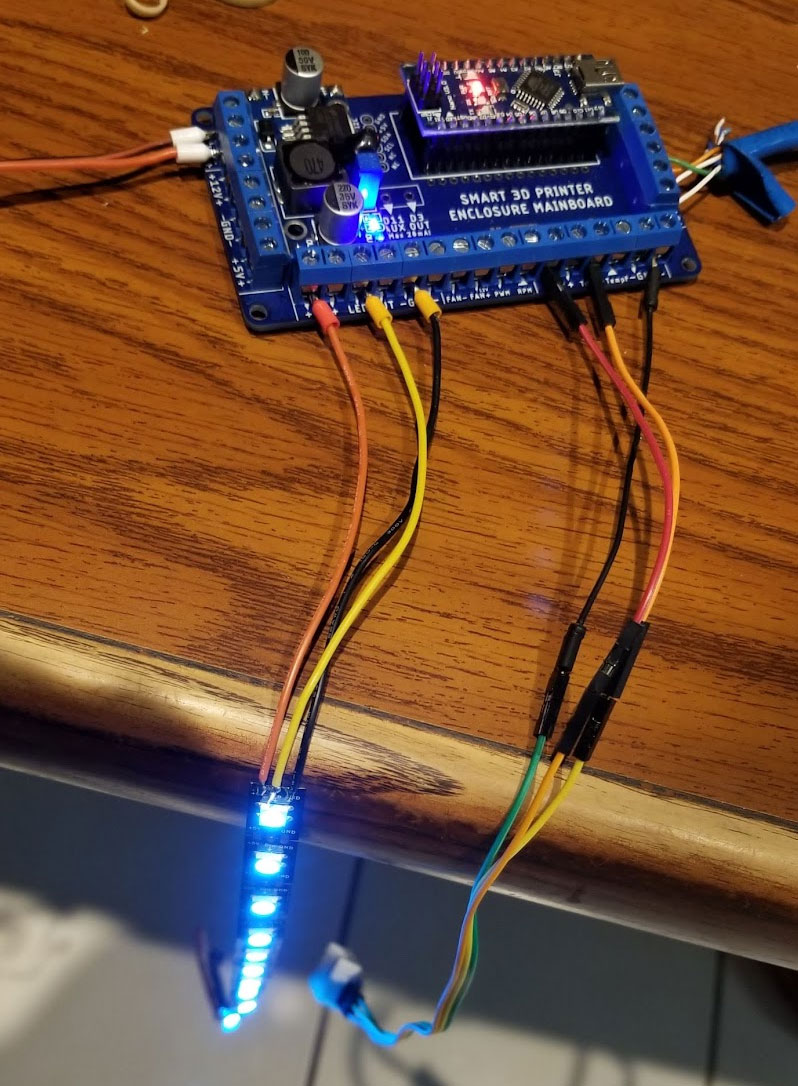
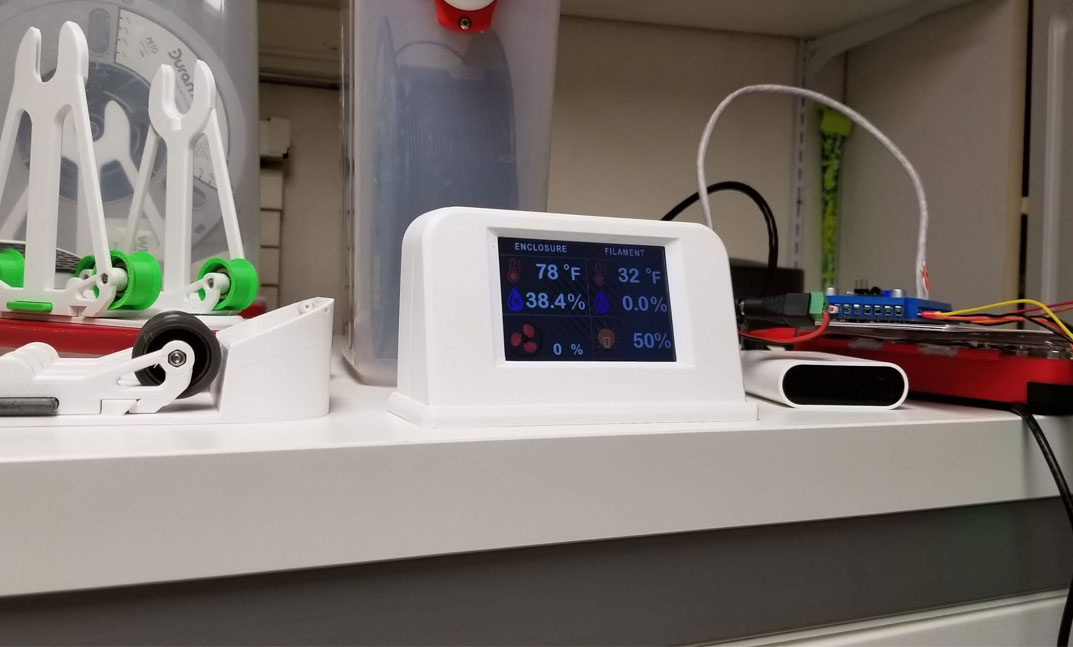
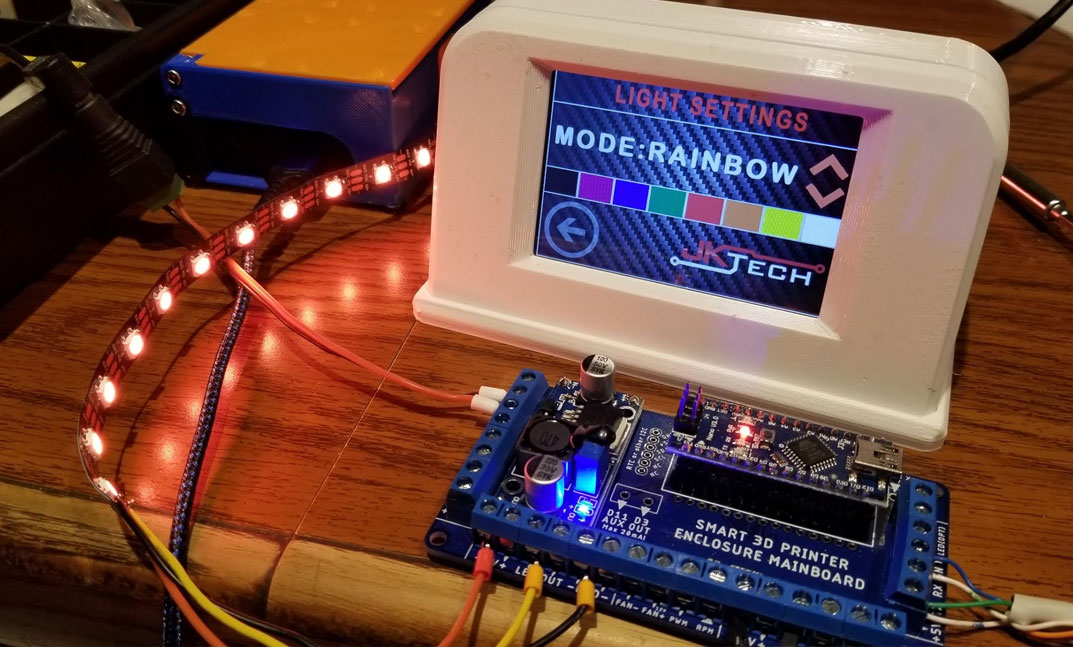
My first thought after setting it up was that that this board is very cool and is pretty much all I need for controlling the enclosure. Once the Arduino was programmed, everything was plug and play and just works (I have not tested fan PWM control yet). The LED control is very cool, and there are a number of preset modes (rainbow, heartbeat, solid and a color based on the temp sensors). There are also two temperature and humidity sensors supported (I only have one connected right now), and there are other cool monitoring features designed into the programming which I have not checked out yet. The board has a small (2A I believe) adjustable buck converter, which is set to 5V and makes for a very simple no solder set up.
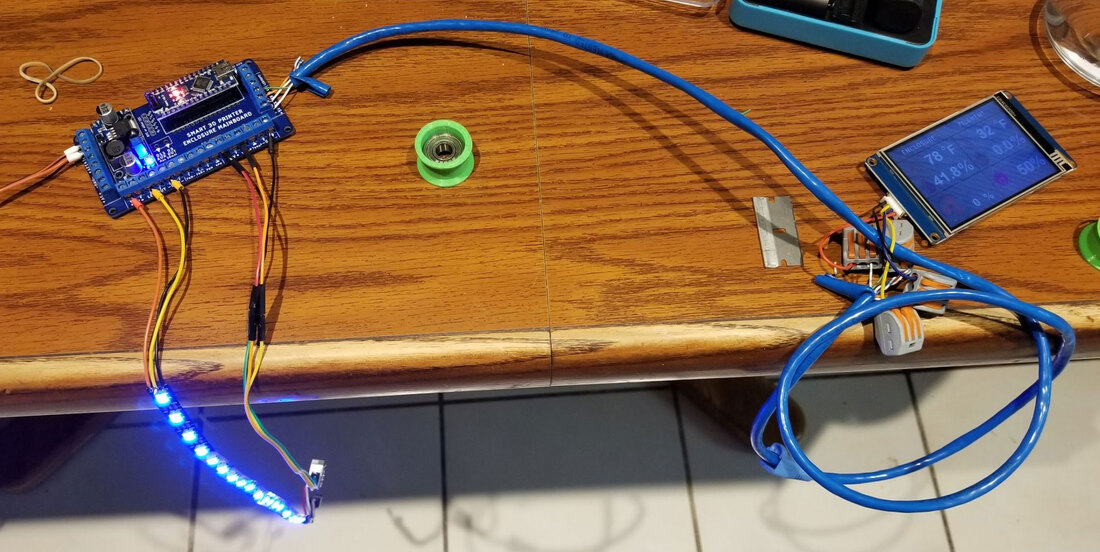
By default, due to the current limitations of the onboard 5v supply (which can be bypassed), there are limitations on the number of 5v LED's that can be safely run without over driving the 5v converter. The number of LED's is also dependent on the current drawn by fans controlled by the board as well, since everything connected to the 5v converter needs to stay under the current limit for the buck converter. I don't recall the exact number of LEDs that can be used, but I feel it's enough. What you see in the pics is, I think the default number of LED's (if more are needed, they can be added by editing one line in the arduino code which is very simple).
When I initially set the board and display up, I found that I had to shorten the length of the cable between them to a couple inches or there would be problems with the serial communication between them (the trimmed down stock wire harness can be seen in the above pic, which was connected to a Cat5E cable for testing). However I discussed with JKTech and was advised that the latest firmware has some changes to help with this, and now there should be no need to shorten the stock cable that ships with the display (which again is bought separately from the controller board). I don't recall which version of the code that I used, so will need to check that I got the latest installed.
I'm going to extend the display away from the controller by 1.5 to 2 meters however, so I tested with about 1 meter of stranded twisted pair Cat5E cable to extend the display, and I found it works perfectly. I'm sure it will be fine with longer lengths since serial communication can go I think 30 feet at least with a proper cable (I think). Edit 9/22/2021 - I tested with a 4m cable and it also worked fine. I may try paralleling some of the extra wires in the cat5e cable to help with power, so it looks very promising (Edit 9/22/2021 - this was not necessary for my setup, it works fine with just one pair for power).
 |  |
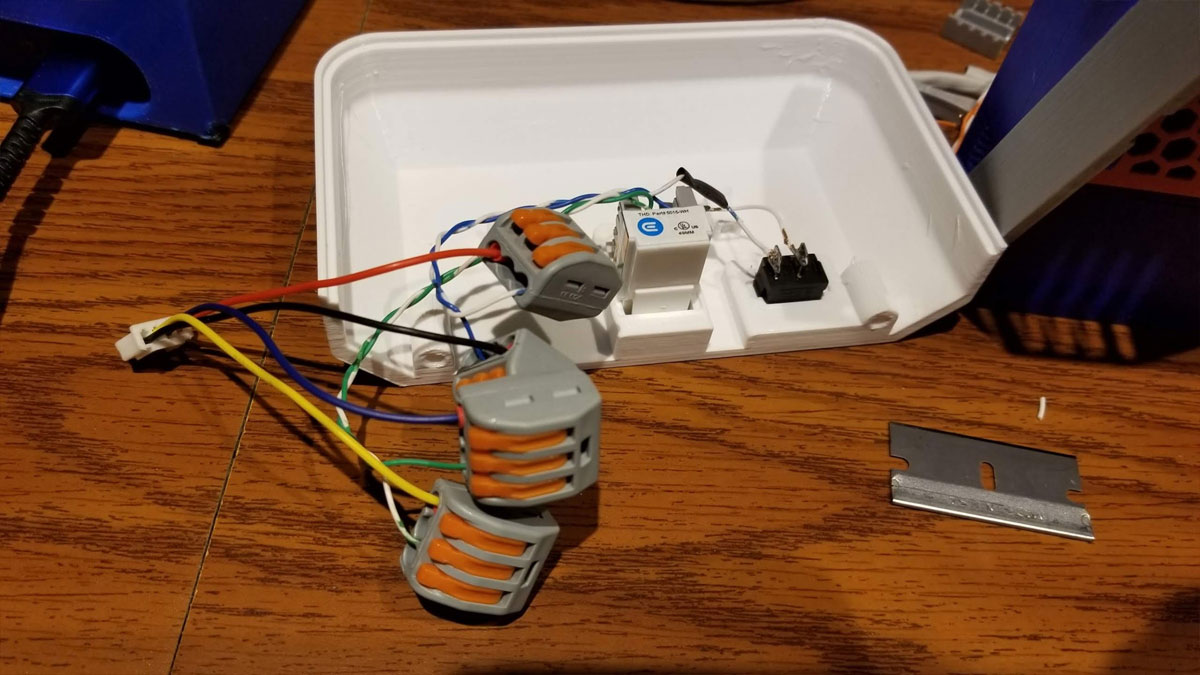
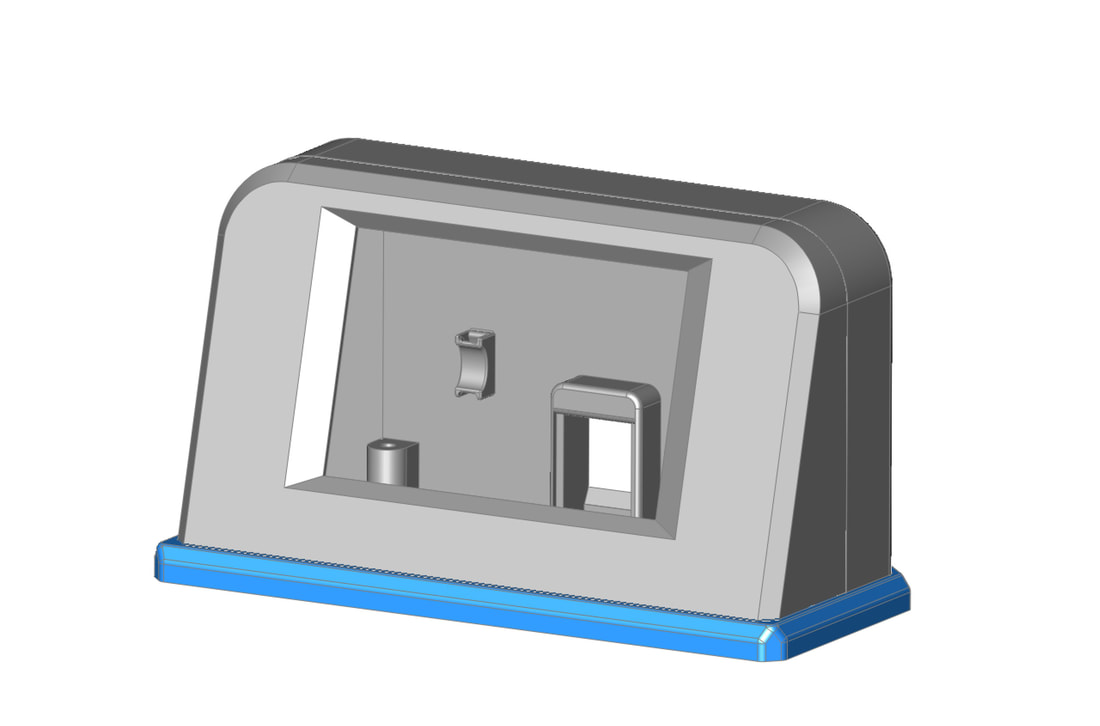
I've also remixed an enclosure for the Nextion 3.5" Touchscreen display ( model NX4832T035 ) from HeinAndre's Nextion Desktop Dashboard Case, so I can keep it remote on top of the enclosure unless I find a better way to mount it. It has a keystone jack and I plan to use a standard patch cable to connect it (noting that this is not running Ethernet). I will have to do some careful wiring on both sides of the jack and make sure to label it so it's clear it is not Ethernet.
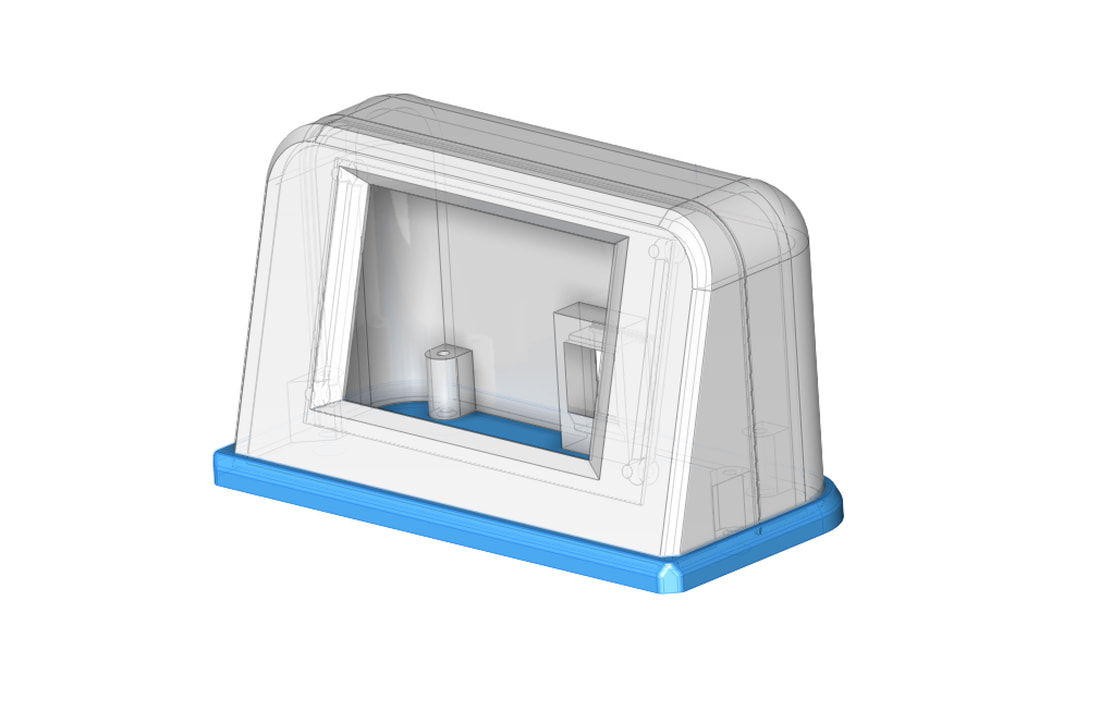
Update 9/20/2021 - I decided to add a power switch to shut down the display since I may not want it on all the time. I also made some changes for better printability. I'm going to print it this week and test it out.
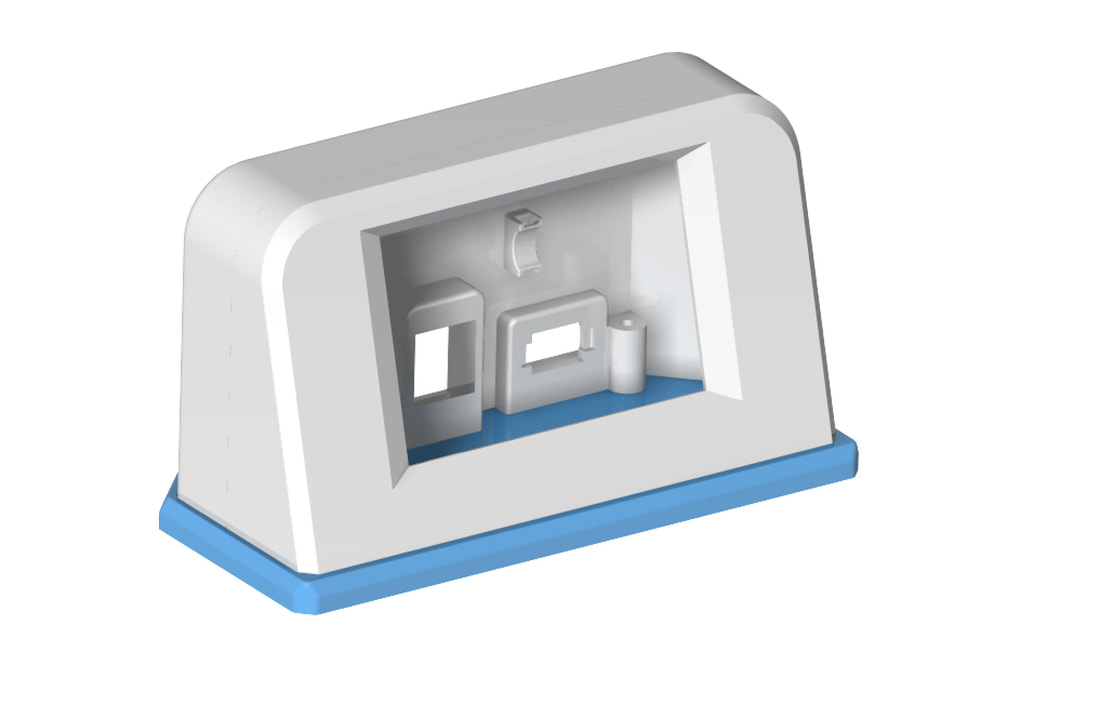
Update 9/21/2021 - The enclosure is finished and I put it together today (after a brief detour with backwards facing Keystone jacks). At least I didn't waste to much PETG prototyping this one. And the good news is that the screen is working perfectly in the enclosure. I even got it to work without any changes to the software using a 12' CAT5E cable (longest I had right now). I noted that the power switch will not work the way I connected it, since although it does kill the power to the screen, the screen will not automatically re-synch with the Arduino until the Arduino is reset as well. No big deal though since I'm gonna use it instead to control an optoisolated relay board that will power on and off the V2 Electronics board. I added a version of the backshell without the switch knockout, as another option to use.
The Nextion 3.5" Screen enclosure is posted here:
https://www.thingiverse.com/thing:4970457
The Nextion 3.5" Screen enclosure is posted here:
https://www.thingiverse.com/thing:4970457


 RSS Feed
