I have been slacking on uploading things to Thingiverse lately, but I still plan to. Prepping things for Thingiverse takes a bit of work and it's not as interesting as designing (have to make a decent attempt at a description, try and recall if there were any gotchas when printing, re-slice tricky parts to check the best print orientations, find the correct version of a design, etc). Most of the new stuff is either waiting on parts, or I have not been able to print (or test) due to other stuff taking priority. Also my CR10S Pro has only recently gotten back into production (with extra huge thanks for MicroSwiss for assisting with getting it back up).
My top project is getting some RGBW LED strips installed on a pair of new gazebos for my parents. They picked up some strange LED rope lights at Costco which are pretty interesting, but very basic. After explaining to them that the different types of LED strip lights and all the cool ways they can be controlled, they asked me to look into upgrading them (they only bought one set of 18ft rope lights to test). I decided to go with the following setup since I want to do this right and the lights will be outdoors:
I probably paid about $150 more for everything due to choosing a high quality, IP rated power supply (and not overdriving a cheap one), and also by getting the aluminum channels but I want this to last at least as long as the gazebos, but I saved some on the LEDs which I figure are going to be the most variable part quality-wise no matter where I get them. The channels are necessary due to the design of the gazebos, but they will also help cool the LEDs which may help with longevity. The plan is to make a hanger for them which will snap onto the frame of the gazebo and provide a bit of reveal for the LED strips below a fabric cover. I only bought one of the RF controller receivers from Amazon and ordered a second from Ebay, since I want to test it out first and figure I can wait on the 2nd. Each gazebo will have one controller and one 24v 10A power supply on 44 feet of LEDs (13.4m). The RGBW strips I bought are 0.5A per meter (max) so that would be 6.7A per gazebo. It is very unlikely I will drive them that high and I wanted a buffer so the 10A supply on each gazebo should work, with some amps to spare if I decide to run some addition strips of LED's in the future, off the existing set up.
One remote will control both gazebos using the linked controllers. There are 2 types of remotes for that system, one can control 4 zones independently and the other can control only one zone, both types can control several receivers. I think Amazon only sells the combo with the single zone remote however. I had also considered the Shelly REBW2 but decided against it since a physical (RF) remote was a requirement, and did not want to jury rig some switch/mosfet/relay thing to switch between controllers.
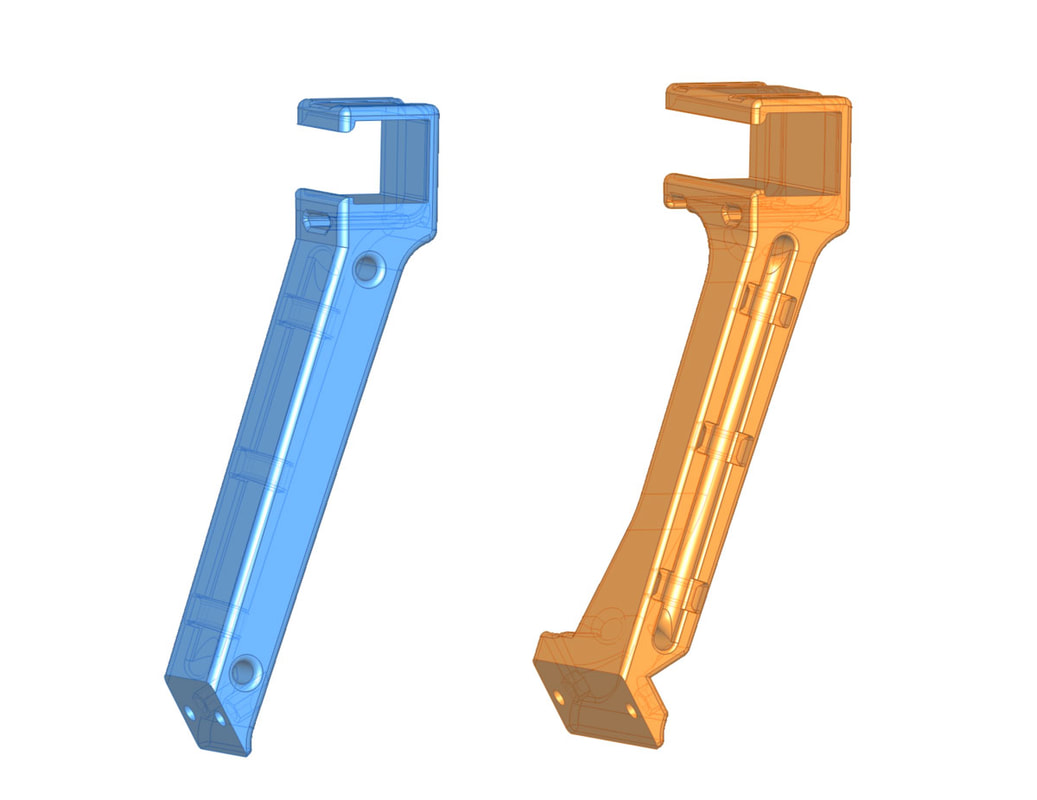
I'm currently waiting to test some hangers I designed to hold the aluminum channels several inches below the top frame rails of the gazebo, and also provide some cable management. These will attach to spring steel clips which will connect to the aluminum extrusions which will hold the LED strip. Even though the design is pretty well optimized, each of these will still take 3-4h to print and I will need 10 of the large ones and 8 of the smaller ones per gazebo:
My top project is getting some RGBW LED strips installed on a pair of new gazebos for my parents. They picked up some strange LED rope lights at Costco which are pretty interesting, but very basic. After explaining to them that the different types of LED strip lights and all the cool ways they can be controlled, they asked me to look into upgrading them (they only bought one set of 18ft rope lights to test). I decided to go with the following setup since I want to do this right and the lights will be outdoors:
- Mean Well HLG-240H-24B Switching LED Power Supply, Single Output, 24V, 0-10A, 240W, 1.5" H x 2.7" W x 9.6" L @ Amazon
- 4 Channel LED RF Controller RGBW/RGB/CCT/Dimming Multfunction Controller 12-24VDC @ Amazon
- Muzata Black LED Channel System with Milky White Cover Lens,Aluminum Extrusion Profile Housing for Strip Tape Light Diffuser Track Segments,40Pack 3.3ft U1SW BW 1M, LU1 @ Amazon
- Muzata Extension Connectors for U1SW @ Amazon
- 5050 RGB Strip (Waterproof) 24V RGBW (Warm White) 5m (qty 7) $78 @ Ebay (waiting on these from China)
I probably paid about $150 more for everything due to choosing a high quality, IP rated power supply (and not overdriving a cheap one), and also by getting the aluminum channels but I want this to last at least as long as the gazebos, but I saved some on the LEDs which I figure are going to be the most variable part quality-wise no matter where I get them. The channels are necessary due to the design of the gazebos, but they will also help cool the LEDs which may help with longevity. The plan is to make a hanger for them which will snap onto the frame of the gazebo and provide a bit of reveal for the LED strips below a fabric cover. I only bought one of the RF controller receivers from Amazon and ordered a second from Ebay, since I want to test it out first and figure I can wait on the 2nd. Each gazebo will have one controller and one 24v 10A power supply on 44 feet of LEDs (13.4m). The RGBW strips I bought are 0.5A per meter (max) so that would be 6.7A per gazebo. It is very unlikely I will drive them that high and I wanted a buffer so the 10A supply on each gazebo should work, with some amps to spare if I decide to run some addition strips of LED's in the future, off the existing set up.
One remote will control both gazebos using the linked controllers. There are 2 types of remotes for that system, one can control 4 zones independently and the other can control only one zone, both types can control several receivers. I think Amazon only sells the combo with the single zone remote however. I had also considered the Shelly REBW2 but decided against it since a physical (RF) remote was a requirement, and did not want to jury rig some switch/mosfet/relay thing to switch between controllers.
I'm currently waiting to test some hangers I designed to hold the aluminum channels several inches below the top frame rails of the gazebo, and also provide some cable management. These will attach to spring steel clips which will connect to the aluminum extrusions which will hold the LED strip. Even though the design is pretty well optimized, each of these will still take 3-4h to print and I will need 10 of the large ones and 8 of the smaller ones per gazebo:
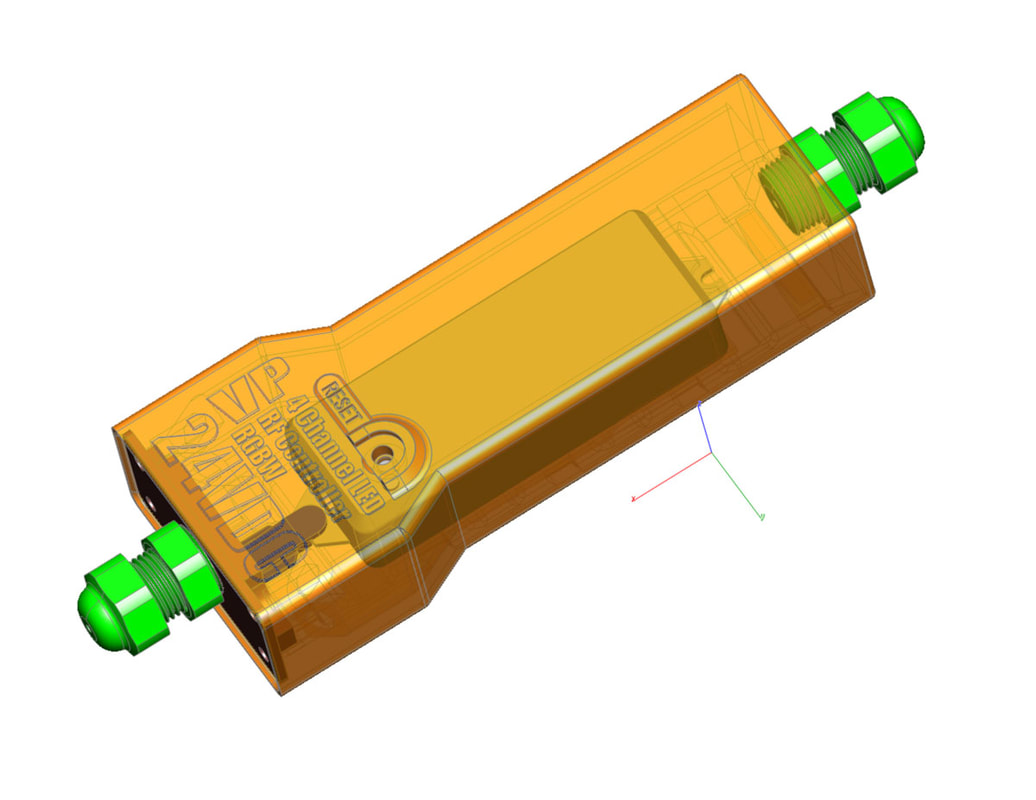
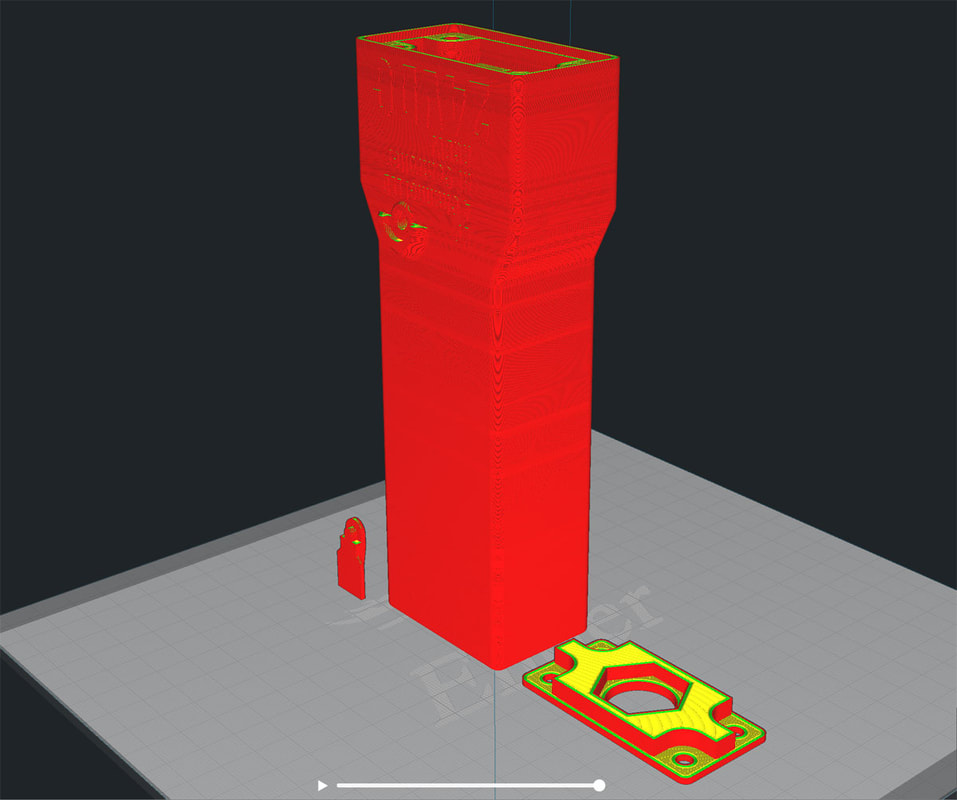
Next up is to test and print an enclosure for the RF LED Controller. These will use PG11 cable glands and will have an M4 screw which can be removed to poke something through to reset the controller if needed (an M5 screw could also be used without the insert). It is designed to be printed without supports. I plan to use some slicone to help seal the baseplate, though gravity should help keep rain out. The mounting will be with zipties.

The second project has been a work in progress for a while and I am a bit stuck on it, but it is to add a drawer to my enclosure. I'm trying to decide how to make some parts to connect the enclosure to the drawer rails on an Ikea drawer. There have been several iterations of the design, but I'm trying to cut the cost and print time to the minimum and also avoid problems putting it together. For something so simple I am making it much harder than it needs to be I think.
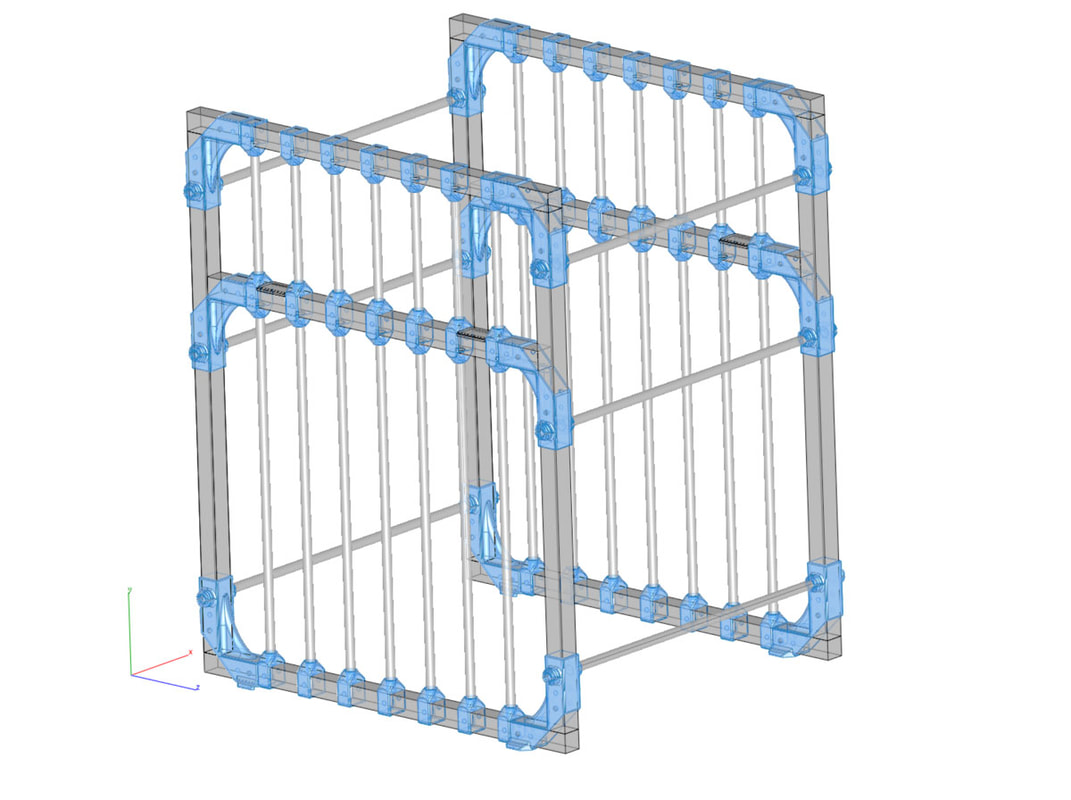
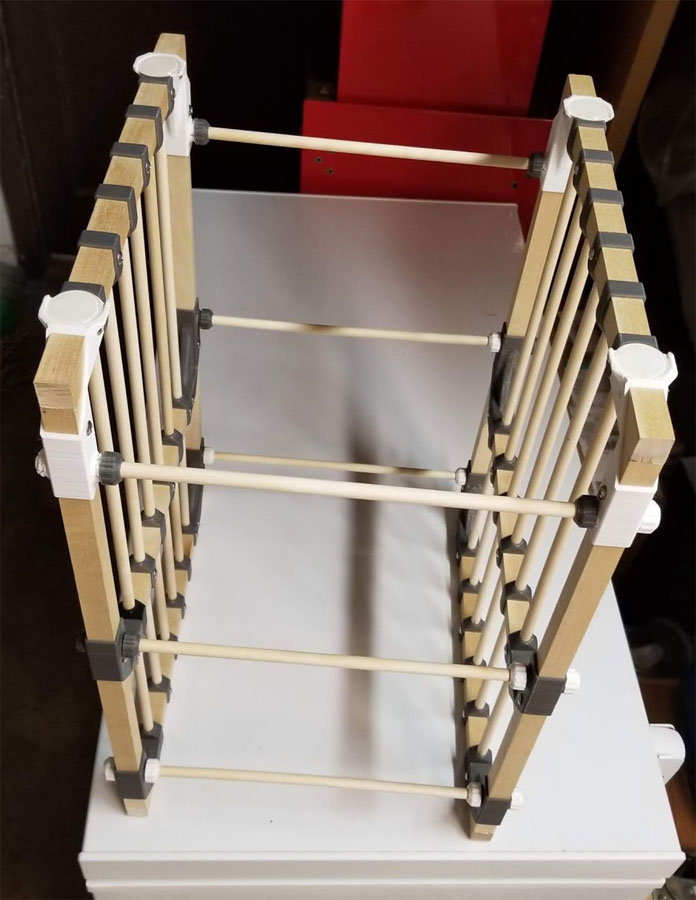
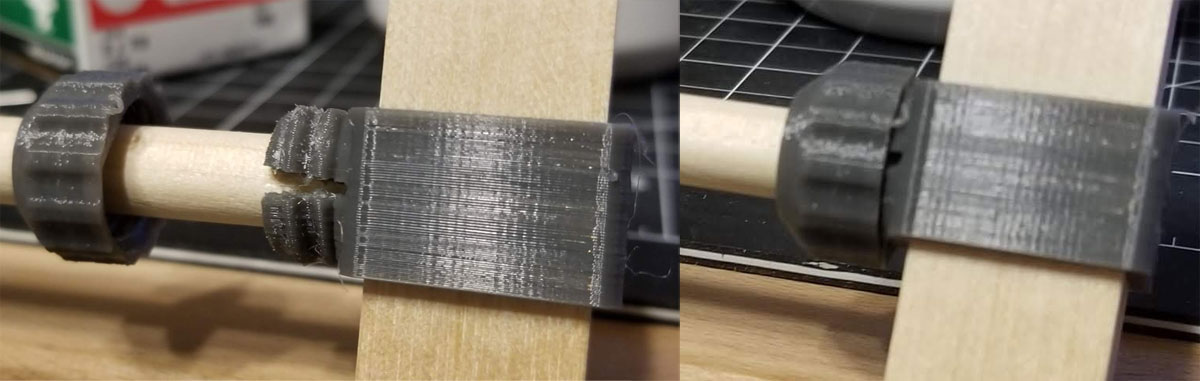
The third project is completed and installed, as of today. It is a simple divider for a chest freezer. I set up the fridge with a plan, and tried to keep some organization, but unfortunately all plans go out the window on first contact with the family. In short the fridge is a mess. I looked at freezer dividers which seem to be the best way to go, but those things are crazy expensive to get enough parts to outfit a fridge. I decided to roll my own using wood purchased from Amazon and Walmart, some 3D printed parts. There are some silicone feet also from Amazon which I decided to use to protect the base of the freezer from any hard edges. I am pretty happy with the result, which I call the bread jail because for some reason bread needs to go in the freezer. With the 3/8" dowels from Walmart I could have made the width upto 12" (as shown in the pics), but that would have interfered with buckets already in the freezer, so the final design is only half as wide as shown. Sorry no pics of it in action though, still a bit embarrassed by the mess in the freezer, and it's not much to look at when fully loaded up (unfortunately with bread). Despite it being made of 3/8" dowels and 3/4" sticks it is damn strong, it would not be easy to pull it apart. The dowels are clamped in by a threaded coupler and requires no gluing or holes drilled (see pic below). There are however a ton of screws (and I did pre-drill for those). I also added dowels to pin the corners but that was unnecessary. The design allows for additional panels to be added to either side.
I plan to post this design up to thingiverse in the next week or two.
Update 10/24/2020: Uploaded the design to Thingivsers with some instructions. You can find it here.
 |  |
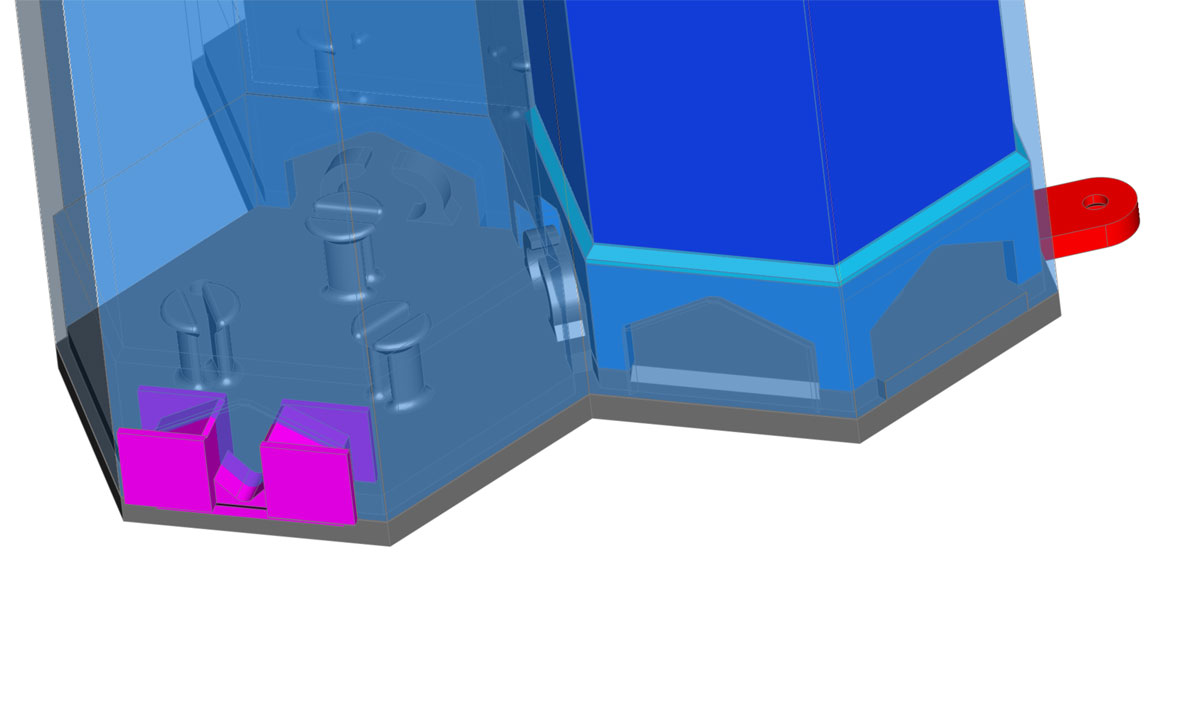
Finally, I have back-burnered a LED spice rack I was working on, which could possibly turn into just a cool piece of wall art. Lack of printers and time to test it out has placed this one on hold for a while. I expect this one to take a loooong time to print. I had intended to use this with a battery powered RGB LED strip which would wind around through the base of the spice holders and shine through a clear diffuser. The whole thing would be wall mounted and the battery pack would be hidden (ideally). The problem was that the LED strip I had initially chosen for the project, though bright was not bright enough when placed behind the diffuser. Due to that problem I decided to test it using a 12V battery used for CCTV testing, but that is still pending (waiting on the LED strip). It would be really cool to use an arduino with some individually addressable LED's but really I'd be happy to just get the LED design completed at this point. If it is down to practicability, any battery setup would have a short runtime and require some design compromises (make it smaller), so it may end up without a battery and just require an ugly cord and plug for power (or maybe it will only exist in my CAD software where I can power it with anything I want :-)
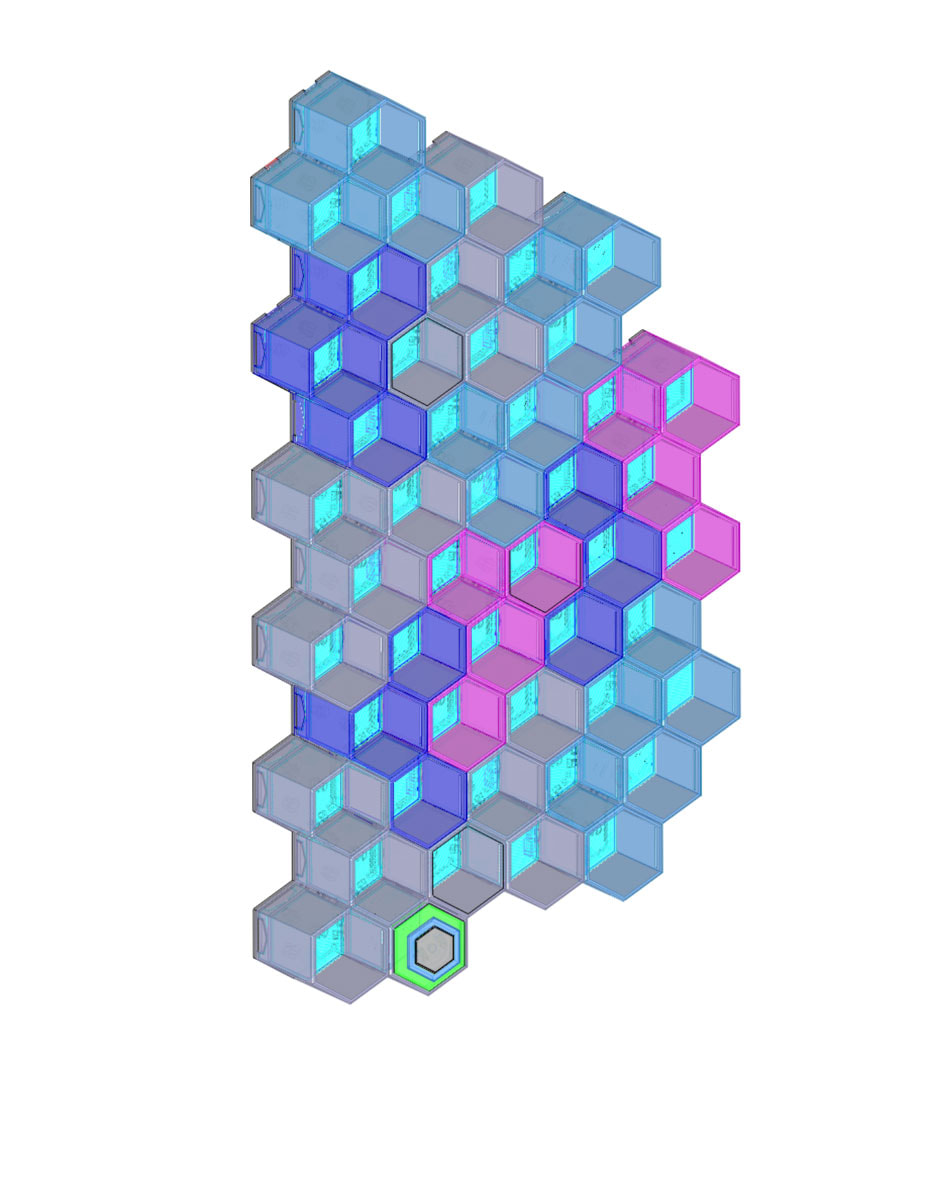
The modules will clip together (clips are pink) though bump outs than should be easily cut out since they are indented to have a very thin wall holding them. There are also screw in clips (red) which will stabilize the whole thing. I'm still working on the design for the LED holders since so far I have not been happy with the way the LEDs either don't show through enough or are producing bright spots. It may be the printed diffuser is the part of the problem since it was printed in clear.
As usual it's the same old story, not enough time/money/printers, and too much crap to do.


 RSS Feed
