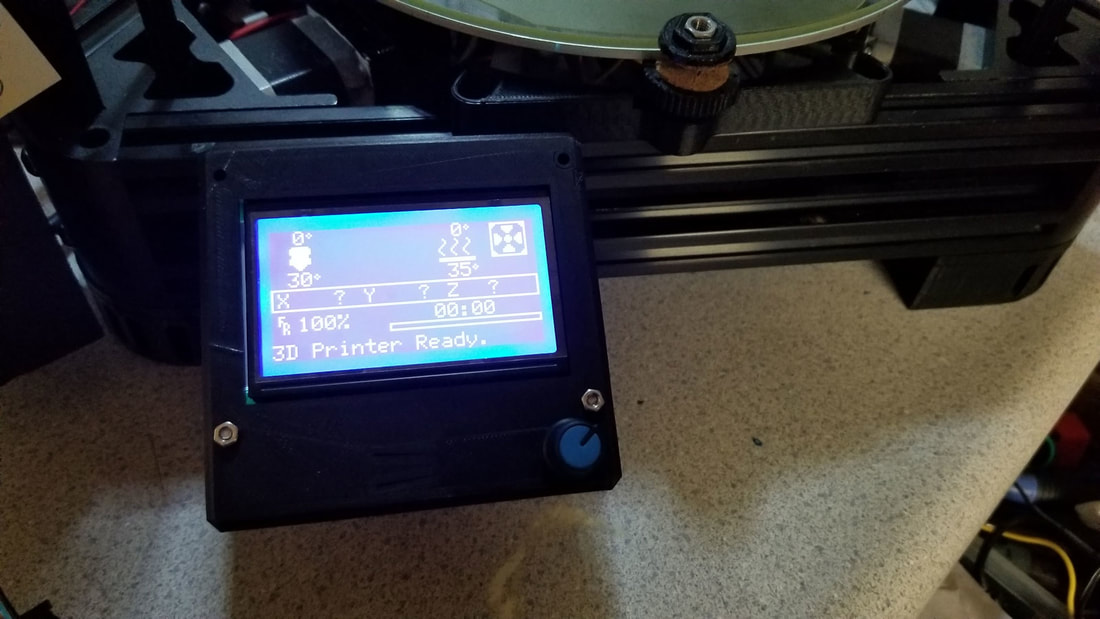
The Kossel seems to be back in business* (given it's history I cannot say this 100% confidence), but I am hopeful. The first print off the machine since the fixes looks decent. So I still have some things to work out, but they are pretty minor and just require some re-wiring.
Most of the following info is from memory, but will try and lay out a general outline of what was needed to get the Re-ARM working with a RAMPS 1.6 (should be the same for RAMPS 1.4 or 1.5 also), for my Anycubic Kossel Linear Plus (Delta). One of the most difficult things to get done was compiling the Marlin firmware using Atom. It is not as user friendly as the Arduino IDE and requires a good deal of backtracking when there are errors. This is really just a re-hash of the info found in the following links which I am also referring to below:
http://marlinfw.org/docs/basics/install_rearm.html
http://marlinfw.org/docs/basics/install_platformio.html
http://docs.platformio.org/en/latest/ide/atom.html#installation
Firstly though, here are some limitations with the Re-ARM to consider, none of them caused me any serious issues though (yet).
P1_30 (37) - not 5V tolerant
P1_31 (49) - not 5V tolerant
P0_27 (57) - open collector
P0_28 (58) - open collector
Installing Atom and Platform I/O
Now that the limitations (as I know them) are out of the way, here is the basic process to getting Marlin 2.0 compiled for the Re-ARM. The first thing I needed to do was install Atom and Platform I/O, which I won't lie, was a pain in the butt. I used the following guide for that:
http://marlinfw.org/docs/basics/install_platformio.html
and this (which is linked in the above)
http://docs.platformio.org/en/latest/ide/atom.html#installation
I had problems installing CLANG so I skipped that, and have had no problems because of it. I did not take good notes on this process, so this is a bit light. In the above guide, I don't recall doing any of the "new project" stuff, I just opened the Marlin directory (see below). One thing to note is that when running Atom, it needs to be run as administrator (that is, right click the icon, then "Run as Administrator"). If that is not done there will be a bunch of errors.
Opening the Marlin-bugfix-2.0.x file in Atom
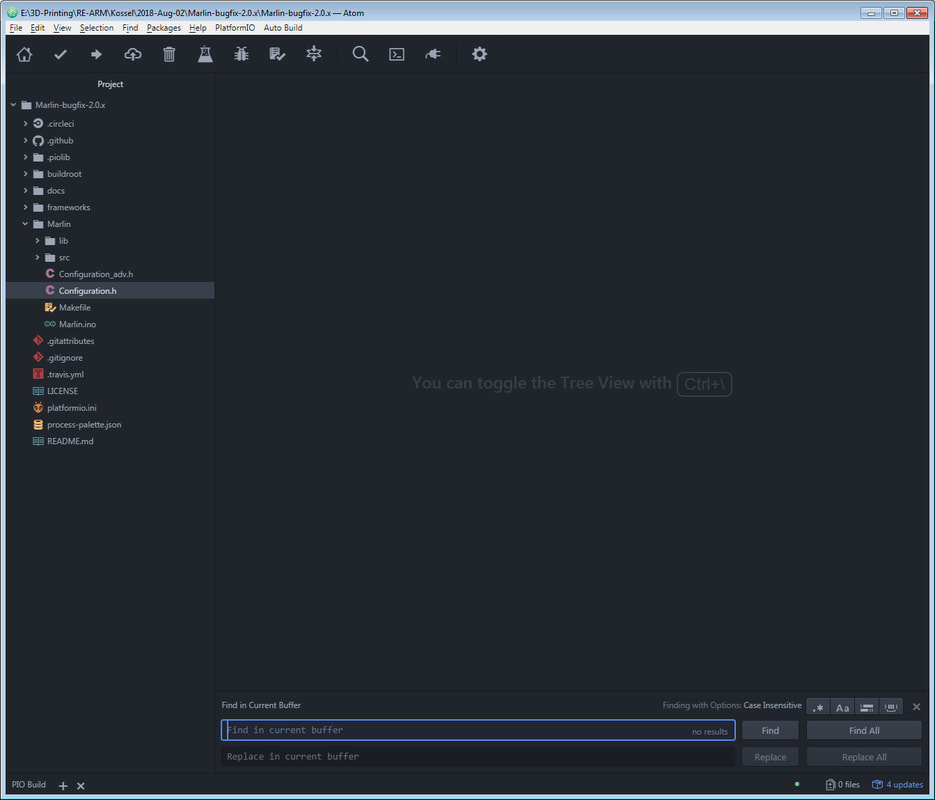
To start, I would close out Atom, and re-open it (run as administrator). Then close the welcome tabs that open up to clean up the workspace. Then I went to file > Open folder and navigated to the Marlin-bugfix-2.0.x directory. Once open, there will be a directory listing on the left side pane.
Most of the following info is from memory, but will try and lay out a general outline of what was needed to get the Re-ARM working with a RAMPS 1.6 (should be the same for RAMPS 1.4 or 1.5 also), for my Anycubic Kossel Linear Plus (Delta). One of the most difficult things to get done was compiling the Marlin firmware using Atom. It is not as user friendly as the Arduino IDE and requires a good deal of backtracking when there are errors. This is really just a re-hash of the info found in the following links which I am also referring to below:
http://marlinfw.org/docs/basics/install_rearm.html
http://marlinfw.org/docs/basics/install_platformio.html
http://docs.platformio.org/en/latest/ide/atom.html#installation
Firstly though, here are some limitations with the Re-ARM to consider, none of them caused me any serious issues though (yet).
- the RE-ARM does not have as many I/O pins broken out as the Arduino Mega, this link has info on which pins are missing.
- Since there are fewer I/O's broken out, the AUX headers on the RAMPS will not have the expansion possibilities of a RAMPS + Arduino, this can be a problem (probably not insurmountable),when tying to use some more advanced features like the serial connections to TMC2208 stepper drivers. TMC2130 should work fine however. Also the RepRap Discount Graphics LCD works fine with one small fix (mentioned below).
- Some pins are broken out in several places on the RAMPS, and the Re-ARM's own pins (this is more something to be aware of than a drawback). See the pics here for more info.
- The Re-ARM is a 3.3 volt board, unlike the Arduino Mega which is 5 volts. This is not a problem for the most part since the Re-ARM has taken care of adding level shifters for the outputs to the MOSFETs (which if driven at a lower voltage would not work as expected). Additionally most of the pins are 5 volt tolerant, however not all of them. There is a list of pins that are not 5 volt tolerant in the marlin > pins > pins_RAMPS_RE_ARM.h file (none of these should be a problem though unless there is some special setup that could end up using them):
P1_30 (37) - not 5V tolerant
P1_31 (49) - not 5V tolerant
P0_27 (57) - open collector
P0_28 (58) - open collector
- Related to the above, if using the RepRap Discount Graphic Display, a modification needs to be done to the cable since the display runs on 5 volts and the pins on the Re-ARM natively only do 3.3 volts. The Re-ARM has a 5 volt regulator however it is broken out on only specific pins. The mod is described here. If you look closely at the pics it is clear which pin needs to be broken out from the cable. I don't want to describe it specifically since you sort of need to be looking at the cable and I don't want somebody frying their board because I messed up. What I did was clip the outside wire on the ribbon as shown on the link and added a dupont connector to it and connected it to one of the 5 volt headers they described. This is super easy to modify, but if you order a Re-ARM I'd suggest just buying the cable for a buck or two more and don't sweat it (I forgot to).
Installing Atom and Platform I/O
Now that the limitations (as I know them) are out of the way, here is the basic process to getting Marlin 2.0 compiled for the Re-ARM. The first thing I needed to do was install Atom and Platform I/O, which I won't lie, was a pain in the butt. I used the following guide for that:
http://marlinfw.org/docs/basics/install_platformio.html
and this (which is linked in the above)
http://docs.platformio.org/en/latest/ide/atom.html#installation
I had problems installing CLANG so I skipped that, and have had no problems because of it. I did not take good notes on this process, so this is a bit light. In the above guide, I don't recall doing any of the "new project" stuff, I just opened the Marlin directory (see below). One thing to note is that when running Atom, it needs to be run as administrator (that is, right click the icon, then "Run as Administrator"). If that is not done there will be a bunch of errors.
Opening the Marlin-bugfix-2.0.x file in Atom
To start, I would close out Atom, and re-open it (run as administrator). Then close the welcome tabs that open up to clean up the workspace. Then I went to file > Open folder and navigated to the Marlin-bugfix-2.0.x directory. Once open, there will be a directory listing on the left side pane.
Setting up Atom to compile
So, this is jumping ahead, since nothing has been changed yet, but to confirm that Atom will compile with just a base Marlin config out of the box, a test run should be made. How to compile is not obvious with Atom, and since it does not know what we are compiling for (that is, it does not know if it is compiling for an Arduino Mega, a Re-ARM or a Ford Model T), we have to tell it what board we are using. To do that, there are 2 ways I am aware of. First, we can tell it when we compile - but that needs to be done each time. The simpler way to go is just to follow the guide linked above - specifically we need to edit the platformio.ini file. To do that, just double click on platformio.ini (which is under the "Marlin" directory), from within the Atom editor and it will open as a tab:
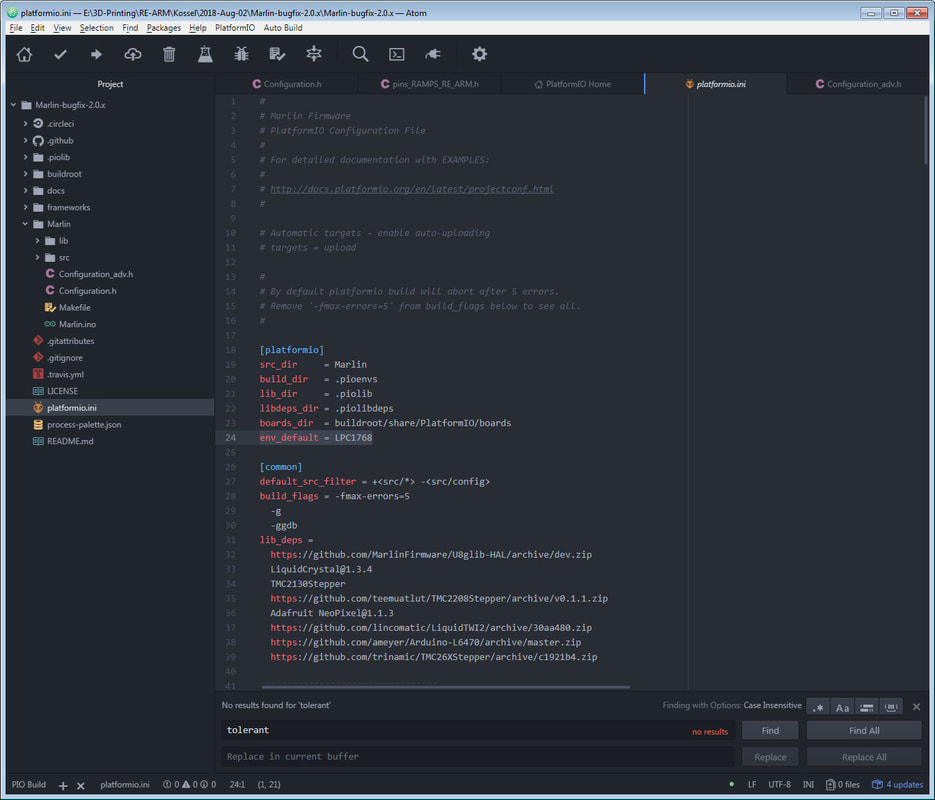
Now just change the following:
env_default = LPC1768
and then add this in the section under "[env:LPC1768]" (does not matter where):
upload_port = /Volumes/REARM
env_default = LPC1768
and then add this in the section under "[env:LPC1768]" (does not matter where):
upload_port = /Volumes/REARM
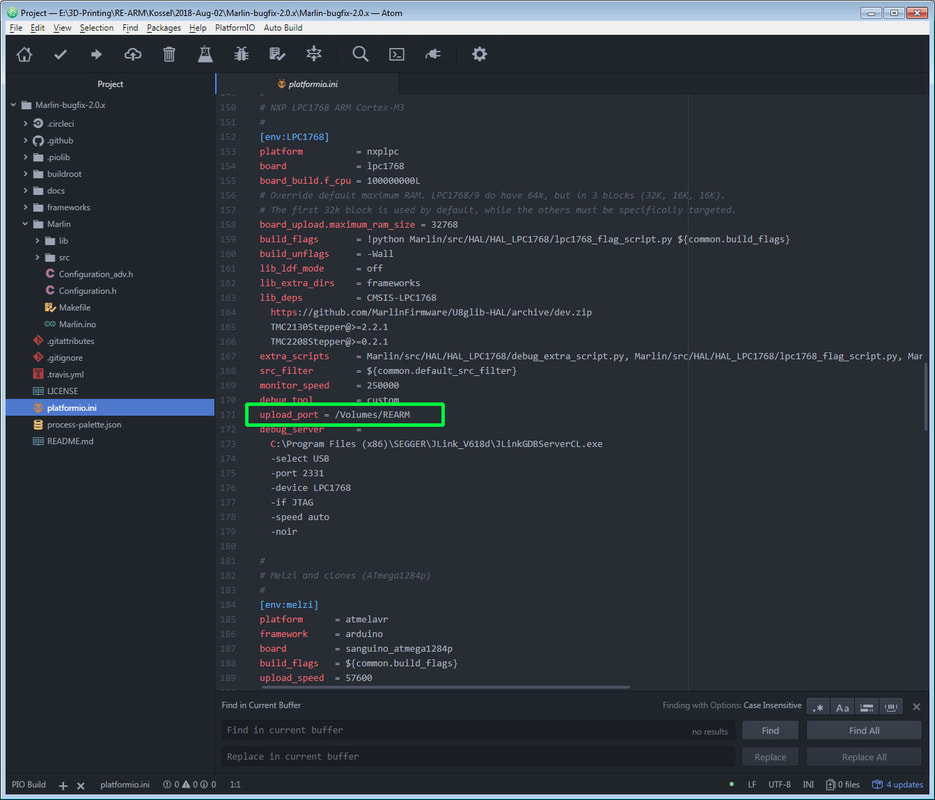
The effect of this will be to allow you to just compile and each time without selecting the specific type of board, and Atom will know what you are compiling for. Note however that this is all contained in the platformio.ini file which is inside the specific Marlin-bugfix-2.0.x directory that is being worked on. If you change that, then the changes to platformio.ini will also need to be done over again. If you continue to work from the same directory though then it should not change.
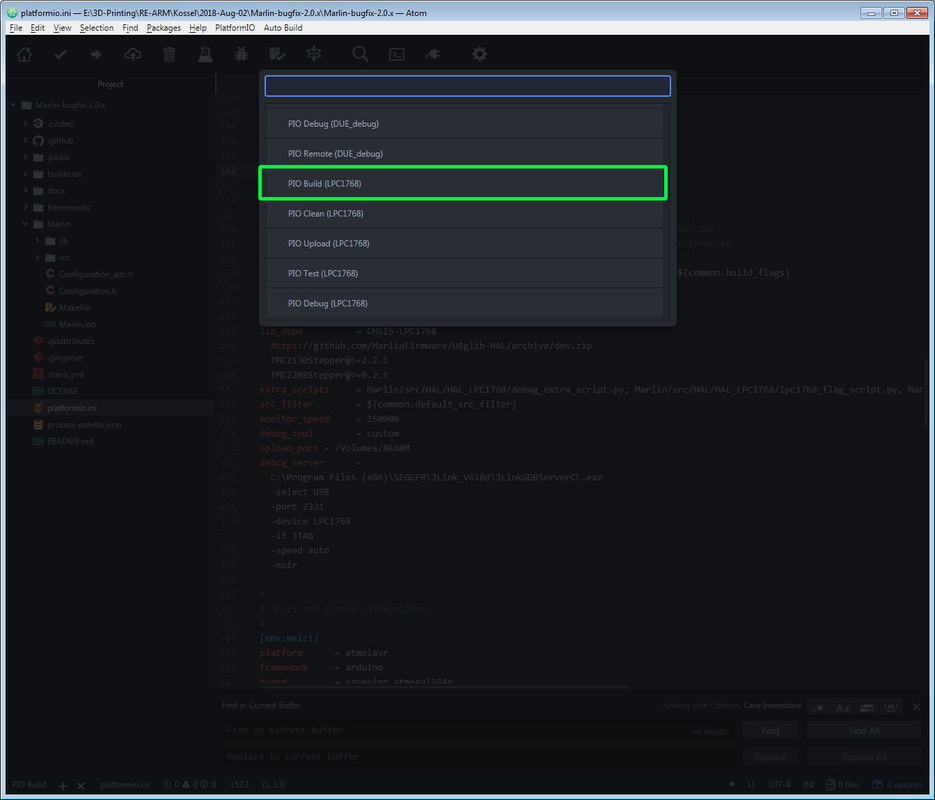
The alternative method of compiling, without modifying the platformio.ini file, is to select the board each time when compiling (don't compile just yet though since the configuration.h needs to be updated for the Re-ARM).
The alternative method of compiling, without modifying the platformio.ini file, is to select the board each time when compiling (don't compile just yet though since the configuration.h needs to be updated for the Re-ARM).
Re-ARM specific configs for configuration.h
At this point, I would save, and then close atom out, and re-open it (run as administrator). It seems like after installing libraries or making changes to the platformio.ini and such it helps to do that. Then open up the configuration.h to make the following changes (I would run at least one test with just the base configs before modifying the config files for everything):
For the Re-ARM the necessary configs in configuration.h are (these need to be changed) - see this link for more info:
#define MOTHERBOARD BOARD_RAMPS_14_RE_ARM_EFB
#define SERIAL_PORT -1
Once everything else is set up, you can save it (file > save) and compile it (read below for info on how to do that).
I also found that I had to disable the speaker by commenting out the following in configuration.h, due to an error when compiling:
//#define SPEAKER
I think that error has to do with this. If you get an error, try that.
Compiling the firmware.bin using Atom
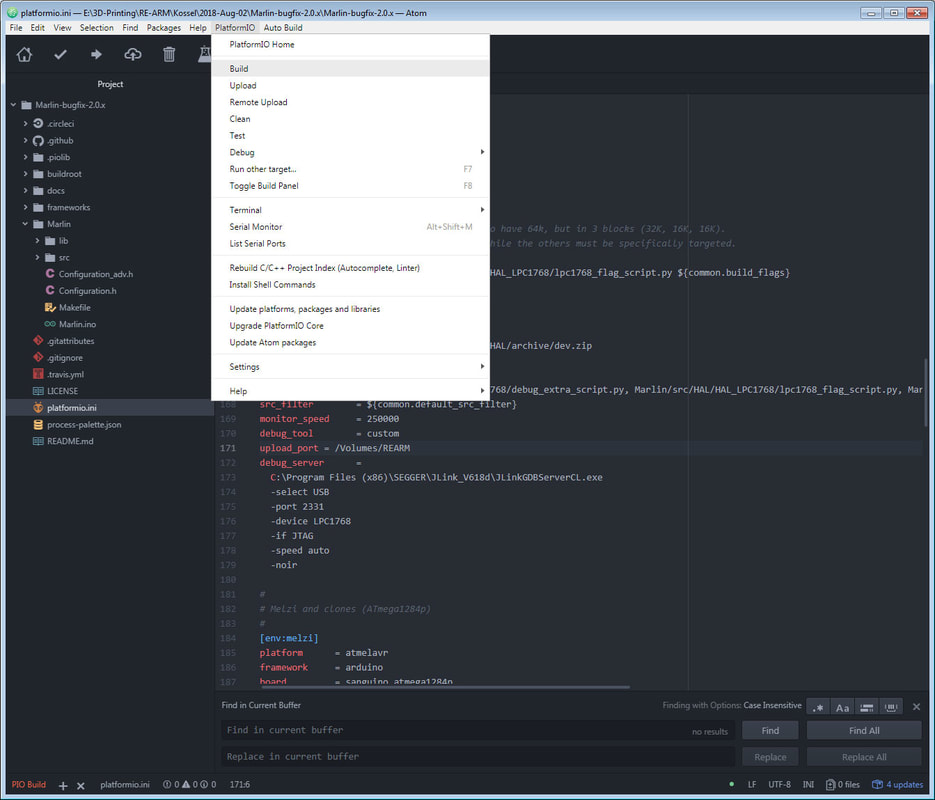
To compile, you can either click the "PIO Build" text-like button on the bottom left of the screen, or use the platformio>build menu at the top:
To compile, you can either click the "PIO Build" text-like button on the bottom left of the screen, or use the platformio>build menu at the top:
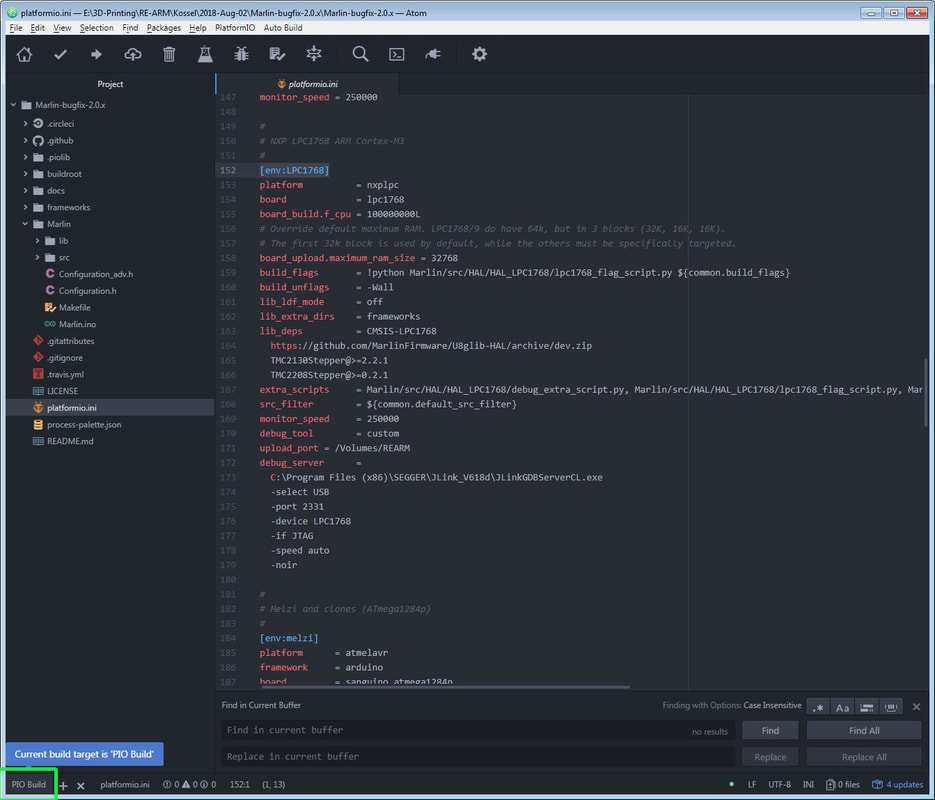 |  |
I would just try compiling Marlin with the default settings to make sure it does not derp out with errors as a test (so you know it works when it derps later on). If it does work, it will just zip through a bunch of stuff in a pane on the bottom right of the window, and close then pane showing the progress (at the bottom left the "PIO Build" text will be green). If it fails the pane with the errors will stay open and you can try and see what went wrong. If it fails, the "PIO Build" text at the bottom left will also be red instead of green. If it was successful, Atom will create the "firmware.bin" in a sub directory, sneakily hidden several folders inside the Marlin directory:
Marlin-bugfix-2.0.x\Marlin-bugfix-2.0.x\.pioenvs\LPC1768\firmware.bin
That is going to be the file to load onto the 32 GB microSD card (which should be formatted as FAT32 and named "REARM") - when things are ready to go. I always check the date, timestamp and size to be sure it looks correct so I don't load up some older firmware by accident. Once I had a good firmware.bin with just the base config for the Re-ARM, I loaded it onto the Re-ARM to test, and then was able to connect to it and send it gcodes from Octoprint which confirmed it was working.
If it failed with just the basic config, which seems unlikely, it may be missing a library, the errors should indicate that. If it worked then the configuration.h and configuration_adv.h can be edited to work with the specific config needed and then compiled and loaded onto the Re-ARM.
If something does not work with the specific configs, it may be because it cannot work - at least in same way as before. An example is TMC2208 drivers using the serial control. For the TMC2208, I was only able to compile it using them in "standalone mode" since the pins needed to allow serial communications with the Re-ARM are not defined in the pins_RAMPS_RE_ARM.h file. I don't think that is an oversight or error, but probably due to the missing I/O's on the Re-ARM vs the Arduino Mega. The TMC2208 would probably work with serial control if I figured out which pins to use and edited the pins file, but after looking it over I decided that it would be a mess of wires here and there. The TMC2130 which uses SPI however, did compile in both standalone mode and with SPI control. In both cases though, the libraries would need to be installed for the driver being used.
If using the A4988 drivers, no libraries are needed.
ATOM Libraries (may be needed depending on the drivers used)
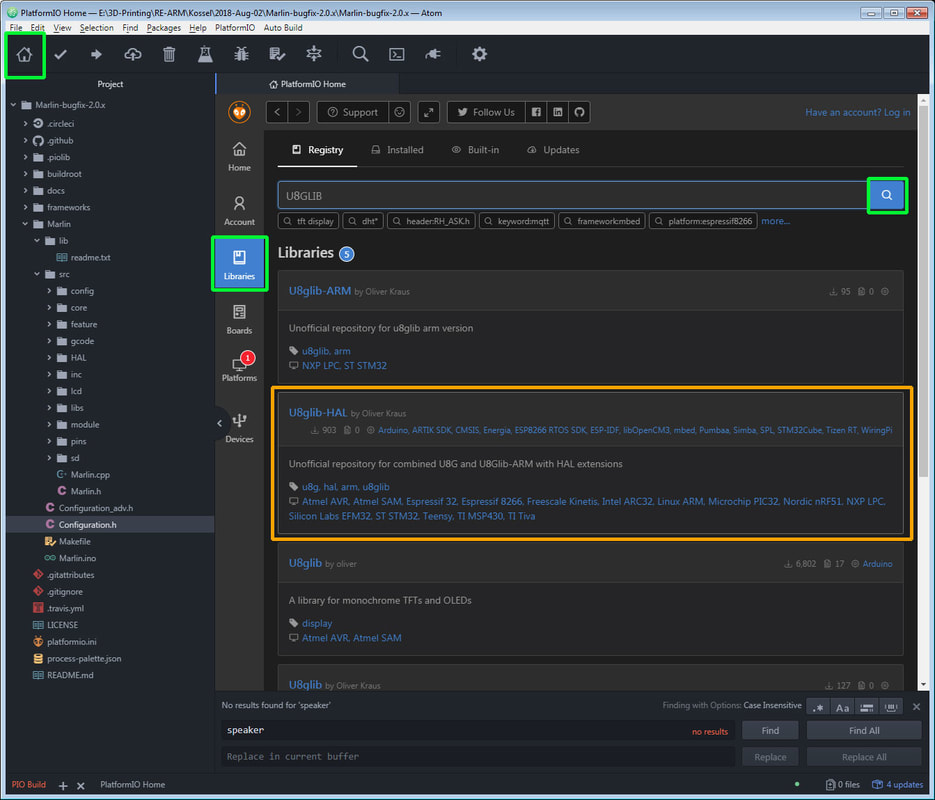
I am a bit fuzzy on this point, but I recall that I had some compiling problems initially, so I had to install some libraries within Atom. Aside from the TMC drivers, my suggestion is to just compile, and if it has a problem, see if it says it is missing a librany, then install it and re-try. To install a library, click the home icon, then on the vertical pane, click the library, and search, and then install. The following are the libraries that I recall I may have needed at various points:
U8glib-HAL by Oliver Kraus I can't recall if I needed this one or not, but I see it was installed. There are several of these, but the one I have installed is the U8glib-HAL.
TMC2130Stepper by teemuatlut - used when I was checking to see if I could compile Marlin 2.0 for Re-ARM using the TMC2130 stepsticks.
If using TMC2208 drivers (which I could only compile as "standalone" mode stepsticks), the TMC2208Stepper by teemuatlut would be needed.
After installing a library, I would close and restart Atom (running it as administrator).
Once you have a good firmware.bin (check the date, time and size on the file to make sure it is correct so you don't load an older or invalid one).
Follow this guide to install it (basically load it up on the microSD which was prepared earlier and reset the Re-ARM):
http://marlinfw.org/docs/basics/install_rearm.html
Note that they state that the Re-ARM should be disconnected from the RAMPS board, and running off USB power (USB / Int jumper set to USB) the first time you test the config on it. If you do that, just be sure to move the jumper back to INT when done (and before you install the RAMPS), so the Re-ARM will run off the RAMPS power supply. It is not possible to move the jumper once the RAMPS is installed.
If the RAMPs being used will have non-standard pins or anything that could send a signal > 3.3V < 5V to the RAMPS, double check that the pin it will send it to on the Re-ARM is 5V tolerant. If using mechanical endstops and a basic config, there should be nothing to worry about.
UPDATE Nov 17, 2018 - Please see the comments.
Since I wrote this in August 2018, there has been a change to the way Marlin 2.0 handles the SD card on the RepRap Discount Smart Display. Now, changes need to be made in the "pins_RAMPS_RE_ARM.h" to enable the SD on the display - but there is also now an option to use the MicroSD onboard the Re-ARM which may be preferable. Thanks to sl1pkn07 for pointing this out.
I also cleaned up some spelling and added some links in the original post, but did not make any significant changes.
In a nutshell, if you are using a newer version of Marlin 2.0 (since Oct 13th I think), and want to use the SD on the display, the Marlin-bugfix-2.0.x\Marlin-bugfix-2.0.x\Marlin\src\pins\pins_RAMPS_RE_ARM.h needs to be edited as noted in sl1pkn07's 2nd post in the comments - the following needs to be commented out in pins_RAMPS_RE_ARM.h, for the SD on the display to work:
#define LPC_SD_LCD // Marlin uses the SD drive attached to the LCD
//#define LPC_SD_ONBOARD // Marlin uses the SD drive on the control board
I am pretty sure the same caveat regarding occasional garbage lines on the display will still apply, but the SD on the display should work as before. Of course if you want to use the MicroSD on the Re-ARM, that is now the default, so you shouldn't need to change anything in that case.
Update May 25, 2019 - switching to VSCode + PlatformIO IDE:
Alot has changed with Marlin since I made this post, and I think they have fixed or worked around the LCD and SD card issues (not 100% sure on that but I saw some things in the config files that would lead me to think that is the case).
However I wanted to add a note that I am switching to VSCode since that seems to be recommended for PlatformIO now. VScode is to PlatformIO the same way Atom is to PlatformIO, they should be pretty much interchangeable. I had problems with Atom when I went to rebuild Marlin recently so it was a good time for a change anyway. I put together some things that helped me get VSCode working here. I am not up and running with code created with VSCode + PlatformIO yet however, but I think it is at least working to compile Marlin.


 RSS Feed
