Filtering or ducting away the ultrafine particles and VOC's which can be created by 3D printers, is something that is not given much thought by most manufacturers. Even today, most consumer 3D printers are not even enclosed, and those that are, do not do a great job of filtering (if they even include a filter). As 3D printers become more common, the science will catch up. But what is already out there, should give anyone with a 3D printer some pause to consider what the long term health consequences could be. And also consider the simple things which may hopefully reduce the risks. I don't know much about the science, and have a limited budget (so a $600-$1000 filtering system is not in the cards), but I think a little of something is better than a lot of nothing. My little of something is currently a ducting system which runs the air from my enclosed printer, through a small HEPA filter, and then out through an unused doggie door. It uses 2.5" flex hose, which is the smallest diameter I'd consider, and a rather powerful blower fan.
For my new Bambu X1C, I've designed a small HEPA filter cover which is slapped on the back of the printer, and held on using a bunch of magnets. I just installed it yesterday and have not tested it, but it looks cool at least. This is going to be a temporary solution for my printer though, since I will eventually add a duct system similar to my current enclosure setup.
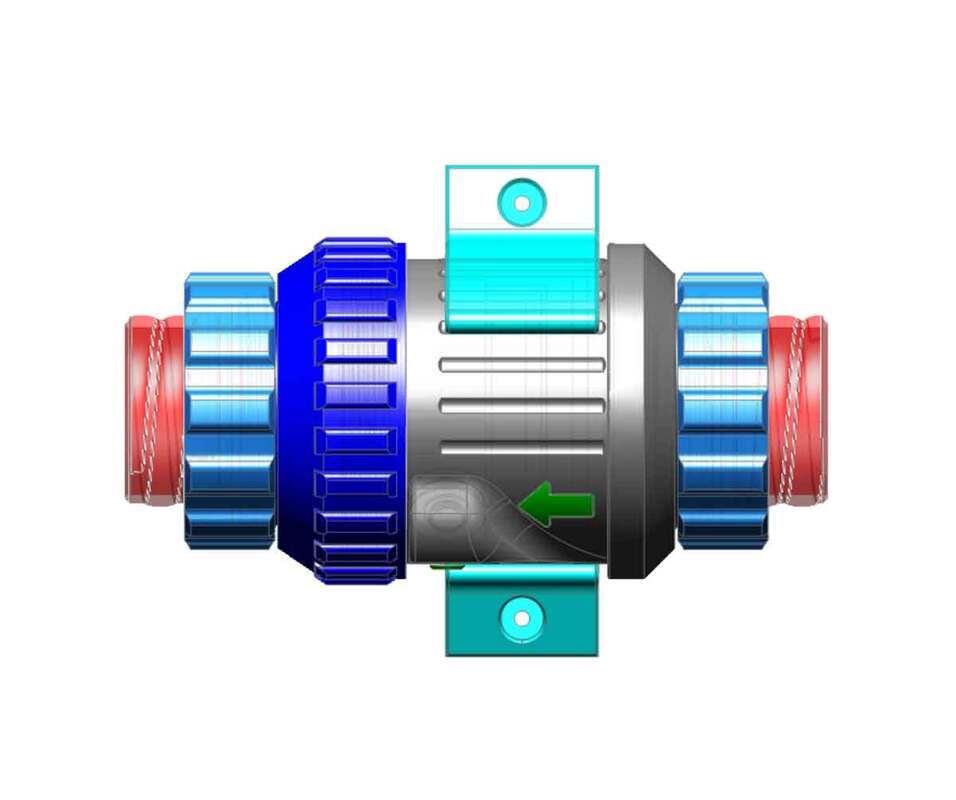
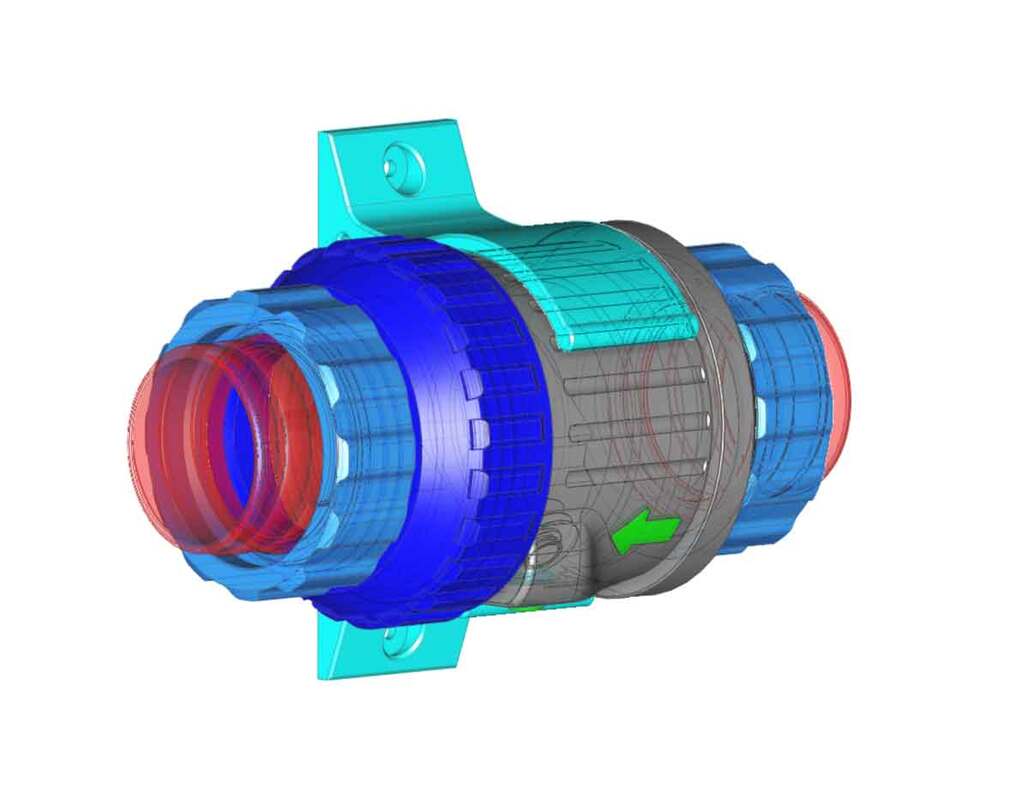
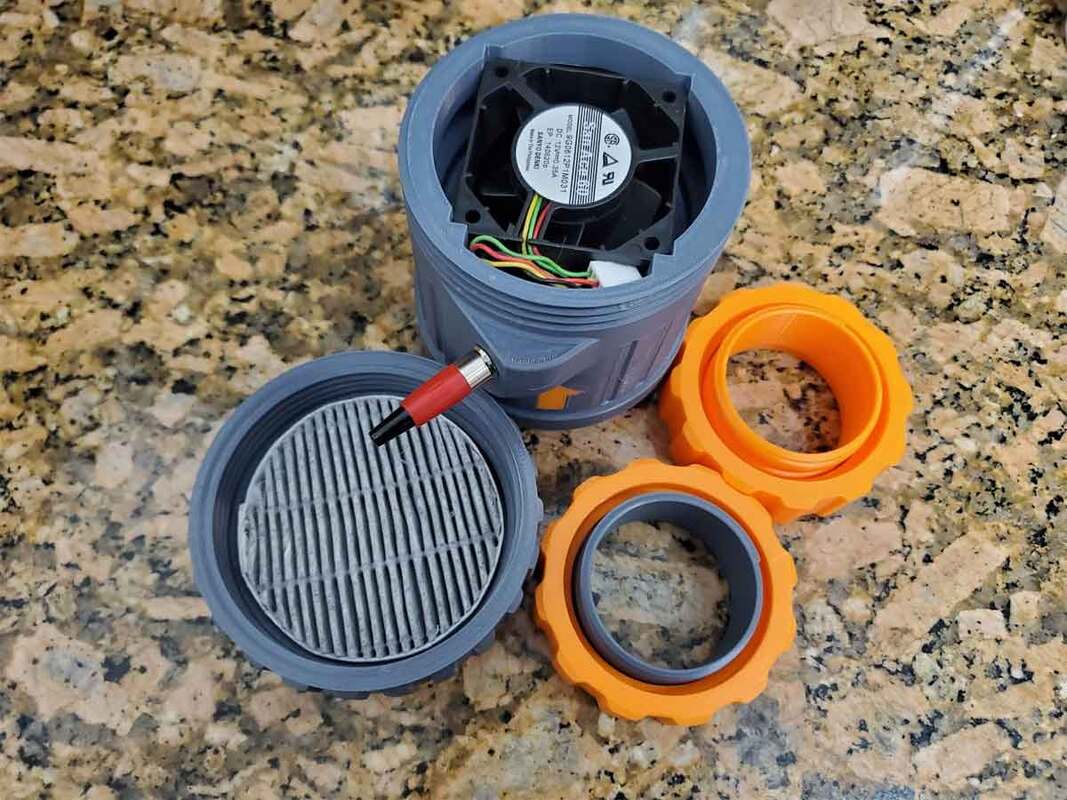
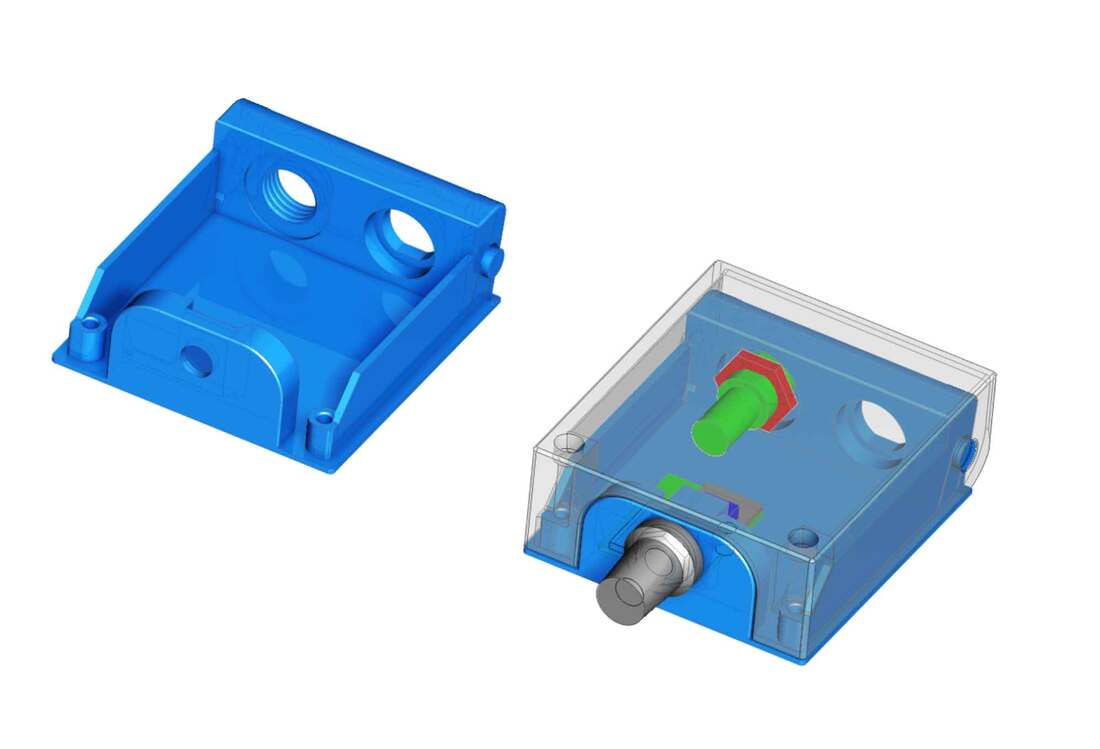
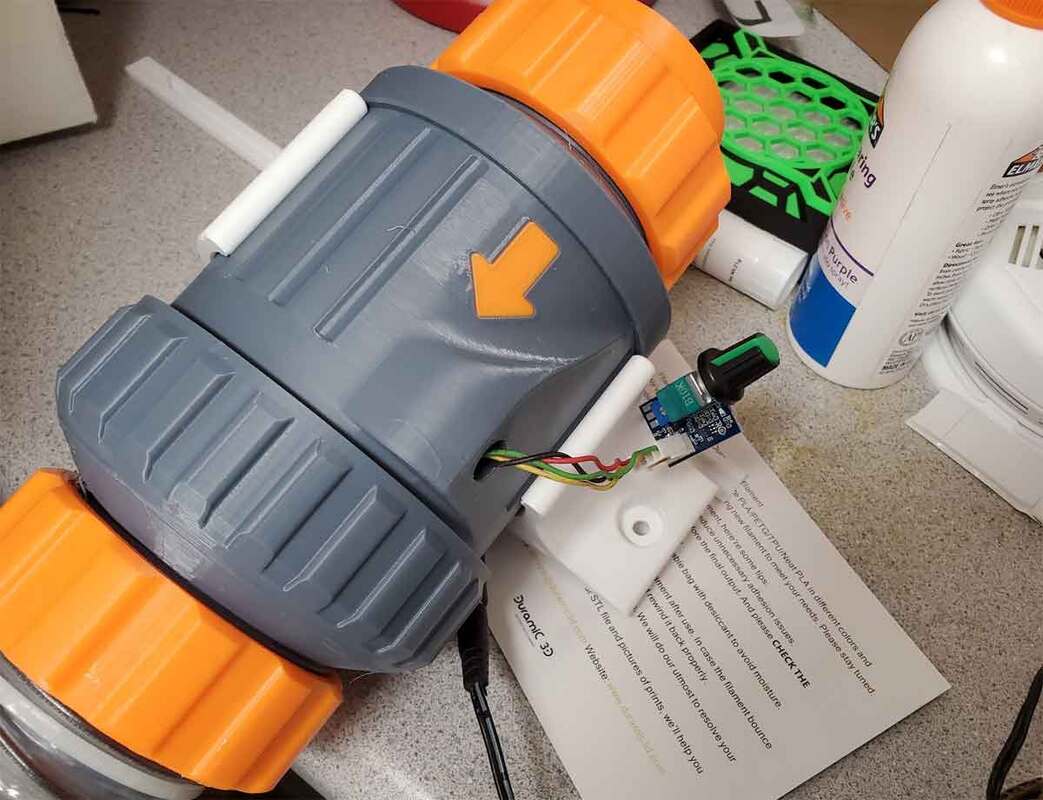
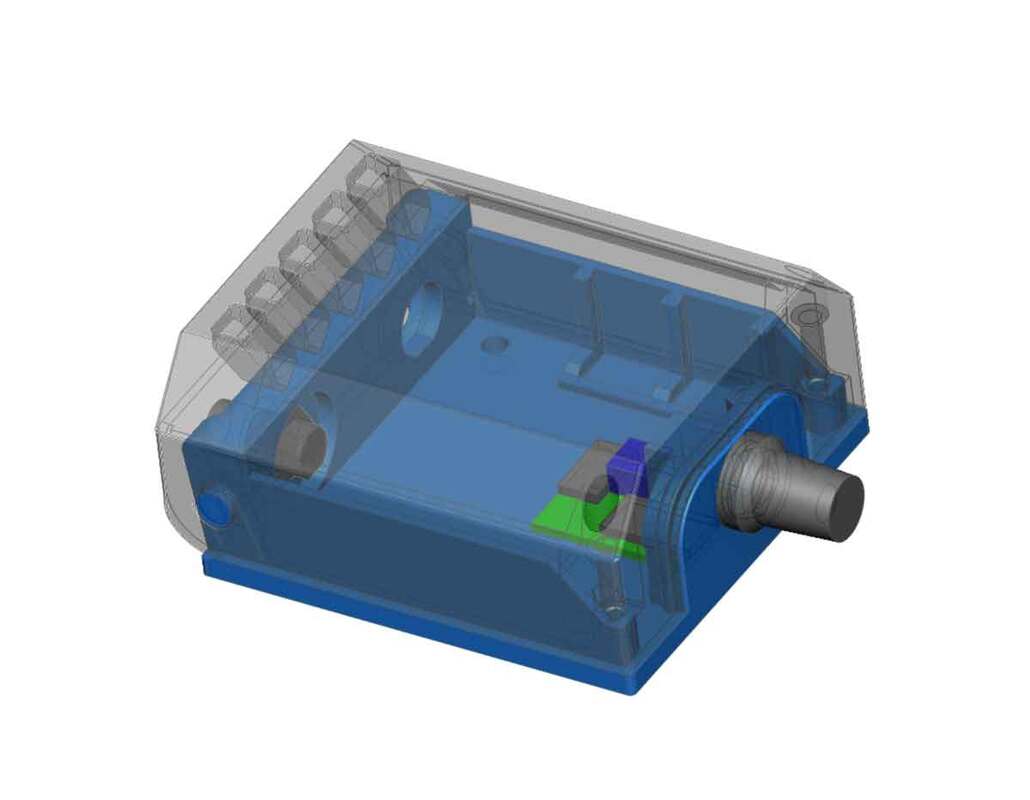
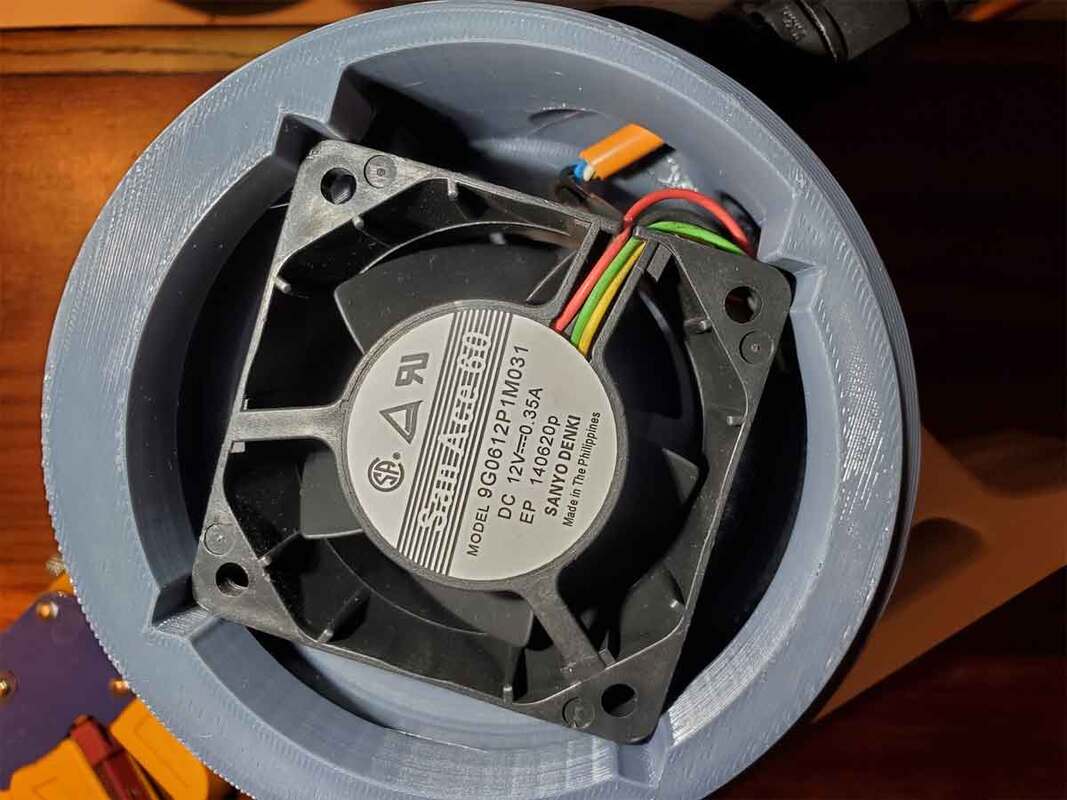
The plan for the next iteration will be to run a duct from the outlet on the back of the X1C, with a booster fan (6038 12V) inline, which will vent out a doggie door (through a printed cover). The booster fan will use a 4 wire PWM fan, and I'm planning to design a remote PWM controller, with a potentiometer to control the speed. I think the booster fan will be needed, since there is going to be several feet of hose, and the small fan on the back of the printer won't cut it. I'm also considering a small circular filter in the booster fan housing, since I prefer to filter the air before sending it outside. I'm still waiting on parts to finalize that design, but I was able to use some of the earlier models from my current setup, which helped speed things along a bit. If the fan has enough power, then I think the newer design should be improved over what I'm using now, and more modular as well.
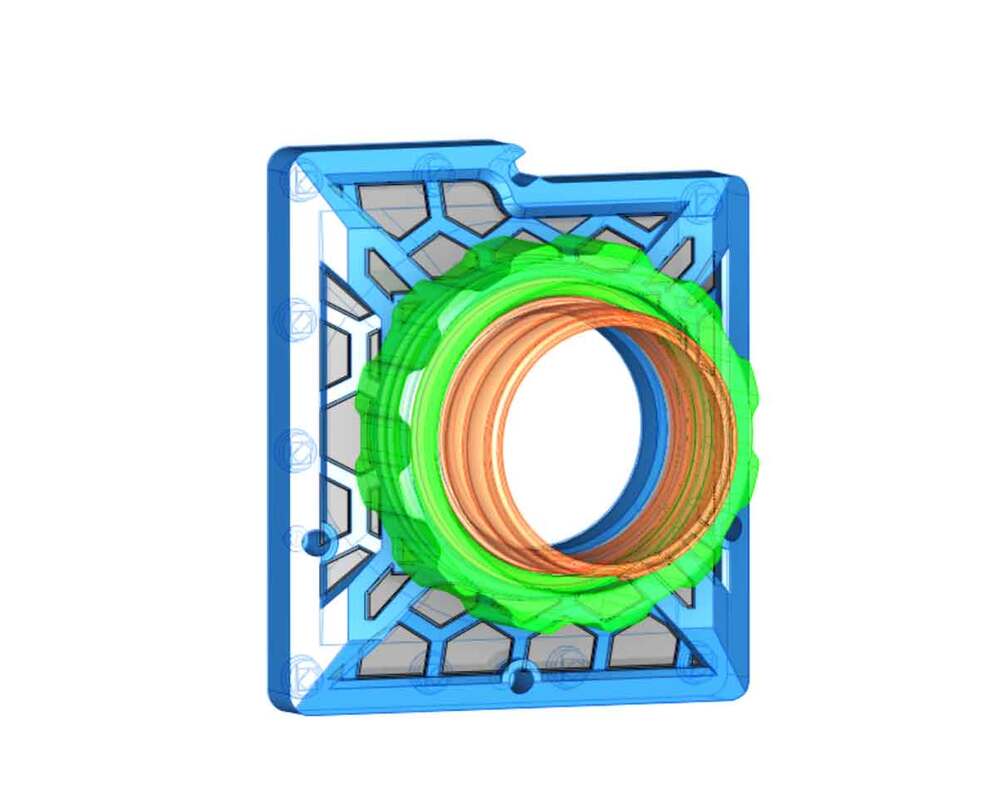
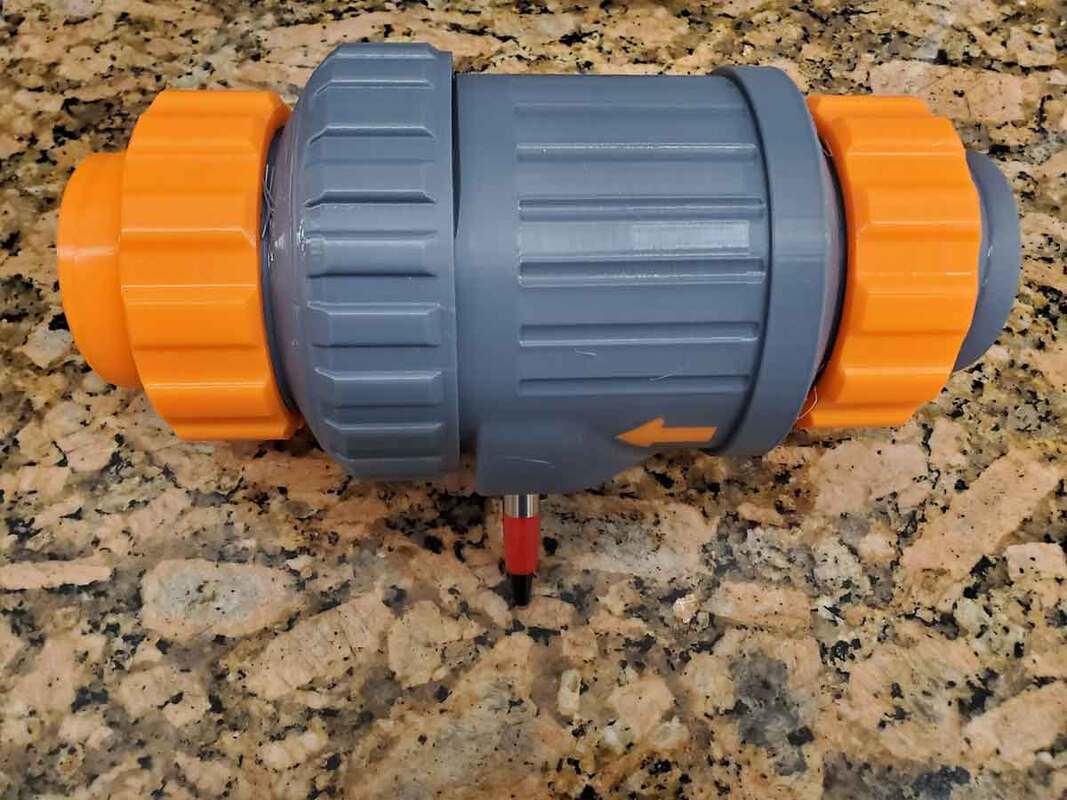
Below are some pics of the inline booster fan (with a filter), and the last pic is the coupler which will connect the hose to the printer. Although they look complete, I need the parts to finalize the models.
For my new Bambu X1C, I've designed a small HEPA filter cover which is slapped on the back of the printer, and held on using a bunch of magnets. I just installed it yesterday and have not tested it, but it looks cool at least. This is going to be a temporary solution for my printer though, since I will eventually add a duct system similar to my current enclosure setup.
The plan for the next iteration will be to run a duct from the outlet on the back of the X1C, with a booster fan (6038 12V) inline, which will vent out a doggie door (through a printed cover). The booster fan will use a 4 wire PWM fan, and I'm planning to design a remote PWM controller, with a potentiometer to control the speed. I think the booster fan will be needed, since there is going to be several feet of hose, and the small fan on the back of the printer won't cut it. I'm also considering a small circular filter in the booster fan housing, since I prefer to filter the air before sending it outside. I'm still waiting on parts to finalize that design, but I was able to use some of the earlier models from my current setup, which helped speed things along a bit. If the fan has enough power, then I think the newer design should be improved over what I'm using now, and more modular as well.
Below are some pics of the inline booster fan (with a filter), and the last pic is the coupler which will connect the hose to the printer. Although they look complete, I need the parts to finalize the models.
Update 9/18/2023: The parts for the booster fan are printed, so I just need to assemble it and then build the PWM controller housing (which will just be a PWM controller and DC input for the 12V the fans require).
Update 10/6/2023: The PWM controller design is completed, but needs to be printed and tested. I'm also waiting on some four conductor wire to use between the fan and PWM controller.
Updated 10/9/2023: I finally got around to hooking up the 6038 fan and PWM controller (with 12V) and testing it through 6 feet of 2.5" hose. It will definitely work without the filter, and with the filter the airflow is cut by probably half. It is enough to get a good breeze at the end of the hose though (without the filter), and enough to easily cause a tissue held in front of the outlet of the hose with the filter to wave around. It's not a torrent of airflow, but it will be enough to clear out the small X1C enclosure and create a negative pressure (as long as I can seal up the holes that can be sealed). I think I will still use the filter to start with at least, since it should help cut down on the crap going into the air, even if outside. The booster fan is also not as loud as I thought it would be, which was a surprise, but I think being fully enclosed helps with that.
I found that the design is mostly OK, however I may open up the holes for the hose collars just a bit, and remove the brass inserts for mounting the fan (since it should be a one time deal, there is no reason to use inserts really).
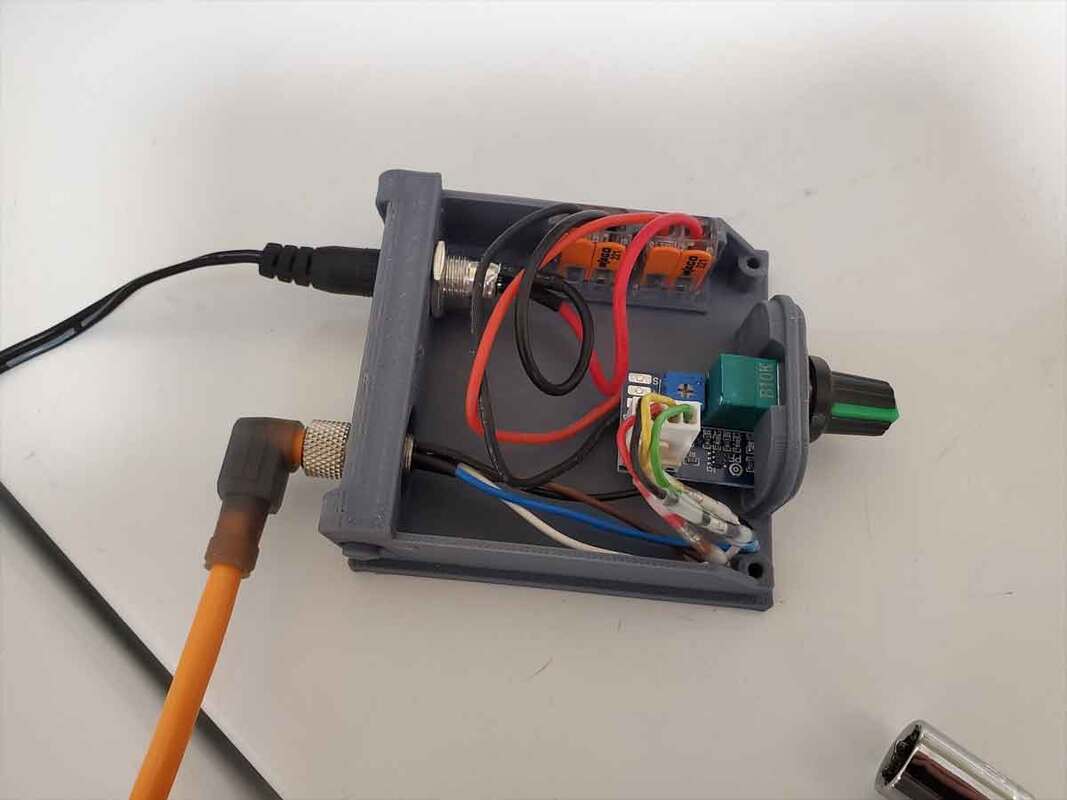
I'm printing the PWM enclosure now, and may post that as a separate design once I complete it. For the final wiring configuration, I decided to go with some M8 aircraft style connectors on the booster fan end, and a M12 cable gland on the PWM controller end. I want to be able to completely remove the hoses and cables from the booster fan module, so having removable connectors is necessary. I've ordered an M8 male 4 pin panel connector which is wired, and that will connect to the fan. I also ordered a 5m female M8 cable, which I will cut off at about 1-2m and use the cut end with the PWM controller (it will go into the controller using an M12 cable gland). It's a bit of an expense in cables, but I have had to deal with plenty of intermittent garbage connections in the past, and having a reliable (and pre-wired) connector will be worth the extra cost. The final design will have a couple different options though, including a simple M12 cable gland at both ends, which are pretty cheap. I will also need to redesign my doggie door outlet to accommodate two hoses.
I found that the design is mostly OK, however I may open up the holes for the hose collars just a bit, and remove the brass inserts for mounting the fan (since it should be a one time deal, there is no reason to use inserts really).
I'm printing the PWM enclosure now, and may post that as a separate design once I complete it. For the final wiring configuration, I decided to go with some M8 aircraft style connectors on the booster fan end, and a M12 cable gland on the PWM controller end. I want to be able to completely remove the hoses and cables from the booster fan module, so having removable connectors is necessary. I've ordered an M8 male 4 pin panel connector which is wired, and that will connect to the fan. I also ordered a 5m female M8 cable, which I will cut off at about 1-2m and use the cut end with the PWM controller (it will go into the controller using an M12 cable gland). It's a bit of an expense in cables, but I have had to deal with plenty of intermittent garbage connections in the past, and having a reliable (and pre-wired) connector will be worth the extra cost. The final design will have a couple different options though, including a simple M12 cable gland at both ends, which are pretty cheap. I will also need to redesign my doggie door outlet to accommodate two hoses.
10/21/2023: The PWM controller design was re-worked, since the previous version was way too small. I added an addition 10mm to every dimension, and made some other changes, which I think will improve the assembly experience. The prototype is printing now, and then I can really start to test this. The PWM controller housing is designed to use an 8x0.5mm threaded 8mm aircraft type connector (4 wire in this case, linked above), as well as a DC input, and a PWM controller. There are a pair of mounts for WAGO 221-412 connectors as well, which, if combined with some solder seal connectors, it would be a soldering iron free build.
I also made some small changes to the hose couplers, which make them easier to assemble. And finally, I'm working on a design to connect the duct to an unused doggie door, which will replace a similar setup on my current printer exhaust fan.
I also made some small changes to the hose couplers, which make them easier to assemble. And finally, I'm working on a design to connect the duct to an unused doggie door, which will replace a similar setup on my current printer exhaust fan.
The test models are printed and everything fits in the new PWM controller design. It's pretty much done now, I just need to write up a build guide.


 RSS Feed
