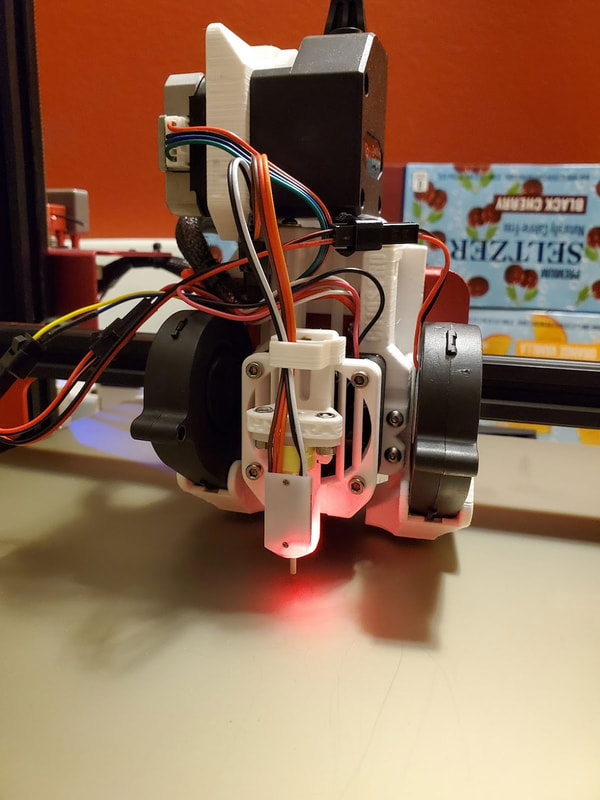
- Replaced the stock Capacitive sensor with an Inductive Sensor (LJ18A3-8-Z/BX), more info is here. Update 1/6/2022 - I am now using a 3D Touch probe (BL-Touch clone), which seems to be faster, but is probably just as good as the inductive probe. You can find these cheaper on Ebay often, they should be around 10 bucks.
- Replaced the brass z-axis nuts with POM anti-backlash nuts, more info is here.
- Swapped the wheels on the Y-axis with polycarbonate wheels. I'm still testing these and have seen some white dust from them but they did solve a problem due to a faulty bearing on one of the old wheels.
- Added a PEI sheet (310x320mm) which works great (sometimes too well on PETG and TPU though). The GizmoDorks PEI sheet linked is great since it is thick enough to be sanded if needed. I would sugget knocking down the corners with a razor or file though, snce the stock bed has a fillet and the sheet does not (I cut my finger on the edge before I got smart and trimmed them down). Update 1/6/2022 - I switched to a magnetic spring steel build plate with PEI, which was difficult to install (the way I did it) and may have caused my bed to warp, but it's all good now.
- Added the extruder arm fix from Tinymachines.
- Added a printed cable chain for the ribbon cable (V2 version here).
- Added a strain relief cable chain on the bed cable
- Added a filament guide
- Extended the micro-sd card from the display to make it easier to upgrade.
- Updated the firmware to Tinymachines (and now DGUS Reloaded)
- Designed a dry box system using Rubbermaid 21 Cup storage boxes. I have it set up to feed from the top of my enclosure.
- Micro-Swiss All Metal Hotend for the CR10S Pro (note that the CR10S Pro has a specific hot end and tne normal CR10 hot end will not work). This was probably the best upgrade on my printer so far, however the stock hot end is no slouch either. Some folks have different opinions of this hot end though, it has been very solid for my printer.
- I added a BMG clone extruder as a direct drive, with my Hydra Remix for the CR10S Pro. I'm also working on an endoscope camera mount. The direct drive has been a great upgrade, it is amazing how much better the quality of the prints have been and I think it is down to the much lower retraction needed.
- It's not specific to this printer, but I also use an OctoPi with it, which runs on a Pi 4B (4G), though I have another running on a 3B+ without issues. Now the best option is probably the Pi Zero 2 W for only $15, though there are some compromises with that vs the full size Pi3B and Pi4's.
- I also use these leveling blocks to keep the x-axis gantry in proper trim (which I rarely need to mess with thanks to the anti-backlast nuts).
|
The CR10S Pro is a great printer out of the box, but I have made some minor (and major) upgrades to my version 1 CR10S Pro (which has a capacitive probe standard). Below are some of them (updated 1/6/2022):
0 Comments
Leave a Reply. |
Stoopid MeWelcome to my Stoopid corner of teh Internet. It's mostly gonna be 3D printing stuff, but I also post some recipes, projects, and the occasional rant here as well. More Stoopid stuff is updated regularly. Archives
July 2024
Categories |


 RSS Feed
