My Stoopid Stuff
  • Home
  • Projects
  • Blog
  • Lec'tronics
  • Links
  • CNC
  • Quick Recipes
  • 3D Printer Tips
  • Voron 2.4

DK Riser Remix is Posted

11/3/2023

4 Comments

 
Picture
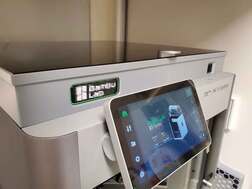
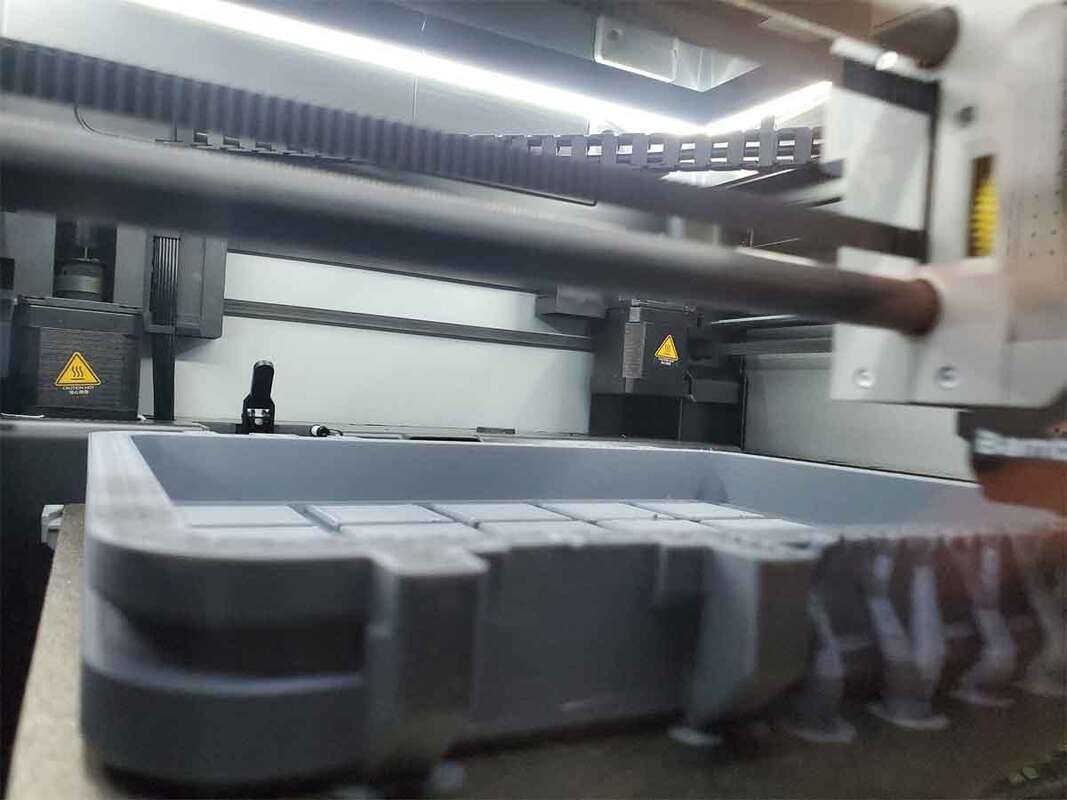
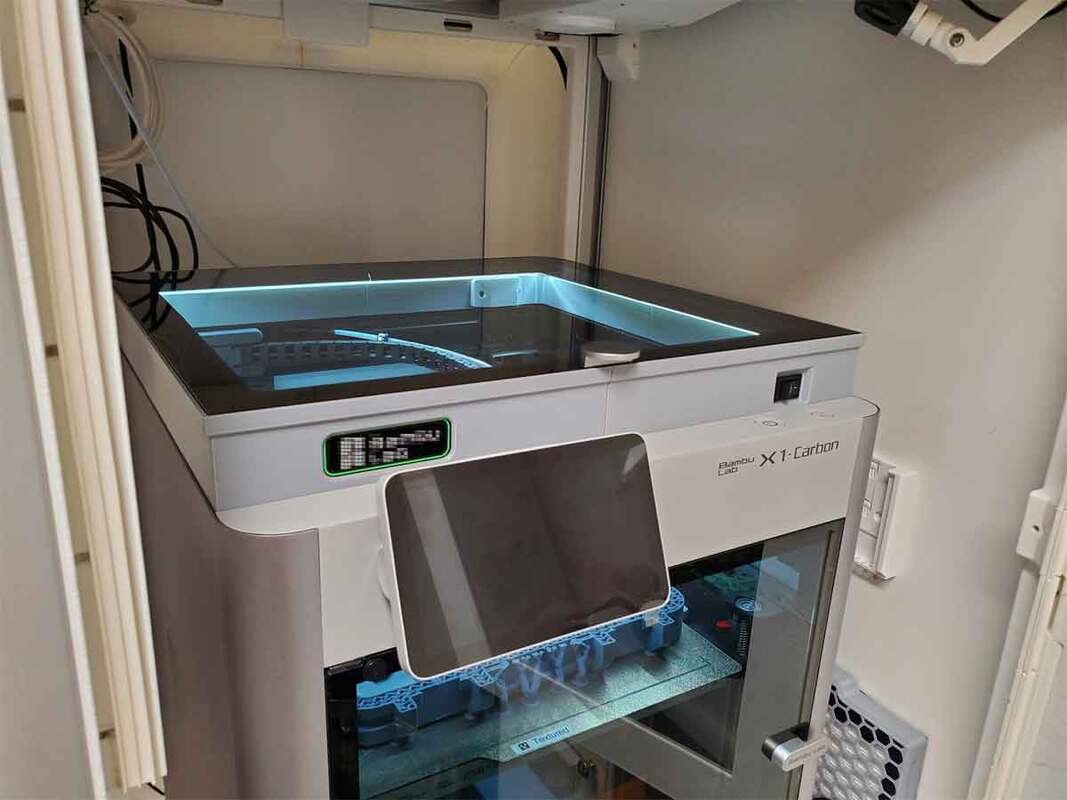
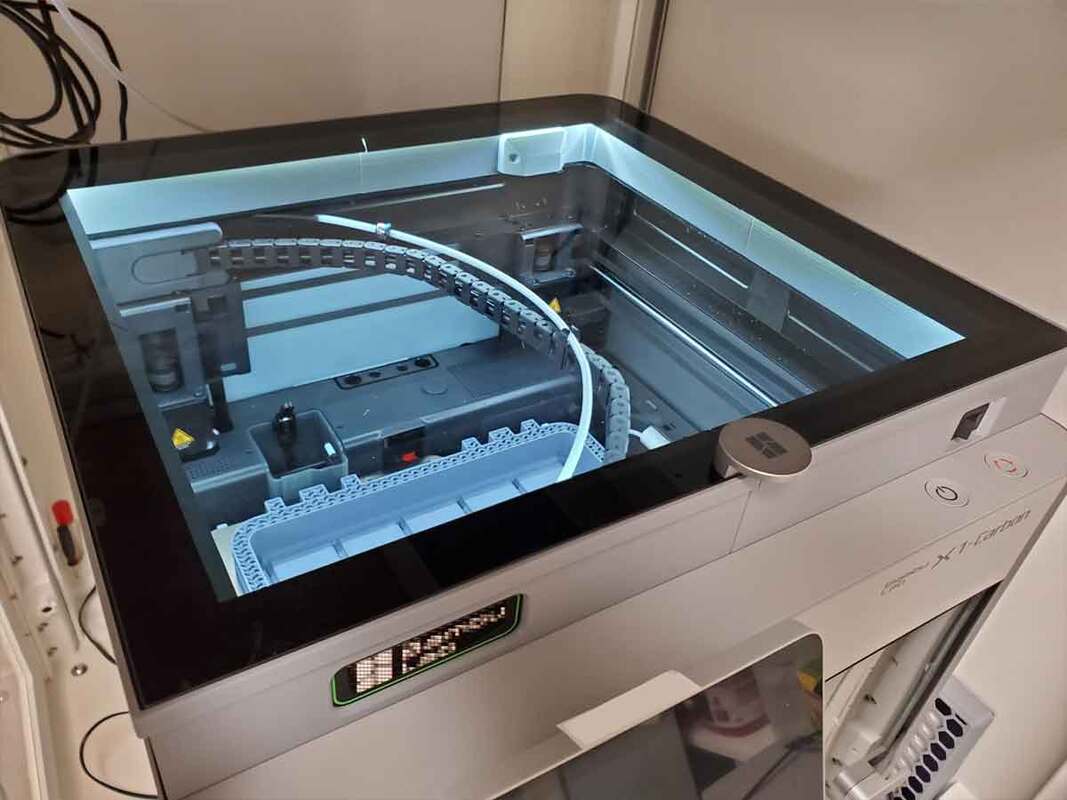
The DK Riser is finally posted, with some updates which were added at the last minute to address a couple minor issues.  You can find the models (along with a .3mf from OrcaSlicer) at the links below:

https://makerworld.com/en/models/56211

https://www.printables.com/model/635010-dk-riser-remix-no-vents-with-a-front-switch


I'd recommend that anyone making (or planning to make) this consider the components used, and make their own choices on what is appropriate.  But note that this was designed for a 2 wire connection to the LEDs, which means it will not work with RGB LEDs (only single color, like these).   If you see something I should correct here, please let me know. I am not an electronics expert, and I don't claim to be an expert on this stuff, only a hobbyist. And as always, if you make or use one of these, it is at your own risk. Also, please don't run with scissors, always wear safety glasses, and do your own research, and have fun!


I may add a build guide for this later, but for now the list of parts for the project are below.  The amazon affiliate links are just suggestions, but they should help to find the parts which fit this model, even if they are sourced elsewhere (*cough* AliExpress *cough*)
​
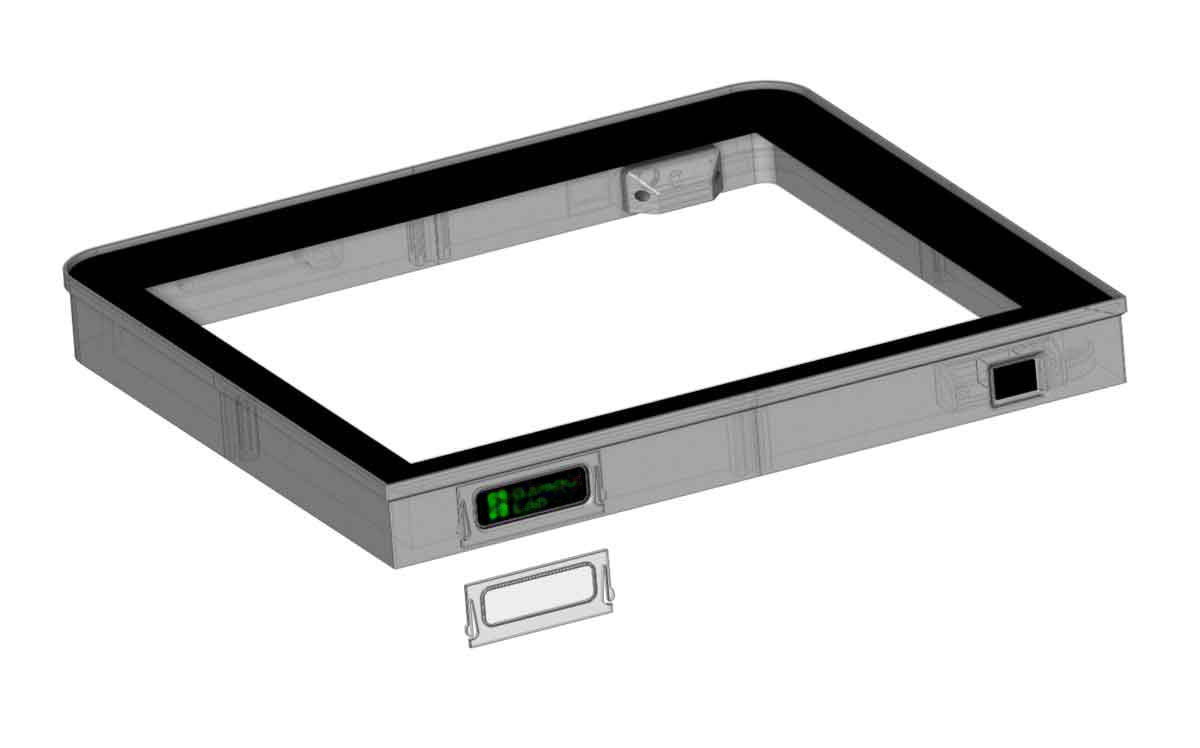
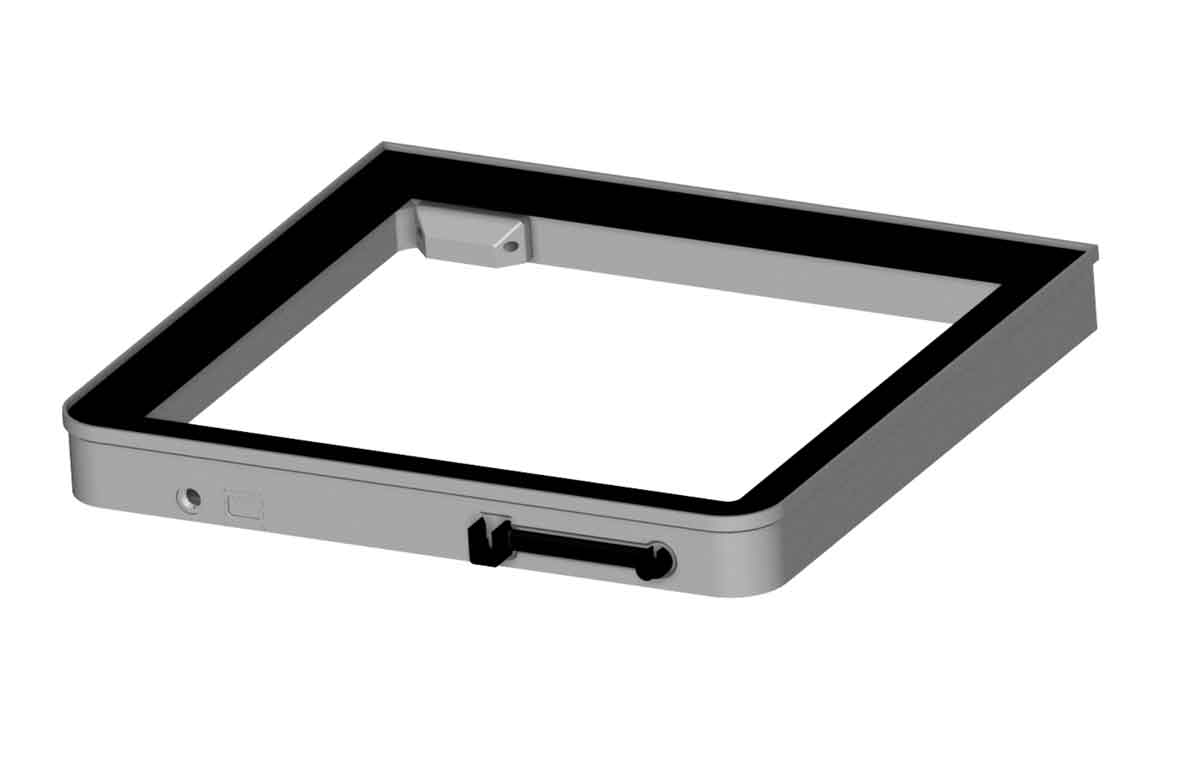
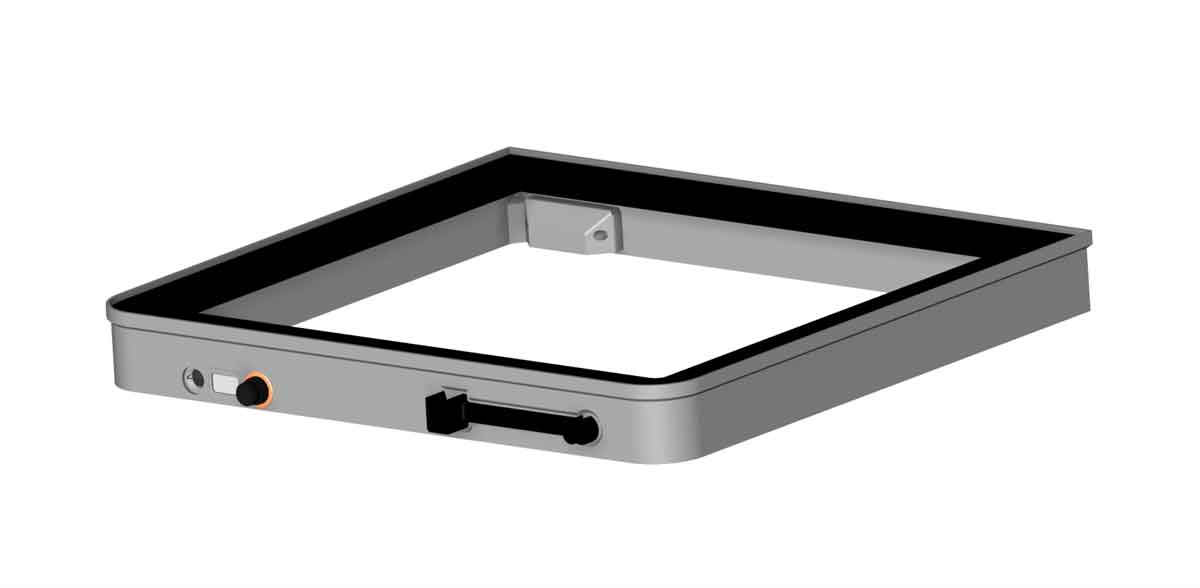
  1. Qty 1 - rocker switch (non-prewired version also works).  I used a similar switch I had already. The hole for the switch is 12.9x18.4mm. 
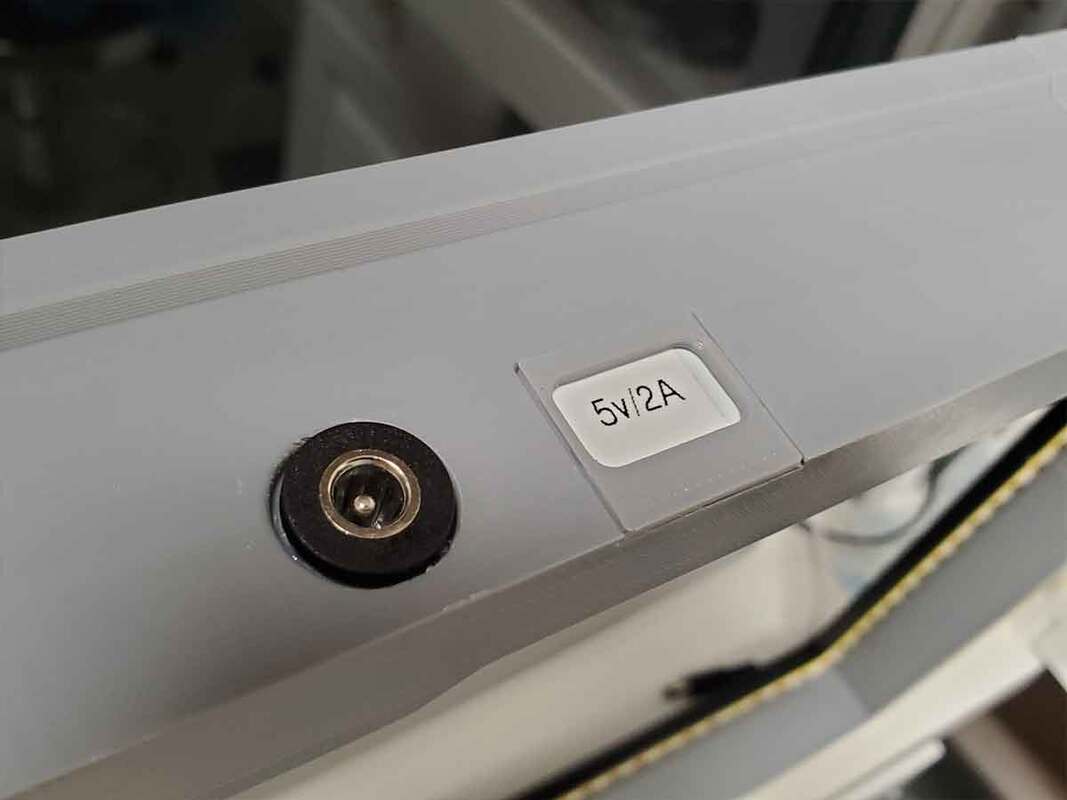
  2. Qty 1 - DC input jack (other sizes will also work, but may need to be drilled out)
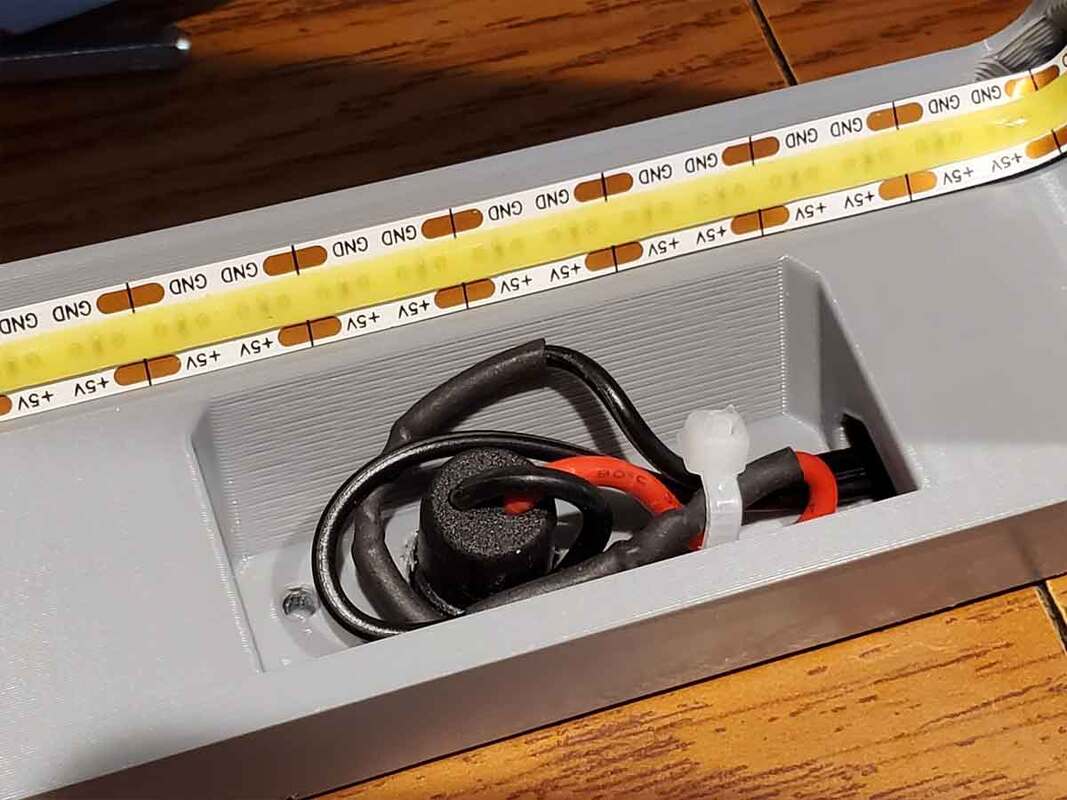
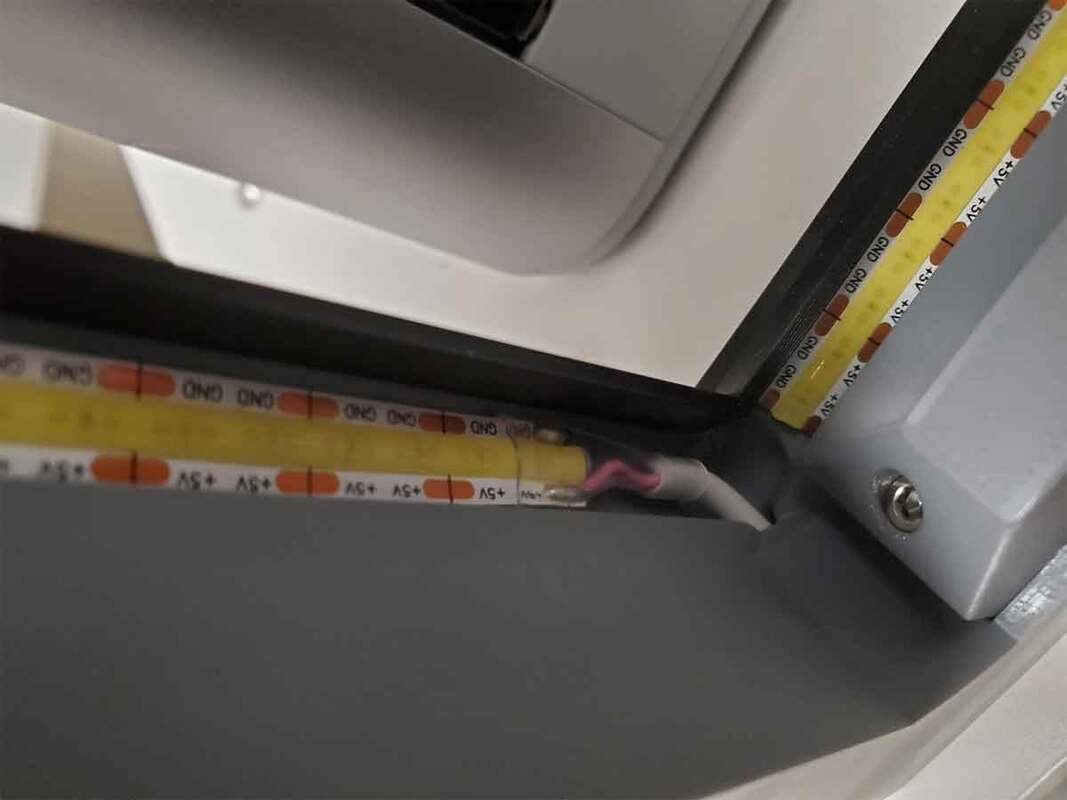
  3. Qty 1 - Wire, I used 20 AWG "zip" wire (which I had around), similar to this.
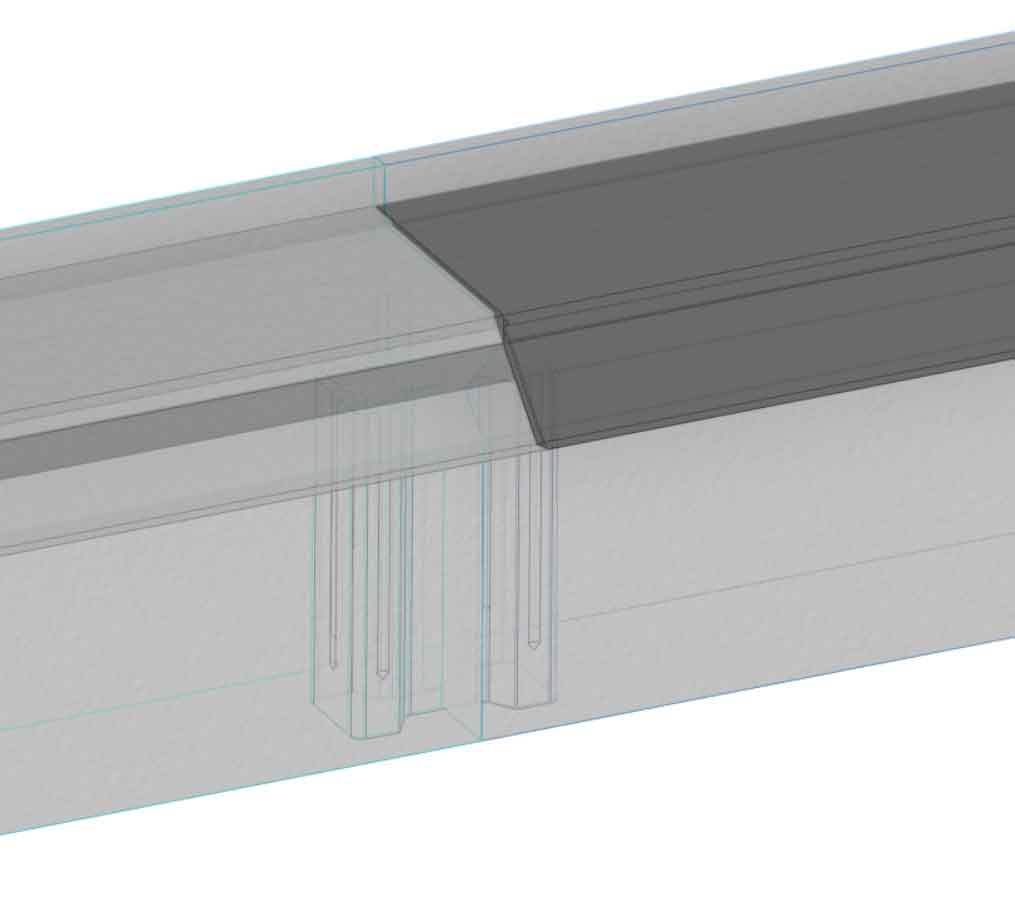
  4. Qty 1 - COB LED strip.  There are many options for these, but this is what I used.  I put a 5.5x2.1mm DC male connector on the end, so I can use the RF controller (which works great).
  5. Qty 4 - M3x20mm SHCS (this assortment from Amazon has all the M3 hardware needed)
  6. Heat shrink tubing for the wire connections.  The smallest of these Heat Shrinkable Solder Seal Connectors may also work (but I used regular heat shrink in this case, which is more compact).
  7. Optional Qty 1 - Fuse Holder The non-wired version will be easier to work with.  The pre-wired versions make it very hard to remove or install the nut.  And I had one where the wire fell off, so if I buy them again I will just get the non wired version.  If using the fuse holder, it's important to get a fuse which is sized correctly for the load.
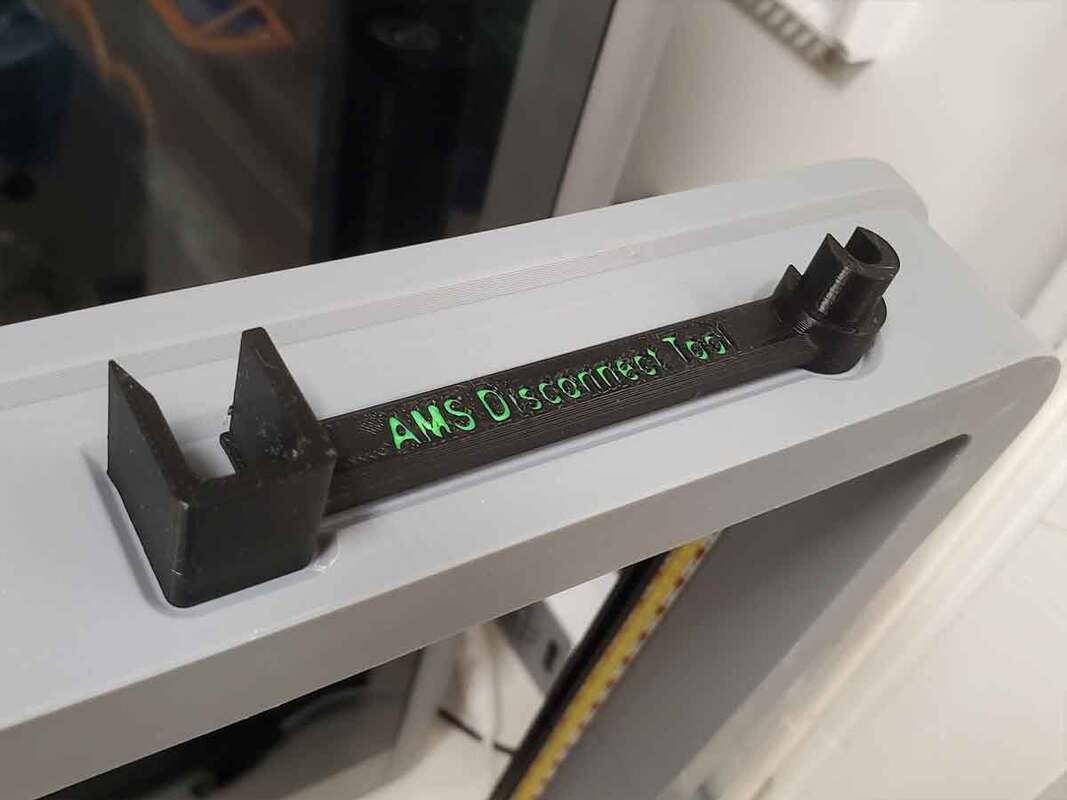
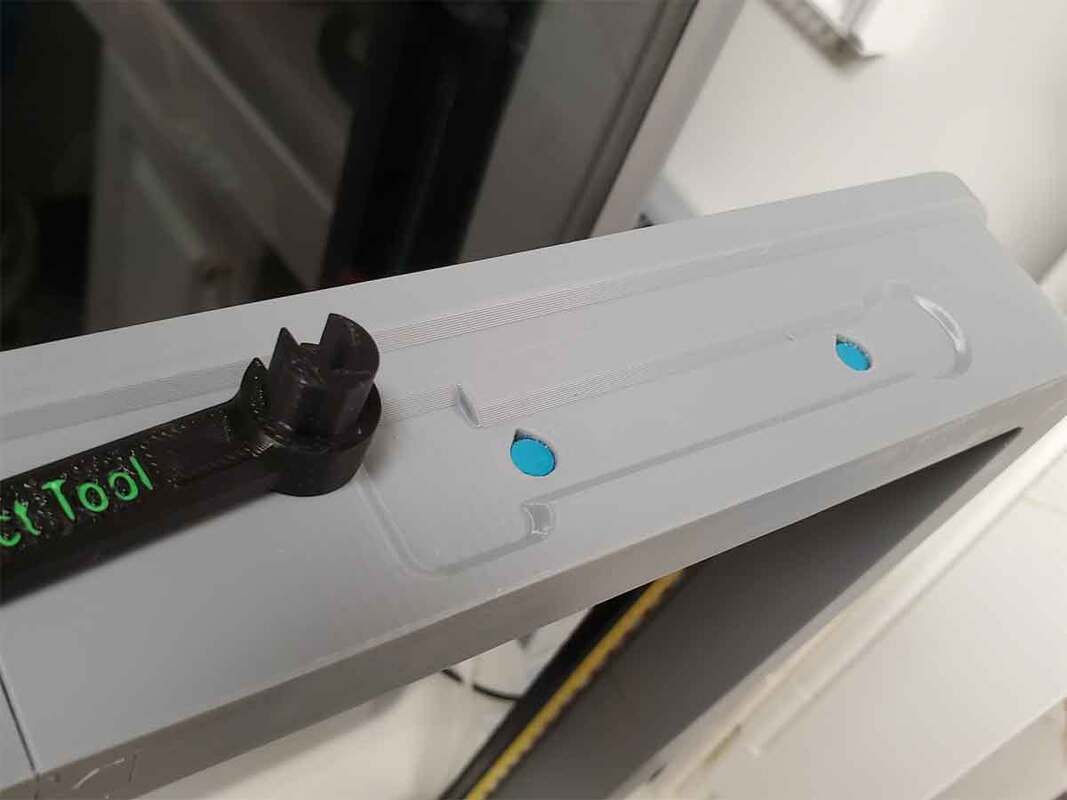
  8. Optional Qty 4 - 6x3mm cylinder magnets (if using the AMS tool)
  9. Optional - the back has a holder for best tool for the Bambu printers with an AMS. 
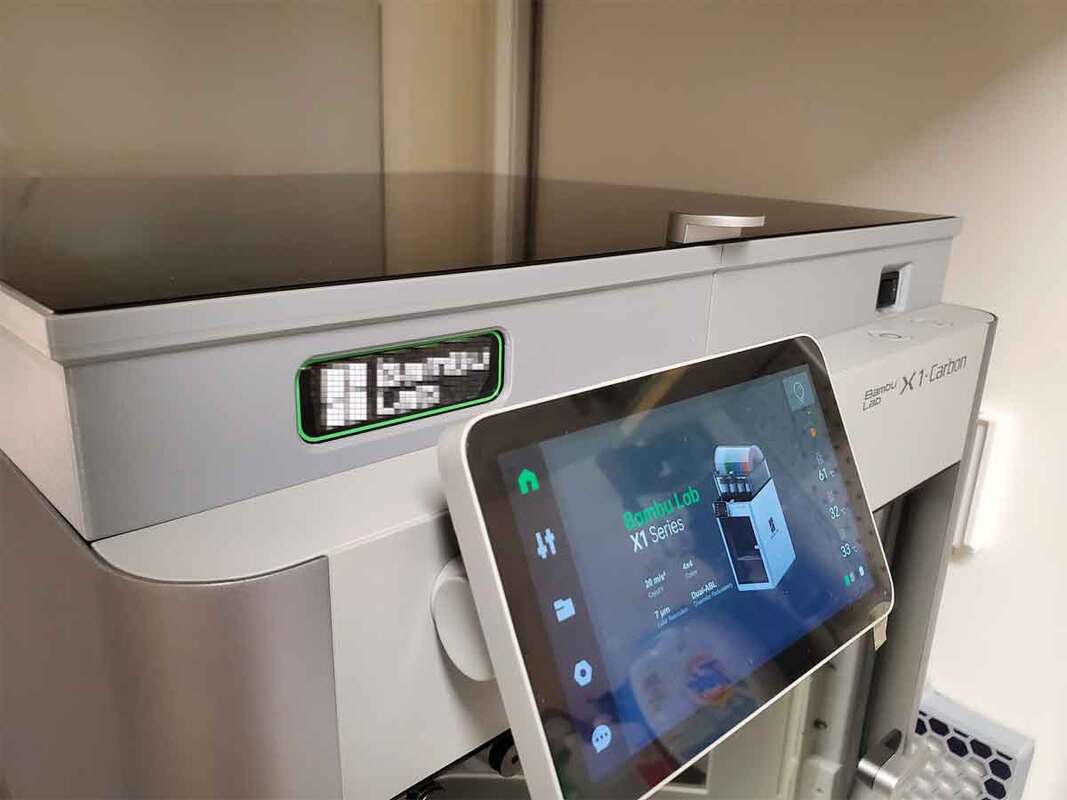
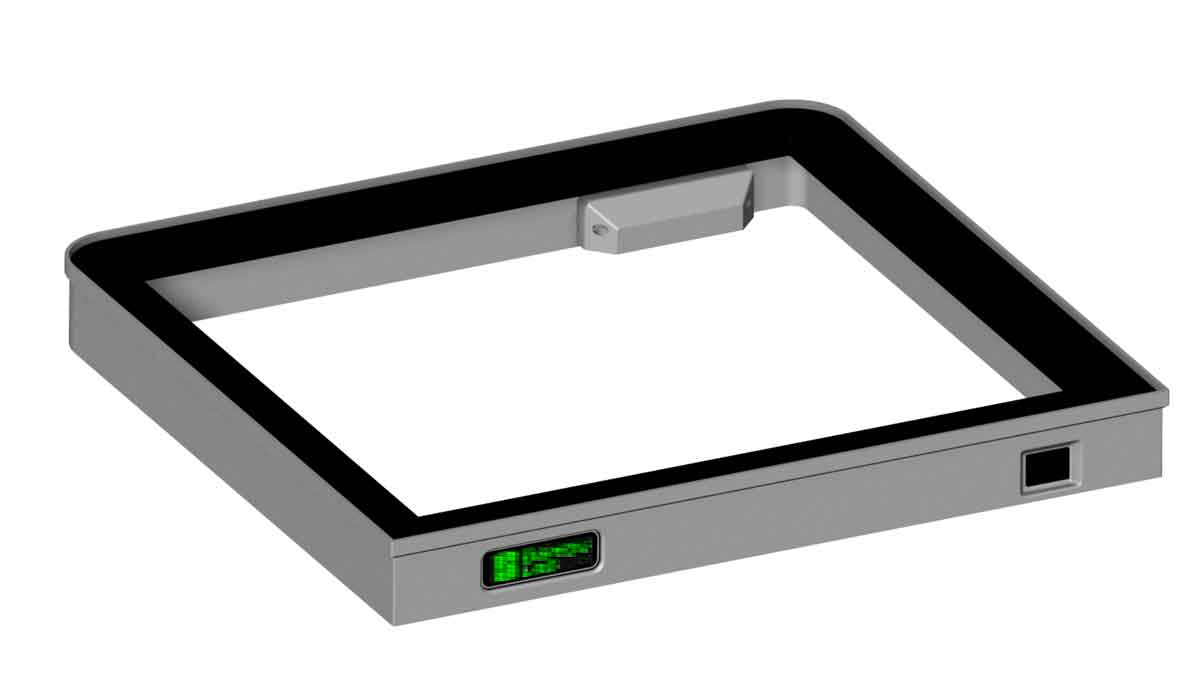
  10. Optional - I used a 0.47" Brother P-Touch label to notate the voltage for the LED's (so the wrong power supply is not accidentally connected to them).

Update 8/21/2024: I added some additional images of the wiring on my riser, which shows how I connected the switch and the DC input jack.  I also added a crude diagram of how the wiring was done in my riser (I updated the diagram to reflect how mine was wired) .  I extended the wires from the DC input jack, through the wire chase to the front where the switch is located, then I connected the switch and LEDs from there.  

Update 9/1/2024:
I'm working on an update to this design, which will add a flip up block to raise the front of the glass when venting is required.  You can follow updates on that here.

4 Comments
Vampma
8/20/2024 11:23:51 am

Would a basic wiring diagram or description for DC input -> fuse -> switch -> led be possible?

I'm good up to the point where I get to the rocker switch (2 connector).

The way I've understood it up to this point is connect the load (red) of the DC input to the barrel fuse, out from the barrel fuse to the rocker switch.

Up to this point it gets a bit muddy however.

I know I need to clip the USB connector on the LED strip and connect the male barrel connector, and as a result also connect a matching female barrel connector to the rocker switch, such that I would have the following connection on the rocker:

Load (red) - coming from the fuse and merging with a female barrel connector (to connect to the LED strip's male) on the load wire from the rocker switch.

Line (black) - from the load wire on the rocker switch connecting to both a female barrel connector and the dc-input (also a female connector).

Is this accurate?

Reply
Mike link
8/21/2024 04:35:40 pm

Hi, I'm no electronics expert, but I posted some more pics of my build, and a crude diagram showing how I wired mine up. Something to note is that I clipped the wire on the controller between the controller and the LED strip (so the USB plug connects to the controller).

There are 2 wires (positive and negative) out of the controller, and I wired them into a male DC connector, which plugs into the female jack on the riser. From there (since I don't have a fuse on mine), I extended the wires from the DC jack through the wire chase, up to the front, where the switch is located. I then just connected the positive through the switch, and the ground (from the DC input jack) directly to the LEDs (so my switch toggles the positive wire to the LEDs). If I had a fuse, I would probably put that on the positive side. I hope that helps.

Reply
Vampma
8/21/2024 04:53:45 pm

That does help clear pretty much everything up, it never dawned on me that you had the control module for the LEDs on the outside being powered by a USB wall plug. For some reason my mind you straight to a normal 5v 2a DC wall plug power adapter at that end.

USB Power Source at the wall -> LED Controller w/ male barrel plug on the X1 end and USB on the other -> female barrel plug -> fuse (in my case, omit this part if not used) -> rocker switch -> LED strip -> negative back to the female barrel plug to complete the entire circuit.

Thanks so much for the additional insight and assistance!

Reply
Mike link
8/22/2024 02:16:40 pm

No problem! That's exactly how I have mine set up, aside from the fuse which I don't have. I may revisit this design to move the controller inside the enclosure, since that could allow for using RGB LEDs, but that is a project that would be on the far back burner (and I'm not certain it will happen since I'd need to design it around a specific controller to make any buttons accessible). I hope you enjoy the riser!


Leave a Reply.

    Picture

    Stoopid Me

    Welcome to my Stoopid corner of teh Internet.  It's mostly gonna be 3D printing stuff, but I also post some recipes, projects, and the occasional rant here as well.  More Stoopid stuff is updated regularly.

    I recently joined the Amazon Associate program, so some of the links on this site are Amazon affiliate links. This means that, at zero cost to you, I will earn an affiliate commission if you click through the link and finalize a purchase.  This will help to support this site, and pay for more Stoopid Stuff.

    Currently, there are no active authorized sellers of my designs.  If you see my stuff (such as my Dummy 13 Weapons) for sale on Amazon, Etsy or AliExpress, the seller is using my designs without permission.

    If you want to help out with my parts and filament budget, you can also "Buy Me A Coffee" using the link below.
    ​​

    Buy Me A Coffee

    Archives

    March 2025
    February 2025
    January 2025
    December 2024
    November 2024
    October 2024
    September 2024
    August 2024
    July 2024
    June 2024
    May 2024
    April 2024
    March 2024
    February 2024
    January 2024
    December 2023
    November 2023
    October 2023
    September 2023
    August 2023
    July 2023
    June 2023
    May 2023
    April 2023
    March 2023
    February 2023
    January 2023
    November 2022
    October 2022
    September 2022
    August 2022
    July 2022
    April 2022
    February 2022
    January 2022
    December 2021
    November 2021
    October 2021
    September 2021
    August 2021
    July 2021
    June 2021
    May 2021
    April 2021
    March 2021
    February 2021
    January 2021
    December 2020
    November 2020
    October 2020
    September 2020
    August 2020
    July 2020
    June 2020
    May 2020
    April 2020
    March 2020
    February 2020
    January 2020
    December 2019
    November 2019
    October 2019
    September 2019
    August 2019
    July 2019
    June 2019
    May 2019
    April 2019
    March 2019
    February 2019
    January 2019
    December 2018
    November 2018
    October 2018
    September 2018
    August 2018
    July 2018
    June 2018
    May 2018
    April 2018
    March 2018
    February 2018
    November 2017
    September 2017
    August 2017
    June 2017
    December 2016
    October 2016
    September 2016
    July 2016
    March 2016
    February 2016
    September 2015
    August 2015
    June 2015
    May 2015
    April 2015
    March 2015
    February 2015
    January 2015
    December 2014
    November 2014
    October 2014
    September 2014
    July 2014
    June 2014
    May 2014
    April 2014
    March 2014
    February 2014
    November 2013
    August 2013
    July 2013
    June 2013
    May 2013
    April 2013
    March 2013
    January 2013
    December 2012
    November 2012
    October 2012
    September 2012
    August 2012

    Categories

    All

    RSS Feed

Powered by Create your own unique website with customizable templates.