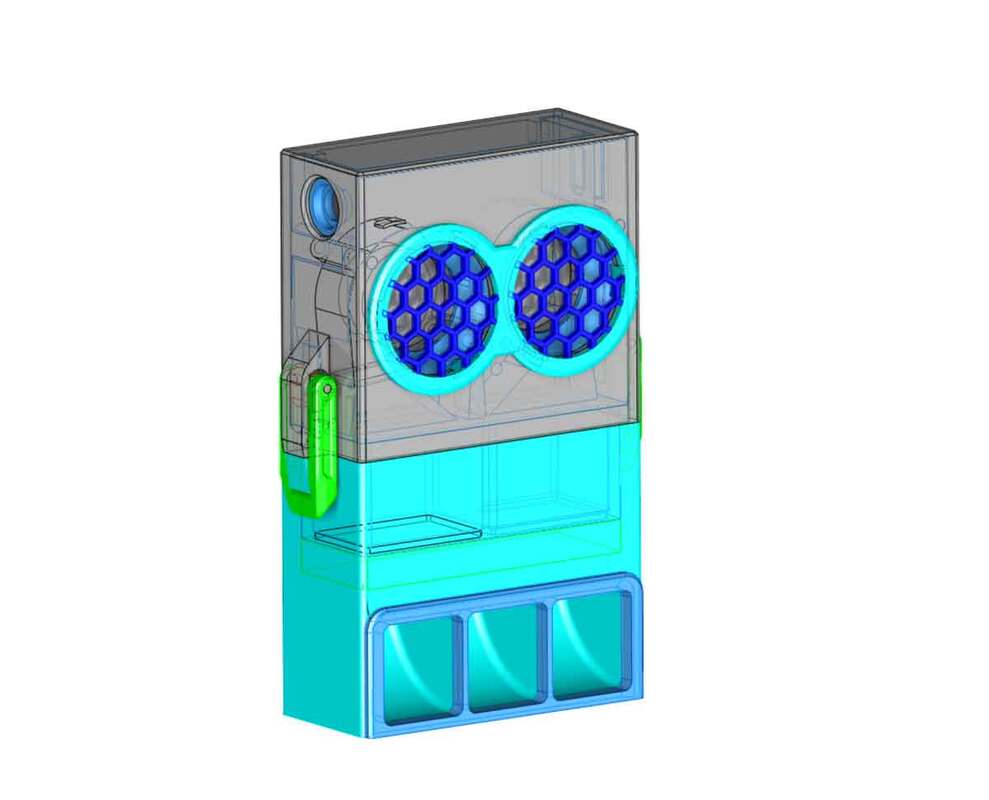
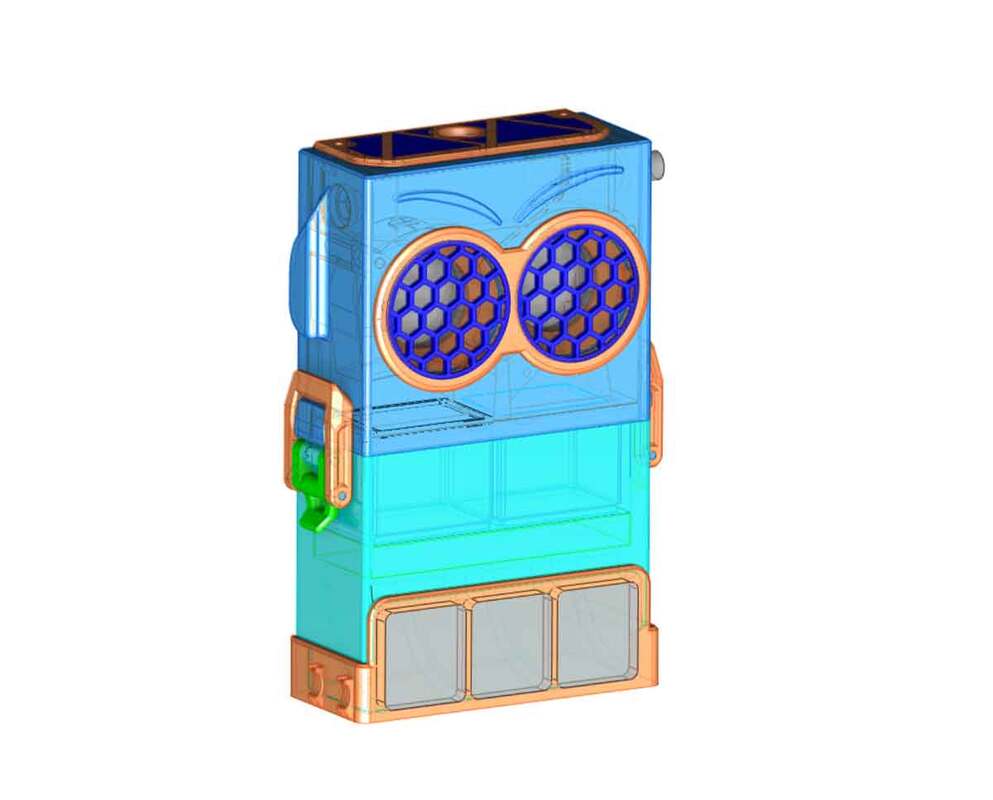
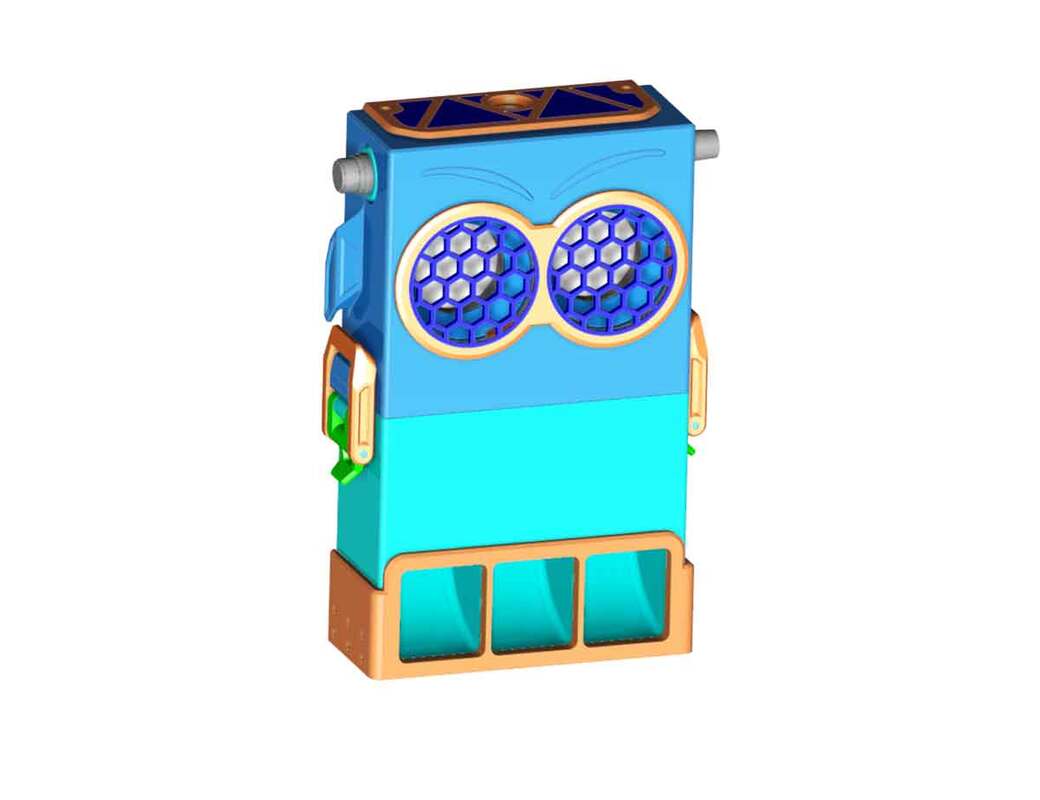
I was looking at all the remixes for the highly regarded Bento Box, and it got me thinking of what design features I'd like a recirculating filter to have. The remixes cover most of the things I'd want, but the more I looked at the remixes, the more ideas I had. I thought I'd just see if I could make my own version of the design, and although it took several hours, I'm pretty happy with it so far. Although this is a ground up design, it obviously takes a lot of inspiration from the Bento Box and the remixes. That is, this is nothing new, just a different take on the idea. The key points which I wanted to achieve with the design are:
I'm currently waiting on the fans from China, so I will update with pics as I get it printed and tested.
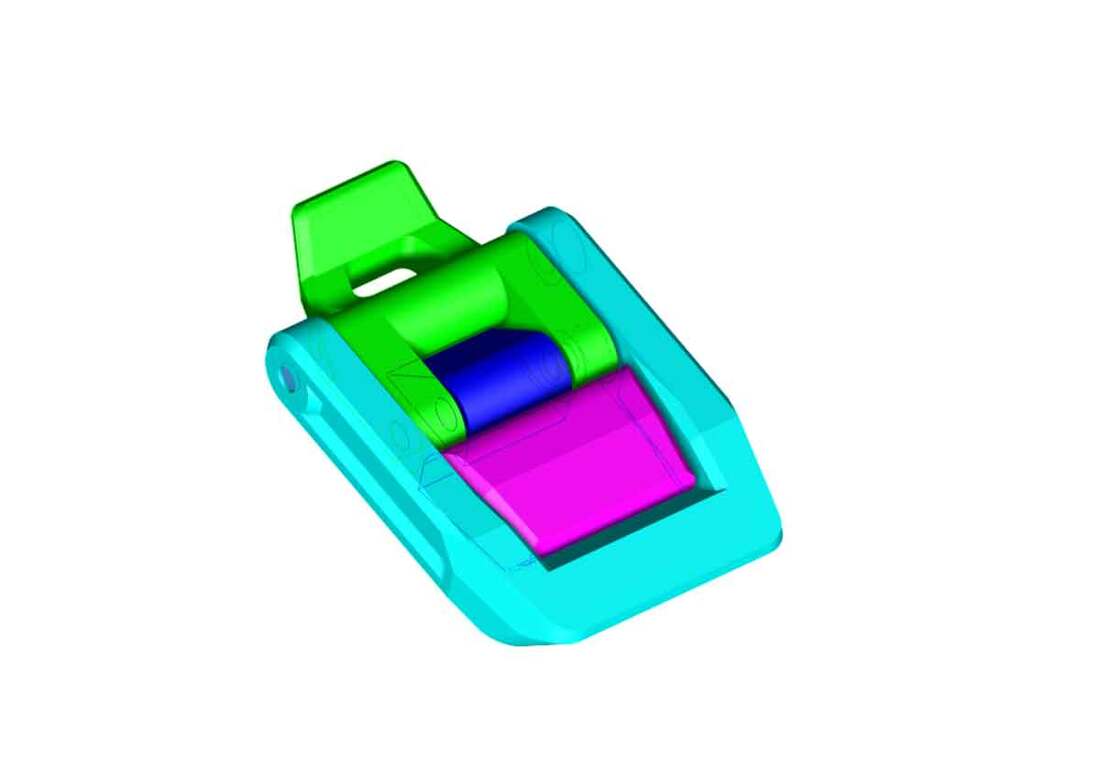
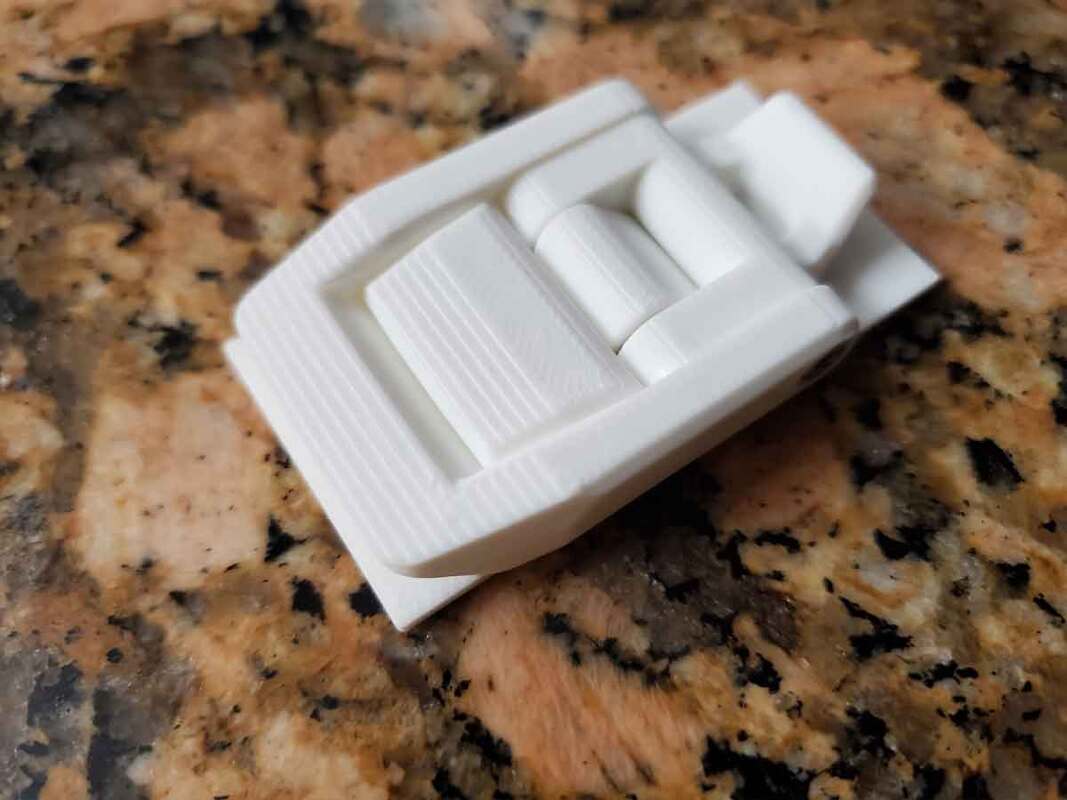
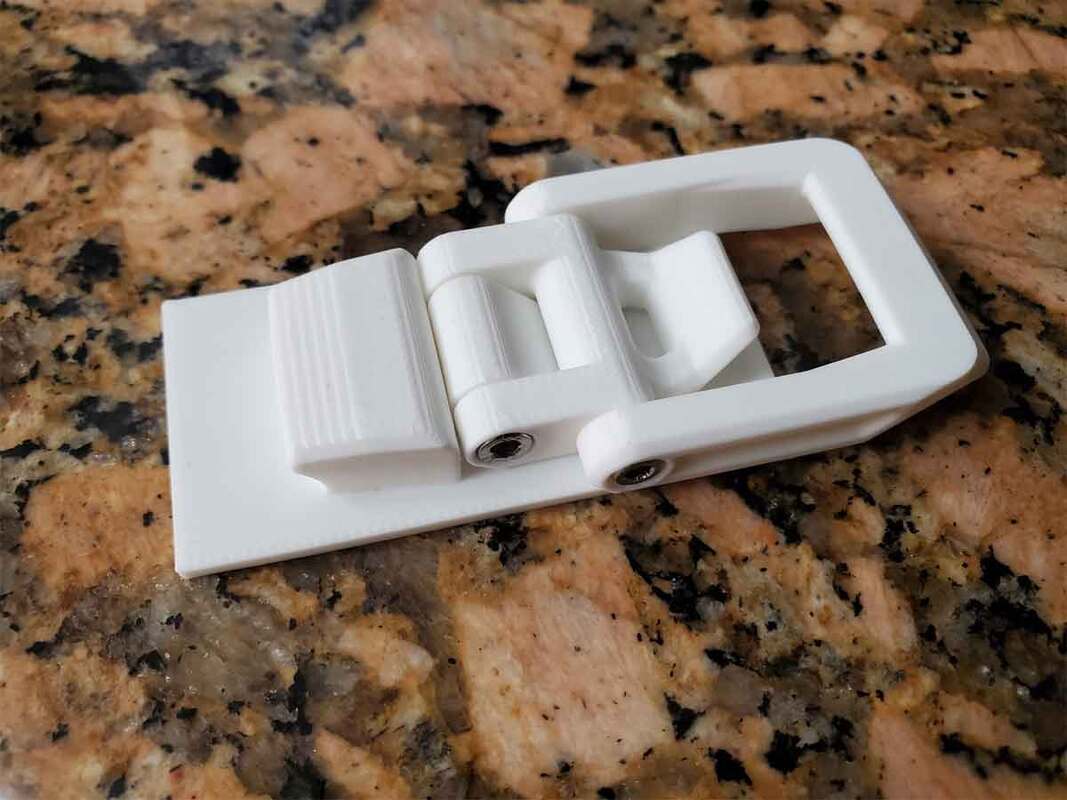
Update 9/2/2023: I decided to use a normal draw latch design, which will use M3x20 and M3x30 mm screws. The latch is untested, like this whole thing, so it will be a while before there is another update.
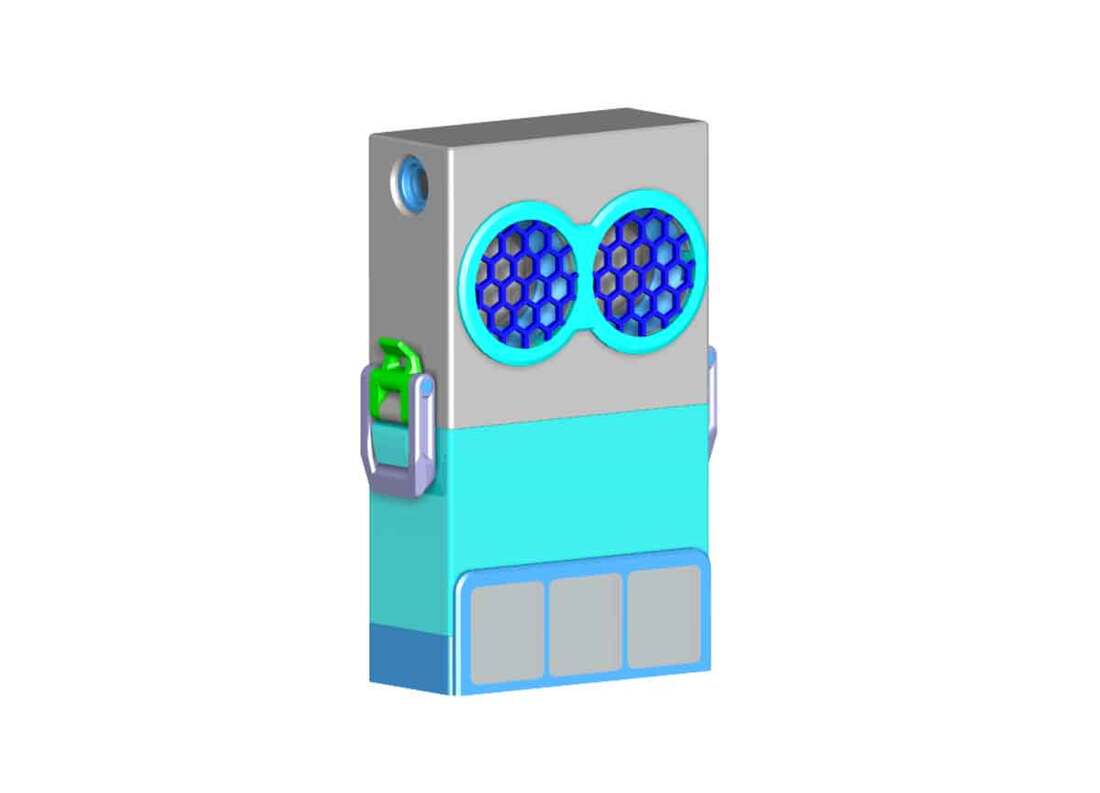
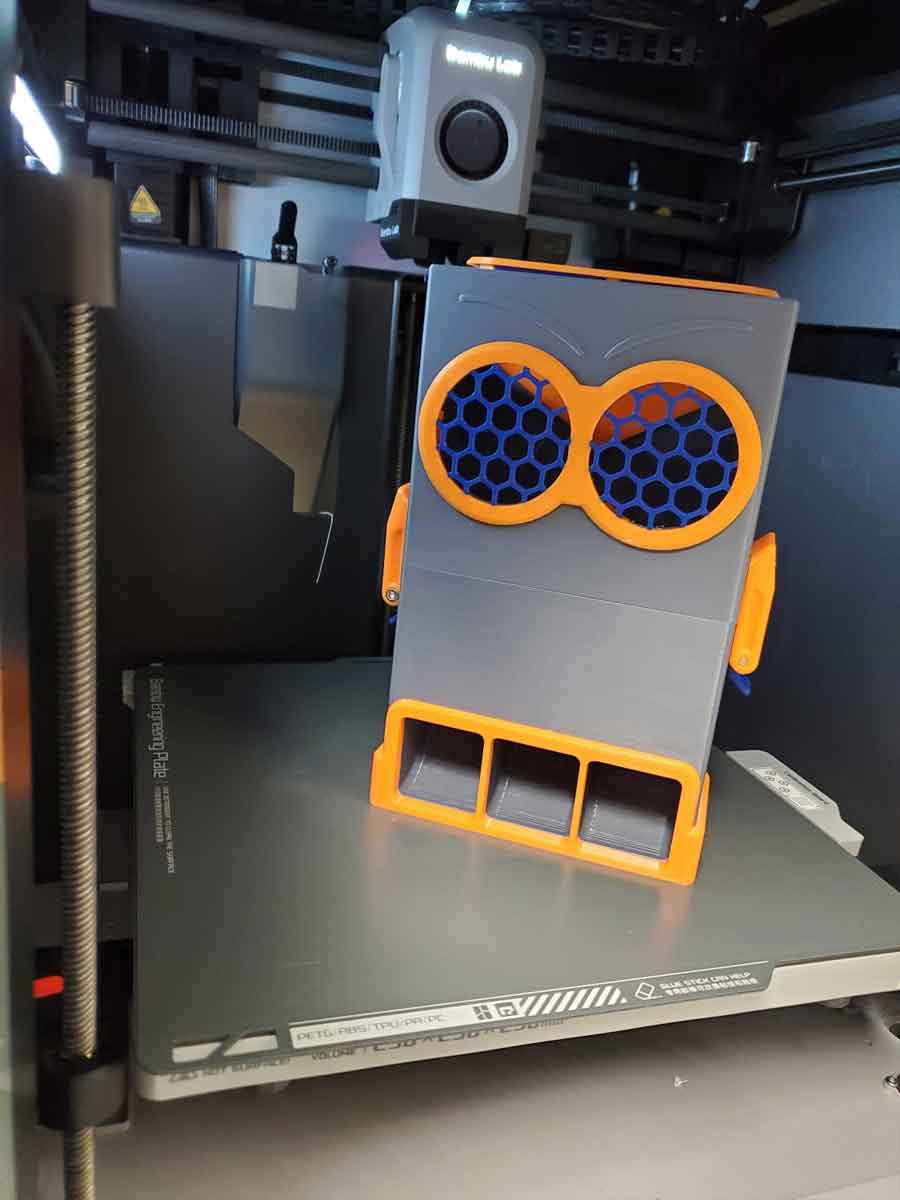
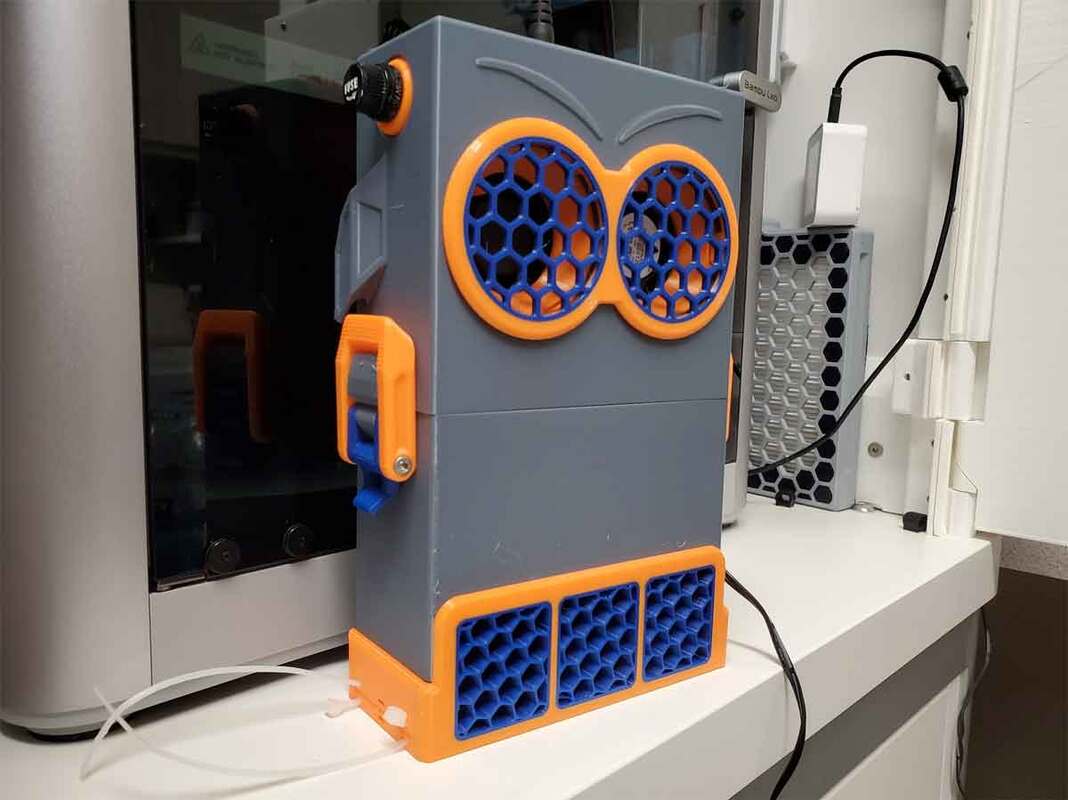
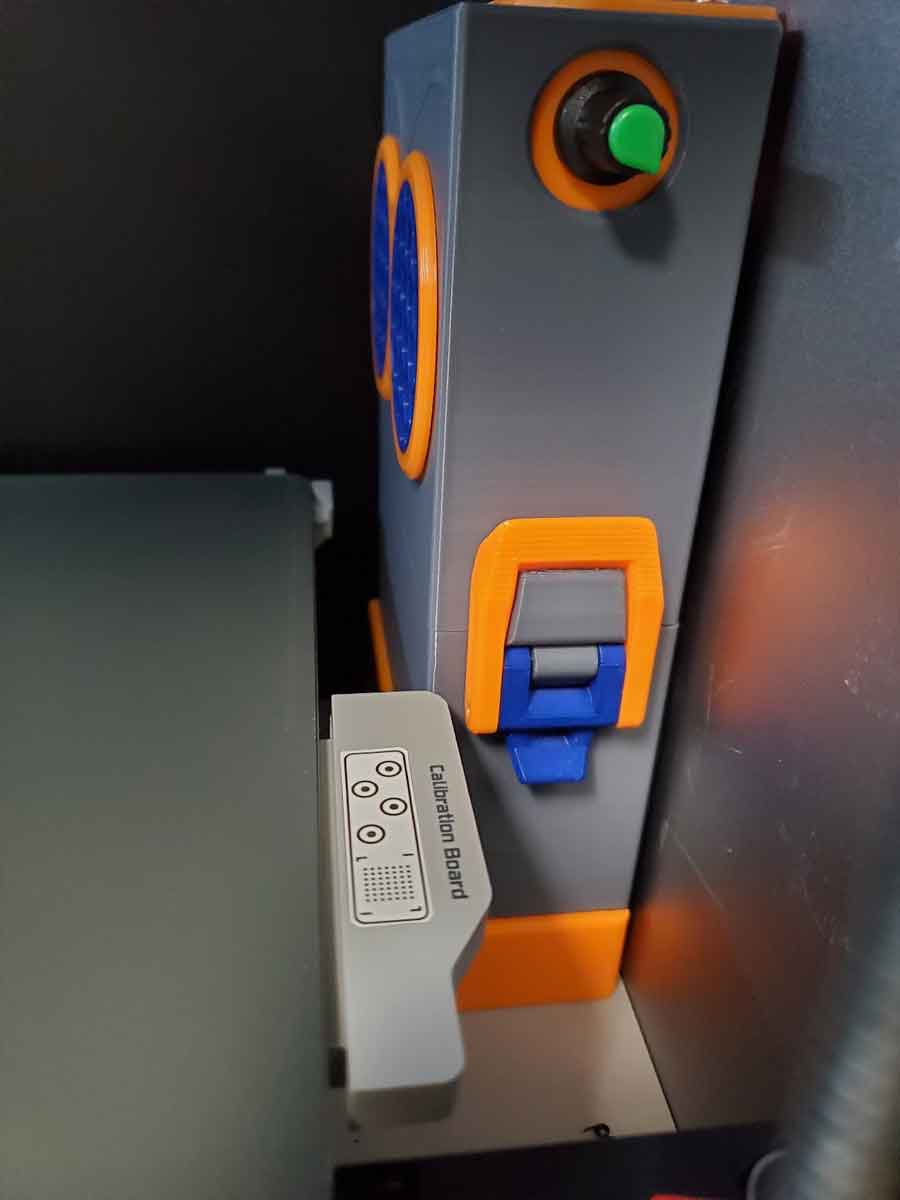
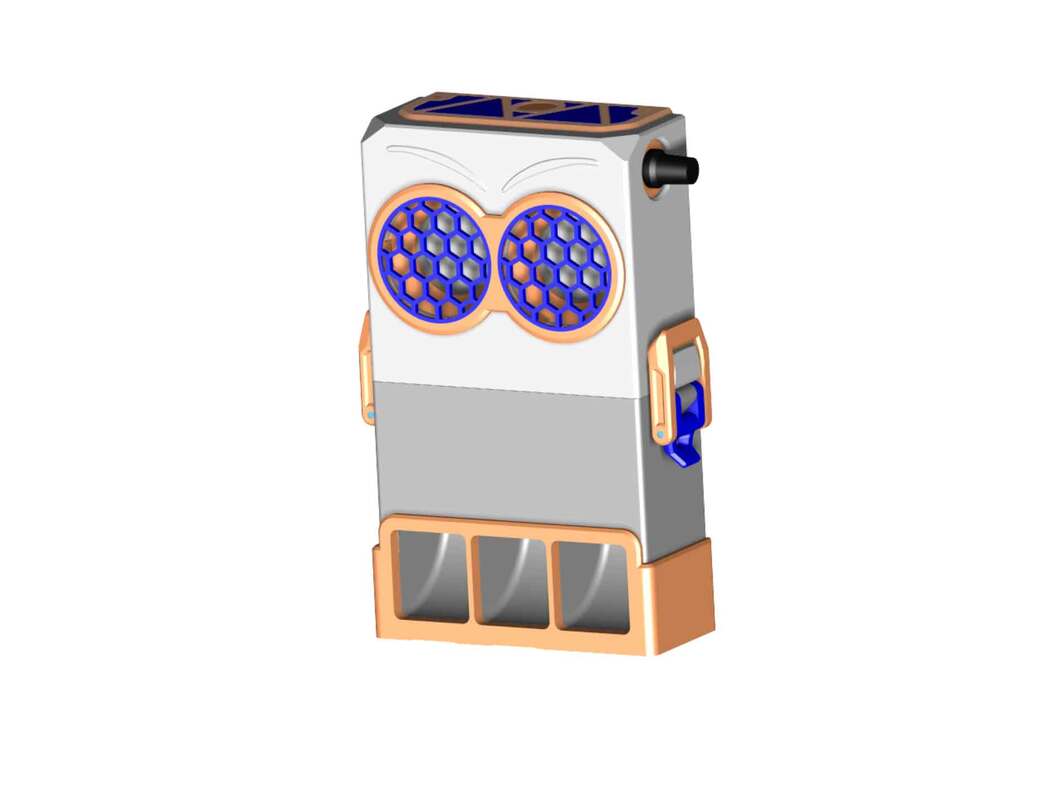
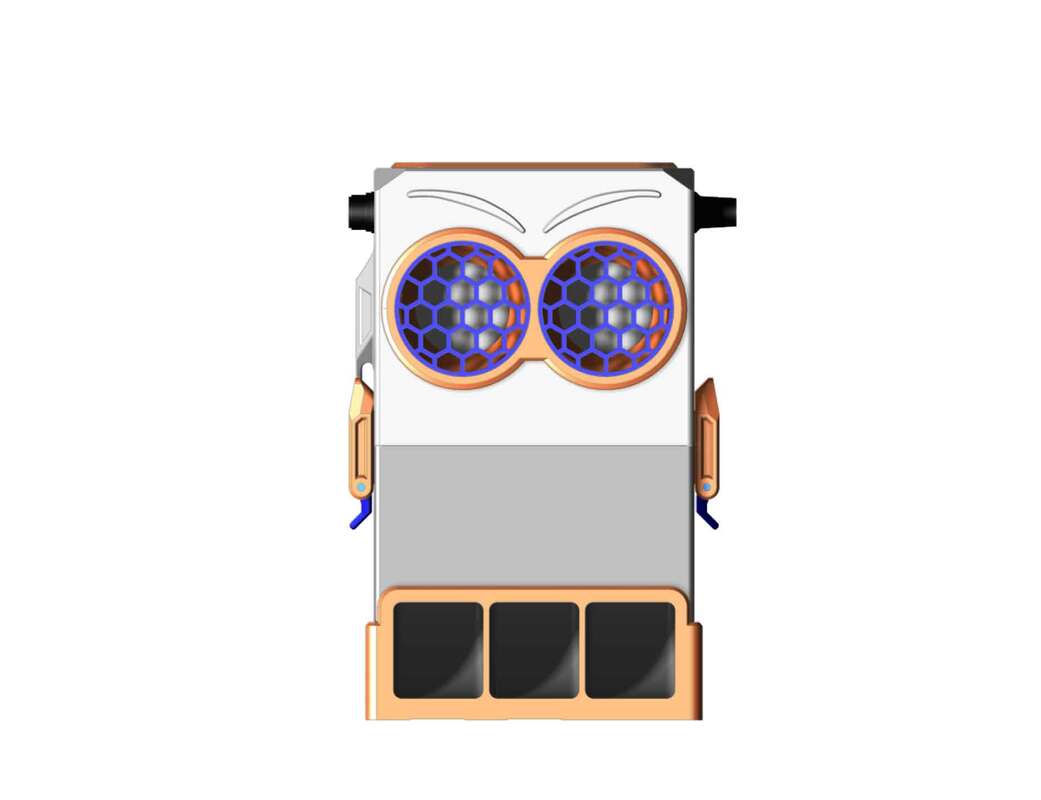
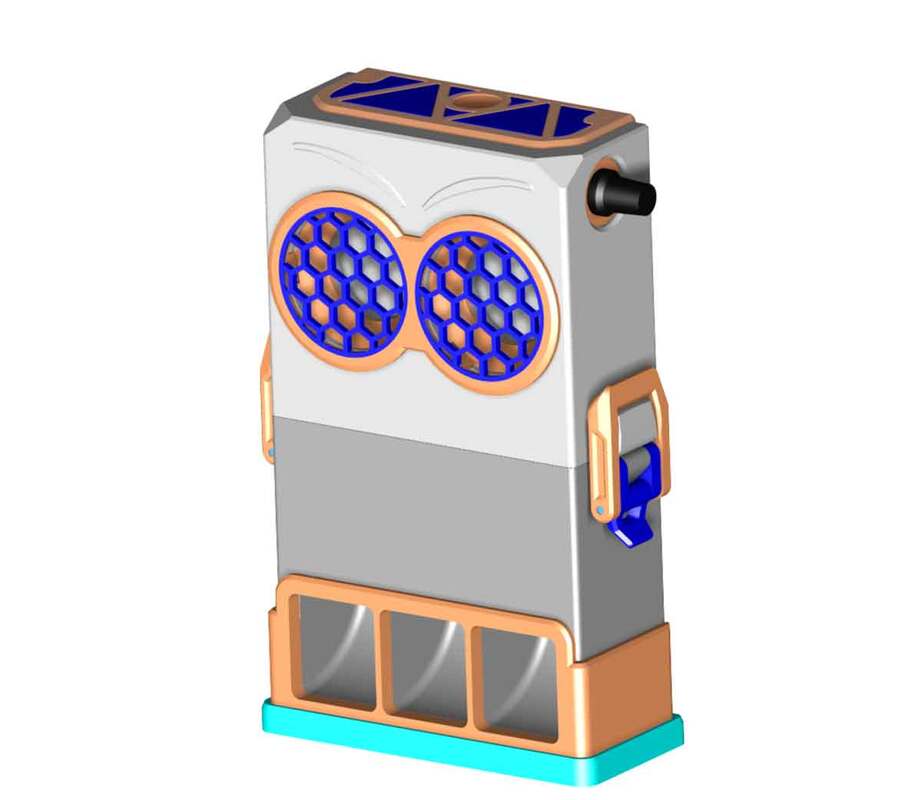
Update 9/3/2023: Just one more quick update. After seeing the way the design has a "face", I'm thinking of naming it "Marvin the MircoParticle Machine".
- Bigger fans, specifically 5020 blowers. There is one potential monkey in the wrench though, which is that the fans I bought are GDS Time GDB5020 24V blowers, which are open on both sides. I hope they will work in both orientations, or I will have to re-work this. Update 9/4/2023: I decided to use some 12V PWM (4wire) 5020 blowers instead, since I can easily control the speed.
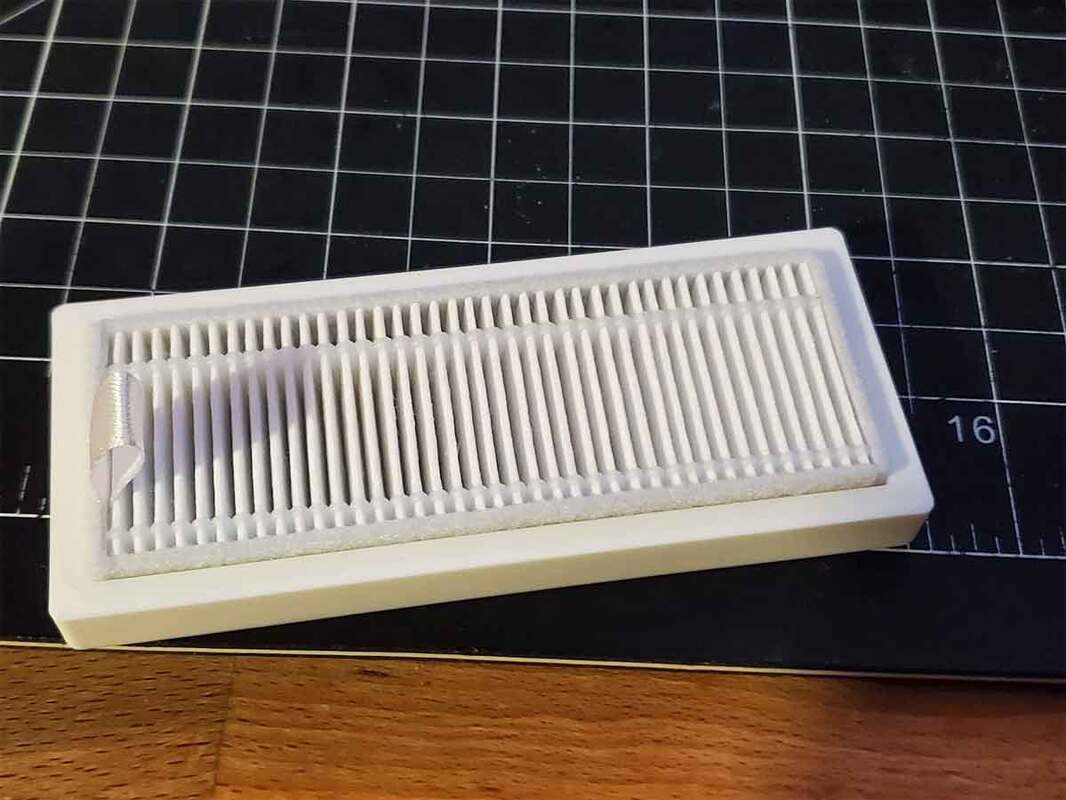
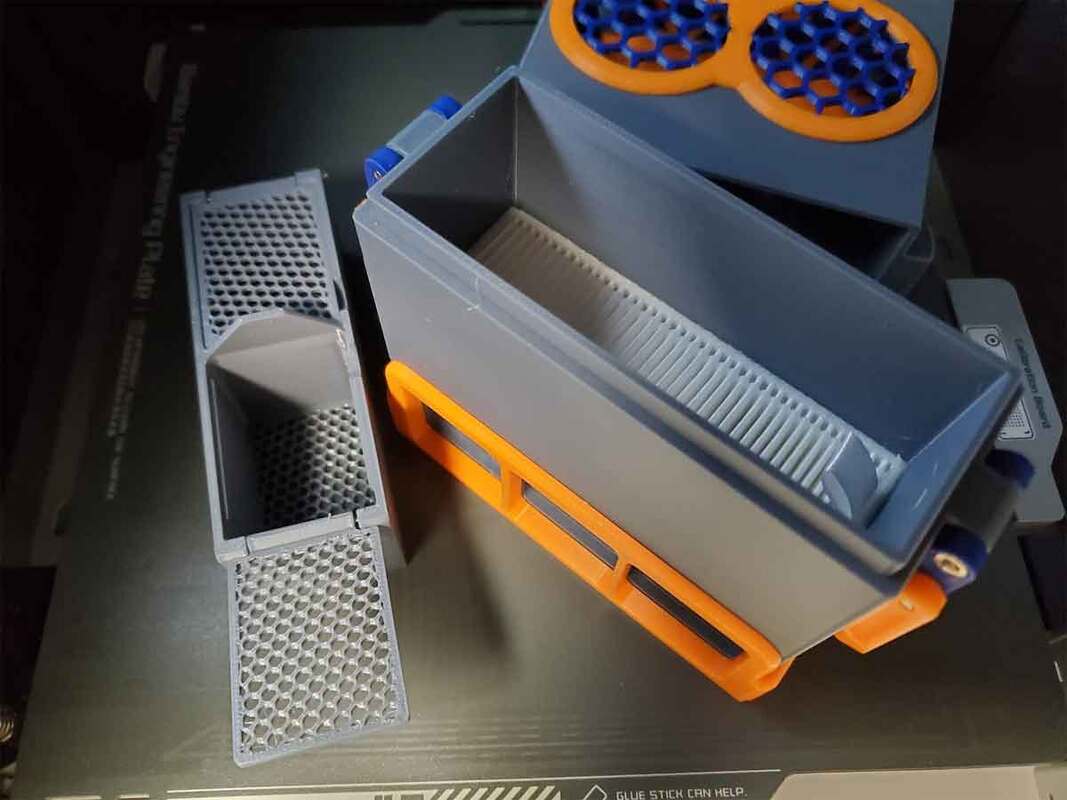
- A bigger HEPA filter. I wanted a larger filter, since it should allow better flow. I already had these on hand from another project (I was working on a nevermore clone, which did not get out of the gate).
- A switch and DC jack. Most implementations of the Bento Box seem to be hard wired, but I thought it would be more convenient to have a DC jack, so the unit could be removed when swapping the filters. A switch is also handy of course, and there are Bento Box remixes which incorporate one as well.
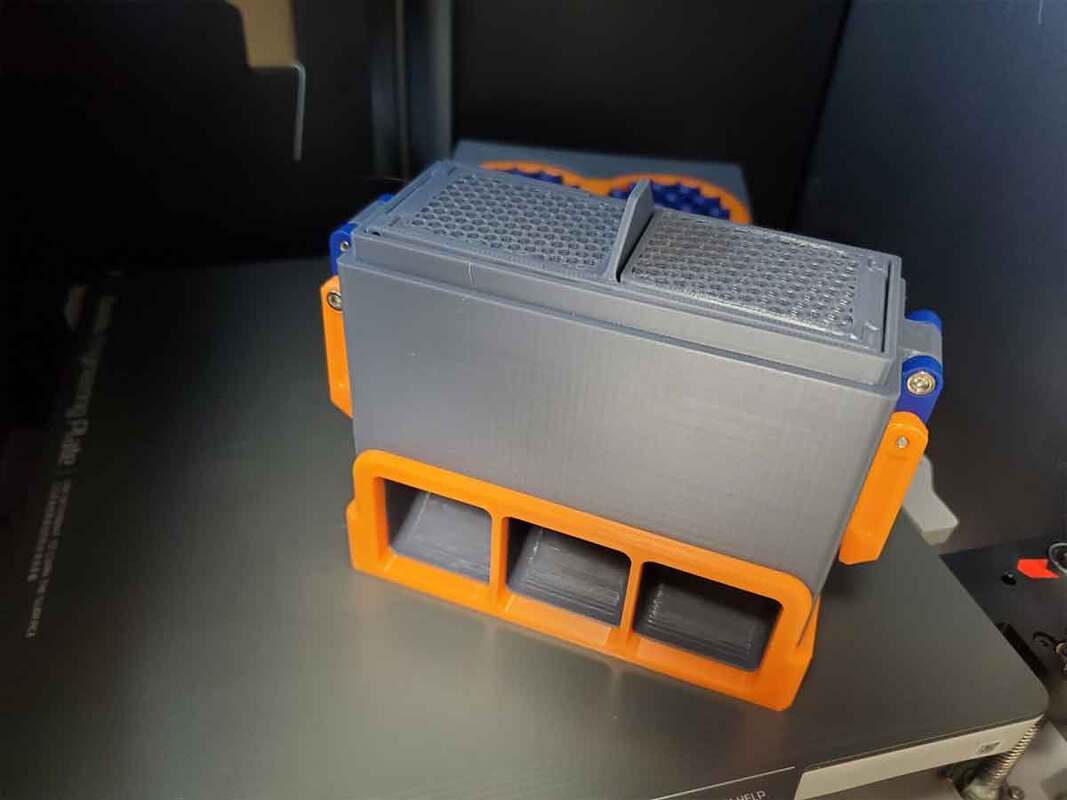
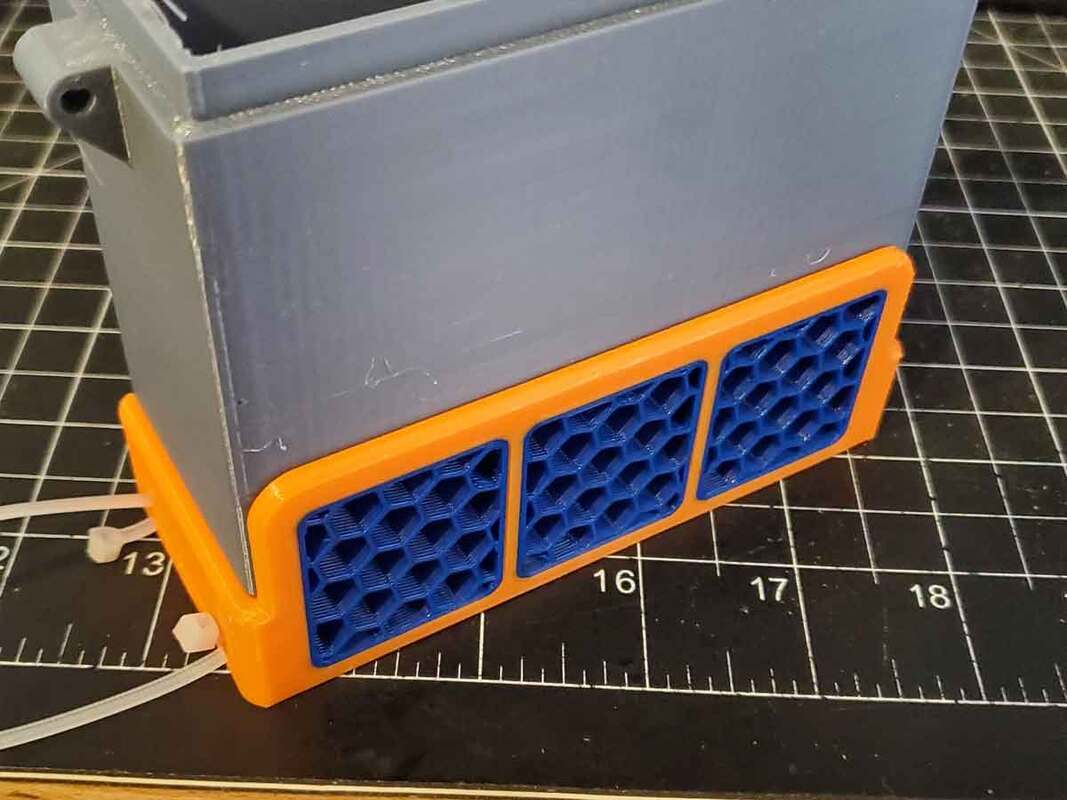
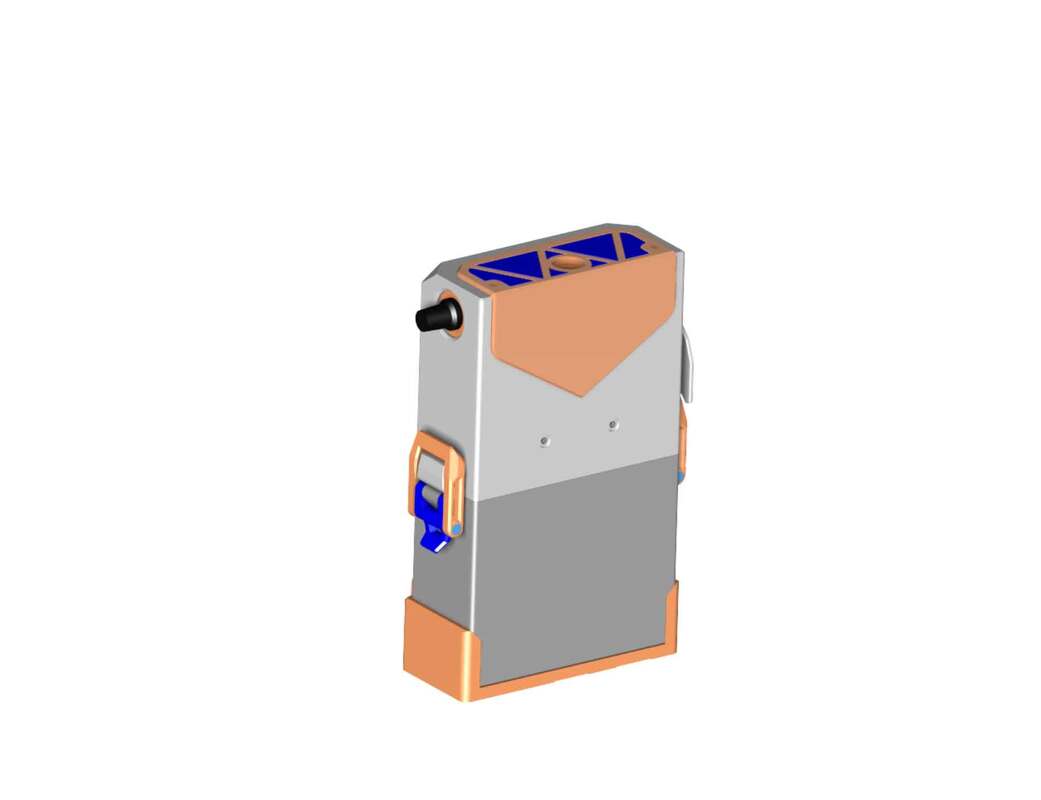
- Fewer compartments, and no magnets. Although I have never seen a Bento Box first hand, the method of keeping the tiers together is through small magnets. I have nothing against magnets for holding lids and things, but I just prefer not to use them as a part of a structure, though the way they are used in the Bento Box does make things convenient. This design uses two compartments, and a pair of draw latches (updated) to hold it together (the latches are a scratch design and are not yet tested).
- A groove to help seal the compartments. Instead of a flush fit between compartments, there is an overlap between them, which should help with keeping the whole thing together and provide some structure. Sealing is less of a concern with a recirculating filter, but it should help with that as well.
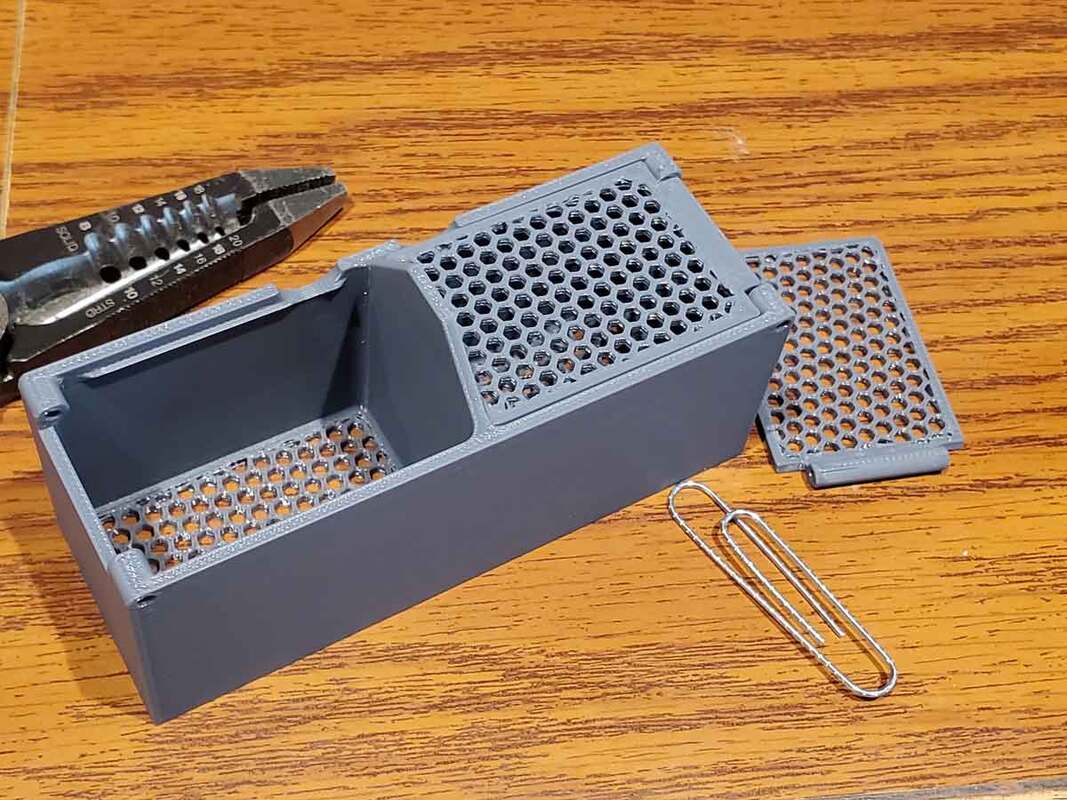
- A removable carbon tray. Some of my other filter designs use a removable carbon filter, and it's handy for keeping the mess down when refilling it. It's not essential, but a preference and since I was going to the trouble I added it.
- Some room for possible additions. The fans and electronic components are housed in a tray, which should make assembly simple, but it also gives some options for upgrading in the future, since there is a bit of extra room. Possibly a temp and humidity sensor with an ESP32, or some sort of smart switch would fit? I'm not planning that currently, but it's cool to have the space.
I'm currently waiting on the fans from China, so I will update with pics as I get it printed and tested.
Update 9/2/2023: I decided to use a normal draw latch design, which will use M3x20 and M3x30 mm screws. The latch is untested, like this whole thing, so it will be a while before there is another update.
Update 9/3/2023: Just one more quick update. After seeing the way the design has a "face", I'm thinking of naming it "Marvin the MircoParticle Machine".
Update 9/4/2023: Ran some test prints to optimize the draw latch and confirm the sizing for the filter pocket. Also ordered some PETG so I can print some tests. The parts so far are run in PLA but PETG is what I plan to use for the final print. I also decided to pick up some 12V 4wire PWM 5020 fans since they can more efficiently be controlled. I picked up a simple PWM controller as well, which will take the place of a switch (though I plan to have models for a switch controlled version as well since it's already modeled). I'm also considering a few other additions which will not be part of the main design and may come later as a remix or optional update.
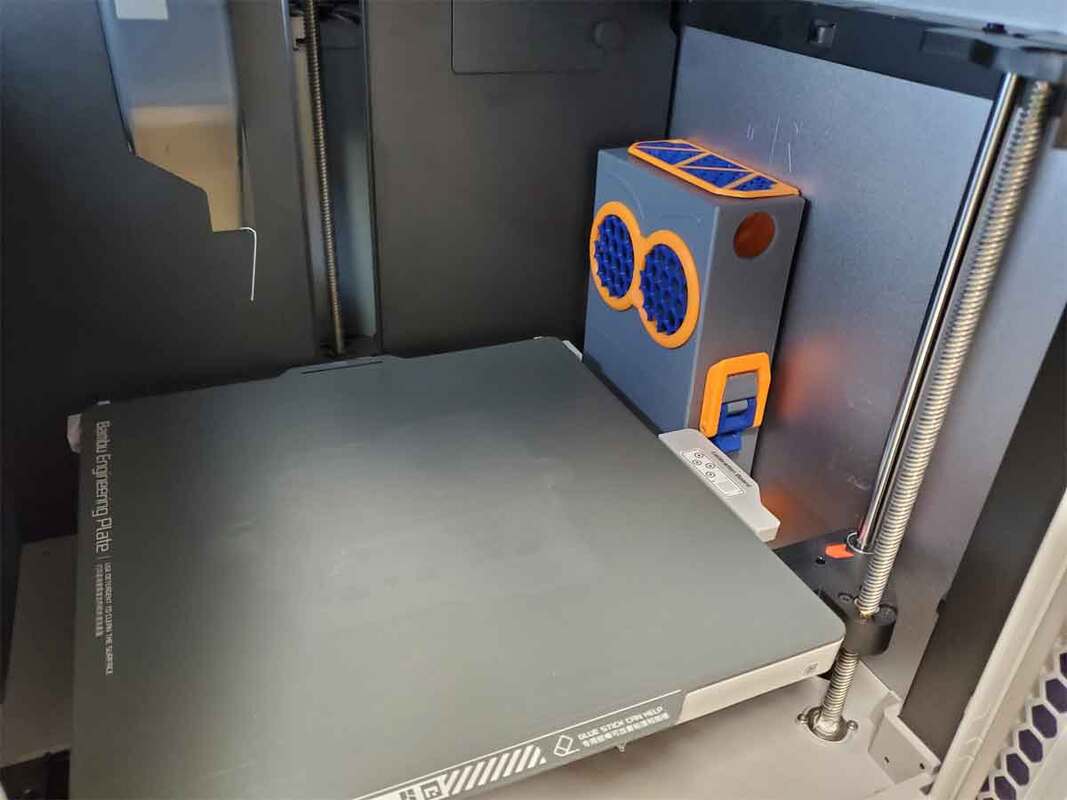
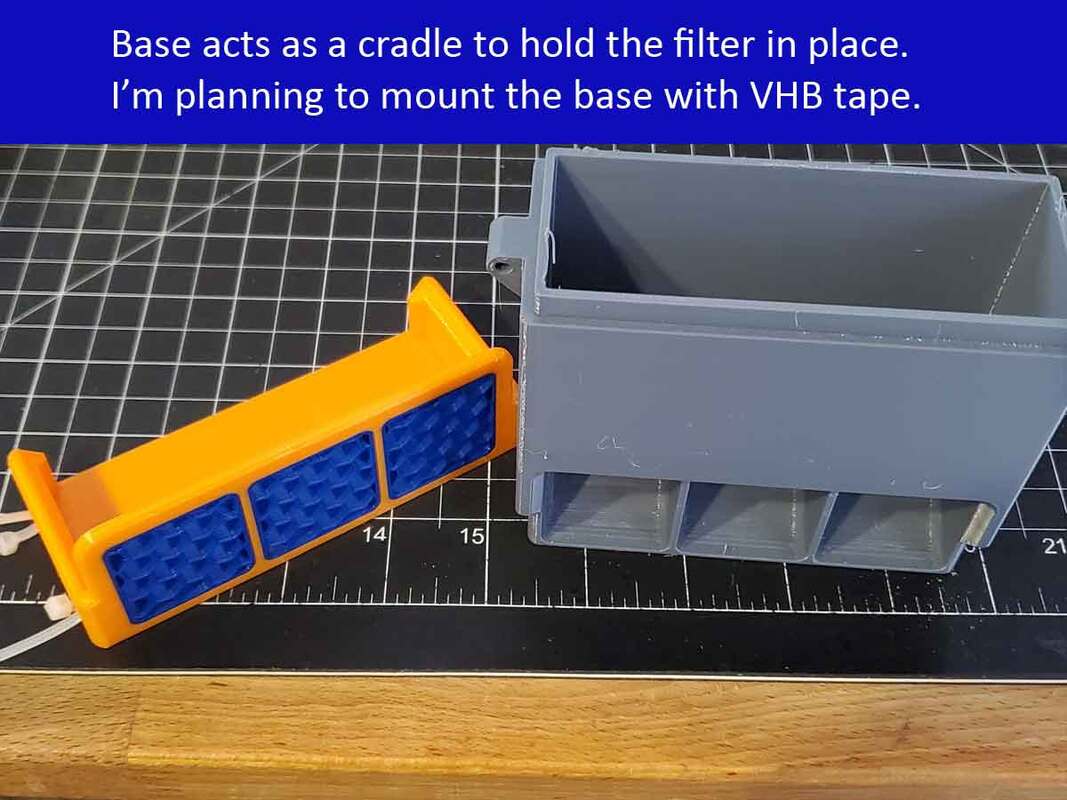
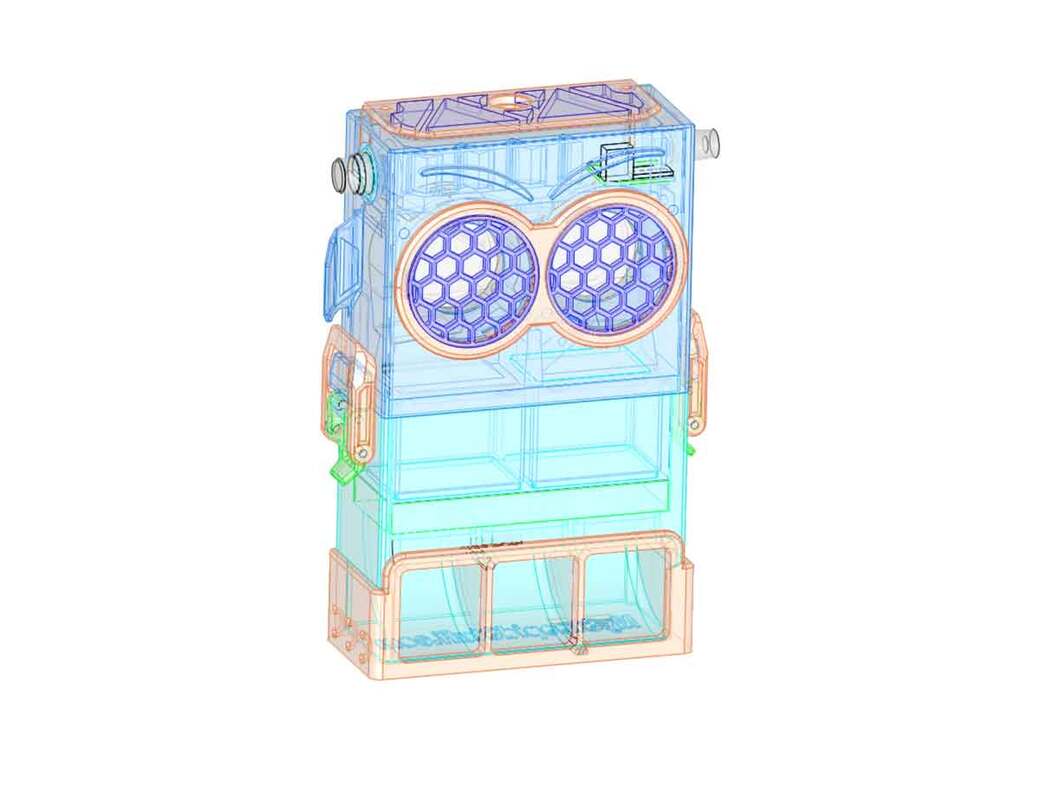
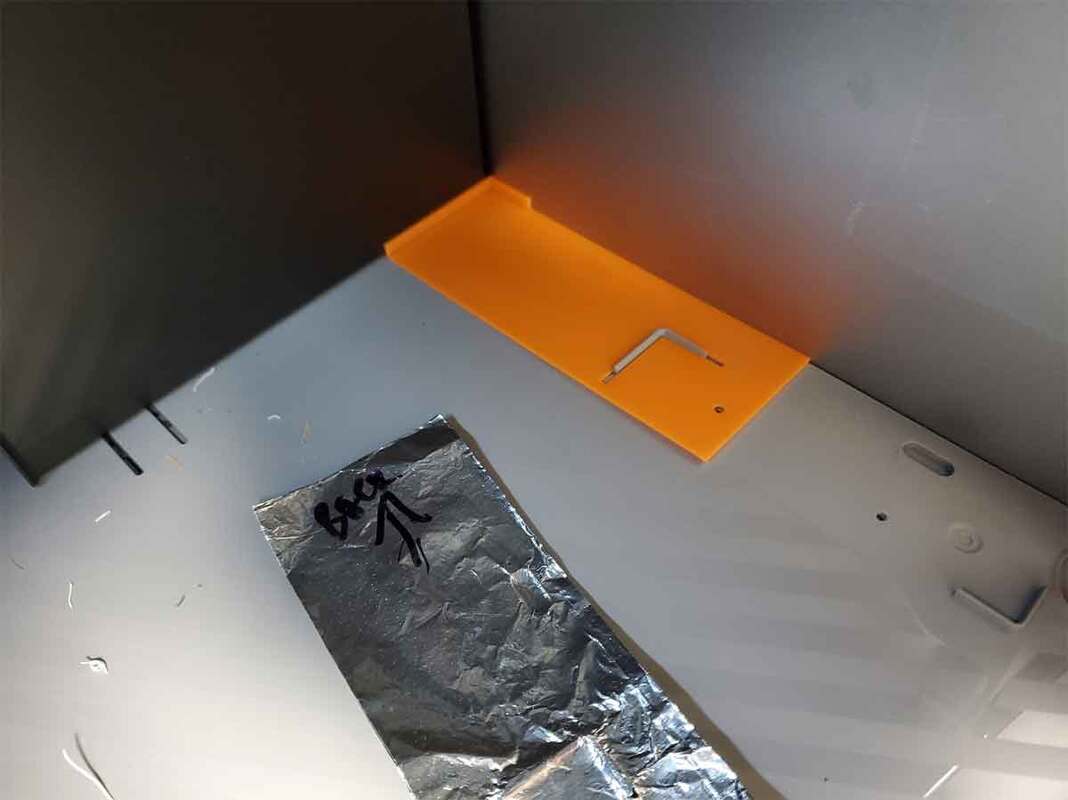
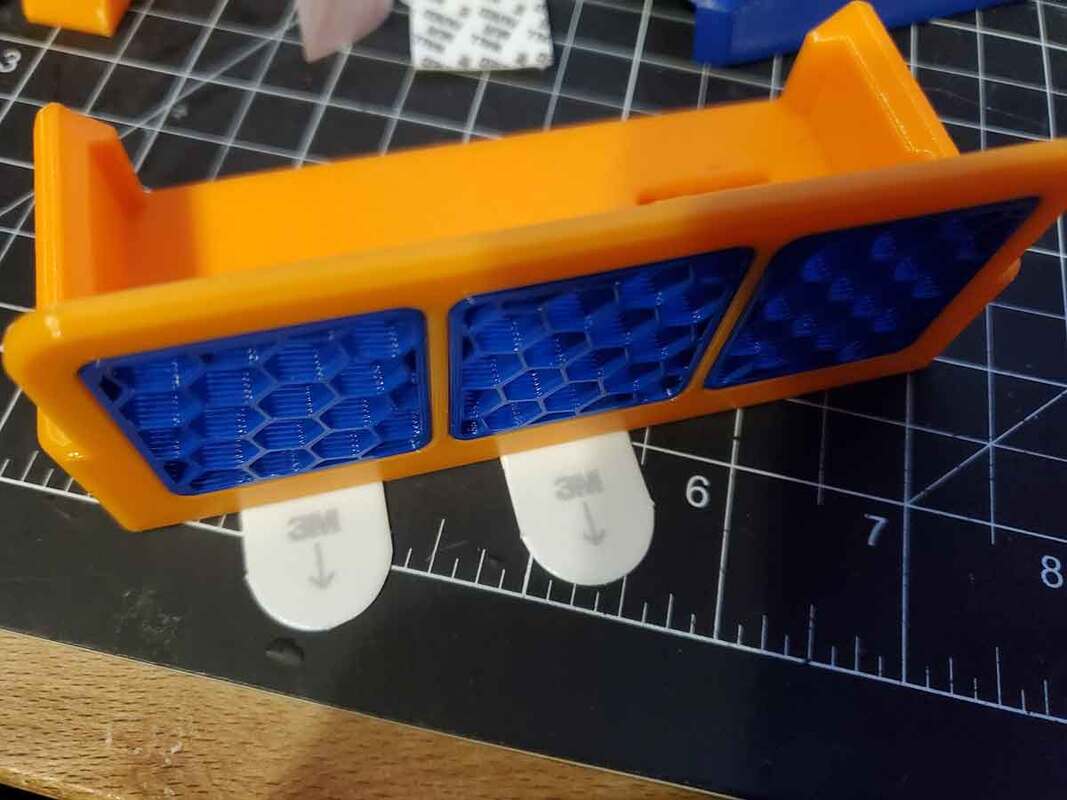
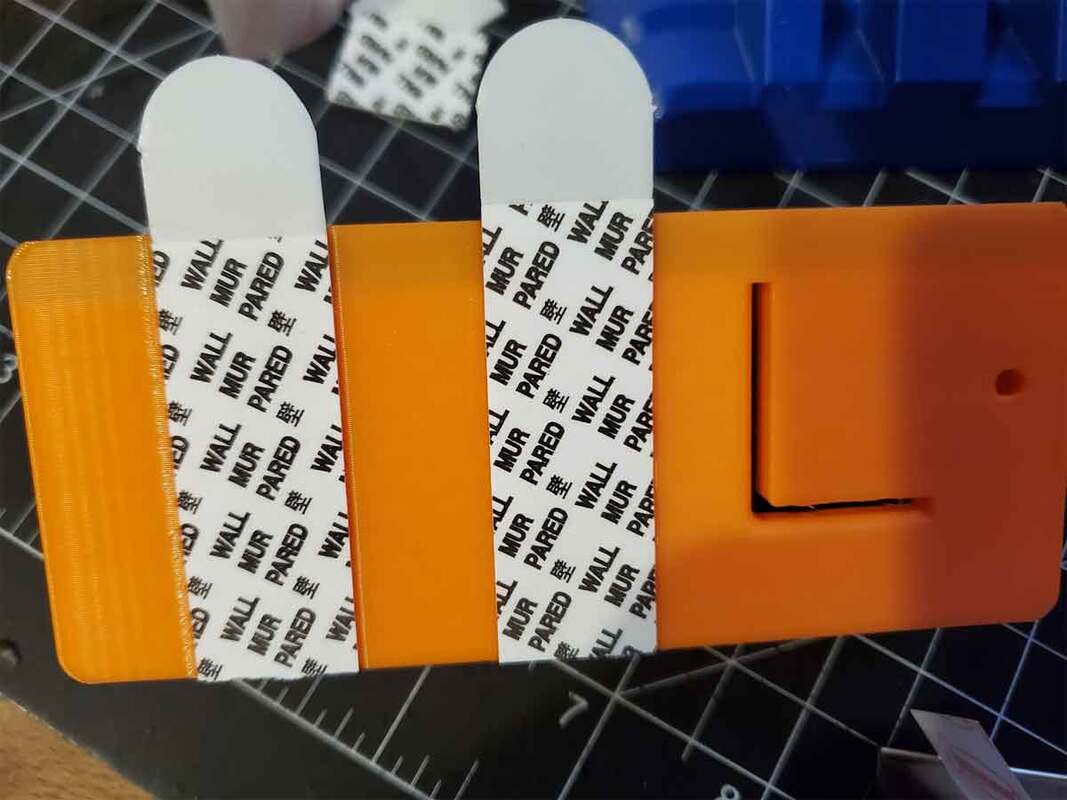
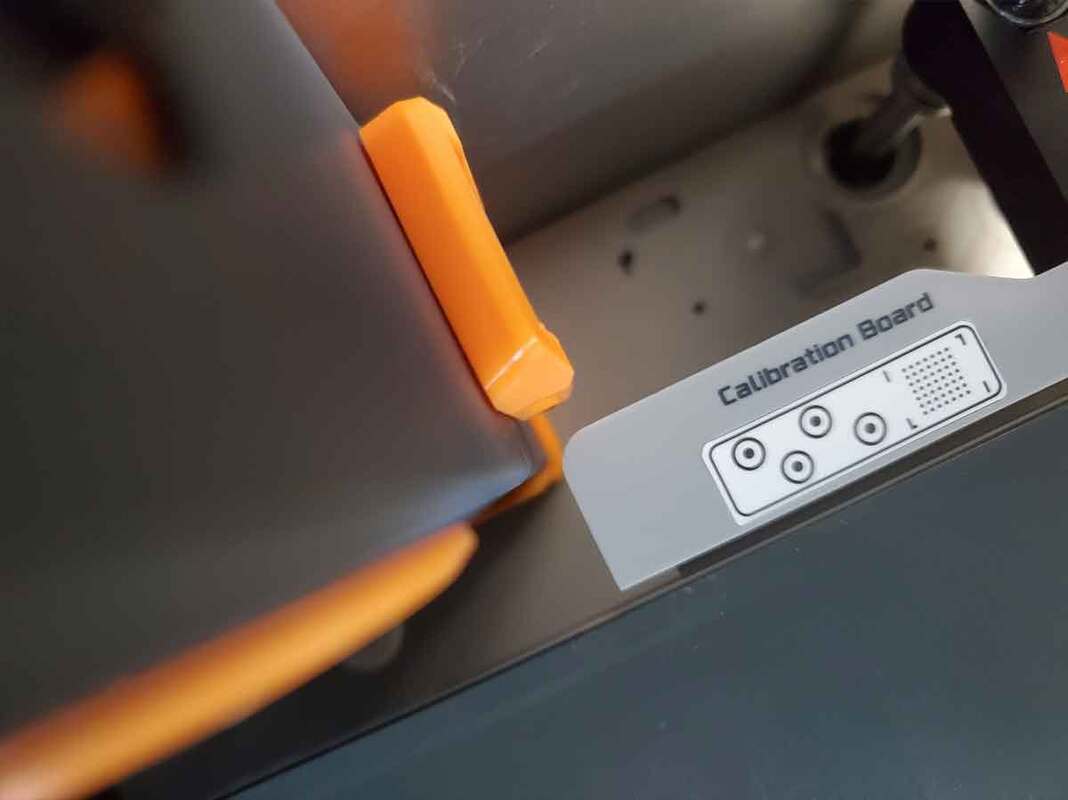
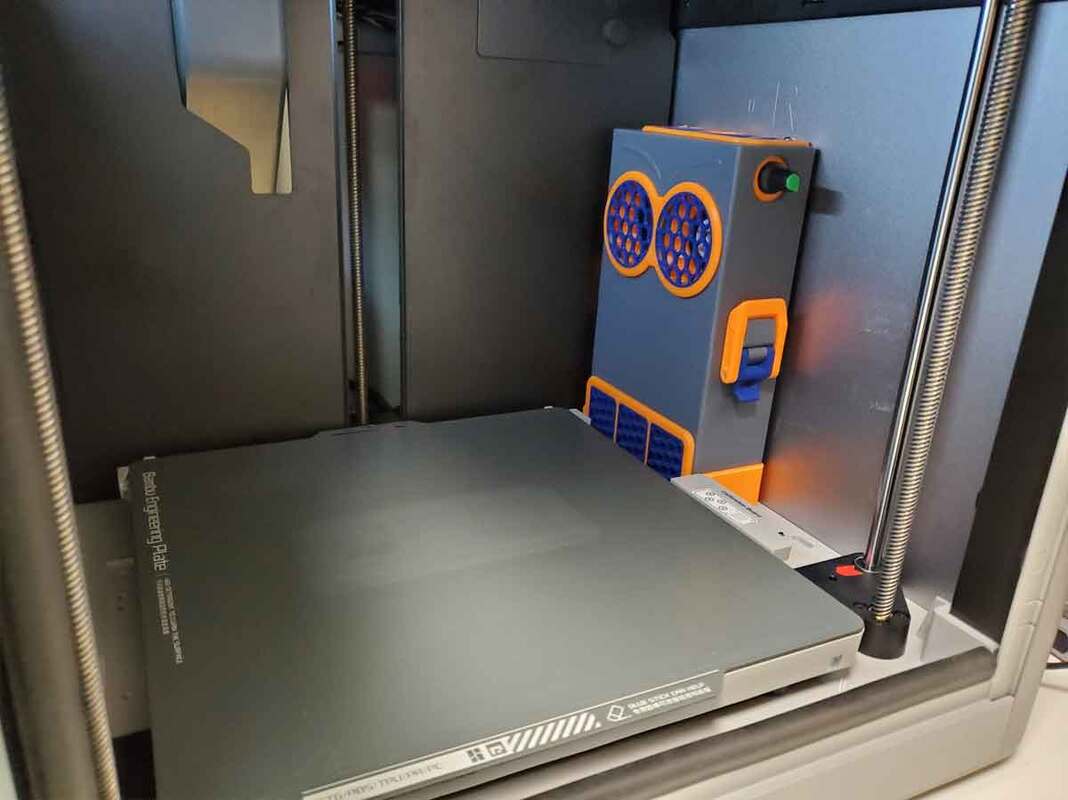
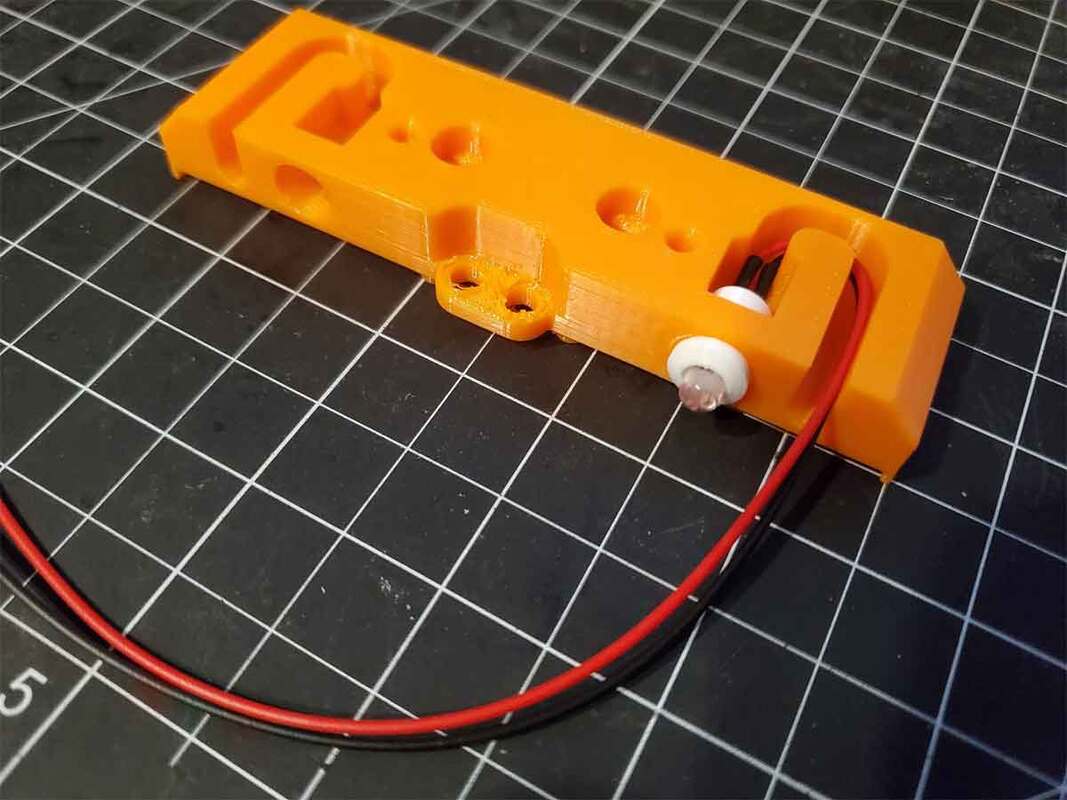
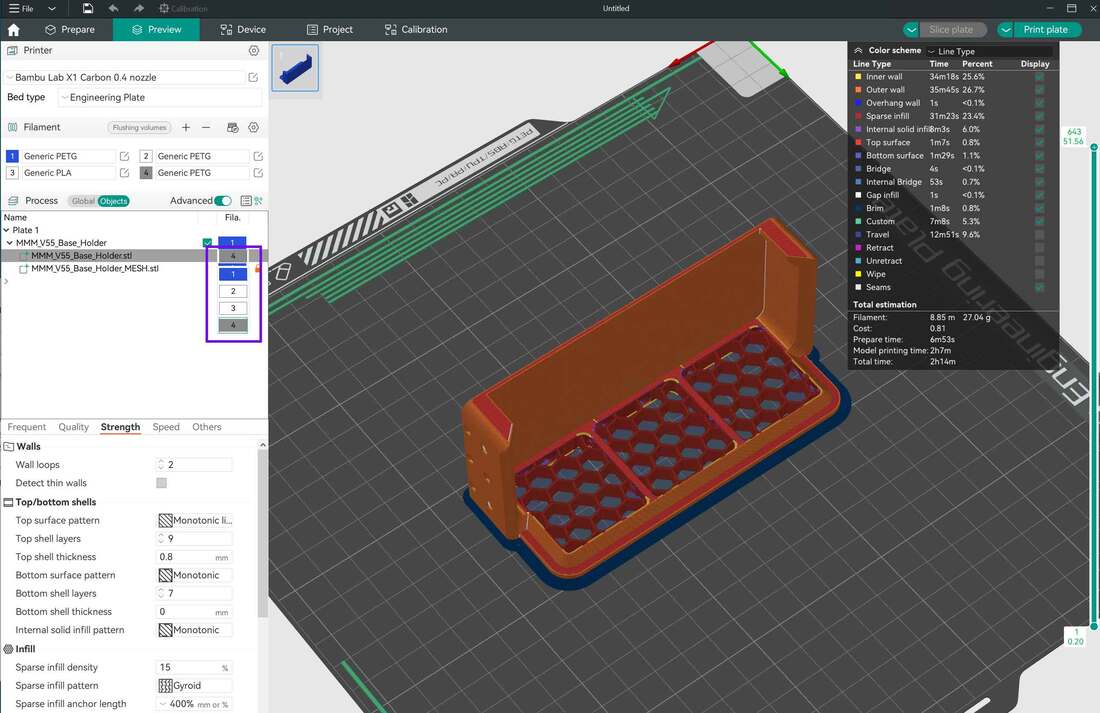
Update 9/8/2023: I decided to go ahead and run some parts off, even though I'm waiting on the fans and the PWM controller. Probably a good thing I did, because I found a few issues with the fit on some parts (too tight) and also a potential problem with where I placed the DC input, and interference with the printer. There is only one place this can go in the Bambu X1C, and that is on the back right corner, and this does fit. However I had to move the DC input to the top of the filter, and added some additional cable management. It was also clear that some sort of mount would be needed, and so I just modified the base to make it into a sort of cradle. I will probably run some more parts off later this week to test again, but it's not all bad news, I think with some minor changes I can use the prototype with my Voron, or certainly with the CR10S Pro, when it goes back into it's enclosure. I also forgot to print the mesh in the outlet area, though I think I like it better that way, so I may just leave it open in the final deign. The first pic shows the design I'm planning to use with my Bambu X1C, the rest are all the prototype which was printed to test fitment of the parts:
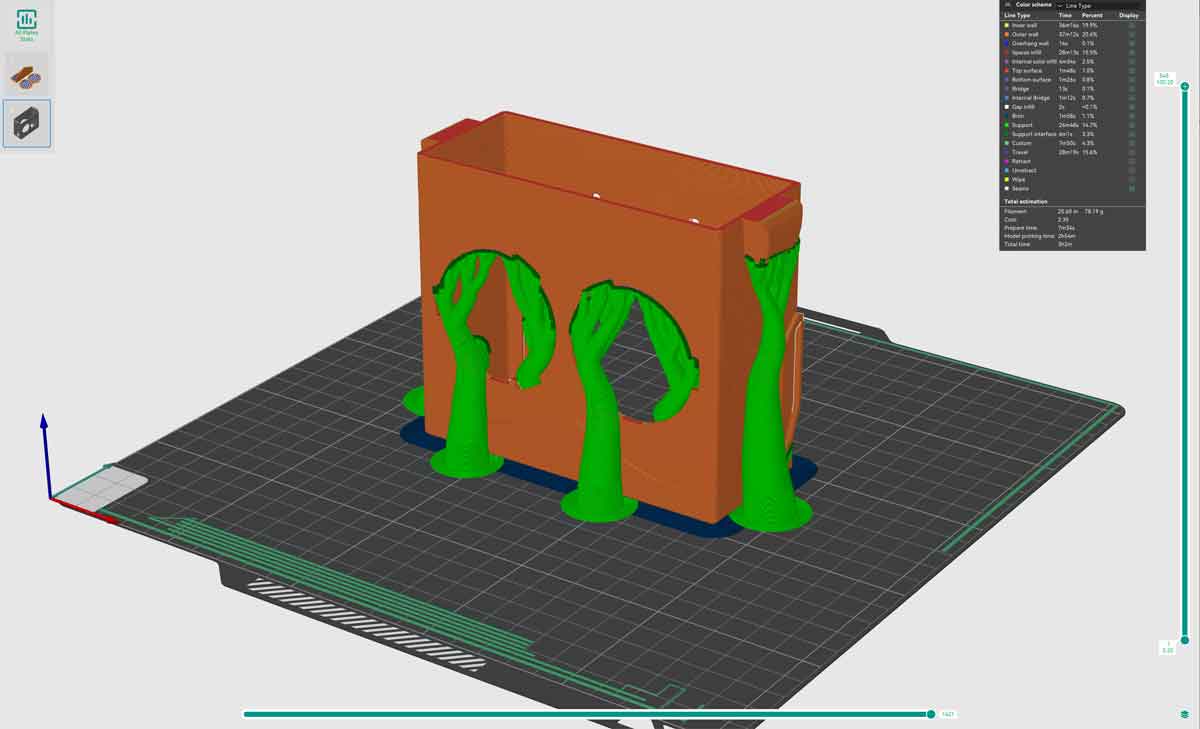
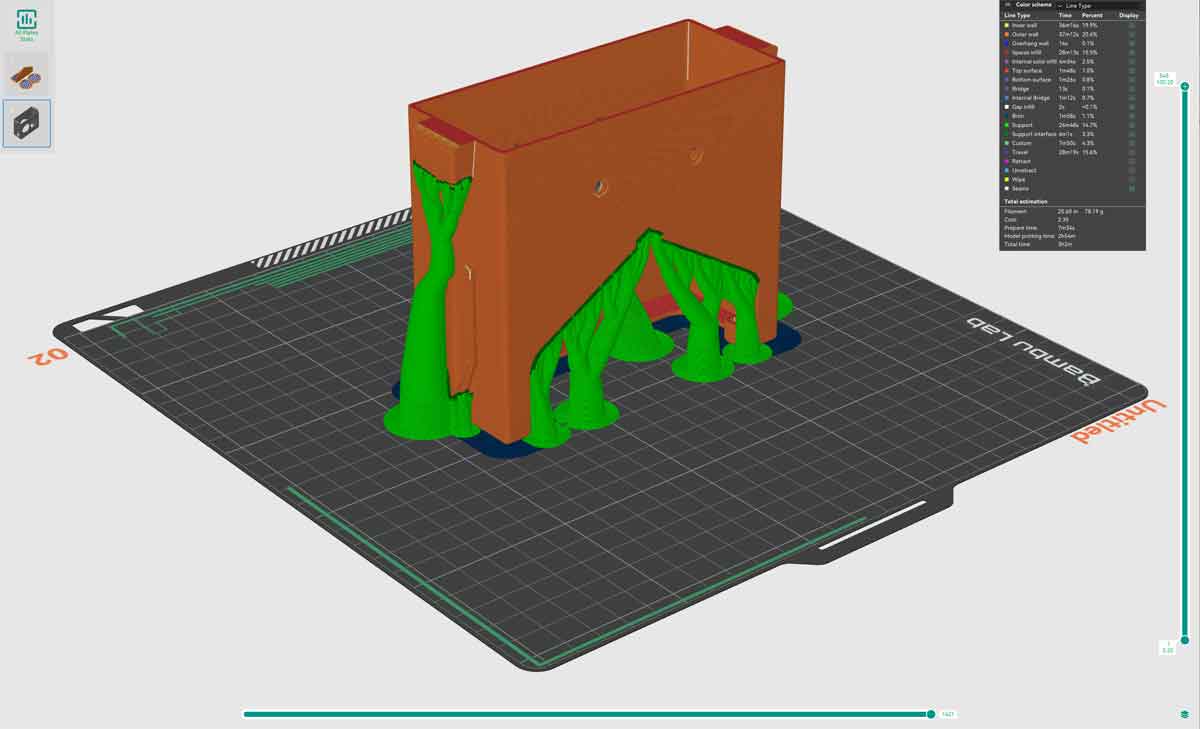
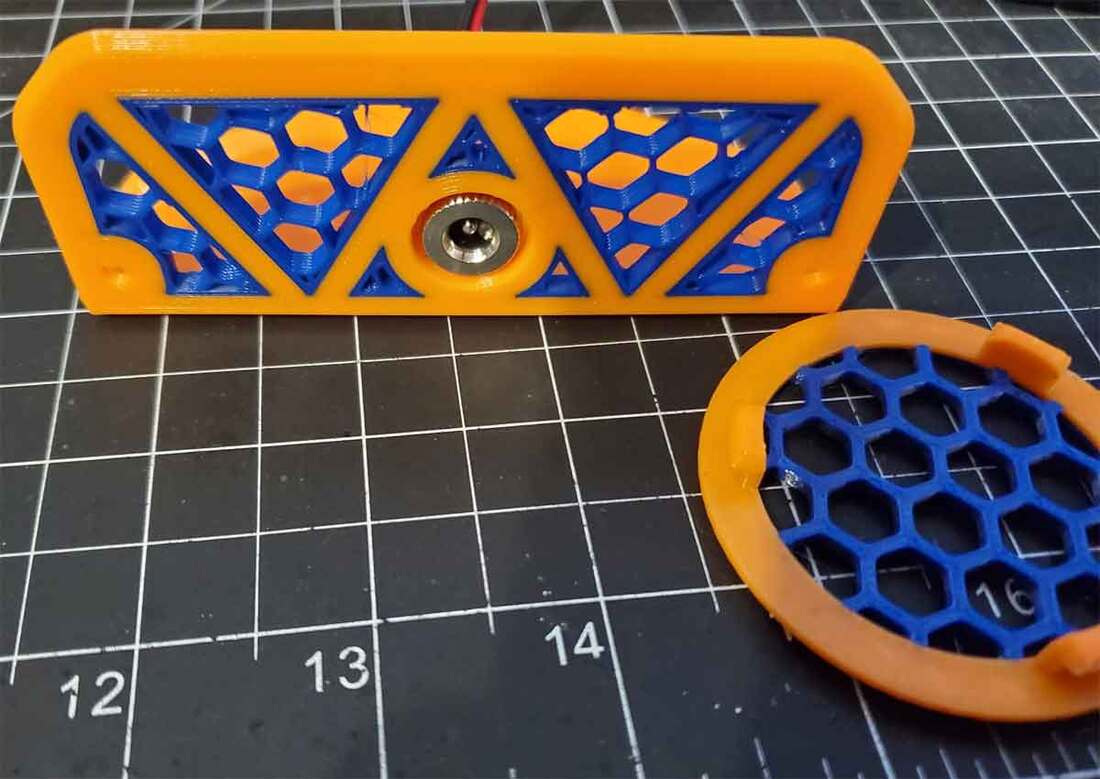
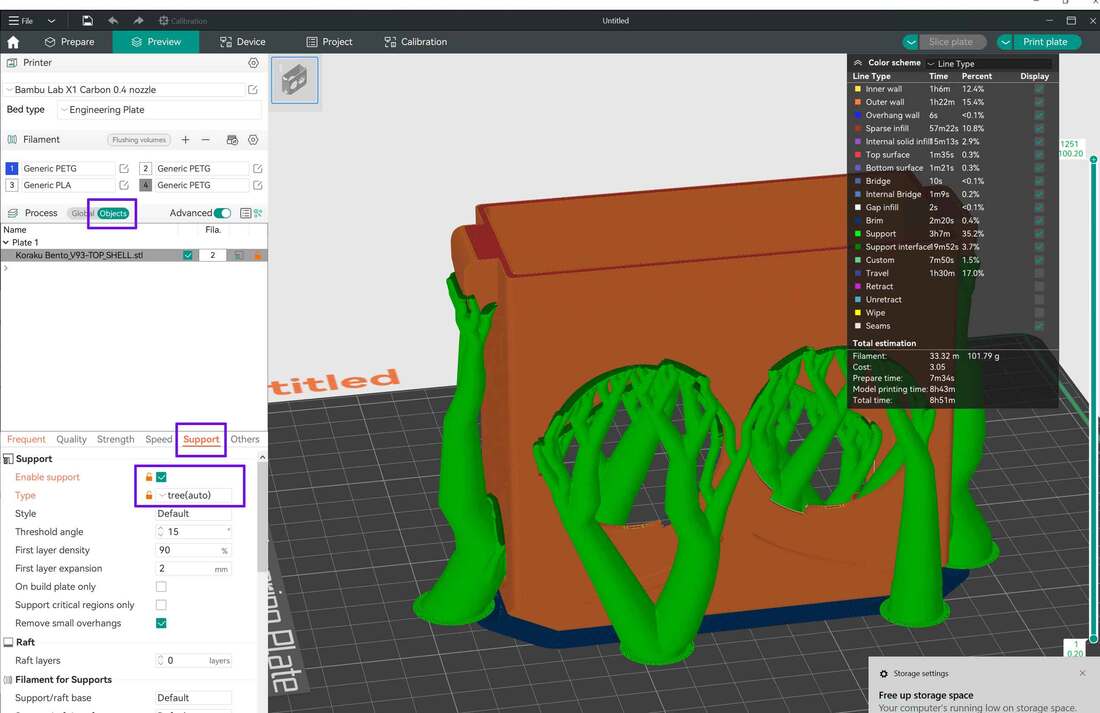
9/12/2023: I think I fixed the issues with the first prototype, and I will be printing the updated models this week. But I'm still waiting on the PWM controller board, and fans, so there will be some more work once they get here. Below are some pics showing the tree supports necessary for the top part (unfortunately quite a bit of them), and also a pic of the top cover where the PWM controller will be located (on the Bambu version). There will also be a version of the top which is closed, and will have a simple on-off switch on the right side, as well as a version with a vented top cover, and a PWM knob on the right side.
Update 9/15/2023: I'm still waiting on parts from AliExpress, but have made a few minor changes in the meantime. The fitment is improved since several parts were difficult to install previously. There is also a base which acts as a sort of cradle for the filter, so it should keep it in place, but also make it easy to remove to swap the filters. Finally, there will be a fuse holder added. I know that some folks will think that is being too cautious with just a 12v fan, but I've had fuses in my printer filters since I designed the first one for my enclosure, so why stop now :D And it's a good idea, considering I run the filters quite often.
I'm also really liking the latches, and already have some ideas to use the same draw latch design in some other projects.
I'm also really liking the latches, and already have some ideas to use the same draw latch design in some other projects.
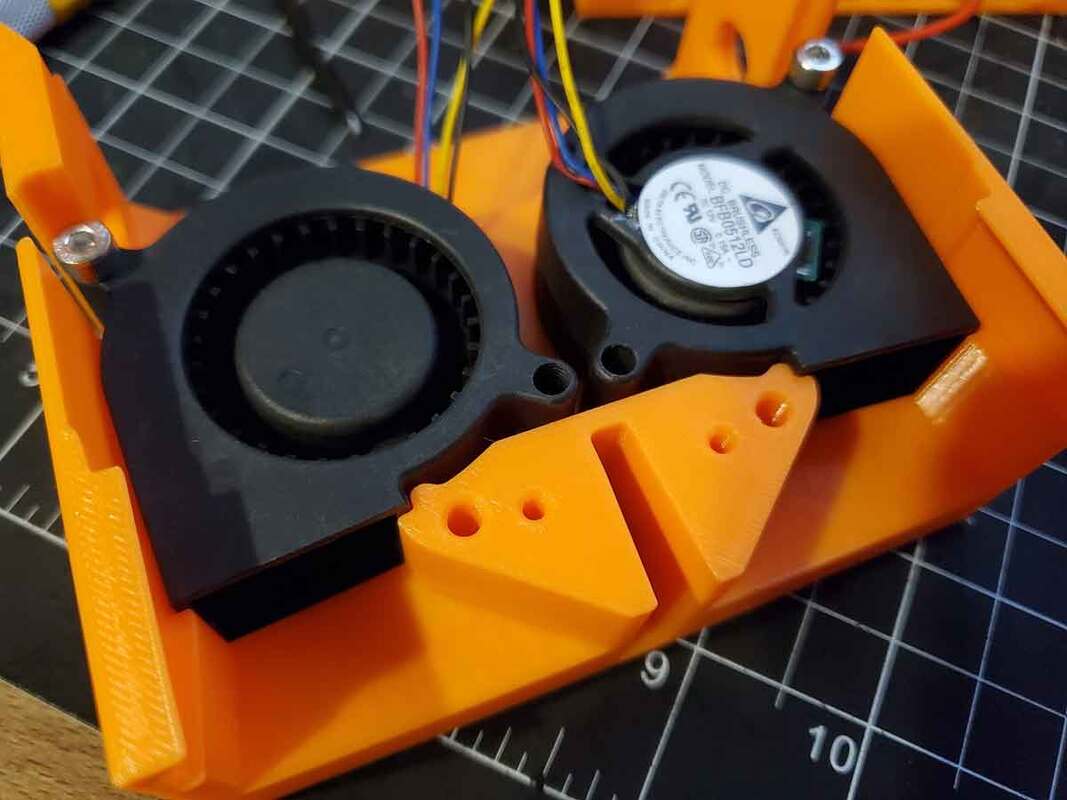
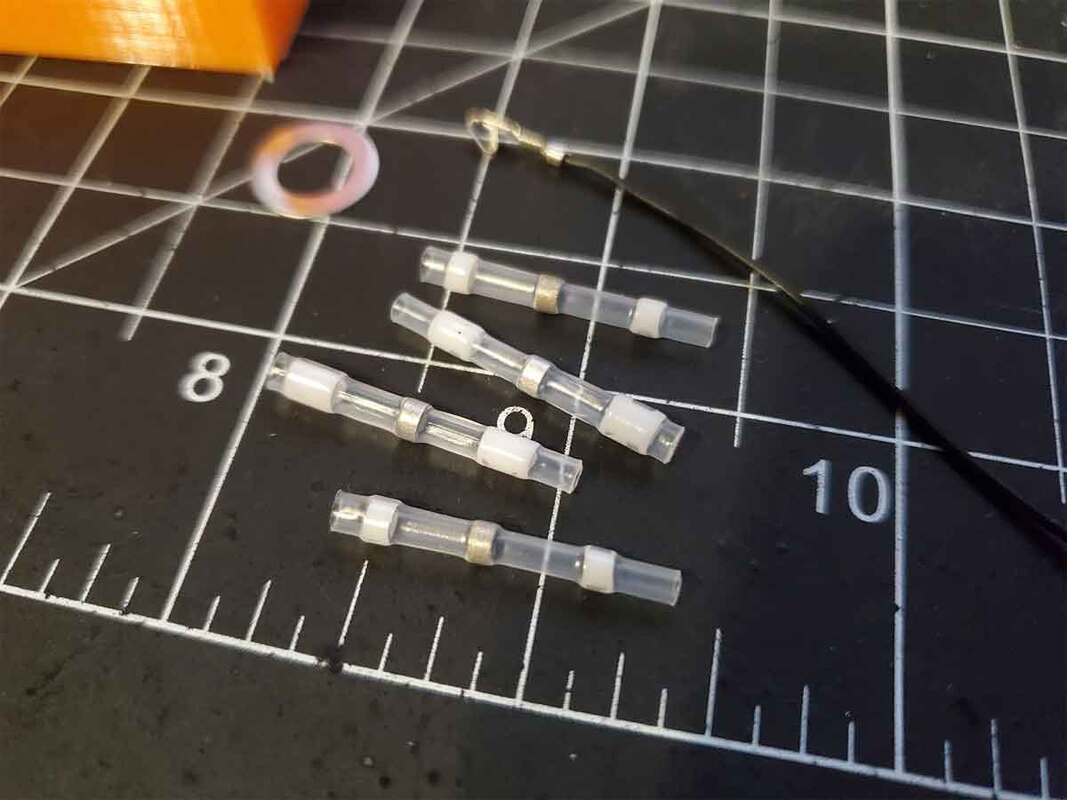
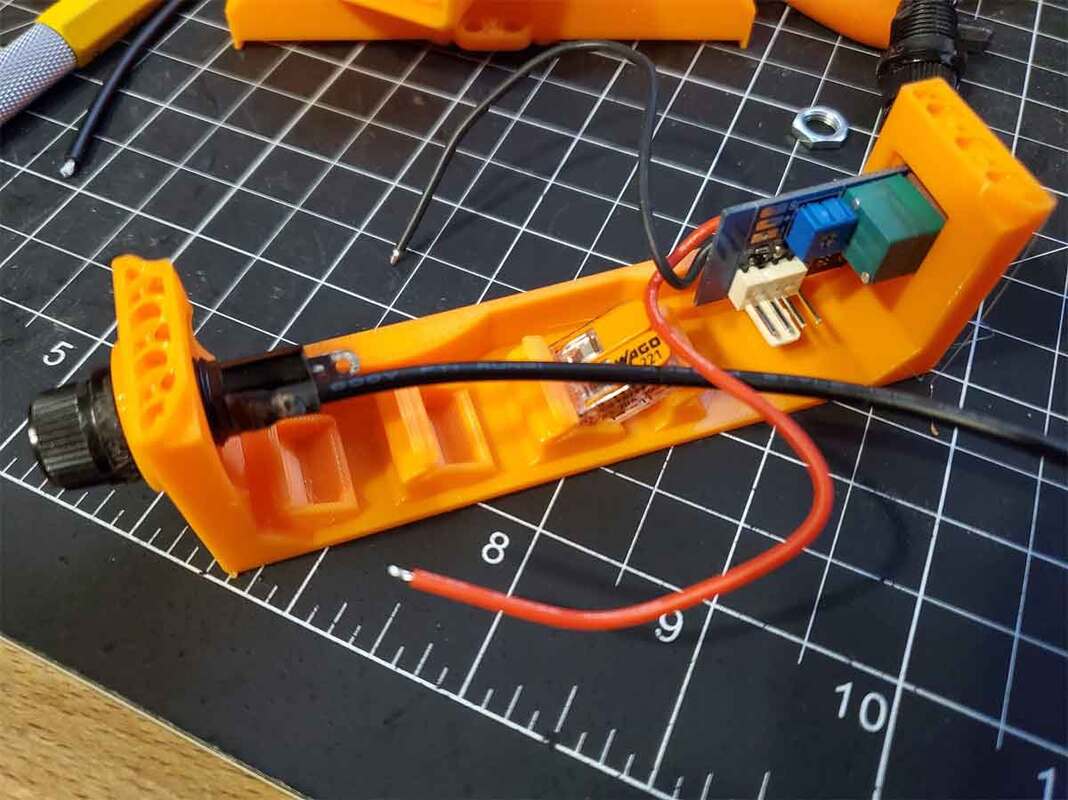
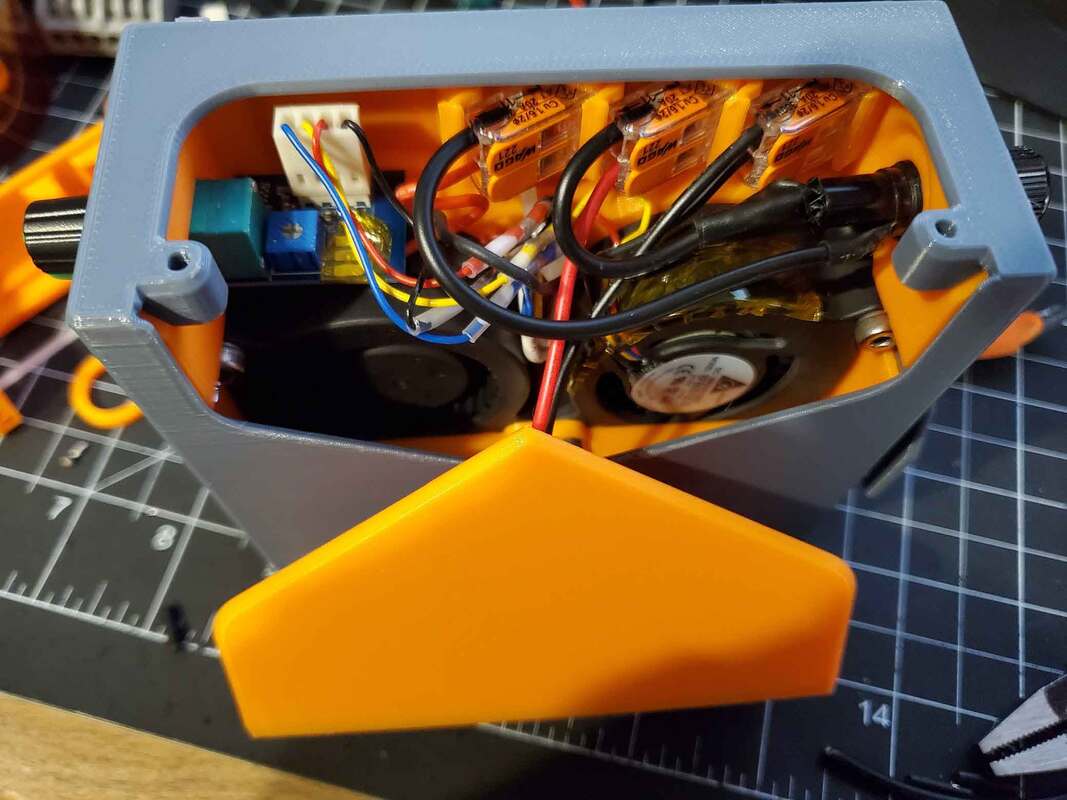
Update 9/22/2023: I was able to test the 4wire 5020 fans work (in parallel) with the PWM controller. There were some areas which I found needed some fine tuning in the design, and I also added some "quality of life" improvements for assembly. I added some 2 wire WAGO holders which will take care of the 12v power wires and fuse connections, though there will be some wire splicing required for the fan wires, can't get around that. Though instead of soldering, I plan to use some heat shrink solder connectors to join the fan wires together into a single fan connection.
I found that the pre-wired fuseholders I ordered are poorly assembled, so it's almost impossible to remove the nut that is used to secure them. I also broke one of the poorly soldered wires off one of the holders, and another shattered when I was trying to remove the nut (which was my fault, but still sucks). So I'd not get the pre-wired fuse holders again, and instead would get the type that require soldering some wires to. However, I was able to get my pre-wired fuseholders to work (after finally removing the nut), and also threaded the hole they will go into (with an M12x1mm thread). I also made an allowance for the wires to pass through, in case the pre-wired holders are used. It's a lot of work for a fuseholder, but I think it's worthwhile for something they will be running for hours.
Although everything was just temporarily connected together for testing, I was surprised how powerful the fans are. I did not have the carbon container filled up, but even just blowing through the HEPA filter, they move air pretty well. I think having the ability to fine tune the airflow using the speed controller is going to be very useful too. I would not call the fans quiet, though they are not too loud either, and having the ability to turn down the speed, also turns down the noise. Overall I am really pleased with the performance so far.
I'm running some further full function parts now, and if all goes well, I hope to have the model built this week, so I can run it for some longer tests in the X1C.
I printed the parts and found there is an interference issue with the floor of the printer (it has a raised L shaped area which would be under the filter). The fix was easy, but then I decided to change a few other things, and am printing the changes now. Once I get it printed, I will install it and test it.
Update 9/23/2023: I worked out the interference issues with the base, and have placed the filter in the printer. It fits OK, and I ran the Z axis up and down several times, and did not feel like it was going to hit anything, but it "looks" close. I think I can gain a couple mm by modifying some simple things, so will try that first, but it may mean re-printing the cradle (again - this is the 4th time)... I will get back to this next week and hopefully have the design finalized.
Update 9/29/2023: I made some changes to the design which provide extra clearance inside the printer, but those will require significant parts to be reprinted. I will probably use the version you see in the pics above with my Voron, but for now still plan on testing it inside the X1C (until I get the updated parts printed out). I have also received an extension cable for power (since I don't want to cut up my power supply cable). I also remixed Rob the 3D Printing Dad's Power Cable Guide for the BentoBox, to fit a thicker cable (and also trimmed 2.5mm from the length, so it would fit better in the X1C). I need to install all that stuff and then run some tests, but so far it has been working sitting outside my printer (in the enclosure).
Update 10/5/2023: The updated parts are now getting some printer time (now that I'm done testing parts for my Bambu Spare Parts Case). I had planned to get the filter out first, but it was just easier (and more fun) to build the parts case, so that's what I did.
There will be some extras in the revised design, but I may release it without the extras if the parts don't arrive soon (they will be an easy upgrade though). I'm probably just gonna print and test enough of the revised design to verify there are no interference issues, since otherwise I'd need to tear apart my perfectly good filter to scavenge the fans (since I have another pair of those "4 wire" fans on order). The revised design has only a few changes which are mostly under the surface, so what works in the previous design which I printed, will work in the updated one as well.
There will be some extras in the revised design, but I may release it without the extras if the parts don't arrive soon (they will be an easy upgrade though). I'm probably just gonna print and test enough of the revised design to verify there are no interference issues, since otherwise I'd need to tear apart my perfectly good filter to scavenge the fans (since I have another pair of those "4 wire" fans on order). The revised design has only a few changes which are mostly under the surface, so what works in the previous design which I printed, will work in the updated one as well.
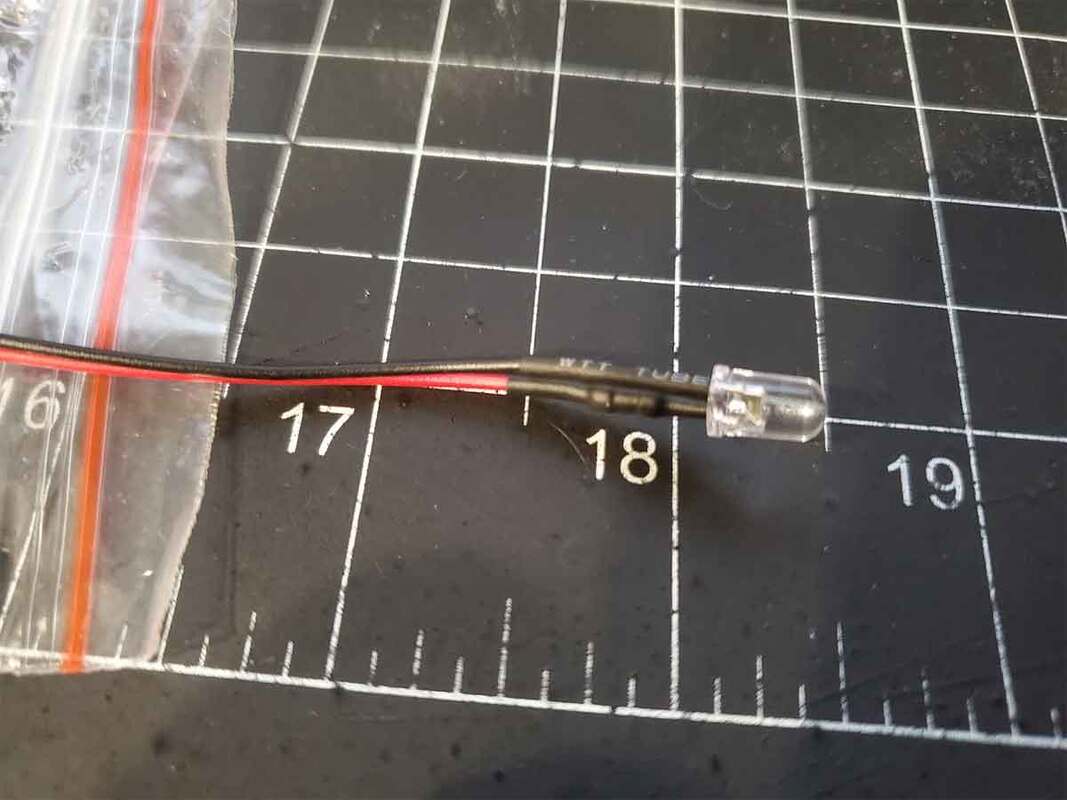
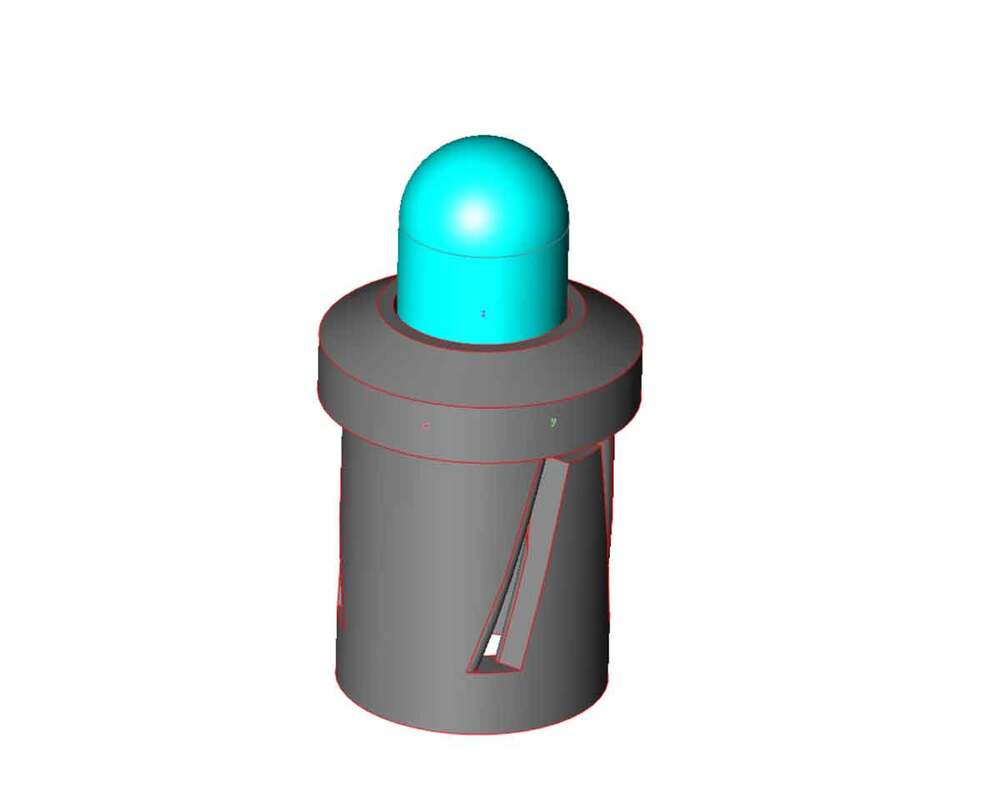
Update 10/12/2023: I received some of the parts for the final design, which were not a show stopper, but good to have. Unfortunately the LEDs (RGB 12v) did not ship with the plastic holders, but the seller is going to send them along. In the meantime, I designed my own 5mm LED holders using the same dimensions, which I will try and use. I also received some 2 conductor 20AWG zip wire, which I need to properly install the filter in the printer. I'm hoping to get some printer time this week so I can wrap this project up and finally post it.
Update 10/13/2032: It took a couple hours, but I think I have the assembly instructions and BOM mostly completed. The instructions are here. It is really not as hard as it looks to build this, but I wanted to cover as much of it as possible. The instructions are 90% done, but I still need to test a few things, and I want to add some information on wiring it through the printer enclosure. Looking at the BOM though, I can see how this will not be for everyone, though many of the parts are things that folks with printers may have around anyway (or good to have at least).
Update 10/19/2023: I have used this a few times and noted that the fans in the filter create a noticeable vibration in the sice of the printer. I don't think it affects prints, but it's something I'd like to minimize. I need to think about this a bit, maybe some foam or TPU buffers would help...
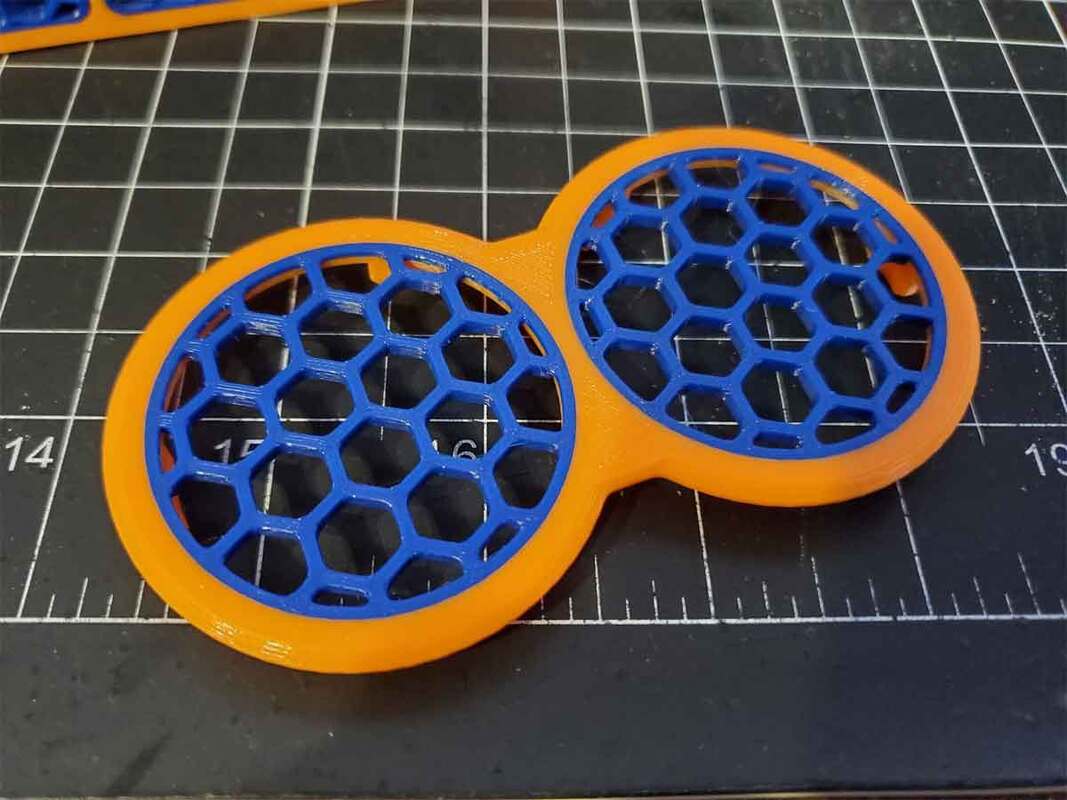
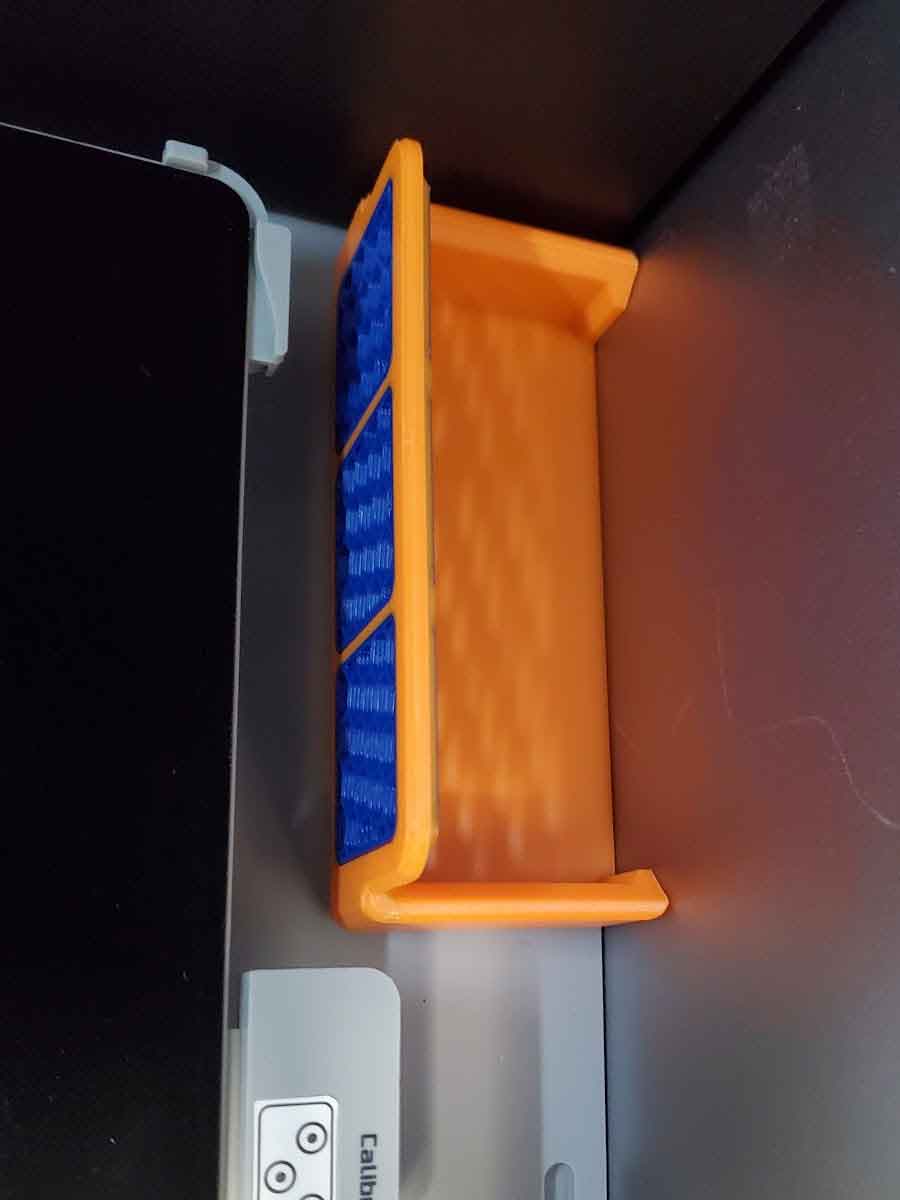
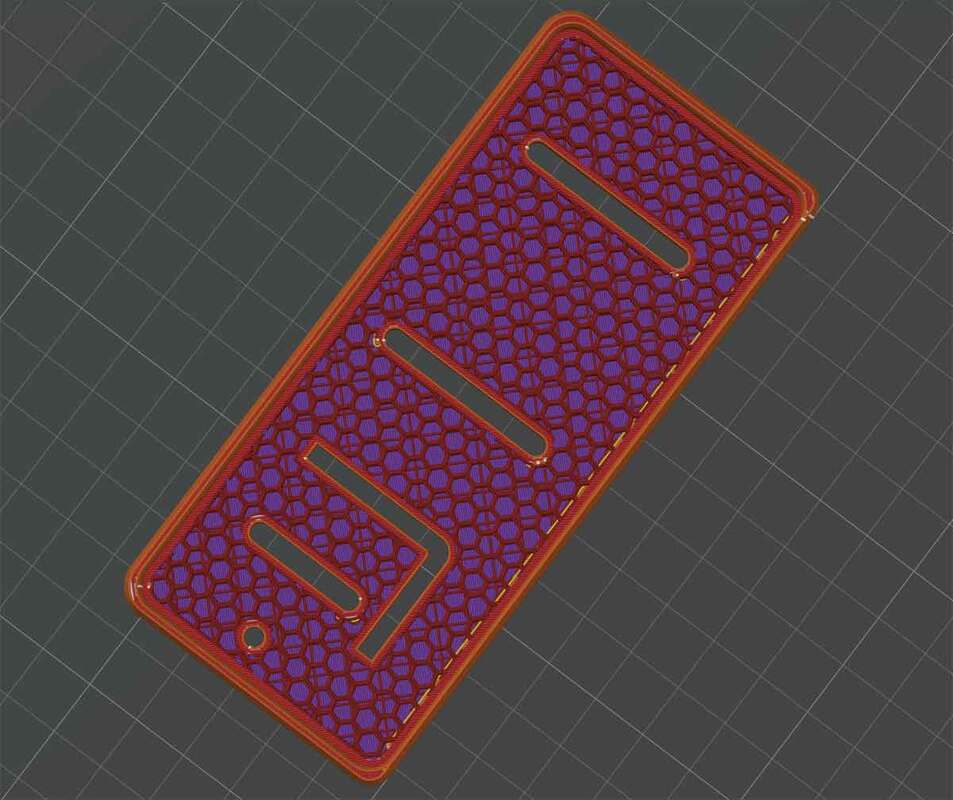
Update 10/23/2023: A simple TPU base may help reduce the fan vibrations, at least that's the hope. The pics show a pad design that the "cradle" sits on. The pad is going to be printed in TPU, with the dark blue area being printed as infill only (no top or bottom layers). That should produce a vibration reducing base for the filter to sit on, with enough support if the infill density is high enough. I'm thinking 20% Hexagonal infill will work (see pics). I will need to dry some TPU and test this, which should be possible to do later this week.
Update 10/23/2023: A simple TPU base may help reduce the fan vibrations, at least that's the hope. The pics show a pad design that the "cradle" sits on. The pad is going to be printed in TPU, with the dark blue area being printed as infill only (no top or bottom layers). That should produce a vibration reducing base for the filter to sit on, with enough support if the infill density is high enough. I'm thinking 20% Hexagonal infill will work (see pics). I will need to dry some TPU and test this, which should be possible to do later this week.

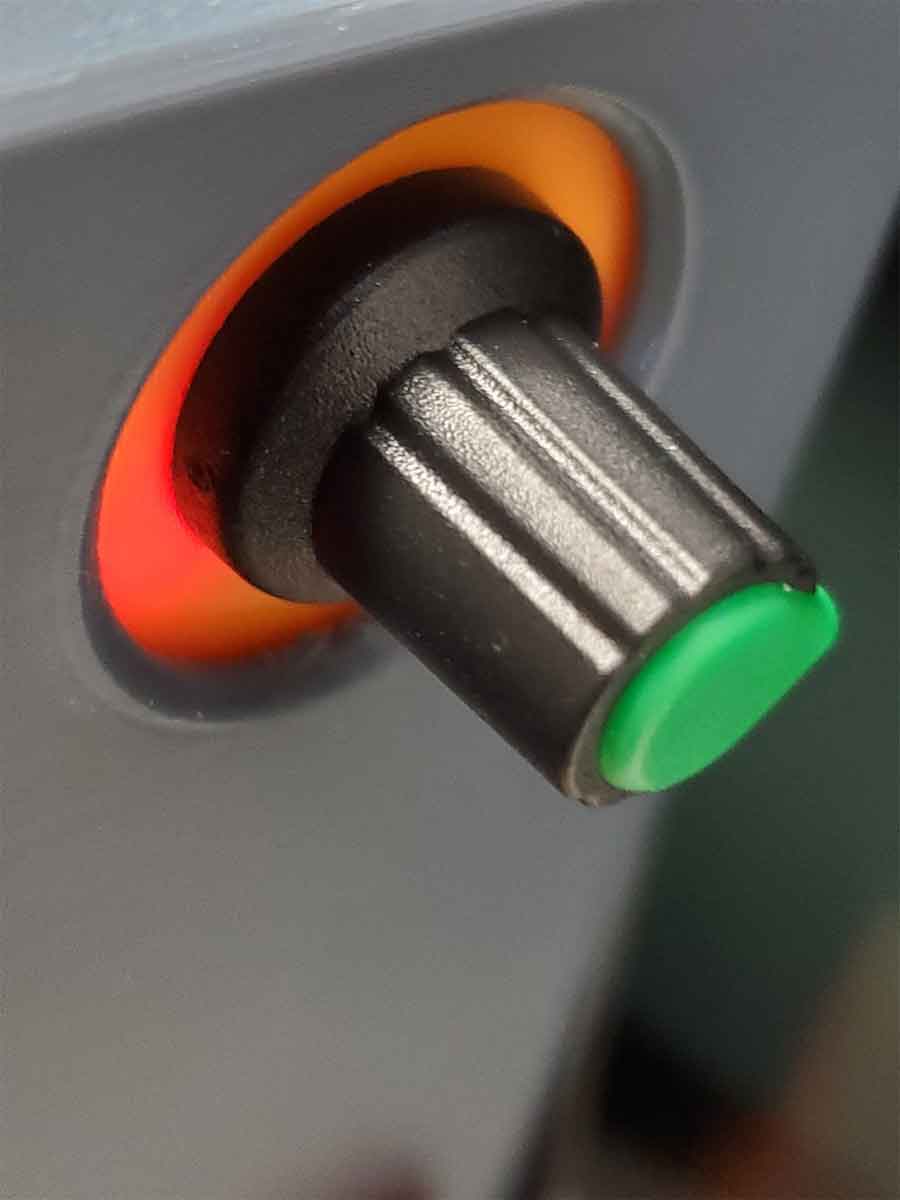
Update 1/22/2024: Well this sort'a stalled out, which is unfortunate, since I've been using the prototype for months now without problems. The prototype which I have been running in my X1C is identical to the final design, aside from the chamfers on the top (which are there to maybe lessen the chance of a bed strike if it were not placed fully in the cradle) and the backlight LED's (which were are superfluous anyway). I really like the fact that I can adjust the speed of the fans using the knob, which I tend to set at around 50-75%. What's held this back from being posted are a few things, but mostly not having the time to write up a build guide, and the fact that I need to make another one just to do that (since I did not take enough pics of the prototype). I also did not get around to printing the TPU base, since I was looking for a softer TPU to use for it, and gave up when I could not find any at a reasonable price (soft TPU is expensive). I then had the idea to make a foam insert since that would be more cost effective, but never got around to trying it. So it's again the problem of too many projects and not enough time. This is not dead, it's just on ice until I get the time to write up a decent build guide, build some 3MF's for the multicolor prints, and maybe work on a base with a foam insert (though I may just post that as a remix). Fortunately, this is a pretty obscure corner of the Interwebs, so I don't think anyone is missing that it's not posted lol.


 RSS Feed
